Last Updated on April 30, 2024 by teamobn
Here’s a humane way of getting rid of rats and mice from your house – a DIY mouse trap!
If you own a home, dealing with pests likely ranks high on your list of headaches. Using poison to tackle the problem isn’t always the best choice. This substance tends to find their way to harm children or pets.
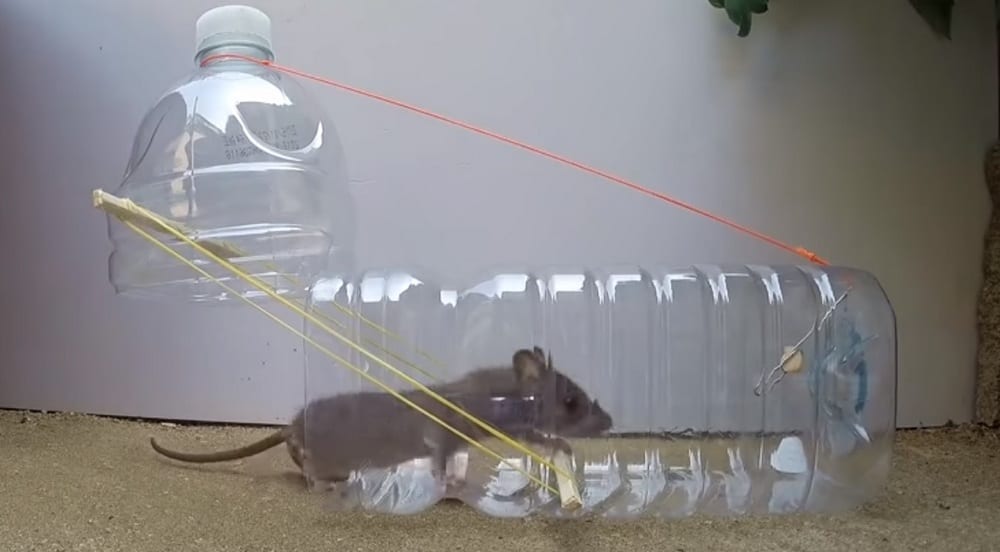
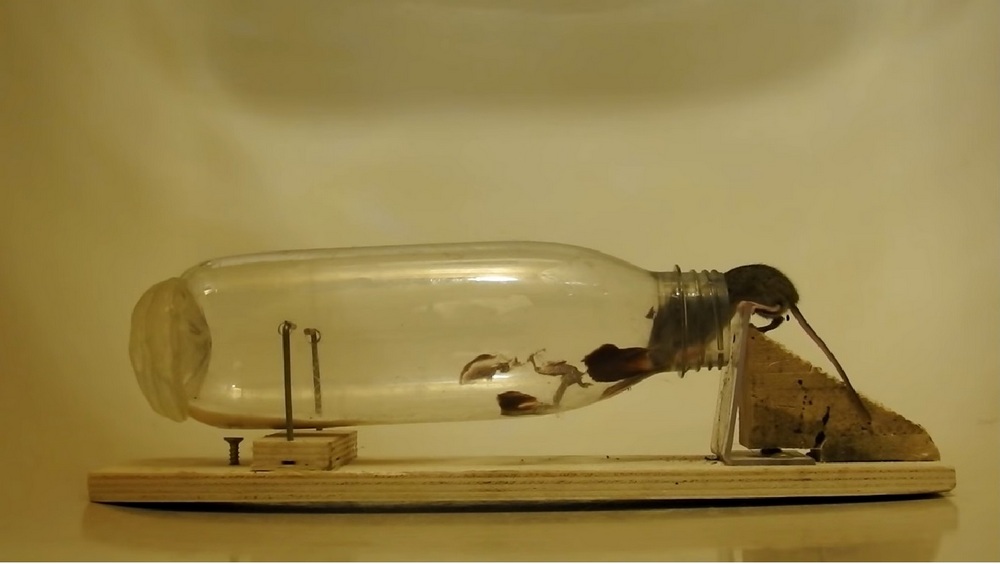
Here’s one humane solution: a DIY mouse trap crafted from a plastic bottle. The water bottle mouse trap designed to capture rodents without causing them too much harm. Just bait the bottle with some food, and once they enter, they can’t escape. Then, you’re free to release them back into the wild or dispose of them in a way that feels right to you.
If you have several plastic bottles at home, you can make a whole fleet of mouse traps and set them up in strategic places. My husband and I tried this and it worked like a charm! Those pesky little mice didn’t stand a chance against our homemade mouse traps.
Plastic bottles are the perfect material for making a mouse trap. They are durable, lightweight, and easy to work with. Plus, they can be easily customized to fit your specific needs. Whether you’re looking to create a simple trap or something more elaborate, plastic bottles are a great choice.
Contents [show]
Crafting a Water Bottle Mouse Trap
Materials
- 1 plastic soda bottle
- Blocks of wood (long and short)
- Coat hanger
- 3 screws
- 3 washers
Tools
- Drill with drill bits
- Wirecutter
- Pencil
- Measuring tape
- Marker
Instructions
Step 1: Prepare the Bottle
- Clean the Bottle: Wash the plastic soda bottle thoroughly to remove any residues or odors.
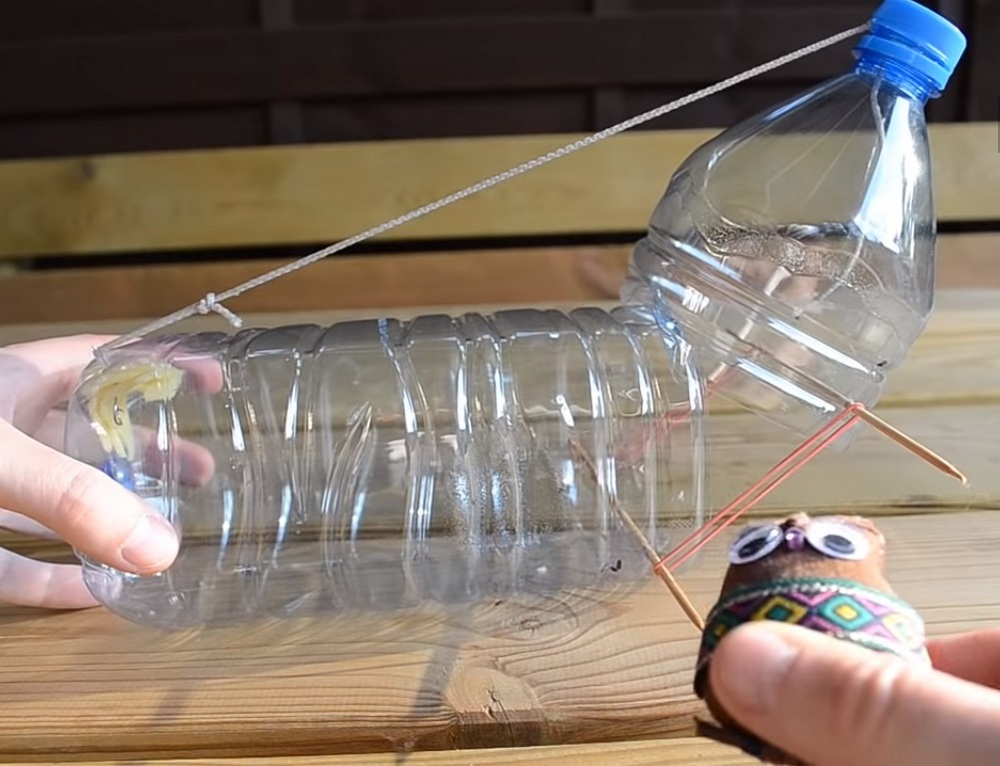
- Cut the Bottle: Use the marker to draw a line around the bottle approximately 5 inches from the cap end. Cut along this line to separate the bottle into two parts.
Step 2: Build the Trap Base
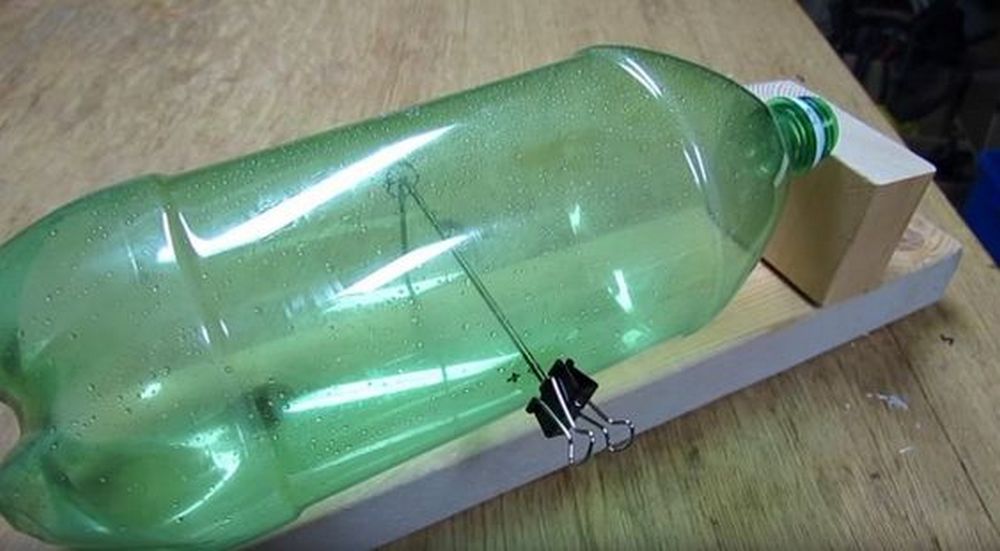
- Prepare the Wood Blocks: Take the long block of wood to use as the base. The short block will act as a support to prop up the bottle.
- Mark and Drill Holes: Place the short block at one end of the long block. Use the pencil to mark where screws will go to attach these pieces together. Drill holes at these marks.
- Attach the Blocks: Screw the short block to the end of the long block using two screws and washers, creating a T-shaped base.
Step 3: Set Up the Trap Mechanism
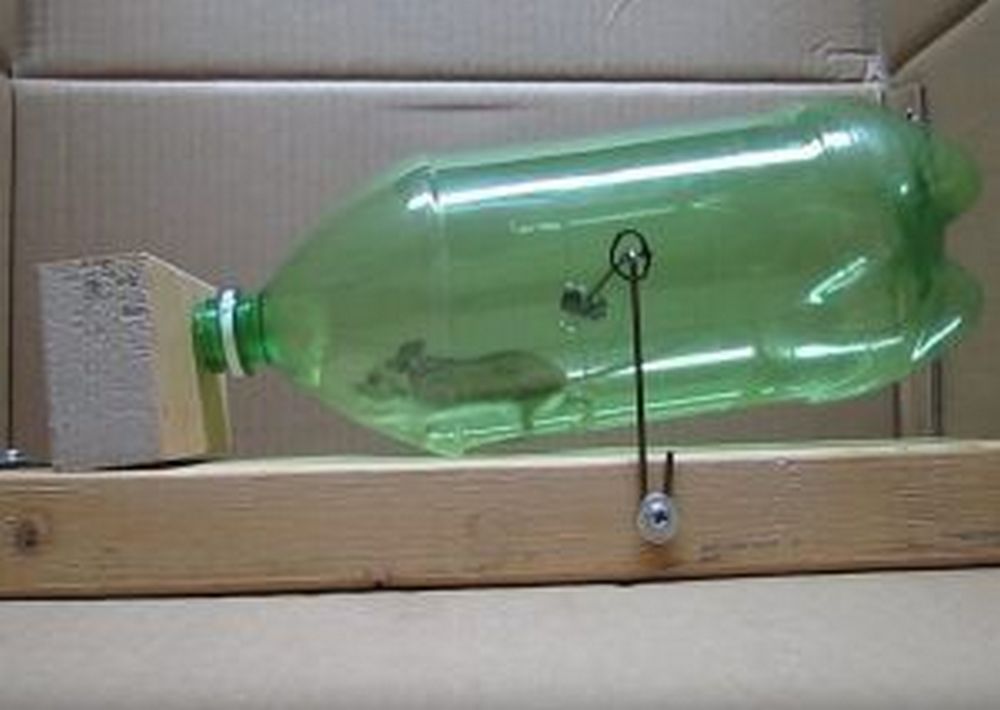
- Prepare the Coat Hanger: Cut a straight piece of the coat hanger using wirecutters. This will be used to hold the bottle in place.
- Drill Holes in the Bottle: Drill a small hole on each side of the cut bottle, just below the cut edge. These holes are for the coat hanger wire to slide through.
- Attach the Bottle: Insert the coat hanger wire through one hole of the bottle, slide the bottle over the short block (like a bridge), and continue the wire through the hole on the other side of the bottle. Adjust so that the bottle can tip easily.
Step 4: Final Assembly
- Secure the Wire: Drill small holes near the end of the long block where the wire ends meet the wood. Bend the ends of the wire into hooks, pull taut, and screw them into the wood block to keep the bottle suspended.
- Check Mechanism: Test the trap by placing a small weight (like a bait piece) inside the bottle. The bottle should tip, trapping the weight inside.
Step 5: Bait and Set the Trap
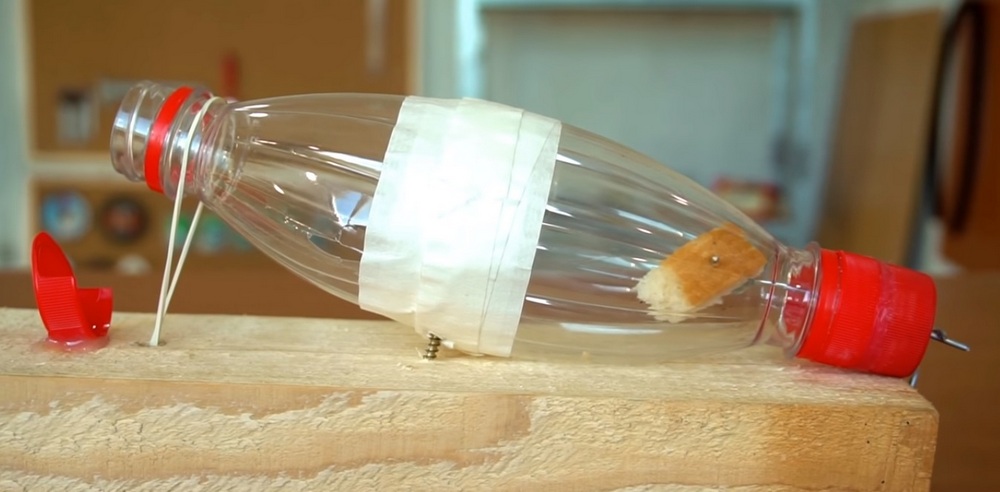
- Bait the Trap: Place bait inside the far end of the bottle (opposite to the hinge point). Peanut butter or cheese works well.
- Set the Trap: Position the trap along a wall where mice are frequently seen. The open end of the bottle should face the wall, encouraging mice to enter from the exposed side.
Step 6: Monitor and Maintain
- Check the Trap Daily: Regularly check if a mouse has been trapped.
- Release Any Captured Mice: Take the trap to a distant area to release any captured mice.
- Clean and Reset the Trap: Clean the trap after each catch and reset it with fresh bait.
Click on any image to start the lightbox display. Use your Esc key to close the lightbox.

Looking to get rid of those pesky mice without spending a fortune? Why not try your hand at making your own DIY mousetrap? In this video, we’ll show you how to make a simple but effective mousetrap using common household items. So grab a few supplies and let’s get started!
DIY Mouse Trap Challenges and Troubleshooting
Creating and using a DIY water bottle mouse trap is a practical and humane solution for controlling rodents. However, like any home solution, it may present challenges that require troubleshooting.
Below are common issues that might arise with your water bottle mouse trap and solutions to effectively resolve them.
Ineffective Bait Placement
- Problem: The bait might not be placed optimally within the water bottle mouse trap, leading to low catch rates.
- Solution: Ensure the bait is placed deep inside the bottle, towards the far end from the entrance. This placement forces the mouse to fully enter the bottle, increasing the likelihood of triggering the trap.
Trap Stability
- Problem: The water bottle mouse trap may tip over or move, especially if larger rodents attempt to enter.
- Solution: Stabilize the trap by securing the base with additional weight or attaching it to a larger, flat surface. This can prevent the trap from tipping or shifting.
Trap Sensitivity
- Problem: The trap may not be sensitive enough to tip when a mouse enters.
- Solution: Adjust the pivot point where the bottle is balanced. Making the resting point of the bottle more central can increase sensitivity. Additionally, ensure that the wire or hinge mechanism is not too tight, allowing the bottle to tip more easily.
Weather Conditions
- Problem: Outdoor elements like wind or rain can affect the performance of your water bottle mouse trap.
- Solution: Place the trap in sheltered locations to protect it from weather conditions. If using the trap outdoors, consider covering it with a small box with entrance holes to shield it from direct exposure.
Bottle Size and Shape
- Problem: Not all plastic bottles are suitable for every rodent size; some might be too small or have inconvenient shapes.
- Solution: Experiment with different sizes and shapes of bottles to find the best fit for your situation. Larger bottles are generally more versatile and can accommodate both small and large rodents.
Escapees
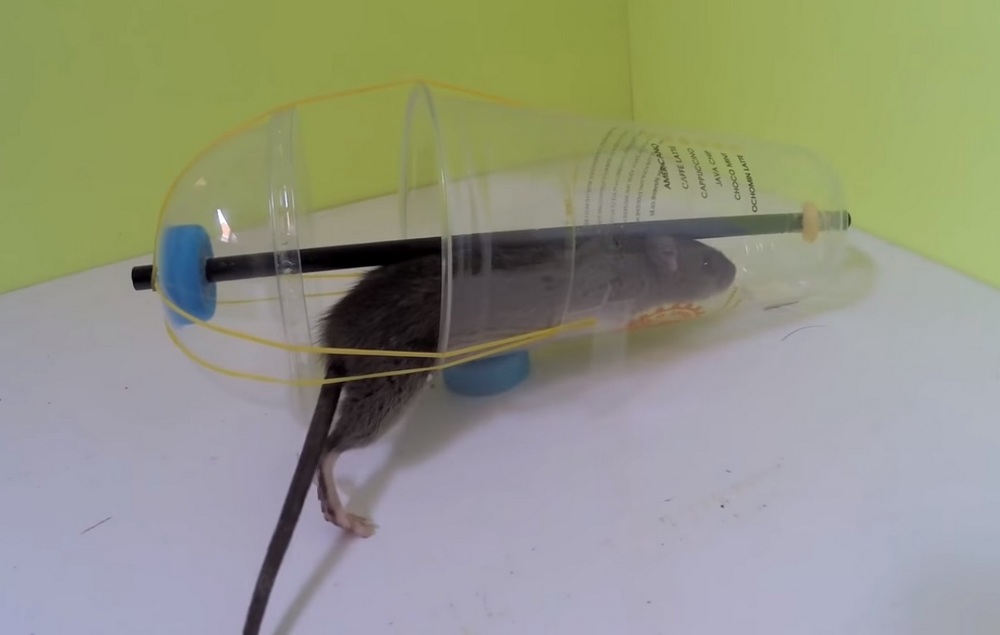
- Problem: Mice might be able to escape from the trap after it tips.
- Solution: Ensure the cut edge of the bottle has no gaps when it rests back down after tipping. You can modify the bottle by adding a flexible flap inside at the entrance, which acts as a one-way door.
Attracting Mice
- Problem: Mice may not be attracted to the water bottle mouse trap at all, despite the presence of bait.
- Solution: Use highly aromatic baits like peanut butter or chocolate to increase attractiveness. Also, place the water bottle mouse trap along walls or paths where mouse activity is known or suspected, as mice tend to travel along edges.
By addressing these common issues, you can enhance the effectiveness of your DIY water bottle mouse trap and better manage the presence of unwanted rodents in your home.
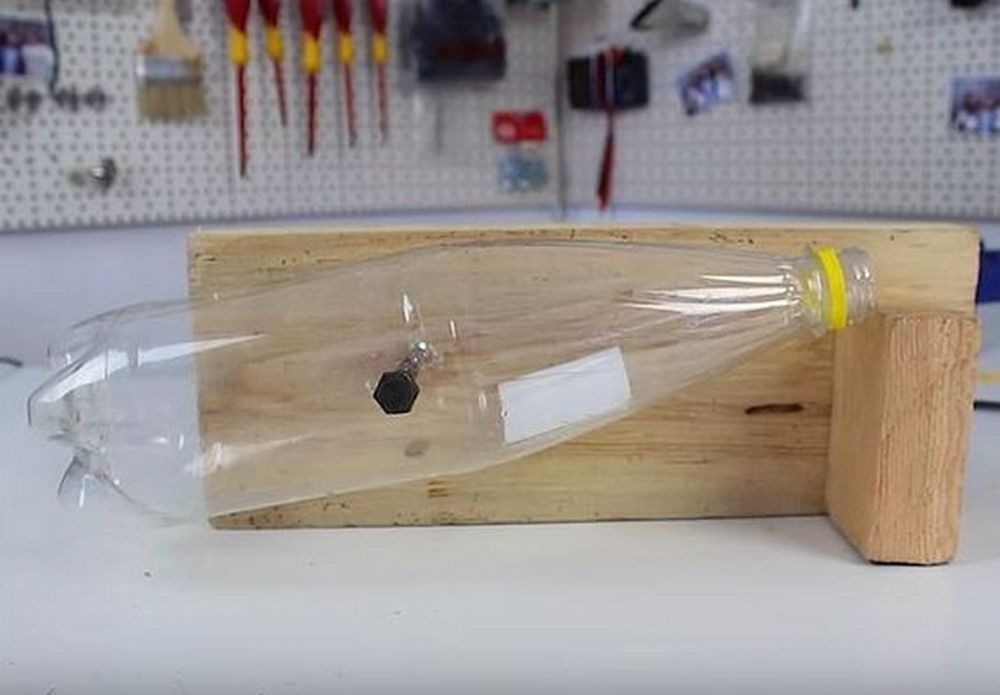
Different Variations of the Water Bottle Mouse Trap
The basic design of a water bottle mouse trap is quite effective, but there are several variations you can try to optimize performance or suit different situations. These variations enhance the versatility of the water bottle mouse trap, allowing you to tailor the design based on your specific needs.
Here are some creative adaptations of the traditional water bottle mouse trap.
Tilt-and-Fall Trap
- Description: This version of the water bottle mouse trap involves a tilting mechanism that causes the bottle to fall into a contained area once the mouse enters.
- How to Build: Attach the bottle horizontally on a fulcrum so that it tilts when a mouse enters at one end. Position a high-walled container beneath the setup. When the bottle tips, it falls into the container, trapping the mouse.
- Benefits: This variation prevents the mouse from escaping after the trap is triggered.
Double-Entry Trap
- Description: The double-entry water bottle mouse trap has two open ends, allowing mice to enter from either side.
- How to Build: Cut both ends of the bottle, and create small hinged doors that close when a mouse enters, using light materials that a mouse can push open but will swing shut behind it.
- Benefits: Increases the trap’s effectiveness by offering multiple entry points and increasing its attractiveness to mice.
Balancing Beam Trap
- Description: This variation uses the weight of the mouse against itself by creating a balancing beam with the water bottle.
- How to Build: Cut the bottle lengthwise into two equal halves. Use one half as a see-saw by balancing it on a narrow support. Place bait on the far end. When the mouse walks towards the bait, the beam tips, dropping the mouse into a holding container below.
- Benefits: This type of trap is very sensitive and can be useful for lighter or smaller mice.
One-Way Door Trap
- Description: This water bottle mouse trap modification involves a one-way door mechanism that allows the mouse to enter but not exit.
- How to Build: Cut the neck of the bottle into a flap that bends inward. Mice can push their way through to get to the bait inside, but the flexibility of the material prevents them from pushing their way back out.
- Benefits: Simple yet effective, this trap ensures that once a mouse has entered, it cannot escape.
Multi-Catch Tunnel Trap
- Description: This design allows multiple mice to be caught without having to reset the trap each time a mouse is captured.
- How to Build: Use a large water bottle and cut two large windows on either side. Insert tube sections (from other bottles) into each window, allowing mice to enter from both directions. The middle section serves as the holding area.
- Benefits: It’s particularly useful in areas with high rodent activity, reducing the need for constant monitoring and resetting.
These variations of the water bottle mouse trap provide several options for dealing with rodent problems in different environments and circumstances. Experimenting with different designs can improve your success rate and offer humane solutions to pest control challenges.
Conclusion
Creating a water bottle mouse trap is an effective and humane method to control rodent populations in your home. This DIY approach not only leverages simple household items but also offers a customizable solution that can be adapted to various needs. With a bit of creativity and basic tools, anyone can build a reliable mouse trap to protect their space from unwanted pests.
We have more ways you can reuse hundreds of plastic bottles. Check out our plastic bottle greenhouse project!