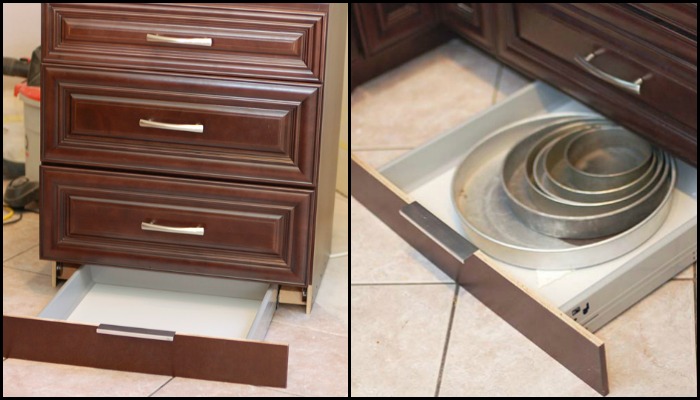
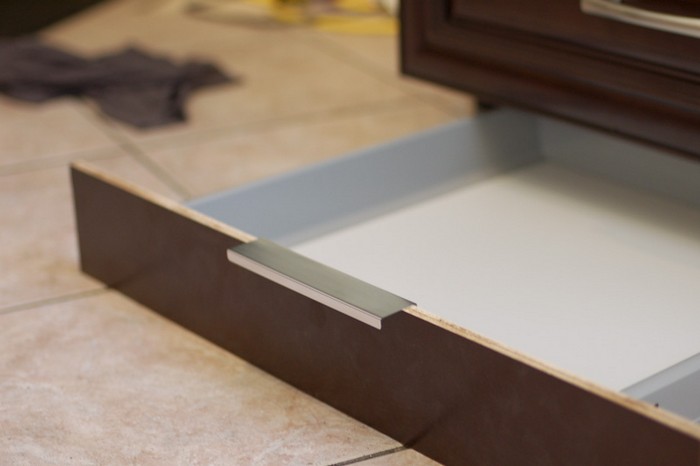
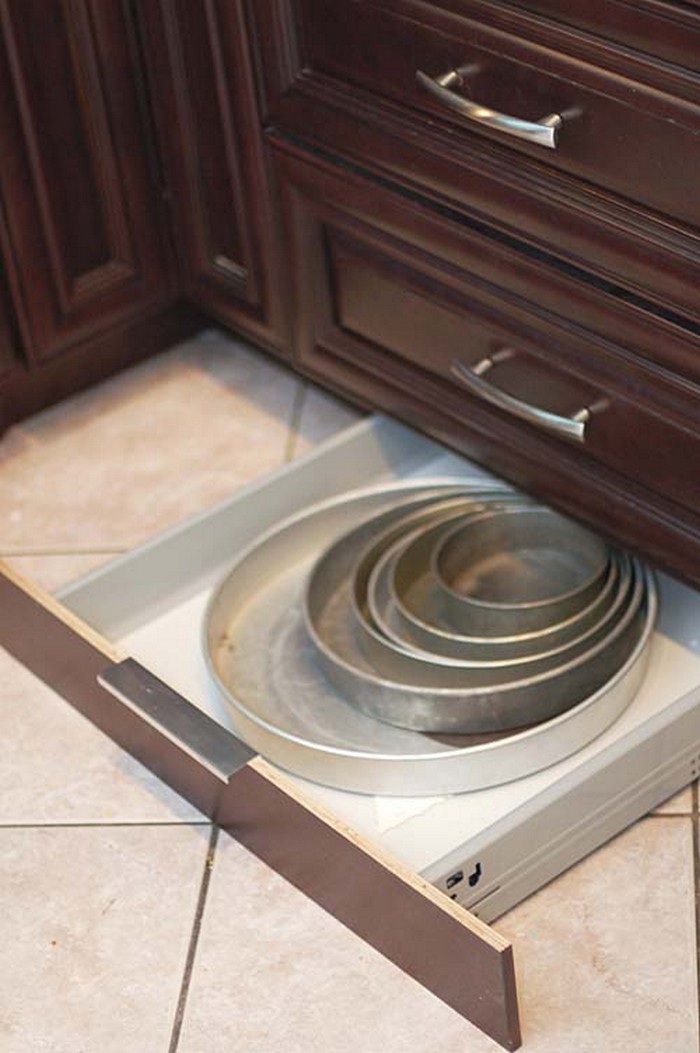
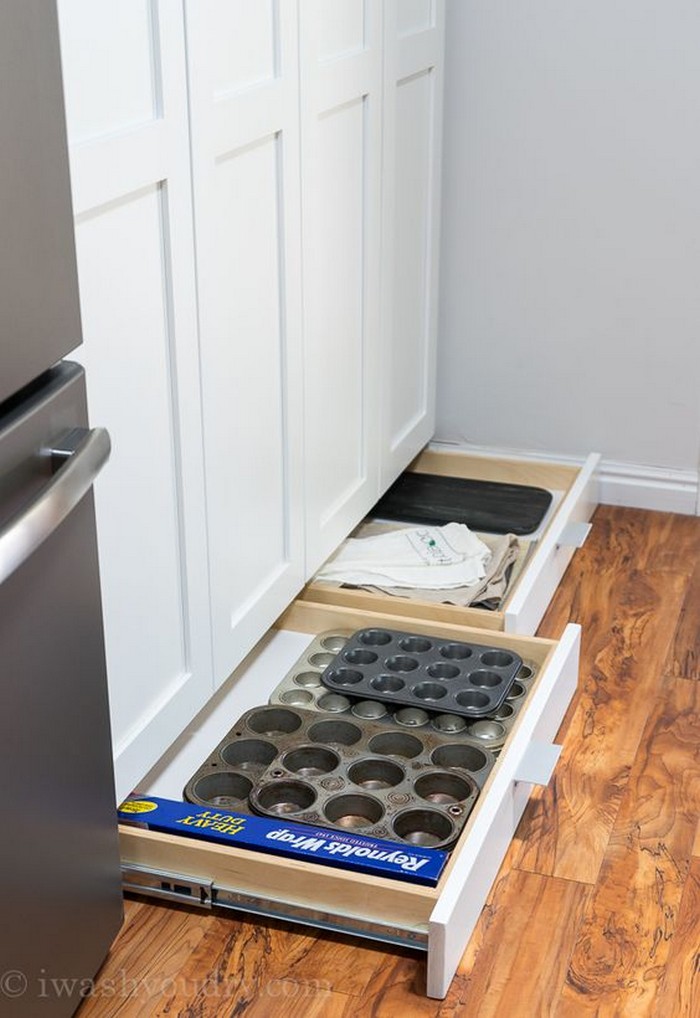
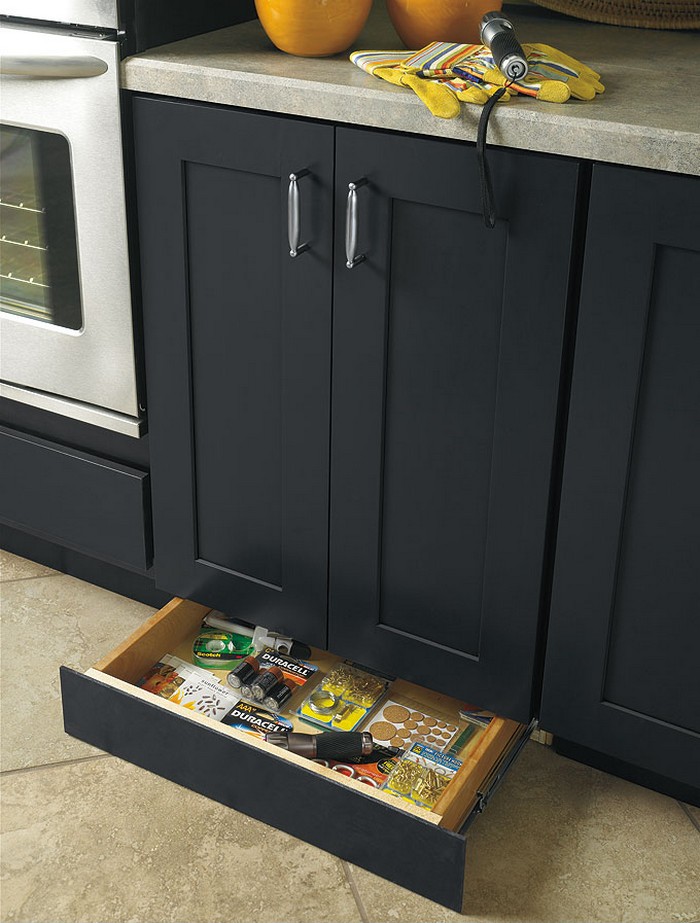
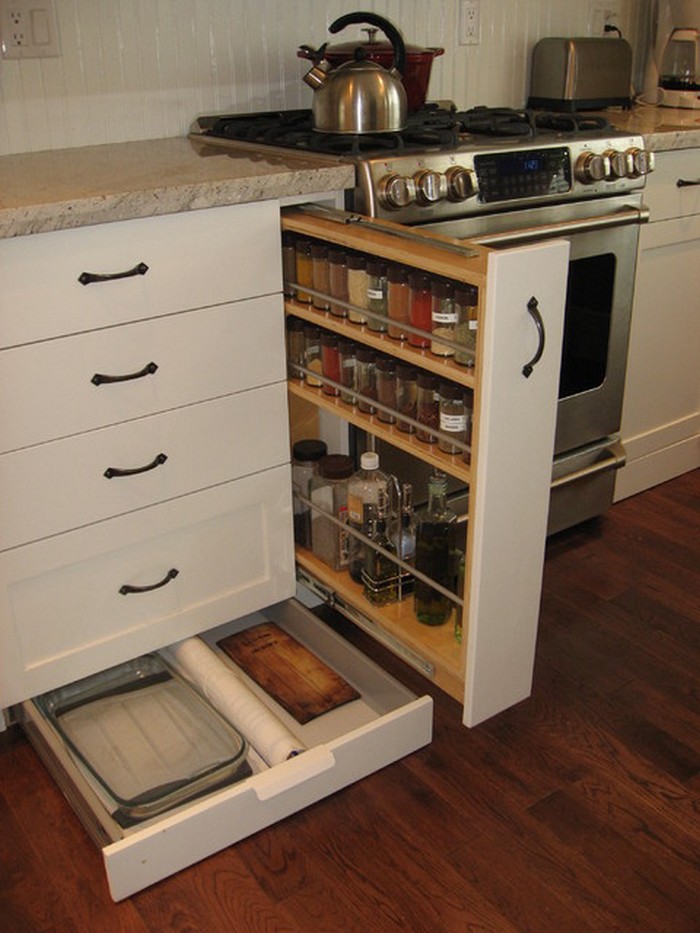
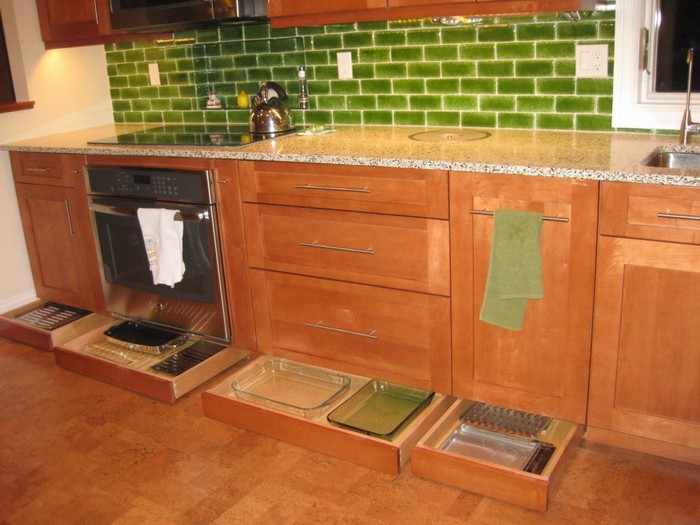
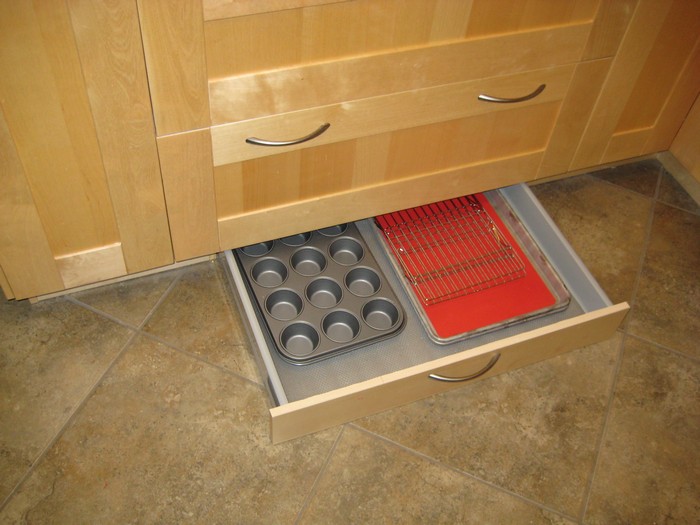
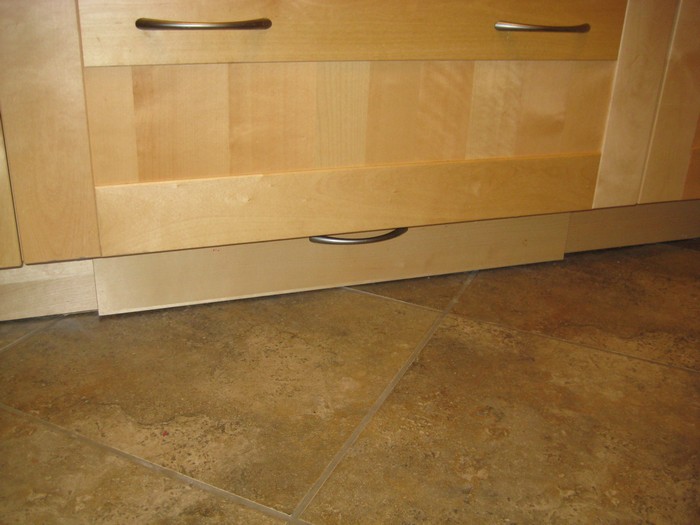
If you’re struggling to find enough storage space in your kitchen, why not make use of the toe-kick? This is the area between your cabinet’s base and the floor, and it can be a great place to store things like small appliances, pots and pans, and other kitchen essentials.
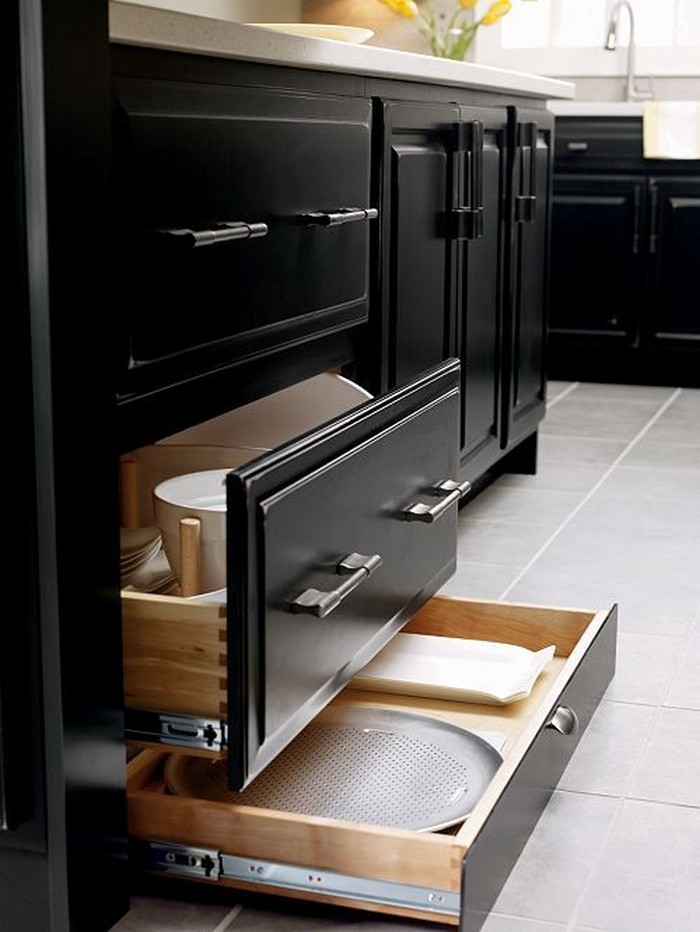
Toe-kick drawers are an excellent way to make use of the often wasted space beneath your kitchen cabinets. Plus, it’s a great way to free up space in your cabinets and keep your kitchen organized.
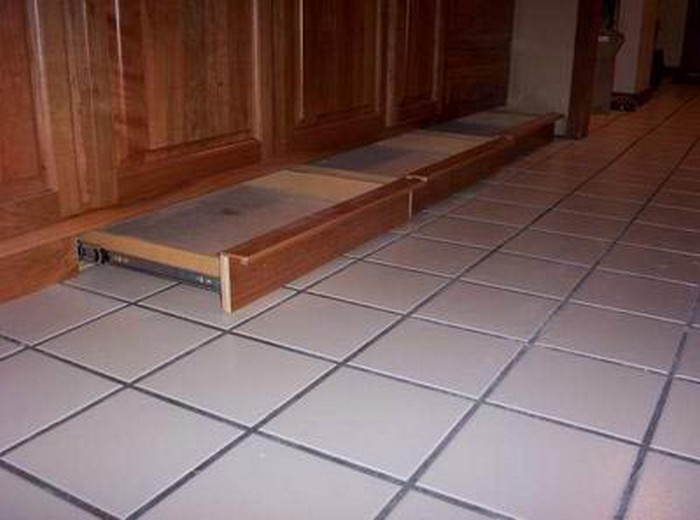
Most people usually overlook this part of the kitchen but it offers valuable storage space that many of us need! By making toe-kick drawers, you’ll have the perfect storage area for kitchen equipment that you do not frequently use. You can also store miscellaneous supplies such as plastic cutlery and unopened packs of table napkins.
If you’re looking for an easy way to add extra storage to your kitchen, consider installing toe-kick drawers. This is a great solution if you have existing cabinets, but it’s even easier if you’re installing new ones. Toe-kick drawers are a great way to make use of the often-underutilized space beneath your cabinets.
They’re perfect for storing things like cooking utensils, silverware, or even small appliances. And because they’re installed at the base of your cabinets, they’re easy to access – no more bending down or reaching up to get what you need.
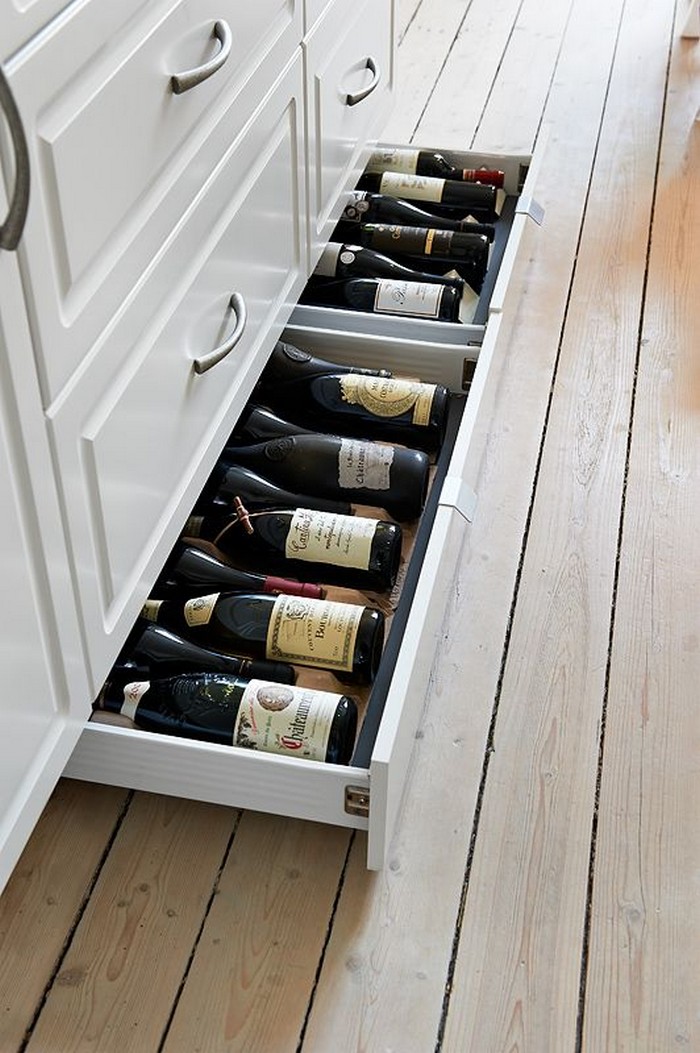
Toe kick drawers are a great way to add extra storage space to your home, and they can be installed in a variety of locations. In the bathroom, for example, you can use them to store towels, toiletries, and other items out of sight. They can also be used as a secret storage space for items you don’t want anyone to know about!
If you’re looking for a clever storage solution, check out our album or click on the link below for step-by-step instructions. With this easy-to-follow guide, you’ll be able to declutter your space in no time!
Contents
Building a Toe-Kick Drawer
Click on any image to start the lightbox display. Use your Esc key to close the lightbox ![]()
Materials
- Ikea Rationell Drawer Kit
- Scrap Wood
- 1-1/2″ Wood Screws
- Drawer Hardware
Tools
- Measuring Tape
- Marker
- Drill
- Miter Saw
- Table Saw
- Small Carpenter’s Square
Instructions
Step 1: Measure the Toe-Kick Space
- Use the measuring tape to accurately measure the width, depth, and height of the toe-kick area under your cabinet.
- Note these dimensions as they will determine the size of your toe-kick drawer.
Step 2: Cut the Wood
- Using the table saw, cut the scrap wood to create the sides, back, and bottom of the drawer. Ensure the pieces match the dimensions measured.
- If your toe-kick has a unique shape, adjust the cuts accordingly.
Step 3: Assemble the Drawer Box
- Lay out the cut pieces on a flat surface to form the drawer box.
- Use the drill and wood screws to attach the sides, back, and bottom together. Ensure all corners are square using the carpenter’s square.
Step 4: Install the Drawer Slides
- Follow the instructions included with the Ikea Rationell Drawer Kit to attach the drawer slides.
- Make sure the slides are aligned properly and operate smoothly.
Step 5: Attach the Front Panel
- Cut a piece of scrap wood to fit as the front panel of the drawer, ensuring it matches the exterior finish of your existing cabinetry.
- Attach the panel using the wood screws, ensuring it is flush with the rest of the drawer box.
Step 6: Fit the Drawer into the Toe-Kick
- Carefully slide the drawer into the toe-kick space to test the fit.
- Adjust as necessary to ensure the drawer opens and closes smoothly without catching on the cabinet.
Step 7: Secure the Drawer
- Once the drawer fits well, secure it in place by drilling screws through the drawer slides into the cabinet base.
- Check stability and make any necessary adjustments.
Step 8: Add Drawer Hardware
- Attach the drawer handle or knob to the front panel using the provided hardware in your kit.
- Choose hardware that matches the style and finish of your kitchen cabinetry.
Step 9: Final Testing
- Test the drawer several times to ensure it operates smoothly and stays securely closed when not in use.
- Adjust the slides if you notice any misalignment or sticking.
Step 10: Clean Up
- Clean the area and your new toe-kick drawer of any sawdust or debris.
- Organize your kitchen items into the new storage space and enjoy the added functionality in your kitchen.

You get more step-by-step instructions from Tikkido over here…
Advanced Organizational Features
When optimizing kitchen storage, a toe-kick drawer can be a game changer, providing a discreet yet accessible place to store essentials. Enhancing these drawers with advanced organizational features not only maximizes their utility but also makes daily routines more efficient.
Here’s how to upgrade your toe-kick drawer with some innovative organizational tools:
Dividers and Inserts
To prevent items from shifting and to keep everything neatly arranged, consider installing adjustable dividers in your toe-kick drawer. These dividers can be custom-fitted to accommodate various kitchen tools and utensils, transforming your drawer into a well-organized storage area that makes it easy to find what you need without the hassle.
Non-Slip Mats
Line the bottom of your toe-kick drawer with non-slip mats to ensure items remain securely in place, even when opening and closing the drawer frequently. This is particularly useful for storing fragile items such as glass baking dishes or fine china, adding a layer of protection and stability.
Integrated Lighting
Installing LED lighting inside your toe-kick drawer can significantly enhance its functionality, especially in low-light conditions. With motion-sensor LED strips, you can easily see the contents of the drawer without needing to turn on bright kitchen lights, which is perfect for finding items during early mornings or late nights.
Push-to-Open Mechanisms
For a sleek and handle-free look, equip your toe-kick drawer with a push-to-open mechanism. This feature allows for easy opening with a simple nudge of the knee or foot, making it incredibly convenient when your hands are full. This upgrade not only enhances the usability of your toe-kick drawer but also contributes to a minimalist kitchen design.
Automated Drawer Systems
For the ultimate in convenience and modernization, consider installing an automated system that opens and closes your toe-kick drawer with the touch of a button. This high-tech feature is perfect for those who value efficiency and a futuristic touch in their kitchen setups.
Customizable Layouts
Incorporate modular sections within your toe-kick drawer that can be rearranged according to your changing needs. This flexibility allows you to customize the layout for different items, from larger pots and pans to smaller kitchen gadgets, ensuring everything fits perfectly and is easy to access.
Labeling Systems
Implement a labeling system inside your toe-kick drawer to keep everything organized and identifiable at a glance. You can use durable, moisture-resistant labels to mark sections for specific items, making it quicker to find what you need and ensuring everything has a designated spot.
Vertical Storage
Maximize the space within your toe-kick drawer by adding vertical storage options. Install upright panels that can hold items like baking sheets, cutting boards, and trays in an organized manner. This setup not only saves space but also prevents these items from being stacked and difficult to retrieve.
Magnetic Strips
For storing metal utensils or tools, fitting a magnetic strip inside your toe-kick drawer can be a practical solution. Knives, spatulas, and other metal tools can be securely held in place, making them easy to access and safely stored away from general kitchen activity.
Temperature Control Features
If you’re storing items sensitive to temperature changes, such as certain wines or specialty foods, integrating temperature control into your toe-kick drawer could be highly beneficial. This feature ensures that these items are kept at an optimal temperature, maintaining their quality and extending their shelf life.
Your toe-kick drawer will be more useful and a design focal point in your kitchen when you include these cutting-edge organizing elements. The main goal of these improvements is to help your kitchen function smarter rather than harder so you can enjoy a spotlessly clean and well-organized area.
Installation Tips and Common Pitfalls
Installing a toe-kick drawer can greatly enhance the functionality of your kitchen by utilizing often overlooked space. However, to ensure a successful installation, it’s crucial to follow some best practices and be aware of common pitfalls.
Here’s a guide to help you through the installation process:
Preparation and Planning
- Plan Thoroughly: Before beginning the installation, ensure you have all the necessary materials and tools. Double-check the measurements of your toe-kick space to guarantee the drawer kit will fit.
- Check for Obstructions: Inspect the installation area for any plumbing, wiring, or structural elements that could interfere with the drawer. Adjustments may be needed to avoid these obstacles.
Accurate Measurements
- Precision is Key: Use a reliable measuring tape and make sure all measurements are precise. Even small inaccuracies can result in a drawer that doesn’t fit or operates poorly.
- Template Use: Creating a cardboard template of the drawer can help visualize its placement and identify any potential issues before the actual installation.
Installation Process
- Securing the Slides: Properly align and secure the drawer slides. Misaligned slides can cause the drawer to stick or derail.
- Even Mounting: Ensure the drawer is perfectly horizontal and flush with the surrounding cabinetry. Use a level to check alignment before finalizing the installation.
Common Pitfalls to Avoid
- Overloading the Drawer: Toe-kick drawers are ideal for lighter items. Avoid using them for heavy objects as this can lead to damage or malfunction.
- Ignoring Aesthetic Alignment: The front panel of the drawer should seamlessly integrate with the rest of the cabinetry. Mismatched finishes or misaligned panels can detract from the overall appearance.
- Skipping Reinforcement: If the drawer will be used frequently, consider reinforcing the installation with additional brackets or stronger screws to withstand regular use.
Final Checks and Adjustments
- Operational Test: Once installed, repeatedly open and close the drawer to ensure smooth operation. Make adjustments to the slides or alignment if necessary.
- Finish and Touch-Ups: Check the finish of the drawer and surrounding area. Any scuffs or marks made during installation should be touched up to maintain the kitchen’s aesthetic.
By following these installation tips and being mindful of common pitfalls, you can successfully add a toe-kick drawer to your kitchen, boosting storage capacity and maintaining a clean, organized space.
Conclusion
Installing a toe-kick drawer is an effective way to maximize underutilized space in your kitchen, providing a discreet yet accessible storage solution. Careful planning, accurate measurements, and proper installation ensure that the drawer functions smoothly and blends seamlessly with your cabinetry. This addition not only enhances organization but also elevates the overall functionality and aesthetic of your kitchen space.