Last Updated on February 18, 2025 by teamobn
Mealworms are an excellent source of protein for your chickens and should be included in their diet. Chickens love to eat mealworms and they are a healthy treat for them. They are also a good way to keep your chickens entertained and occupied.
Why buy them when you can easily grow them yourself? There are many advantages to growing your own mealworms for your chickens. For one, it can save you money on your chicken feed bill. By growing them on your own, you can ensure that your chickens are getting the best possible nutrition.
Another advantage of growing your own mealworms is that you can control the quality of the food that your chickens are eating. Store-bought can be of variable quality, and you may not always know what you’re getting. By growing your own, you can be sure that your chickens are getting the freshest and highest quality possible.
Aside from saving you money, growing your own mealworms also has the added benefit of ensuring a consistent food source for your chickens or quails all year round. Not to mention, you can take pride in knowing that the food you’re giving your animals is healthy and hasn’t been treated with any harmful chemicals or pesticides.
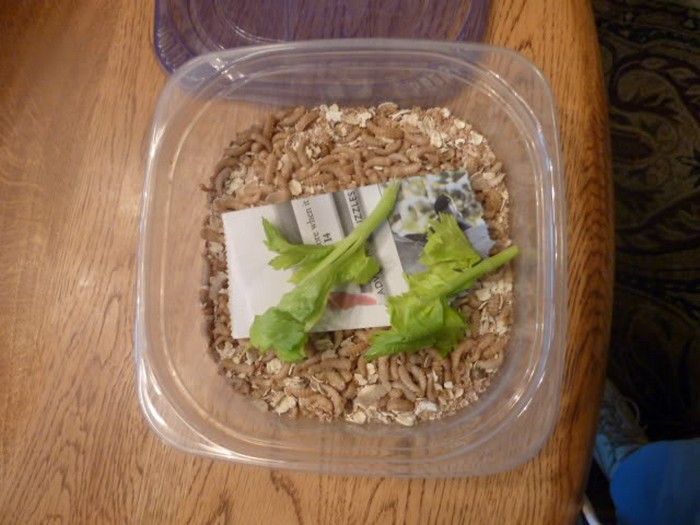
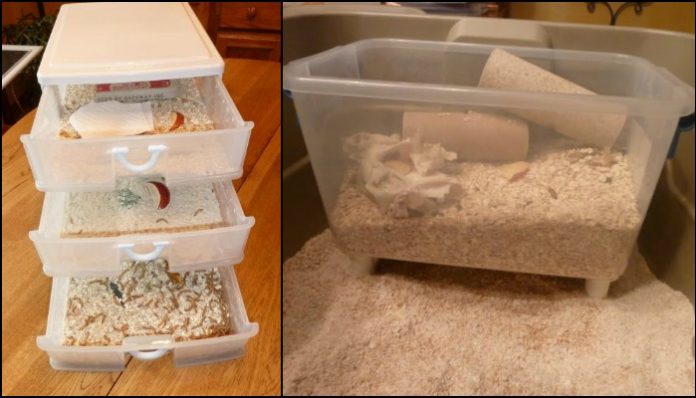
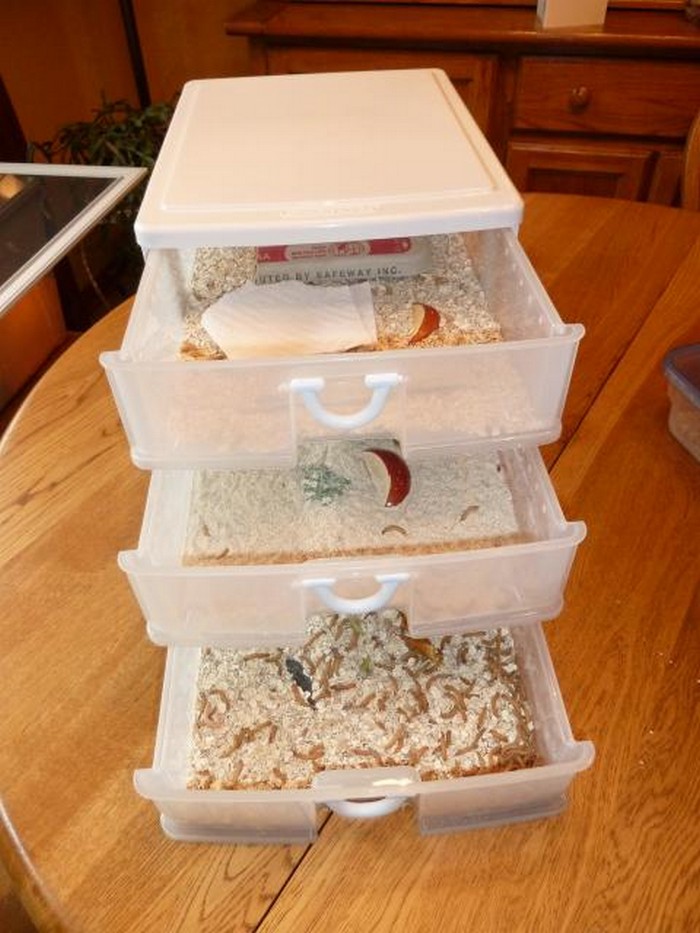
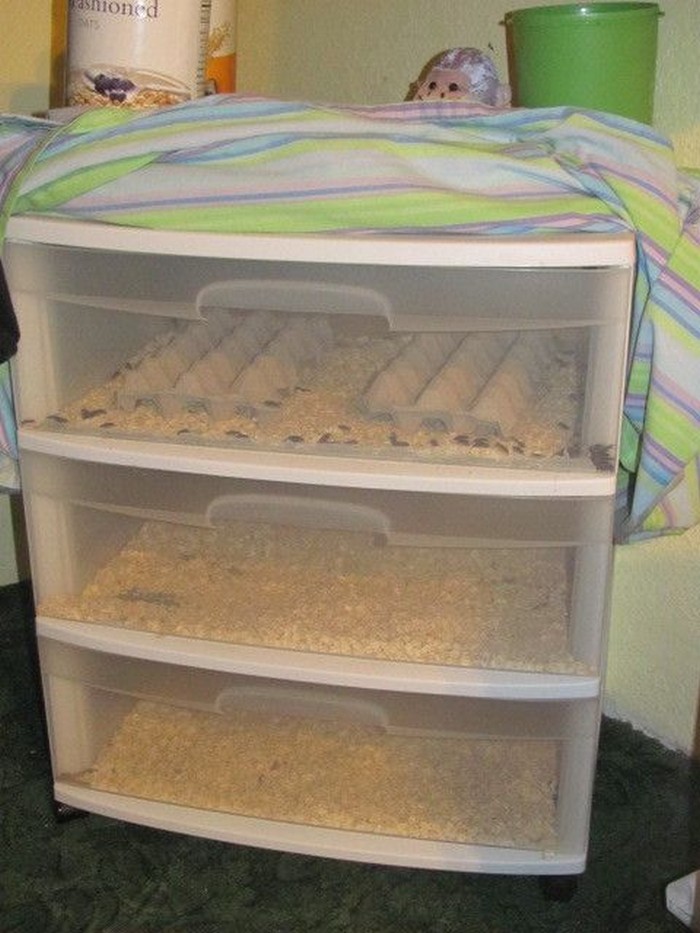
If you’re looking for an easy way to raise your own mealworms, look no further than the mini 3-compartment drawer from the dollar store. This simple and inexpensive solution is perfect for feeding your chickens. Plus, it’s easy to set up and maintain.
They can be bred in a variety of substrates, but some of the most popular options include bran, oats, and wheat flour. You’ll need to experiment to see what your worms prefer. Once you’ve chosen a substrate, moisten it with water until it’s slightly damp.
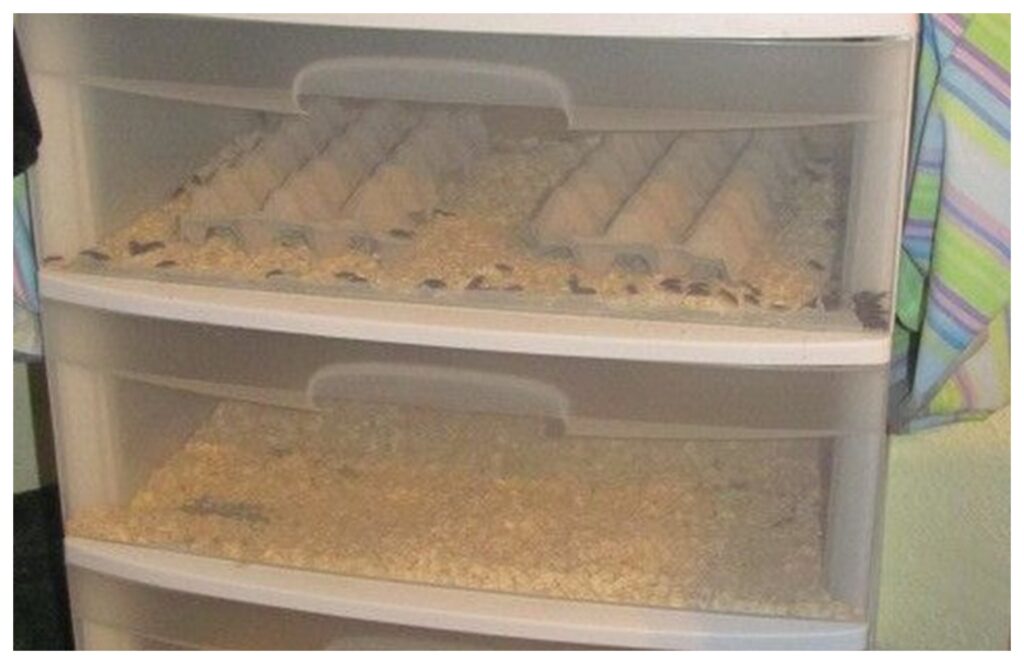
Looking to start your own mealworm farm? This comprehensive guide will teach you everything you need to know to get started. You’ll learn about the benefits of farming mealworms, the supplies you’ll need, and how to set up your farm. It is very informative and addresses the most common problem encountered when raising mealworms – moisture!
BTW, this is also a project that kids can have fun with. So if you have little ones at home, why not involve them and learn how to grow your own mealworms together? Not only will it be a fun bonding experience for you and your child, but they’ll also get to learn about the process of metamorphosis and where mealworm comes from.
Contents [show]
How to Grow Your Own Mealworms
Materials
- Plastic 3-Compartment Drawer
- Plastic Bin
- Screening Material
- Wheat Bran (substrate)
- Cardboard, Egg Carton, Toilet Paper Tube, or Layers of Newspaper (where worms like to hide)
Tools
- Cutter
- Drill
- Hot Glue Gun
Steps:
Step 1: Prepare the Containers
Use a plastic 3-compartment drawer as your main breeding setup. Each drawer will serve a different purpose:
- Top drawer – For adult beetles to lay eggs.
- Middle drawer – For newly hatched larvae (baby mealworms).
- Bottom drawer – For growing and harvesting mature mealworms.
You’ll also need a plastic bin to store extra mealworms or to use as an additional breeding container if you want to expand your farm.
Step 2: Create Ventilation Holes
Mealworms need air circulation to prevent mold and excess moisture buildup.
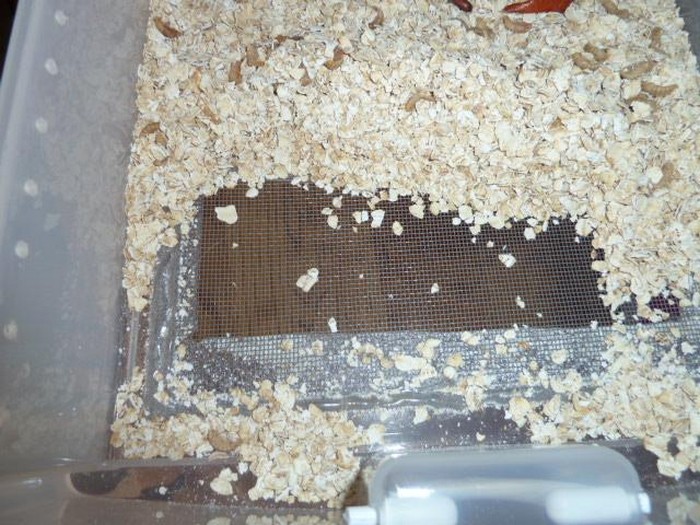
- Use a drill to make small ventilation holes in the sides and lid of each drawer. Space them evenly to ensure proper airflow.
- Cover the holes with screening material and secure it with a hot glue gun to prevent pests from entering.
Step 3: Add the Substrate
Wheat bran is the main food source for mealworms and serves as their bedding.
- Fill each drawer with a 1-2 inch layer of wheat bran as the substrate.
- Lightly mist the bran with water, but avoid making it too damp to prevent mold growth.
Step 4: Provide Hiding Spots
Mealworms prefer dark, sheltered areas to hide and pupate.
- Add cardboard, egg cartons, toilet paper tubes, or layers of newspaper to each drawer. These materials will serve as hiding spots and encourage mealworms to thrive.
Step 5: Introduce Mealworms
- Start by adding a small batch of live mealworms to the bottom drawer.
- These mealworms will eventually turn into pupae, then darkling beetles, which will lay eggs and continue the life cycle.
Step 6: Separate the Beetles
- Once your mealworms pupate and turn into darkling beetles, transfer them to the top drawer.
- These beetles will lay eggs, which will fall through the holes into the middle drawer where they hatch into baby mealworms.
- After a few weeks, move the larvae to the bottom drawer to continue growing.
Step 7: Provide Moisture
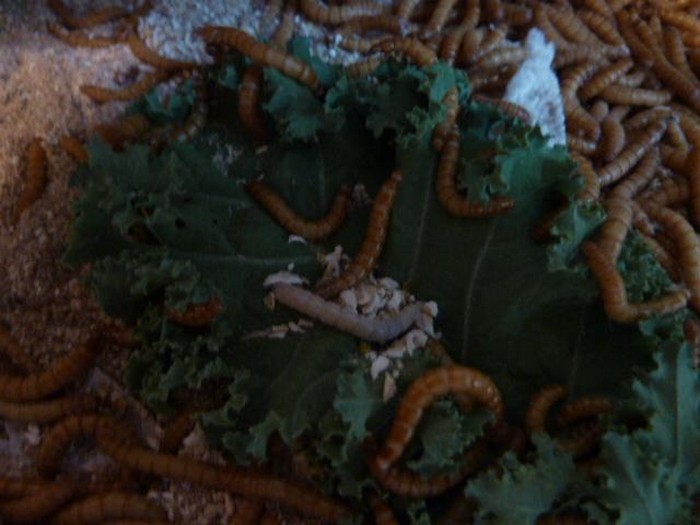
Mealworms need moisture to stay hydrated. Instead of water, use moist vegetables like carrots, potatoes, or apple slices.
- Place small pieces of vegetable scraps in each drawer.
- Replace them every few days to prevent mold or rot.
Step 8: Harvest Your Mealworms
- Once the mealworms in the bottom drawer reach full size, they’re ready to be fed to your chickens.
- Use a sieve to separate the mealworms from the bran.
- Store extra mealworms in the plastic bin or freeze them for later use.
Step 9: Maintain and Expand Your Farm
- Regularly clean out old substrate and replace it with fresh wheat bran.
- Monitor for mold, mites, or odors and adjust moisture levels if needed.
- If your farm is growing well, you can expand by adding more plastic bins for extra mealworm production.
Understanding the Mealworm Life Cycle
Raising mealworms is a simple and rewarding process, especially when you understand their life cycle. If you grow your own mealworms, knowing each stage helps you maintain a steady supply for your chickens while keeping your farm clean and efficient. From tiny eggs to fully grown beetles, mealworms go through four key phases, each with its own purpose.
The Egg Stage
Mealworms begin their life as tiny, nearly invisible eggs. Female darkling beetles lay eggs in the substrate, often hidden among wheat bran or other bedding material. These eggs hatch after about one to two weeks, depending on temperature and humidity. Since they are so small, you might not even notice them, but they are the start of a thriving mealworm colony.
The Larva Stage (Mealworm Phase)
Once the eggs hatch, tiny mealworms emerge and begin feeding on the substrate. This is the stage where they grow the most, molting several times as they outgrow their exoskeletons. Mealworms remain in this larval phase for several weeks or even months, depending on conditions. This is the ideal stage to harvest them for your chickens since they are packed with protein and easy to store.
The Pupa Stage
After enough growth, mealworms enter the pupal stage. During this phase, they stop eating and curl into a hard, motionless shell. This is when their transformation into beetles begins. Unlike caterpillars turning into butterflies, mealworms do not need a cocoon. Within one to three weeks, they emerge as adult beetles, ready to continue the cycle.
The Beetle Stage
Once fully developed, darkling beetles come out of their pupal shells. At first, they appear soft and white, but within a few days, they darken to brown and then black. Adult beetles live for several months, laying hundreds of eggs throughout their lifetime. By keeping beetles in a separate breeding area, you can ensure a continuous supply of new mealworms.
Understanding the mealworm life cycle makes it easier to manage your colony. If you grow your own mealworms, maintaining different containers for each stage helps maximize production and keeps your farm organized. With the right setup, you’ll have a constant supply of nutritious treats for your chickens all year round.
Ideal Conditions for Raising Mealworms
When you grow your own mealworms, providing the right environment is key to maintaining a healthy and productive colony. Mealworms thrive in controlled conditions where temperature, humidity, and cleanliness are carefully managed. Creating an ideal habitat ensures a steady supply of nutritious food for your chickens while preventing mold, pests, and slow growth.
Temperature and Humidity
Mealworms prefer warm temperatures, ideally between 75°F and 85°F (24°C to 29°C). If temperatures drop below 60°F (15°C), their growth slows significantly, and they may enter a dormant state. On the other hand, excessive heat above 90°F (32°C) can cause stress and increase the risk of mold and dehydration.
Humidity levels should stay around 50-60%, which prevents excessive dryness without encouraging mold. Keeping a shallow dish of fresh vegetables, like carrots or potatoes, provides moisture without making the substrate too damp.
Proper Ventilation
Air circulation prevents mold and unwanted odors in your mealworm farm. If you use a plastic 3-compartment drawer or plastic bin, drill small ventilation holes in the sides and top. Cover these holes with screening material to keep pests out while ensuring airflow. Avoid sealing your containers tightly, as poor ventilation leads to excess moisture buildup and fungal growth.
Choosing the Right Substrate
Wheat bran, oats, or cornmeal make excellent substrates for mealworms. These materials serve as both bedding and food. A 1-2 inch layer in each compartment is enough for mealworms to burrow and feed. Replace the substrate every few months to remove waste and maintain a clean environment. Sifting out old bedding helps prevent ammonia buildup, which can harm your colony.
Light and Darkness Balance
Mealworms prefer dark, sheltered spaces. While they don’t require complete darkness, keeping them away from direct sunlight reduces stress. You can provide hiding spots using egg cartons, cardboard pieces, or layers of newspaper. These materials also help maintain proper airflow in the substrate.
Regular Cleaning and Maintenance
A well-maintained mealworm farm produces healthier, faster-growing larvae. Clean out old bedding and waste regularly by sifting it through a mesh screen. Remove dead beetles, pupae, and excess debris to keep the farm sanitary. If you notice mold, replace the affected substrate immediately and adjust moisture levels.
When you grow your own mealworms, optimizing these conditions will lead to a thriving, self-sustaining colony. With the right setup, you’ll always have a fresh supply of protein-packed mealworms for your chickens, reducing feed costs while ensuring a natural and healthy diet.
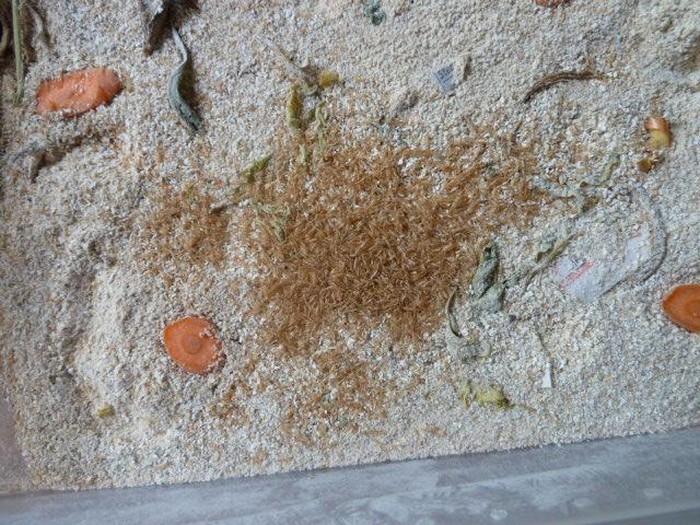
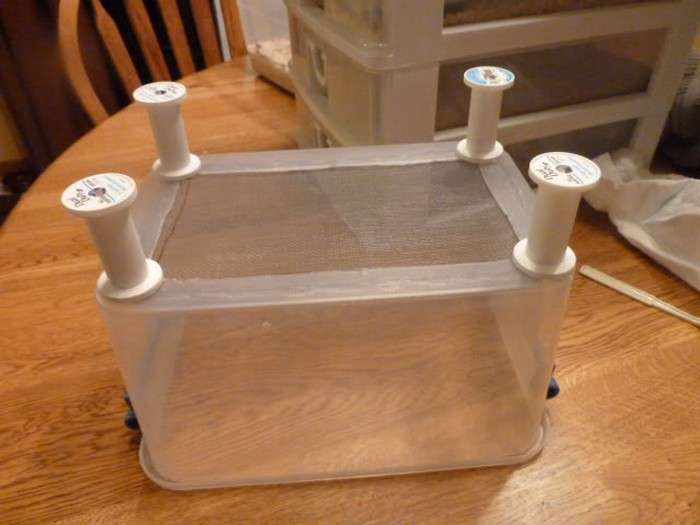
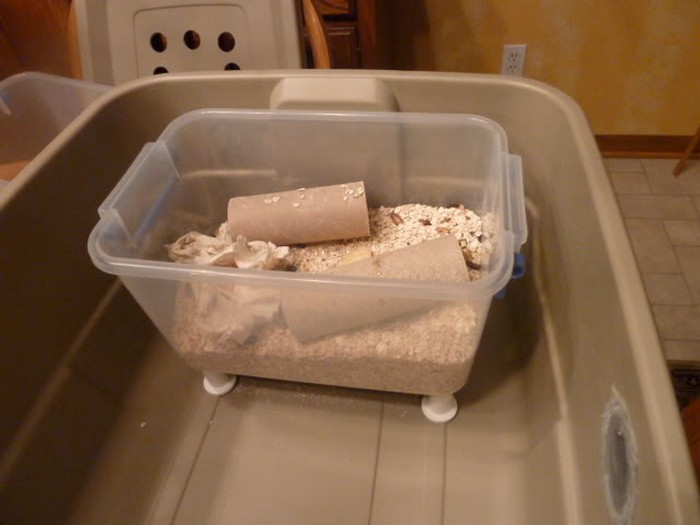
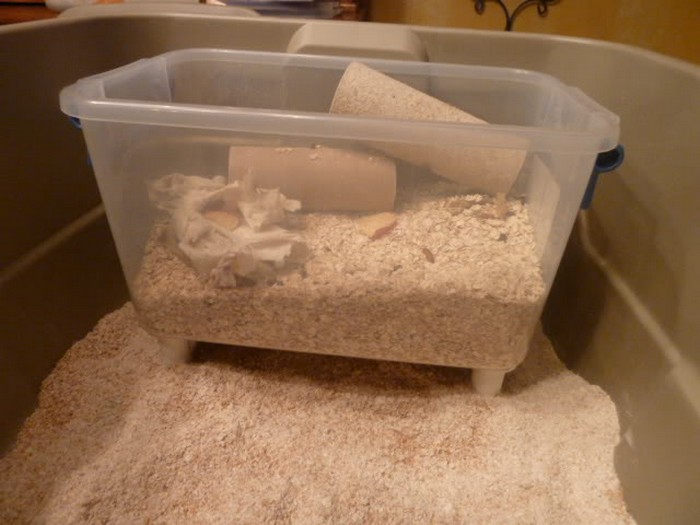
Gallery of the Container To Grow Your Own Mealworms
Click on any image to start the lightbox display. Use your Esc key to close the lightbox. ![]()

How to Harvest Mealworms Efficiently
When you grow your own mealworms, knowing how to harvest them properly ensures a steady, clean, and nutritious supply for your chickens. The right harvesting method helps separate mealworms from bedding, waste, and uneaten food while maintaining a productive colony.
Timing Your Harvest
Mealworms reach their ideal size for harvesting around 8 to 12 weeks after hatching. Fully grown larvae are plump, active, and light brown. At this stage, they offer the most nutritional value to your chickens. Avoid harvesting mealworms that are too small or those that have entered the pupal stage, as these will soon turn into beetles and keep your colony going.
Using a Simple Sifting Method
One of the easiest ways to separate mealworms from bedding and waste is by sifting them through a mesh screen. You can use a fine wire mesh or a kitchen strainer with holes small enough to let bran and waste fall through but large enough to keep mealworms in.
- Place a sieve or mesh screen over a clean container.
- Scoop a portion of the substrate with mealworms and gently shake it. The wheat bran and droppings (frass) will fall through, leaving behind the mealworms.
- Collect and transfer the mealworms to a feeding container or storage bin.
This method works best when harvesting large amounts at once. If you’re working with multiple compartments in a plastic drawer system, focus on the bottom drawer, where mealworms are mature and ready to be collected.
Separating Mealworms from Pupae and Beetles
To keep your mealworm farm thriving, it’s important to separate mature larvae from pupae and beetles.
- Hand-picking pupae: Since pupae don’t move, they are easy to spot and remove by hand. Set them aside in a separate container until they turn into beetles.
- Transferring beetles: Once beetles appear, move them to the top drawer or a separate breeding container to continue laying eggs.
Separating these stages prevents the beetles from eating newly hatched mealworms and keeps your population growing.
Storage and Feeding Options
If you’re not feeding the harvested mealworms immediately, you can store them in different ways:
- Short-term storage: Keep them in a separate container with fresh wheat bran and a moisture source (like carrots or potatoes). Store at room temperature and feed within a few days.
- Refrigeration: If you want to slow their growth, store them in a cooler environment (around 40-50°F or 4-10°C). This keeps them alive but slows their metabolism, preventing pupation.
- Freezing for long-term use: If you want to store mealworms for months, freeze them. Simply place them in a plastic bag and freeze for a few hours. This is the best way to ensure you always have mealworms available.
Keeping Your Farm Productive
After harvesting, refresh the substrate by adding fresh wheat bran and checking moisture levels. Keeping the environment clean prevents mold and ensures a continuous cycle of new mealworms for your flock.
Efficient harvesting is key when you grow your own mealworms. By using the right methods, you can maintain a healthy farm and provide a sustainable, protein-rich treat for your chickens year-round.
Conclusion
When you grow your own mealworms, you create a steady, high-protein food source for your chickens. You can keep your mealworm farm thriving with minimal effort by maintaining the right conditions, regularly harvesting, and managing different life stages. With a little care and patience, this DIY setup will ensure a continuous supply of fresh, nutritious mealworms all year round.
We have more project to keep your chickens healthy. Check out our feeder ideas for your flock!


