Last Updated on March 21, 2024 by teamobn

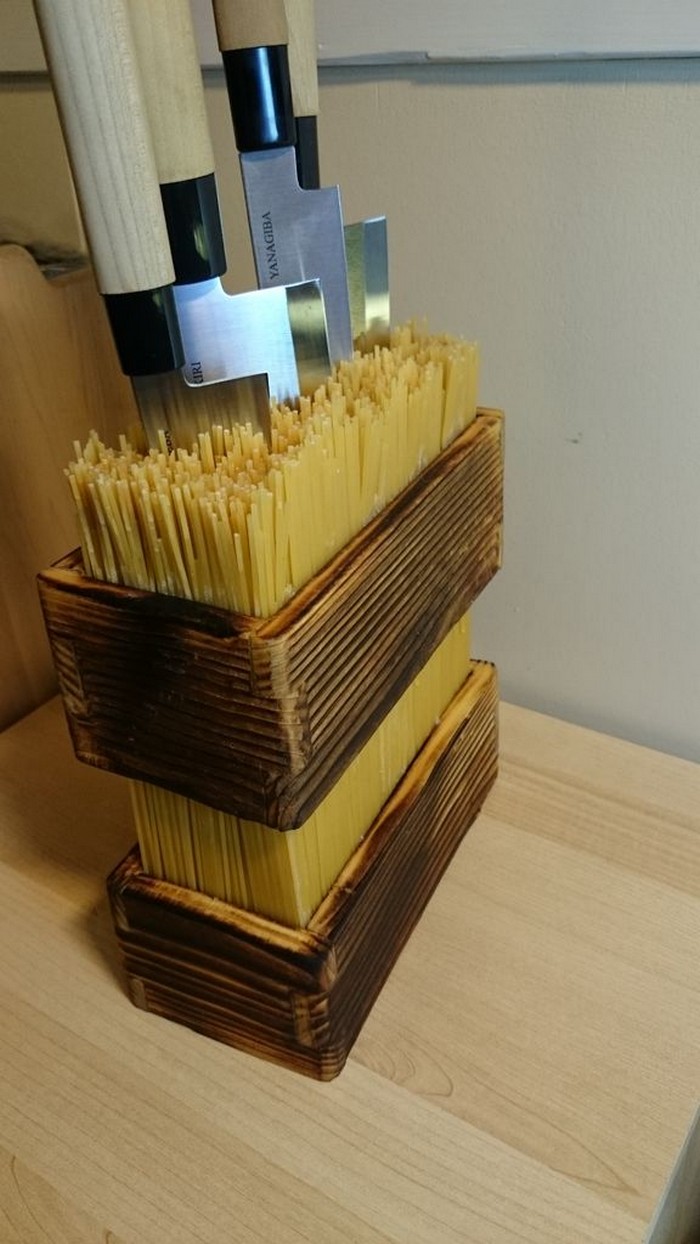
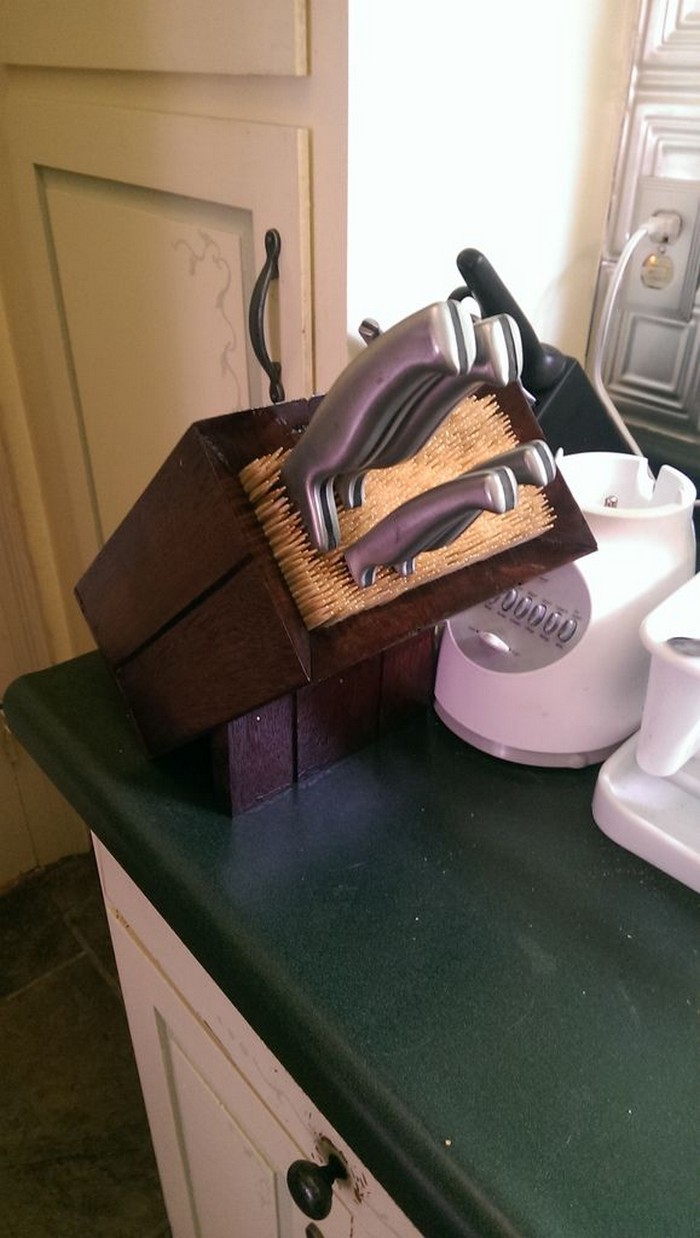
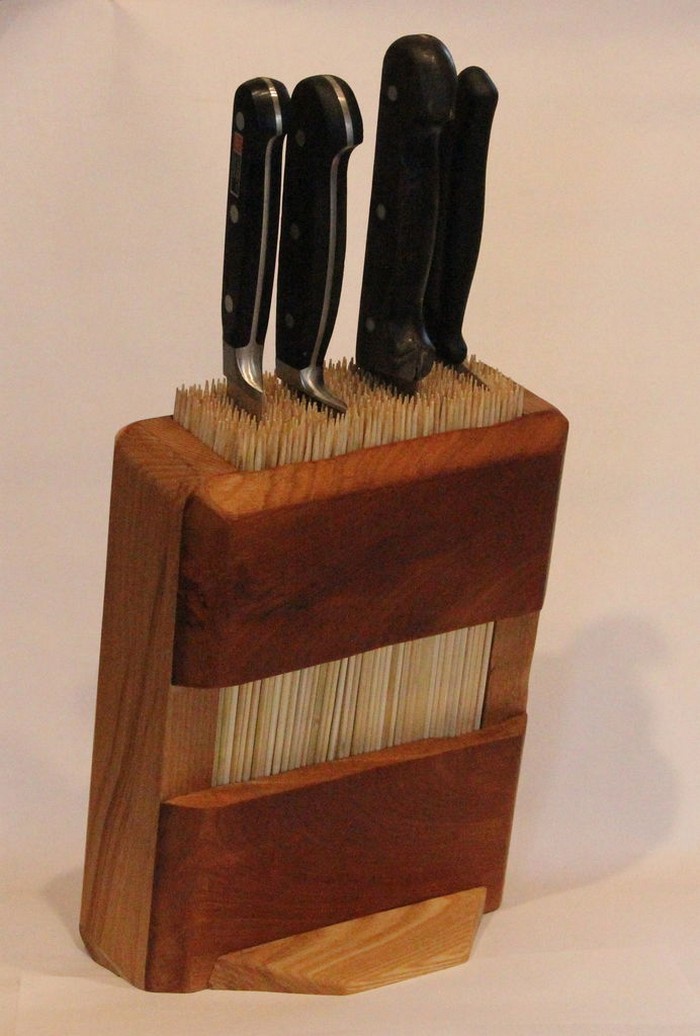
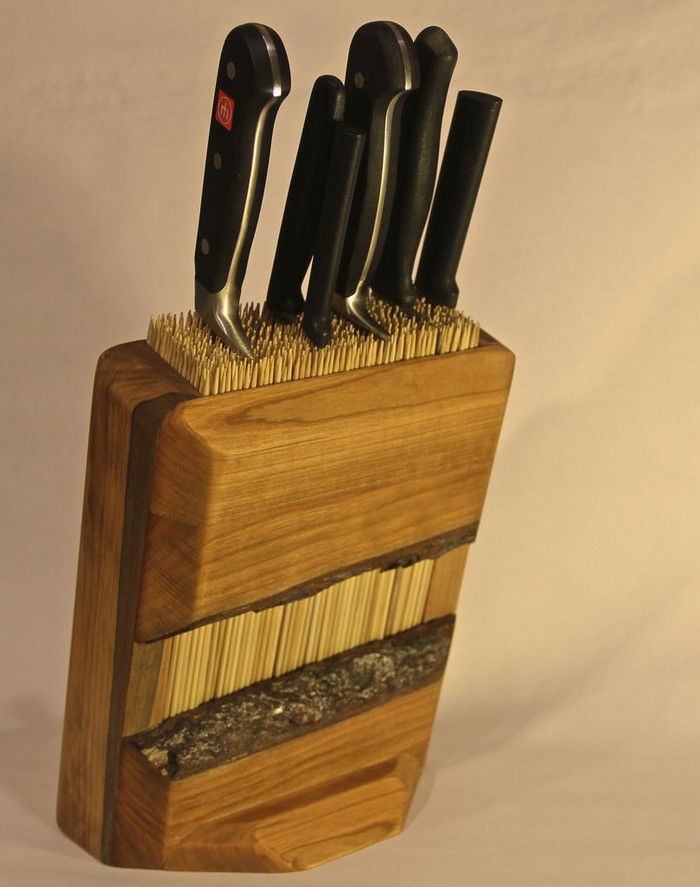
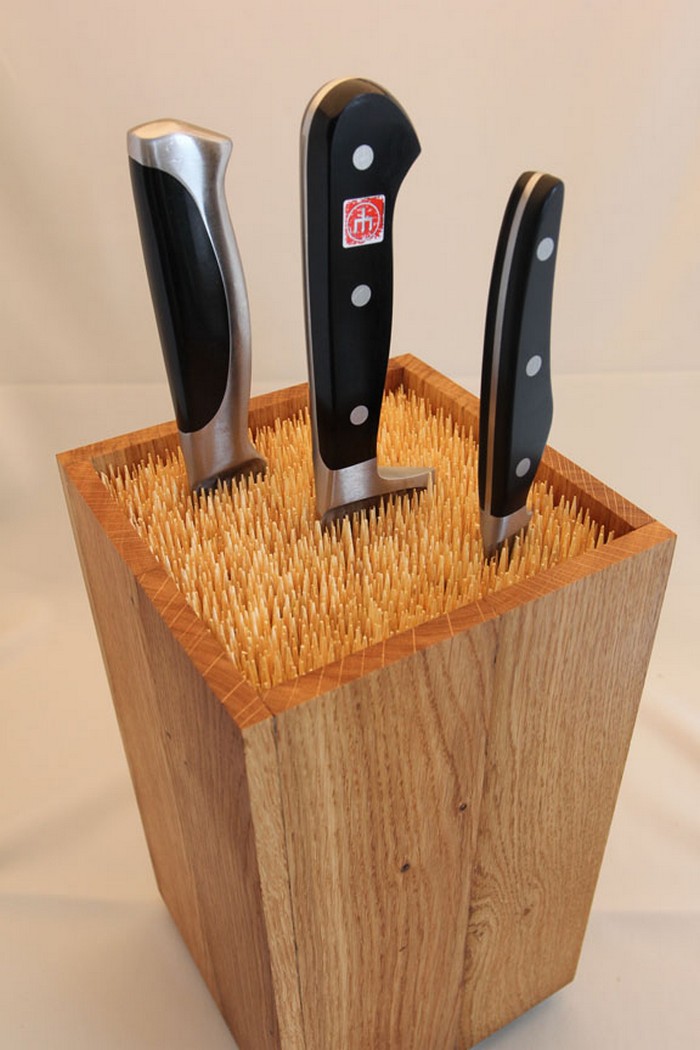
Knife holders are not expensive, but why spend money on a regular knife block when you can easily make a simple yet more elegant and functional one? A Universal Knife Block!
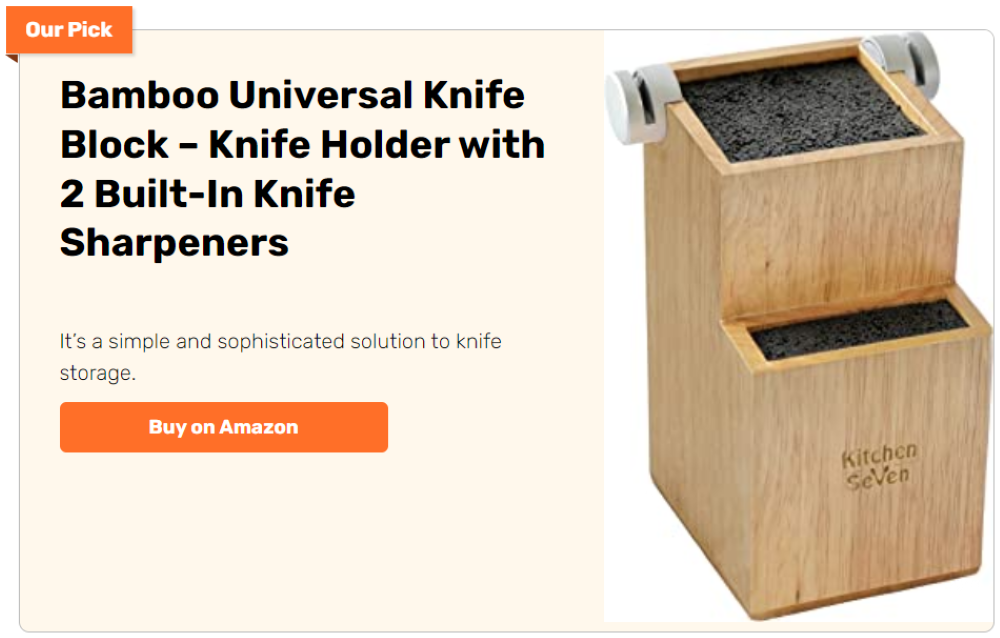
This clever knife block design came from the creative mind of Martin Robitsch. There are plenty of versions sold by different sellers. However, they are a little more expensive than the regular knife blocks!
So, instead of purchasing a knife block, why not make your universal knife block? Follow the tutorial by DIYer strooom. It’s a really simple build, you can even modify the design according to your taste.
Contents [show]
Making a Universal Knife Block
Materials
- 9mm thick Oak Wood
- Bamboo Skewers
- Wood Glue
- Wood Oil
Tools
- Measuring Tape
- Saw
- Belt Sander
- Random Orbital Sander
- Wood Clamps
- Router (optional)
Instructions
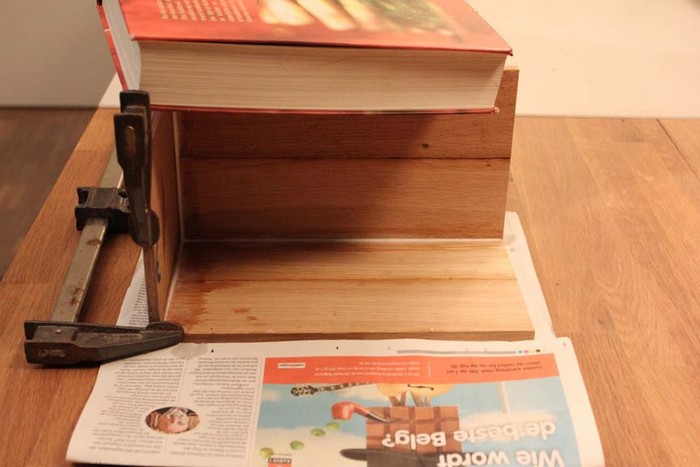
Assembling the box: The hardest part is gluing the box together. It may seem simple, but it isn’t easy to glue five pieces together while keeping right angles everywhere. So, I decided to help you with some step-by-step advice:
- Put one side on a flat surface.
- Glue the bottom on top of it: Align the bottom and one corner.
- Glue one extra side at the opposite corner. (So I added a side to the left.)
- Apply clamps and some weights.
- Glue the remaining sides one by one.
- Finish by applying some glue to all inner joints with your finger.
Ideally, the side will stick out on all four sides. That’s OK (better than being too small). This excess will be removed in the next step.
It is important to take your time. Take it one part at a time and let it dry enough for the parts to stick together. My glue takes about 30 minutes, but 24 hours for full hardening out. So patience is your friend here!
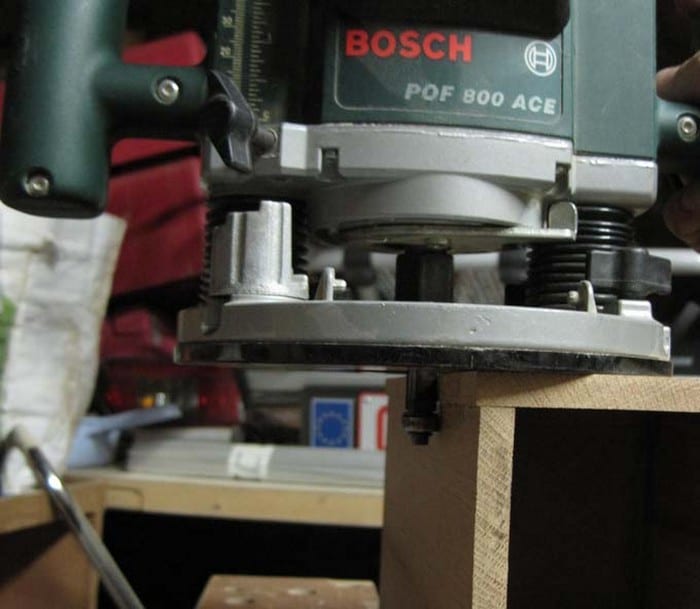
Trimming the sides of the box: On each side of your knife block, the side panels will stick out slightly. This could be removed by sanding it. But I always use a router for this.
You need a straight router bit with a ball bearing. This will trim the panels to be exactly flush with the adjacent sides.
You could also do this with a sander, but it will take longer and will not be as precise.

Sanding the box: Now use a sander to finish the box. It should end up nicely square, and all panels must be clean and smooth.
I usually start with the belt-sander using a grain of 80, then finish with the orbital sander using a grain of 120 or 180.
Important tip: when using the belt-sander, keep the direction of the belt more or less parallel to the grain of the wood. If you you sand it across the grain, you will get visible scratches which are harder to remove. Always keep your belt-sander moving over the piece, never let it rest in one position. If you keep it still, it may leave a groove which is again hard to remove.

Trimming the bamboo skewers: In my case, the Bamboo Skewers were 25 cm, but still they varied a bit in length. A little variation is no problem, but still I decided to adjust the ones that were sticking out too much.
Here is how I did it:
- Cut a piece of wood that fits in the box.
- Then put the skewers in, with the tip pointing down
- Because of the extra piece of wood, the sticks will stick out, and the longest ones will stick out the most.
Use the belt-sander to carefully trim them down so they are more even.
Note : the dust will fall in the box, so be careful when you remove the sticks, as some saw-dust will fall out.
Remove the temporary piece of wood at the bottom of the box. If it is hard to shake it out, put in a screw so you can pull it out.

Surface finishing the box: Oil the box, or use any other finishing of your liking.
I like oil, I think if the wood could talk, it would prefer the oil as well. 
After applying the oil, I added 4 felt pads at the bottom, in order to not scratch any surface I later put the knife block on.
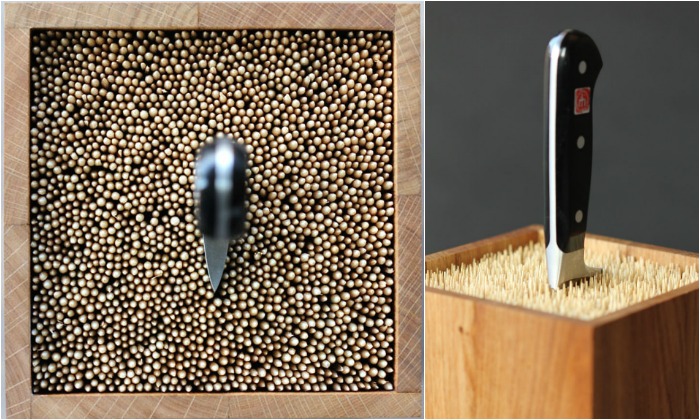
Adding bamboo skewers: Make sure they all go in nicely parallel to the length of the box. Admire your result, and if you are proud, send me a picture of it!
Happy woodworking & happy cooking!
Thanks to strooom for this great project!
Click on any image to start the lightbox display. Use your Esc key to close the lightbox.![]()
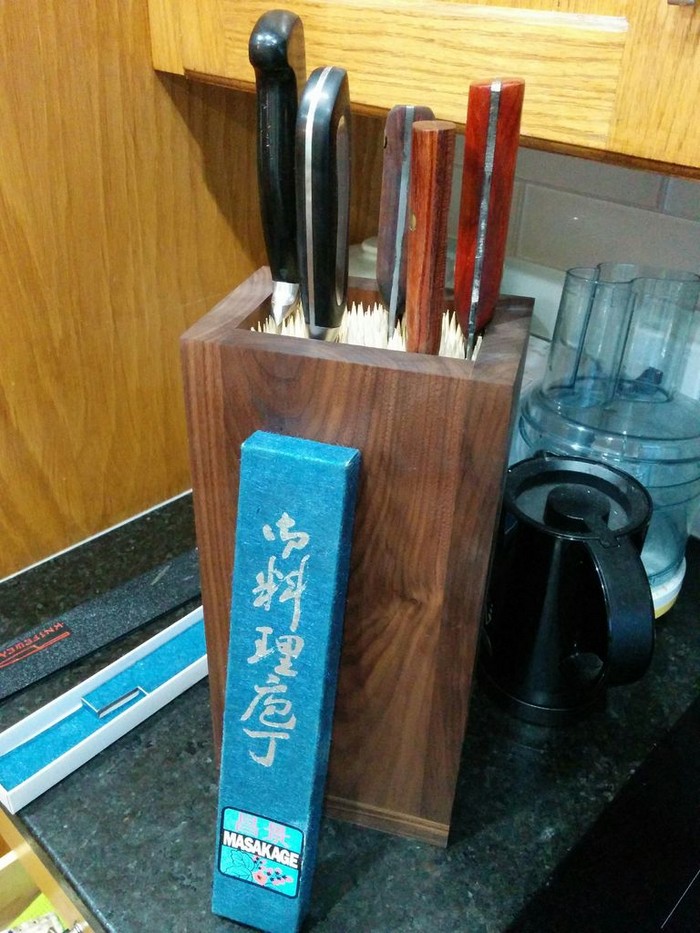
Customization Ideas for Your Universal Knife Block
Creating a universal knife block offers a practical solution for storing your kitchen knives and an opportunity to add a personal touch to your kitchen décor. Customizing your universal knife block allows it to blend seamlessly with your kitchen’s aesthetic or stand out as a unique piece of art. Below, we explore several creative ways to personalize your universal knife block, making it a functional item and a reflection of your style.
Choose Your Finish
A simple yet impactful way to customize your universal knife block is by selecting a finish that complements your kitchen. Whether you prefer the natural beauty of wood with a clear varnish or a bold stain that makes a statement, the choice of finish can dramatically change the look of your knife block. For a modern kitchen, consider a sleek, glossy finish, or for a rustic look, a distressed wood finish might be more appropriate.
Paint It Up
For those who love color, painting your universal knife block can transform it into a vibrant kitchen accessory. Choose a color matching your kitchen’s color scheme or a contrasting shade to make the block pop. Acrylic paints are a great option for wood, and using a sealant afterward will ensure the paint lasts longer and withstands kitchen spills.
Add Patterns or Decals
If you’re feeling artistic, adding patterns or decals to your universal knife block can elevate it from a simple storage solution to a piece of decor. Stencils make it easy to apply complex patterns, while decals can be used for those who want a less permanent option. From geometric shapes to floral patterns, the possibilities are endless.
Engraving and Carvings
For a more sophisticated customization, consider engraving or carving details into the wood of your universal knife block. Personalized messages, your family’s name, or simple decorative motifs can give your knife block a high-end, bespoke feel. This option requires some skill or the help of a professional, but the result is a truly unique piece that could even serve as a family heirloom.
Mix Materials
Experimenting with different materials can give your universal knife block a distinctive look. Consider incorporating elements like metal bands, leather strips, or even tiles around the base or sides of the block. Mixing materials adds visual interest and can enhance the block’s texture and feel.
Functional Add-Ons
Customization doesn’t have to be purely aesthetic. Adding functional features like a built-in sharpener, slots for kitchen scissors, or a space for honing steel can increase the utility of your universal knife block. These practical add-ons make your knife block even more valuable in your daily cooking routine.
Lighting Effects
For the tech-savvy DIYer, incorporating lighting into your universal knife block can create a stunning visual effect, especially in dimly lit kitchens. LED strips at the base or inside the block can highlight your knives and turn the block into a focal point. Opt for color-changing LEDs to adjust the mood or match the lighting with your kitchen’s ambiance.
Customizing your universal knife block offers a fun and creative way to add a personal touch to your kitchen. Whether through paint, material mixes, or even adding lights, each modification enhances the block’s appearance and functionality, making it a truly essential part of your culinary space.

Safety Tips for Handling and Storing Knives
Storing and handling knives safely is paramount in any kitchen to prevent accidents and ensure the longevity of your blades. A universal knife block, designed to accommodate knives of various sizes and shapes, plays a crucial role. Beyond providing a versatile storage solution, it also contributes to safety in the kitchen.
Here, we delve into essential safety tips for handling and storing your knives in a universal knife block, ensuring your culinary environment remains safe and efficient.
Select the Right Spot for Your Universal Knife Block
Positioning your universal knife block in a safe location is the first step toward preventing accidents. Place it away from the counter’s edge where it can’t be easily knocked over, yet ensure it’s accessible during food preparation. Keeping the block out of reach of children is also vital. A stable, secure spot reduces the risk of knives falling out and causing injury.
Insert Knives Carefully
When storing knives in your universal knife block, do so with care and attention. Ensure the blade faces downwards to avoid accidental cuts when reaching the block. Inserting knives gently also prevents damage to both the knives and the block, preserving their condition and functionality.
Keep Knives Clean and Dry
Before placing your knives in the universal knife block, ensure they are clean and completely dry. Storing wet or dirty knives can lead to bacteria growth and potentially rust or damage to the blades. Regular cleaning and drying of your knives and the knife block maintain a hygienic and safe kitchen environment.
Regularly Inspect and Clean the Knife Block
The universal knife block requires attention to remain a safe storage solution. Periodically remove all knives and inspect the block for any signs of wear, damage, or accumulated debris. Cleaning the inside with a dry or slightly damp cloth can remove dust and food particles while allowing it to air dry completely prevents mold growth.
Use the Right Knife for the Task
Safety in knife handling also involves choosing the right knife for the job. A universal knife block makes this easier by keeping your entire collection organized and within reach. Using the appropriate knife improves cutting efficiency and reduces the risk of accidents caused by using a knife inappropriately.
Practice Safe Knife Handling Techniques
Safe knife handling extends beyond storage. Always use a cutting board, keep your fingers away from the blade, and focus on the task to prevent slips. Never attempt to catch a falling knife; let it fall to the ground to avoid injury.
Educate Household Members
Educate everyone in your household, especially children, on the importance of knife safety. This includes proper handling, storage in the universal knife block, and the potential dangers of mishandling knives. Awareness and respect for these tools are key to maintaining a safe kitchen.
By following these safety tips for handling and storing knives in your universal knife block, you ensure a safer cooking environment and contribute to the longevity and preservation of your kitchen knives. Remember, a well-maintained knife block is essential to kitchen safety and efficiency.
Conclusion
Crafting a universal knife block offers a blend of functionality, safety, and personalized style to any kitchen setting. By carefully selecting materials and adhering to safety guidelines, this DIY project transforms knife storage into an art form, enhancing culinary spaces’ aesthetic and practical aspects. Embracing the process enriches your cooking experience, ensuring that every slice and dice is backed by the confidence of securely and stylishly storing your knives.
For more kitchen storage solutions, read our toe-kick drawer guide!


