Last Updated on March 26, 2024 by teamobn
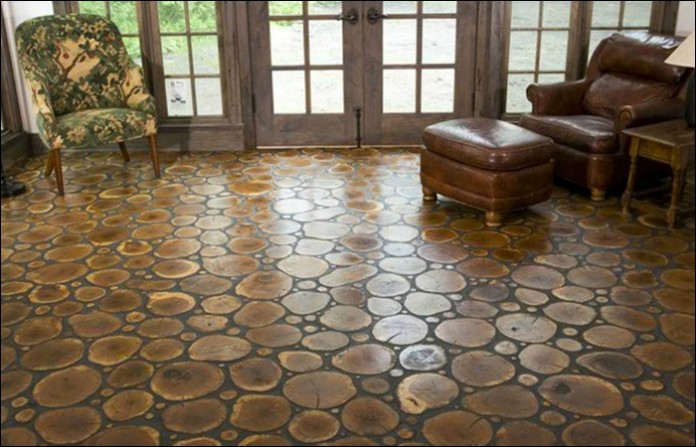
You’re flooring is a big part of your living room’s face. It provides the first impression to your visitors, which is constantly taking a lot of wearing. Finding the proper kind of floor can make or break the look of your liviing room or dining room, which is where cordwood floors come in.
Cordwood mixes the charm of lumber with the durability of polyurethane materials. What’s more, this is an eco-friendly flooring since you can use discarded or unwanted wood materials.
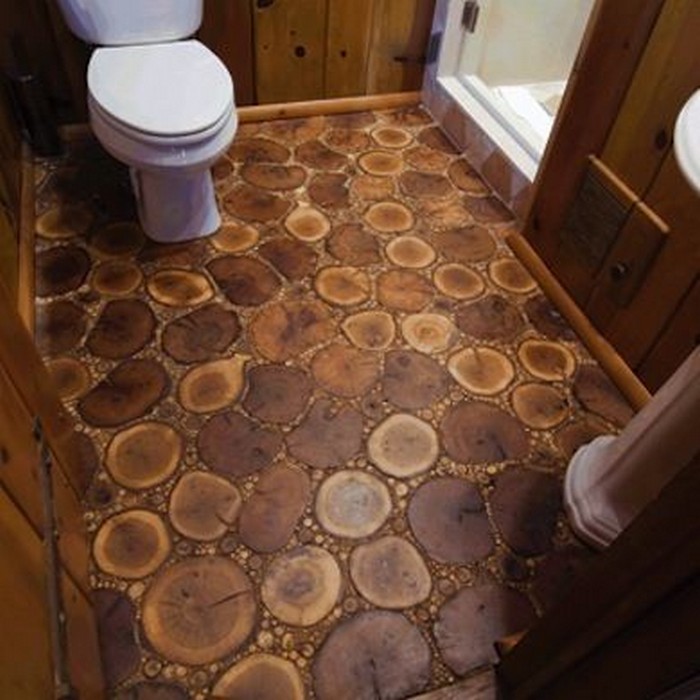
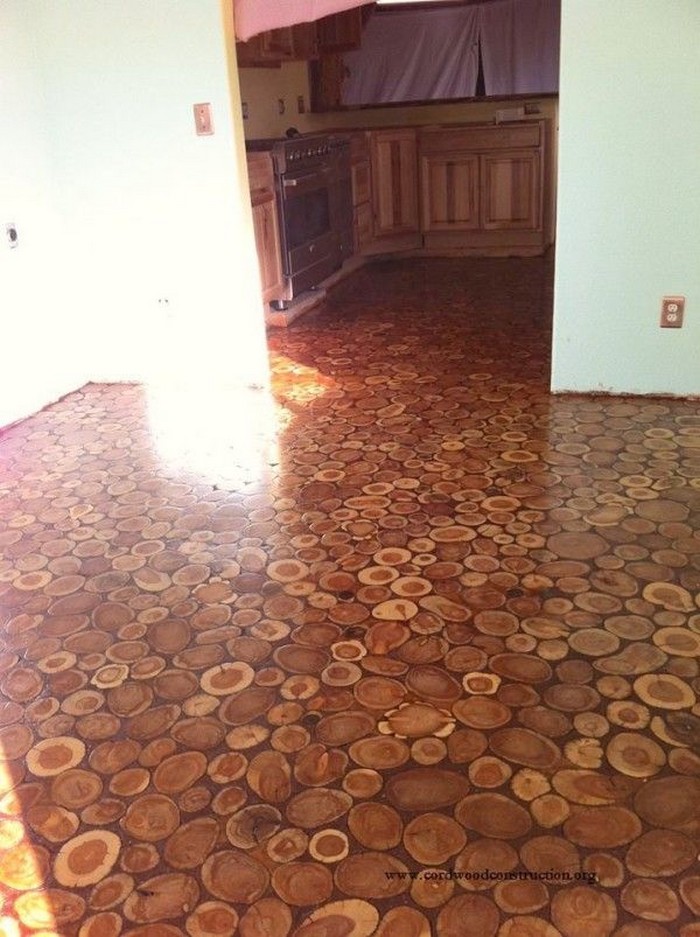
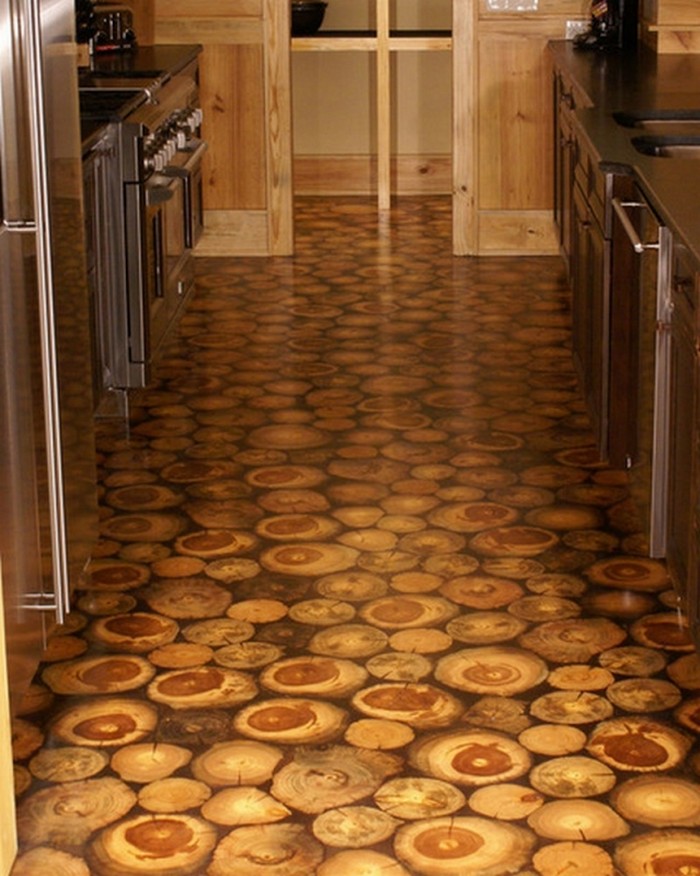
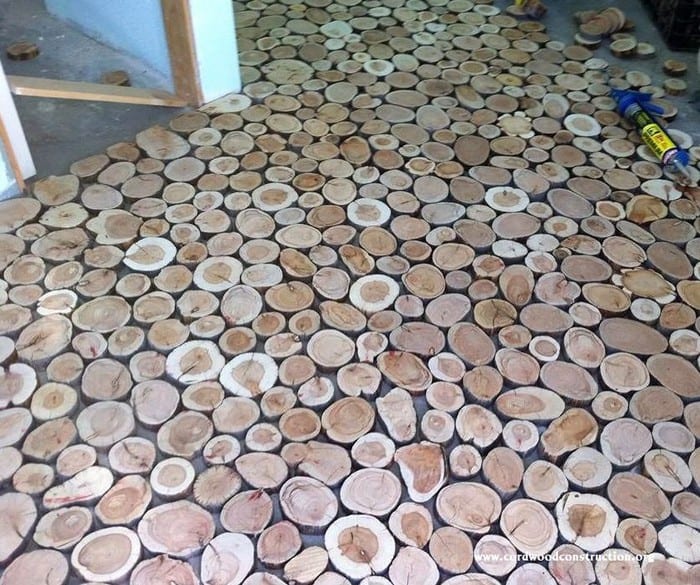
Imagine this: a couple transformed their kitchen’s floor into a stunning cordwood masterpiece, all on their own! With a dash of creativity, the right gear, and a bit of elbow grease, they flipped their space from dull to dazzling, saving a pretty penny in the process. They relished the journey, basking in the glow of a job well done.
Sure, snagging the wood might pose a challenge if your backyard’s not a mini-forest. You’d need to collect ‘dead’ wood, which means getting a permit from your local forest service. It’s a bit of a hassle, sure, but hey, good things don’t come easy, right?
Once you’ve got your wood stack ready, the real fun begins! Laying down a cordwood floor is rewarding, weaving a touch of nature into your home’s heart. Though tempting to DIY for the bragging rights (and the satisfaction of “I built this!”), getting a pro on board might save you some headaches. They’ll make sure your beautiful floor stands the test of time.
But if you’re itching for a personal touch, diving in DIY-style can be incredibly fulfilling. Imagine every step on that floor reminding you of your hard work. Plus, you get to tailor every detail to fit your home just right.
So, what’s the verdict? Planning to give your floors a facelift? How does laying down your own cordwood floor sound? Are you game for the challenge, or leaning towards hiring a pro?
Contents
Creating a Cordwood Floor
Materials
- Dead Tree Logs (ex. Juniper, Pine)
- Loctite PL Premium Construction Adhesive
- Polyurethane
- 80% Tile Grout and 20% Sawdust (for grouting spaces)
Tools
- Gloves
- Chainsaw
- Axe
- Chop Saw
- Sweeper and Mop
- Belt Sander
- Vacuum (for cleaning dust and debris)
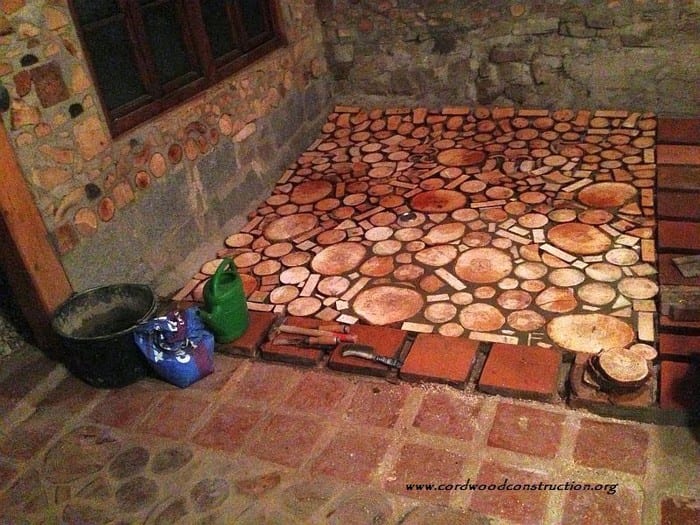
Instructions
Prepare the Logs
Wear your gloves for safety. Use the chainsaw and axe to cut dead tree logs into slices approximately 2 inches thick. For uniformity, try to keep the slices consistent in thickness.
Dry the Wood Slices
Arrange the wood slices in a single layer in a dry, ventilated area. Allow them to dry out completely to prevent shrinkage after installation. You’re going to wait several weeks or more for your cordwood pieces to fully dry.
Prepare the Floor Base
Ensure the floor base is clean, level, and free of debris. Use the sweeper and mop to thoroughly clean the area where the cordwood will be installed.
Lay Out Your Design
Before adhering anything, lay out the wood slices on the floor to finalize your design. This step allows you to adjust for color variation and size, ensuring a visually pleasing pattern.
Apply Construction Adhesive
Once satisfied with the layout, lift a few wood slices at a time and apply Loctite PL Premium Construction Adhesive to their backs. Press them firmly onto the floor base, starting from one corner and working your way across.
Grouting the Gaps
Mix 80% tile grout and 20% sawdust to create a grout that matches the wood’s color. Fill the gaps between the wood slices with this mixture, ensuring an even and smooth application. Wipe away any excess grout from the wood surface.
Sanding
After the grout has dried, use the belt sander to smooth out the floor’s surface. This will help even out any minor height differences between the wood slices and remove grout residue from the wood surfaces.
Cleaning
Vacuum the floor to remove all dust and debris from sanding. Ensure the floor is completely clean before moving on to the final step.
Sealing the Floor
Apply a coat of polyurethane to seal the floor, using a clean mop or a roller. This will protect the wood and grout from moisture and wear, and also give the floor a finished look. Allow the polyurethane to dry according to the manufacturer’s instructions.
Click on any image to start the lightbox display. Use your Esc key to close the lightbox.![]()


Benefits of Cordwood Flooring
Cordwood flooring is not just a choice; it’s a statement of sustainability and creativity. This unique flooring option offers a host of benefits, making it a compelling choice for homeowners seeking both beauty and functionality. Here are the standout advantages of opting for cordwood floors.
Eco-Friendly Choice
Cordwood is a green flooring solution. By utilizing dead or fallen trees, you’re reducing waste and avoiding the need for manufactured flooring materials. This approach minimizes your environmental footprint, making cordwood floors an excellent option for eco-conscious individuals.
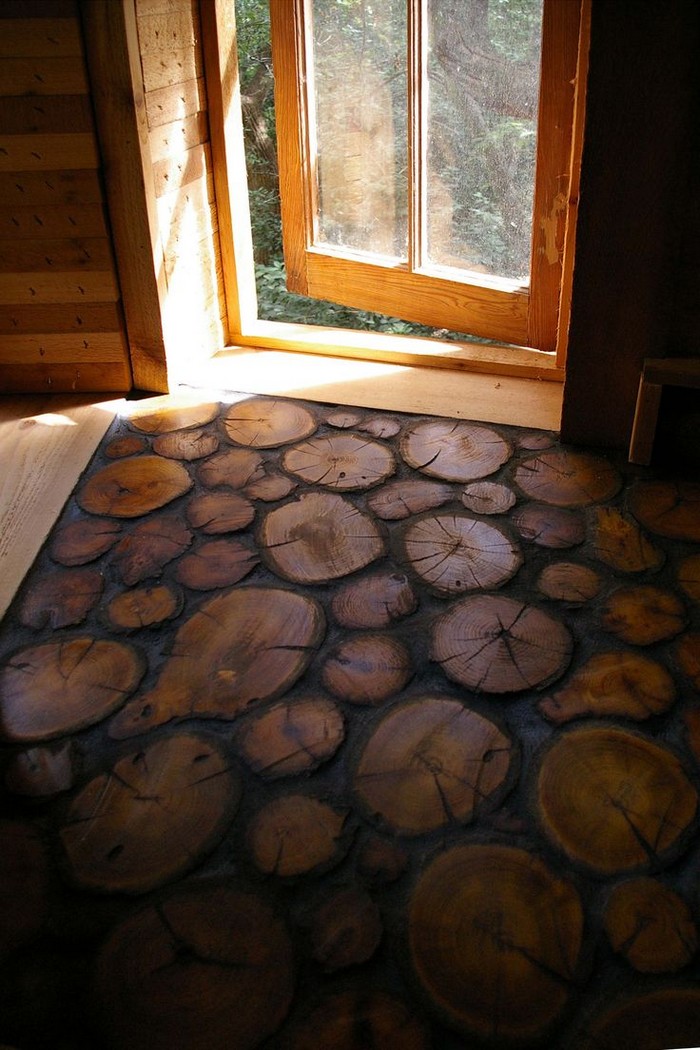
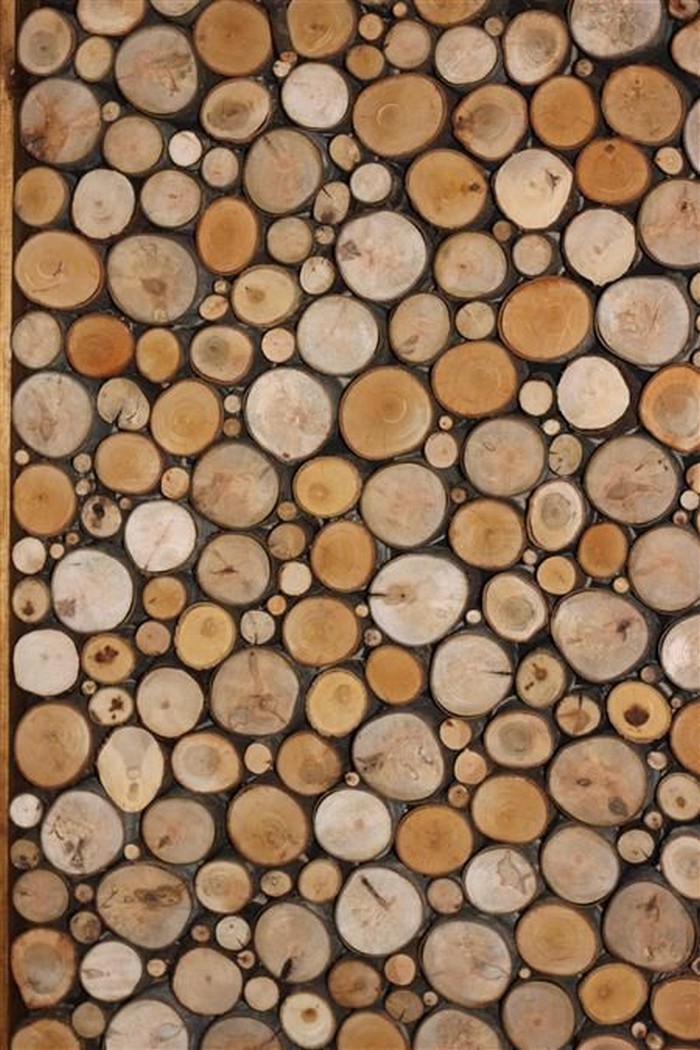
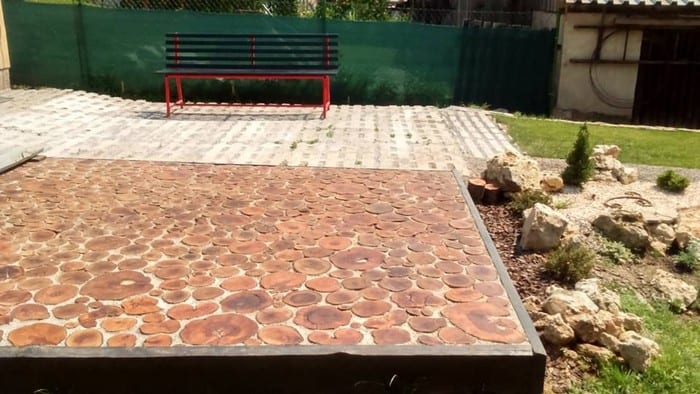
Aesthetic Appeal
Each cordwood floor is a masterpiece of natural beauty. With its varied patterns, textures, and colors, it adds a warm, rustic charm to any space. This type of flooring transforms rooms into cozy, inviting environments, enhancing the overall decor of your home.
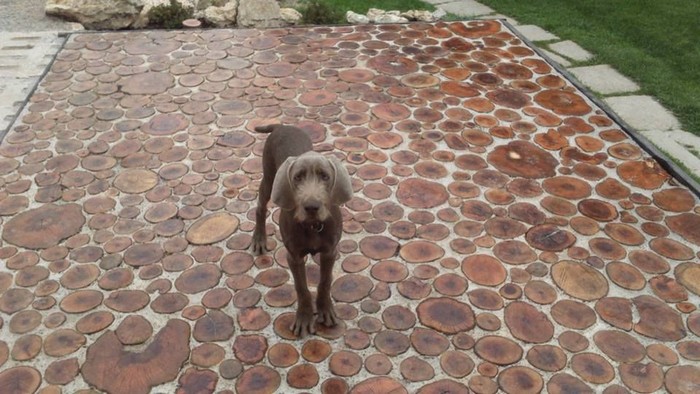
Durability and Comfort
Cordwood floors are surprisingly durable. When properly sealed and maintained, they withstand the test of time, offering a sturdy surface underfoot. Moreover, the natural insulation properties of wood contribute to a comfortable, temperate floor, reducing heating costs in colder climates.
Cost-Effective
Choosing cordwood flooring can be a budget-friendly decision. Especially if you have access to your own wood supply, the cost of materials can be significantly lower than traditional flooring options. Additionally, the DIY nature of cordwood flooring installation offers savings on labor costs.
Personal Satisfaction
The process of installing a cordwood floor provides a unique sense of accomplishment. Completing such a project not only gives you a beautiful floor but also the satisfaction of having created something truly unique and personal.
Enhanced Acoustic Comfort
Cordwood floors excel in reducing noise levels within a space. The natural wood acts as an effective sound absorber, making rooms with cordwood flooring quieter and more serene. This quality is particularly beneficial in homes with high ceilings or in multi-level buildings where foot traffic noise can be an issue.
Improved Indoor Air Quality
Wood is known for its ability to regulate humidity, contributing to a healthier indoor environment. Cordwood floors, with their natural wood construction, can help maintain a balance in indoor humidity levels, reducing the risk of mold growth and allergens. This makes cordwood flooring a smart choice for households concerned about air quality.
Unique Insulation Properties
Beyond the natural insulation mentioned earlier, cordwood floors have a thermal mass that contributes to energy efficiency. During the day, they can absorb and store heat, releasing it slowly as the temperature drops. This unique property can help in reducing energy costs for heating and cooling, providing a comfortable living environment year-round.
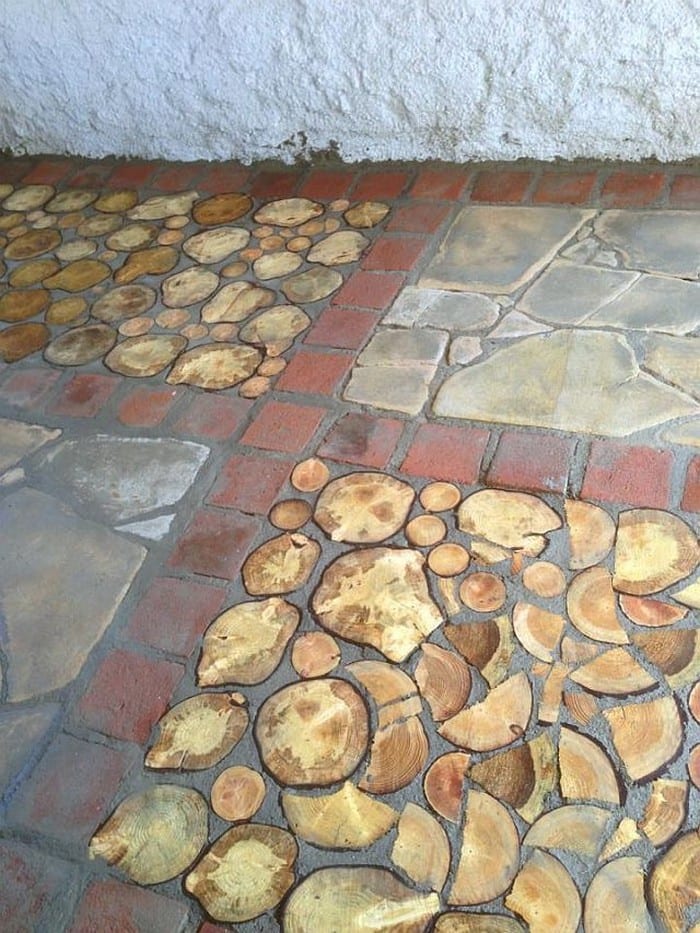
Versatility in Design
Cordwood flooring offers unparalleled versatility in design. The wide range of wood types, colors, and patterns means each floor can be customized to fit any decor style, from traditional to contemporary. This versatility allows homeowners to create a floor that perfectly matches their personal taste and home aesthetics.
Sustainability for Future Generations
Choosing cordwood flooring is an investment in sustainability. By selecting a renewable resource like wood, especially from sustainable or salvaged sources, you’re making a choice that supports the preservation of natural resources for future generations. This aspect of cordwood flooring aligns with a broader commitment to environmental stewardship.
Easy Repair and Maintenance
Despite its durability, any flooring may require repairs over time. Cordwood floors offer the advantage of being relatively easy to repair. Individual pieces can be replaced without having to redo the entire floor, making maintenance more straightforward and less expensive compared to other flooring types.
Cordwood flooring offers an unbeatable combination of environmental sustainability, aesthetic beauty, durability, cost-effectiveness, and personal fulfillment. It’s a choice that brings the outdoors inside, creating a space that is both beautiful and environmentally responsible.
Legal and Environmental Considerations
When deciding to install a cordwood floor, it’s crucial to navigate both legal and environmental considerations carefully. Doing so gives you peace of mind in knowing you are not breaking any rules.
Below, we’re going into the key factors you should account for before embarking on your cordwood flooring journey.
Harvesting Permissions
Before you can gather materials for your cordwood floor, it’s essential to understand the legal framework surrounding wood harvesting in your area. Many regions require permits to collect deadwood from forests or public lands. Securing the correct permissions ensures that your project complies with local laws and contributes to responsible forest management.
Building Codes and Standards
Your cordwood flooring project must also adhere to local building codes and standards. These regulations ensure that construction projects are safe, sustainable, and do not negatively impact the community. Check with your local building authority to ensure your cordwood floor meets all necessary criteria.
Sustainable Harvesting
Sustainable harvesting practices are at the heart of eco-friendly cordwood flooring projects. It involves collecting wood in a way that maintains the forest’s ecological balance, supporting biodiversity, and ensuring the forest’s health for future generations. Always opt for dead or fallen wood, minimizing the impact on living trees and the broader ecosystem.
Minimizing Waste
Cordwood flooring is an excellent opportunity to minimize waste. By utilizing wood that might otherwise decompose or be considered unusable, you’re giving new life to materials and reducing the demand for new resources. This approach aligns with principles of circular economy and waste reduction.
Eco-Friendly Materials
In addition to the wood itself, consider the environmental impact of the other materials used in your cordwood floor. Choose eco-friendly adhesives, sealants, and grouts that do not emit harmful chemicals. This not only ensures a healthier living environment but also reduces your project’s overall environmental footprint.
Local Ecology Respect
Finally, when gathering materials for your cordwood floor, it’s important to respect the local ecology. Avoid disrupting wildlife habitats, water sources, and plant life. Your aim should be to source materials in a way that leaves the smallest possible environmental footprint.
Taking the time to understand and address these legal and environmental considerations not only ensures that your cordwood floor project is sustainable and compliant but also contributes positively to the preservation of natural resources and the well-being of the planet.
Conclusion
Building a cordwood floor combines the beauty of natural materials with a commitment to sustainability and eco-conscious living. By carefully navigating the legal and environmental considerations, homeowners can create a unique, durable, and aesthetically pleasing floor that adds warmth and character to any space. Ultimately, cordwood flooring not only transforms a room but also reflects a deeper appreciation for nature’s resources and a dedication to preserving them for future generations.
For more flooring guides, check out our next post on concrete floors!