Last Updated on October 17, 2022 by teamobn
Ever wanted to have a camper trailer? How about one that is absolutely unique? One that doesn’t need any erection when you get to your favourite camping spot.
Your solution, your own tiny house on wheels, is just a few weekends away! Make it a little larger and you might just want to get rid of your mortgage and live in your tiny home on wheels instead!

This tiny house on wheels project was built using as much recycled material as possible. While that kept the cost down, it made construction more time-consuming. But if you are going to end up with a cute camper like this, wouldn’t it be worth it? 🙂
The first step was to get hold of a trailer home (caravan) that was ready for the dump, strip it, salvage anything worthwhile in addition to the chassis, and then get started. Read on to learn how this family built this cute home away from home!
Materials:
- Old Trailer Frame
- 1/8″ Plywood – flooring
- 1/2″ Plywood – roofing
- 2×12, 1×6 Redwood Boards
- 1×3 Rafters
- 1/4″ thick Milled Cedar and Fir Boards
- 1×2, 2×2, 2×3 Wood Pieces for Wall Framing
- Metal Primer
- Metal Paint
- Recycled Blue Jeans – insulation
- Metal Roofing
- Screws of appropriate sizes – including 3″ star drive screws
Tools:
- Angle Grinder
- Drill with Wire Wheel
- Wire Brushes
- Planer
- Edger
- Staple Gun
- Handsaw
- Sawzall
- Nailer Gun
- Band Saw
Steps to build a tiny house on wheels:
As we used an old trailer frame to build this tiny house on wheels, we started by demolishing the trailer and separating out the aluminium to be recycled. The plywood floor was saved to be re-used as the sub-floor. Then we went at it with an angle grinder and drill with the wire wheel and wire brushes for the hard-to-reach parts. We inspected the frame as we wire-wheeled it clean, looking for any sign of serious rust or other damage.

Thankfully, we found none. So we moved right on to priming with a rust metal primer, and then a coat or two of quality metal paint.

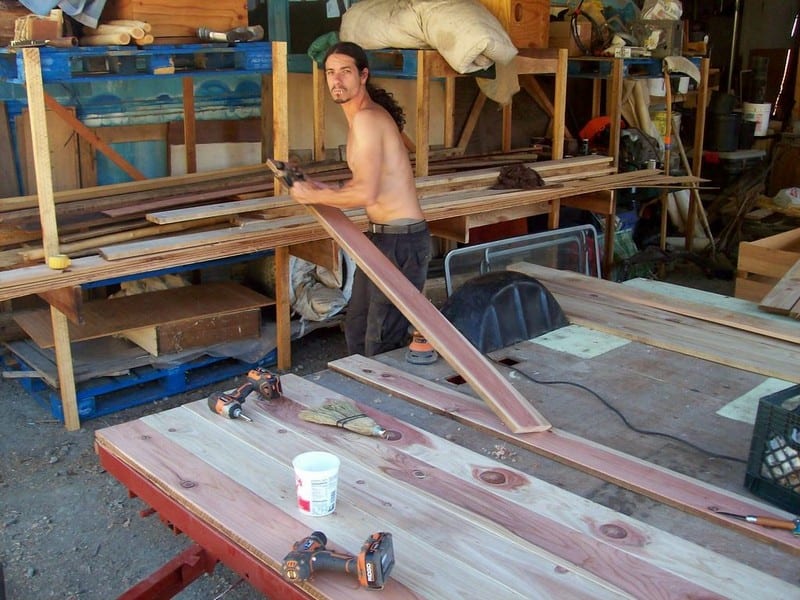
As we live near an old steam-powered sawmill, we decided to use rough-milled redwood 1×6’s for the floor, so we ran them through the planner and then the edger to get a beautiful floor.
As we were using true one inch thick boards we decided to screw them in with appropriate length screws from the underside so that no fasteners would be visible. To protect it for the rest of the project we covered it with some 1/8 inch plywood pieces we had laying around. This is the subfloor before we nailed it on the redwood boards.

We decided to frame the walls of our tiny house on wheels with rough-cut 2x2s, which made it a little more challenging than it would have been to use consistently sized lumber from the lumber yard. Non-loadbearing walls allowed us to frame the windows and door lightly in this manner. Don’t try this on load-bearing walls!
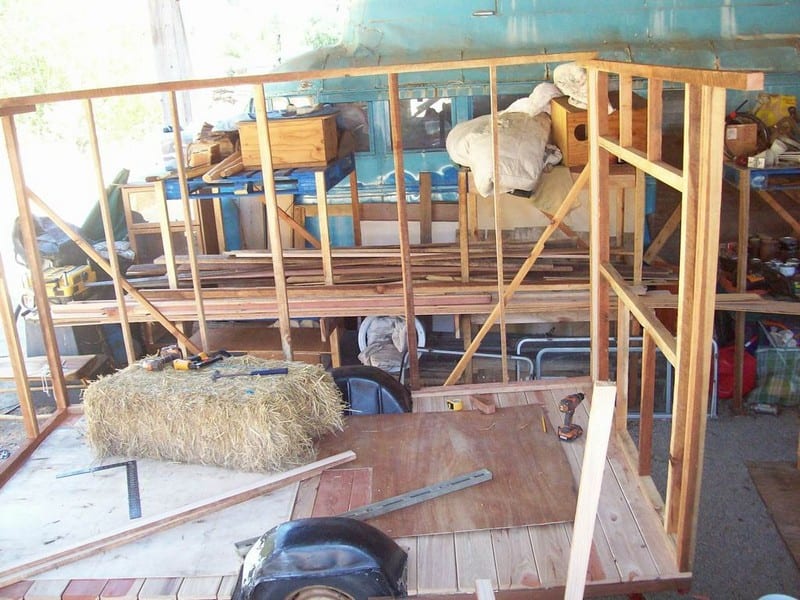
We did the framing with 3-inch star drive screws, which are stronger and much easier to drive than Philips screws of the same length. I Highly recommend them to anyone who has ever stripped out a screw or a few.

As it is only 6×10 feet inside, we decided to keep the back wall without windows, and so we put a window in the other three walls. Due to the roughness of the lumber, we framed with, varying in thickness by up to a quarter inch, the structure started taking on its own dimensions, which we allowed, knowing that it would give it character.

As this structure is designed for use around the San Francisco Bay area where snow load is nonexistent, we used 1×3 rafters for the roof and 1×2 framing for the trusses. As we framed it out we did our best to remove as much weight as possible while creating a sturdy movable structure, thus the use of 1x2s, 2×2’s, and 2×3’s at different places in the frame.

We had a big stack of 1/8 inch ply ready for use so we decided to skin the structure with it for shear strength (to prevent twisting and increase rigidity). Unfortunately, the sheets were 5×5 feet, so we had to cut them to fit our random stud spacing and use two to reach the top of the walls. But they were free so we didn’t complain much. They were fastened with narrow gauge staples fired from a compressed air staple gun. This was very quick.

We chose to overhang the sheets in the corners and trim them later with a sharp handsaw. We did the same with the windows and roof line of the tiny house on wheels but using a Sawzall where a handsaw wouldn’t fit. The roof was decked with 1/2-inch plywood for strength and lightness.

For the exterior siding of this house on wheels, we used rough-milled cedar and fir boards of an average thickness of 1/4 inch. They ranged in width from 5 inches to 10 inches and we mixed them up randomly to give them an organic feel. These were stapled on the same plywood but lapped so that the staples were hidden.

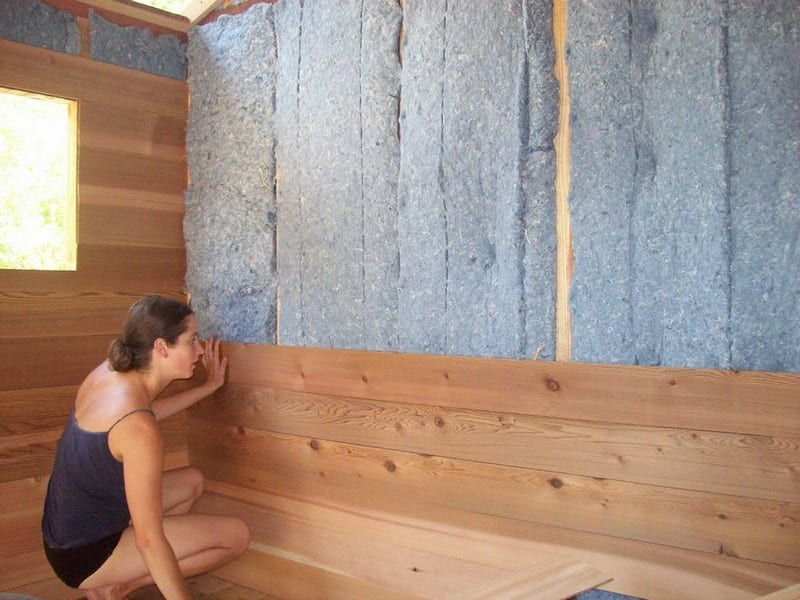
In the end, we decided to go with recycled blue jeans insulation as it is much more likely to stay evenly distributed in the wall than loose wool. Although it is twice the price of fibreglass, it is so much more pleasant to work with that it was well worth it.
It doesn’t cut with a knife like a fibreglass, but can be pulled apart with your hands. As the walls are going to be breathable, we did not want fibreglass particles getting into the air inside the room.
For interior siding, we chose the boards with the fewest knots and ran them through the planer and edger until they were straight and beautiful. Then we tacked them up with a finish nailer.
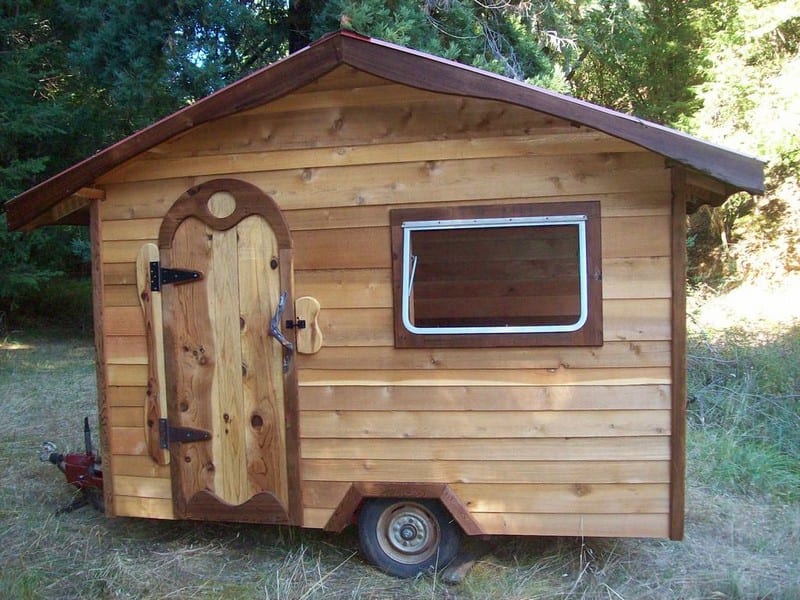
As we were re-using the old trailer’s aluminium windows, we made a frame with rounded bottom corners to fit it using old-growth redwood. It was tricky and it would be much simpler to install normal windows from a house.

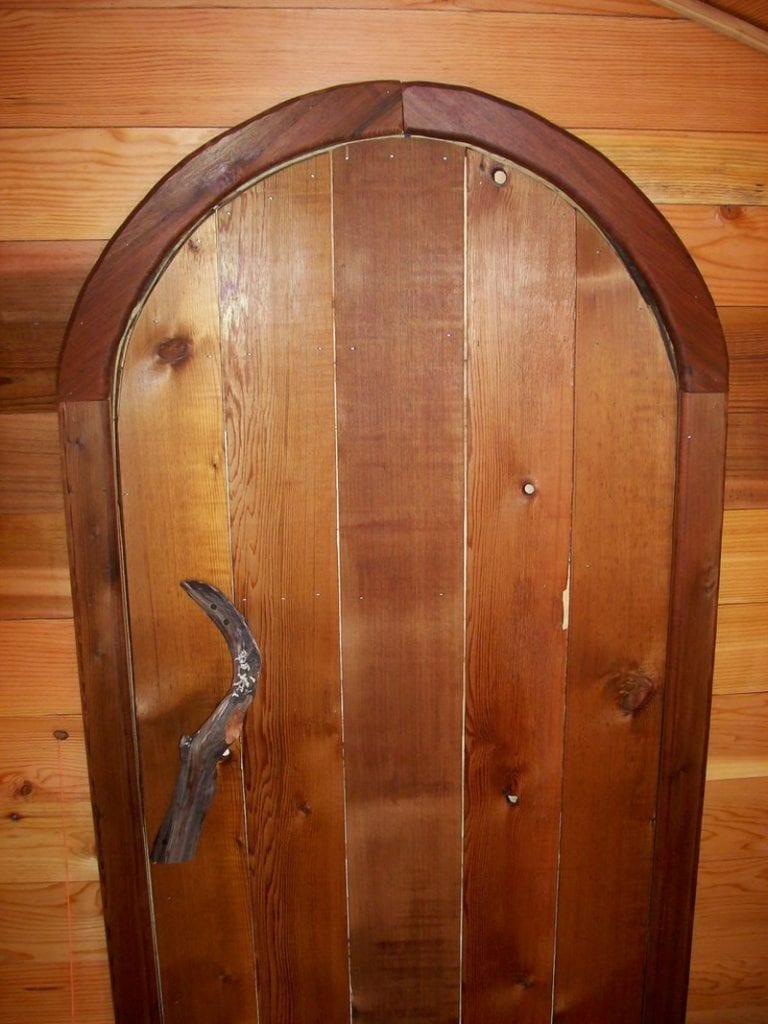
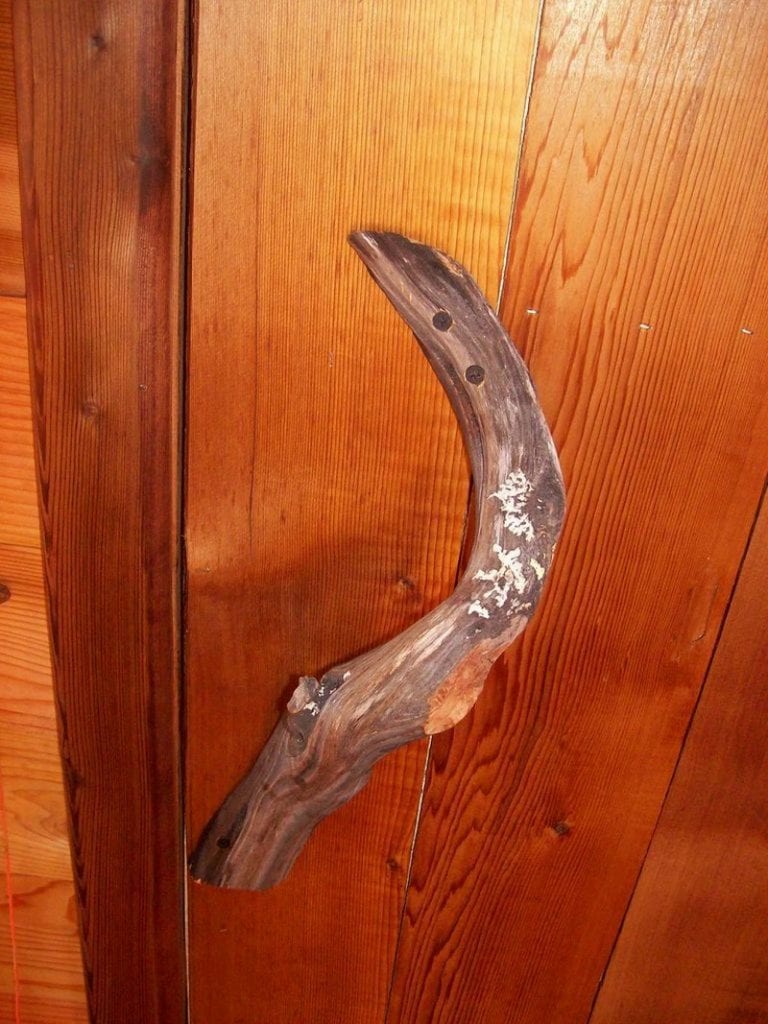
The door of this house on wheels was a very tricky thing. We decided that it had to be rounded as there were so many straight lines already.
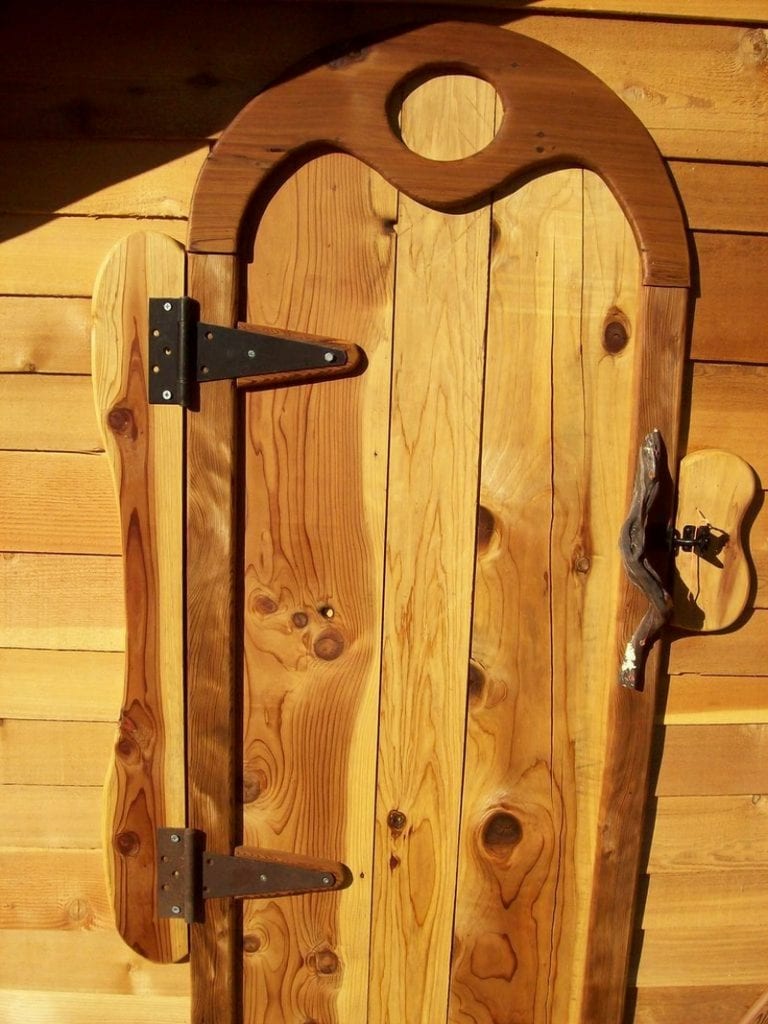
This was eventually accomplished by cutting the curve out of a big slab of 2×12 redwood, adding other framing and then sheathing the outside with 1/8 inch ply and then covering both sides with planed cedar, fir and redwood thin boards.
For the installation of the roof of this house on wheels, 8-foot sheets of 1/2-inch plywood were laid across 1×3 rafters, over the already in-place ceiling and insulation. We used a fairly large overhang, about a foot all around the house on wheels to make it look less like a box the way a lot of tiny houses do. This also protects the walls, doors and windows from rain. We bought metal roofing to size for about $240, which should last a few decades.

We wanted to use at least a little raw wood which we cut down ourselves, and so we quartered a 3-inch fir tree on a band saw, then ran it through the edger many times until it was a good quarter round. Here, you’ll see them at the corners.


The window boxes were trimmed with 1/4 inch fir and most everything else was trimmed using old-growth redwood.


The facia boards are cut wavy for cuteness.
Well, there you go, our very own tiny house on wheels. Probably $1500 in raw materials and hundreds of hours processing them and putting it all together, not to mention figuring out the inevitable complications that come up.
What do you think of this tiny house on wheels? We say it’s a great project to do with the whole family, just like these guys did. It’s a gainful activity for all, plus a rewarding tiny house to enjoy on vacation after a hard day’s work!
How would you design yours? 🙂
Thank you ganeshruskin for allowing us to share this building experience!