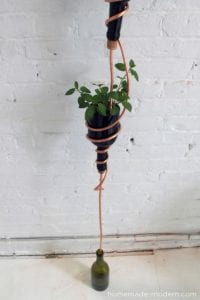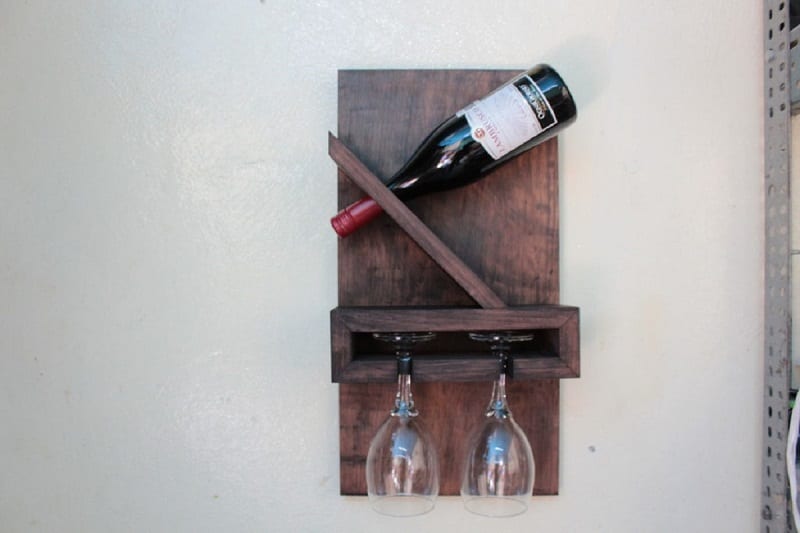
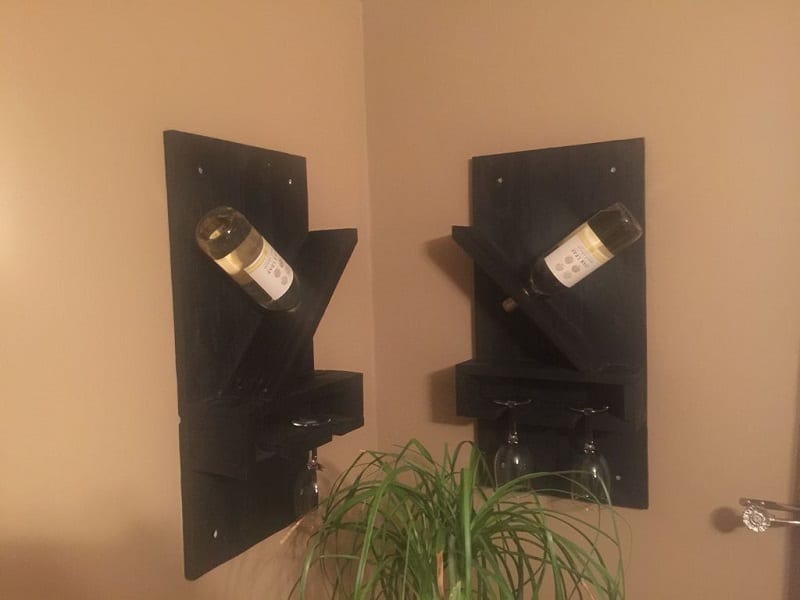
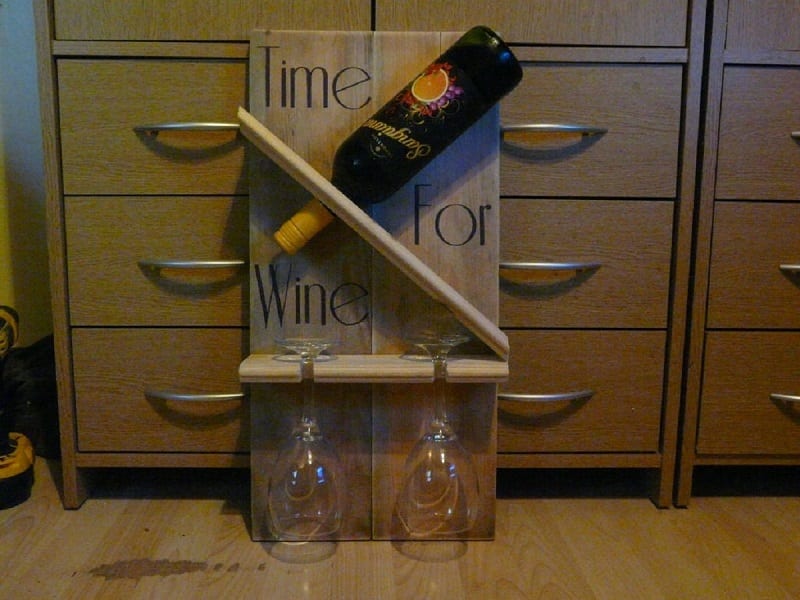
This single-bottle wine rack project is perfect for those who enjoy wine but only buy expensive bottles for special occasions. (Photo: Felipe S27/instructables.com)
“Wine is one of the most civilized things in the world and one of the most natural things of the world that has been brought to the greatest perfection…” said Ernest Hemingway.
The true wine connoisseur is, of course, a collector. Many of them dedicate entire rooms to storing their prized bottles. But since most of us do not own a wine cellar, we get by with what space we have for our bottles.
There are all kinds of built-in, temperature-controlled wine storage options for those who lack the space but not the love of wine. As always, however, we here at OBN enjoy making our own.
Contents
- 1 How to Make a Single-Bottle Wine Rack
- 1.1 Materials
- 1.2 Tools
- 1.3 Step 1. Dismantle the pallets.
- 1.4 Step 2. Assemble the back panel of the wine rack.
- 1.5 Step 3. Cut the cup support.
- 1.6 Step 4. Drill holes for the cups.
- 1.7 Step 5. Sand and glue the cup support together.
- 1.8 Step 6. Cut the bottle holder.
- 1.9 Step 7. Drill the bottle hole.
- 1.10 Step 8. Dry fit and cut the back panel.
- 1.11 Step 9. Glue the pieces together.
- 1.12 Step 10. Apply the finish.
How to Make a Single-Bottle Wine Rack
This wine rack project is perfect for those who enjoy wine but only buy expensive bottles for special occasions. Those who have more extensive wine collections will appreciate the finished product as a delightful addition to their wine storage and home decor.
Here is how you can build a charming single-bottle wine rack from a few pallets.
Materials
- A small pallet
- Screws
- Wood glue
- 80 grit sandpaper
Tools
- Circular saw
- Jig saw
- Drill
- Orbital sander
- 1/2″ flat drill bit
- Hole saw
- Hammer
Step 1. Dismantle the pallets.
Start this wine rack project by dismantling the base of the pallet. Hit the chocks with your hammer. Then, to detach the top section, hit on the wood planks that maintain the structure of the pallet. (These planks will be unusable as you will break them.)
Use a crowbar or your hammer to dislodge the nails from the boards.

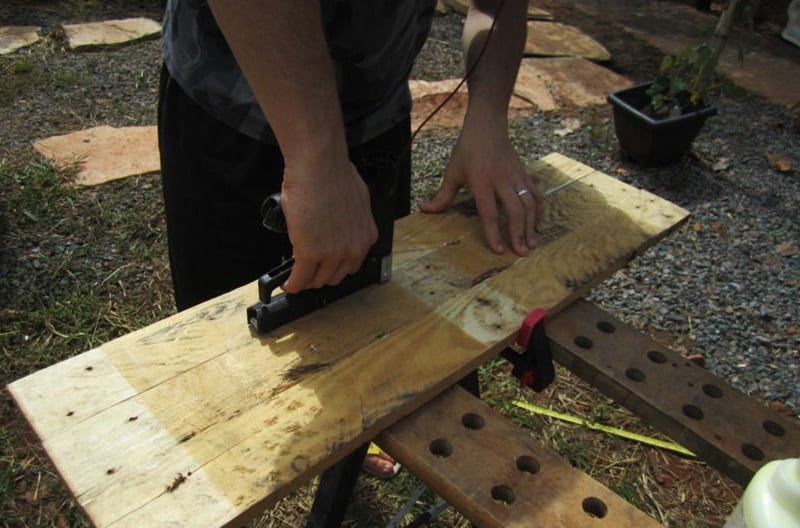
Step 2. Assemble the back panel of the wine rack.
Select 3 boards for the back panel. Choose boards with sides that are straight enough to allow a good contact surface. Mark 60 centimetres on each board.
Lightly sand the sides of the boards. You want them just smooth enough so that the glue can hold them together.
Use plenty of wood glue and spread it on the sides of the boards with your fingers.
Use clamps to hold the pieces together. If you don’t have big clamps, you can use staples.
Ensure that the joints between the boards are fastened as tight as possible.
Step 3. Cut the cup support.
You can start building the cup’s support while the back panel dries. Measure the width of the back panel and cut 2 pieces with the same measurements.
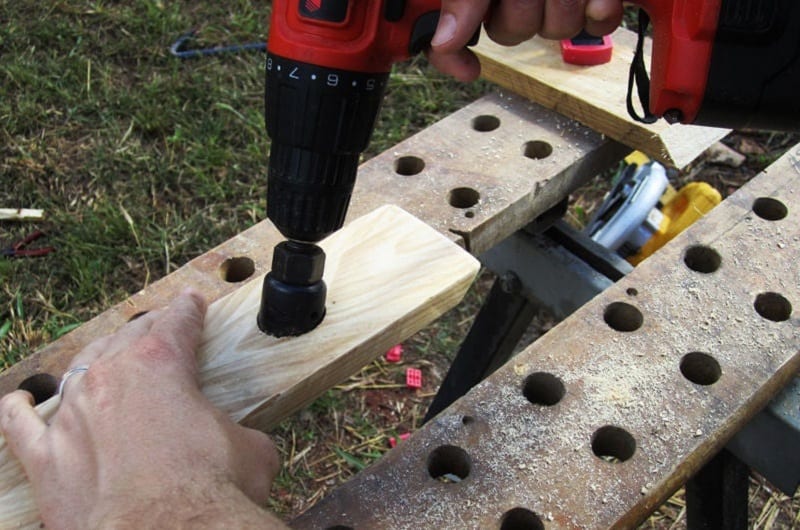
Step 4. Drill holes for the cups.
Select one of the boards cut in Step 2 and measure the middle of the width, tracing a line with a pencil. Do the same for the height.
By so doing, you’ll be dividing the wood into 2 sections. Measure the middle of each section and drill a hole through with the 1/2″ flat drill bit.
Once that is done, trace 2 lines from the edges of the hole to the edge of the wood. Cut the outlined sections out with your jigsaw.
You should also cut spacers 3 centimetres in height.
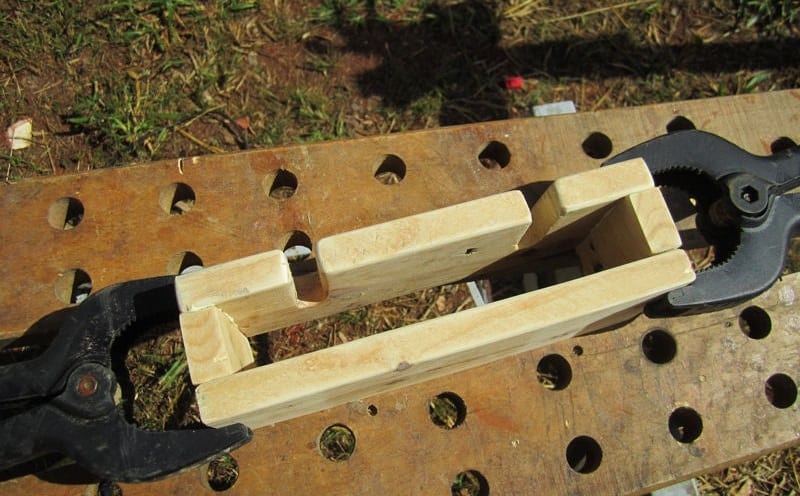
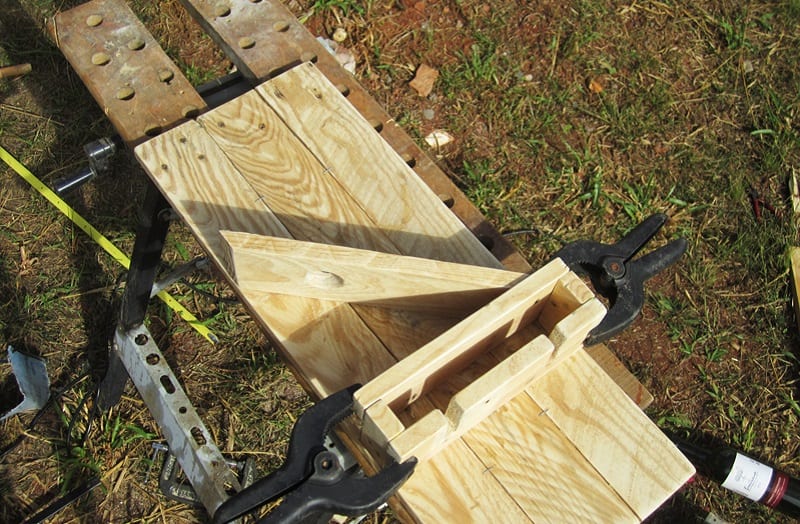
Step 5. Sand and glue the cup support together.
Sand all pieces for the cup’s support. Then, using wood glue and clamps, build the cup holder assembly.
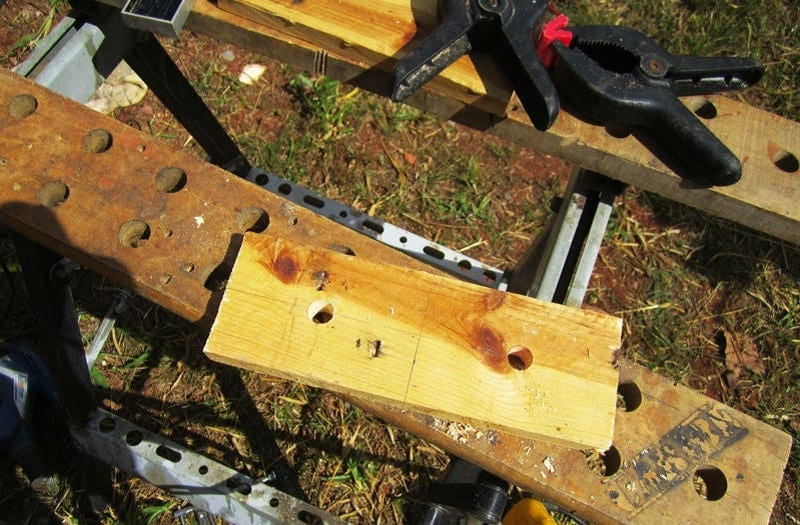
Step 6. Cut the bottle holder.
Now you begin work on the bottle holder. Select a board and make a 45º angle cut on one end with the circular saw.
Measure 28cm from the cut end and cut again with a 45º angle in the opposite direction. (The cuts should look something like this: /____\.)
Step 7. Drill the bottle hole.
This step involves drilling a hole through the bottle holder piece you just cut. Measure 9.5 centimetres from one end of the board and use the hole saw to drill a 90º angle hole through the wood.
Remember that the hole should be slightly large enough to fit a bottleneck. Sand the inside of the hole.
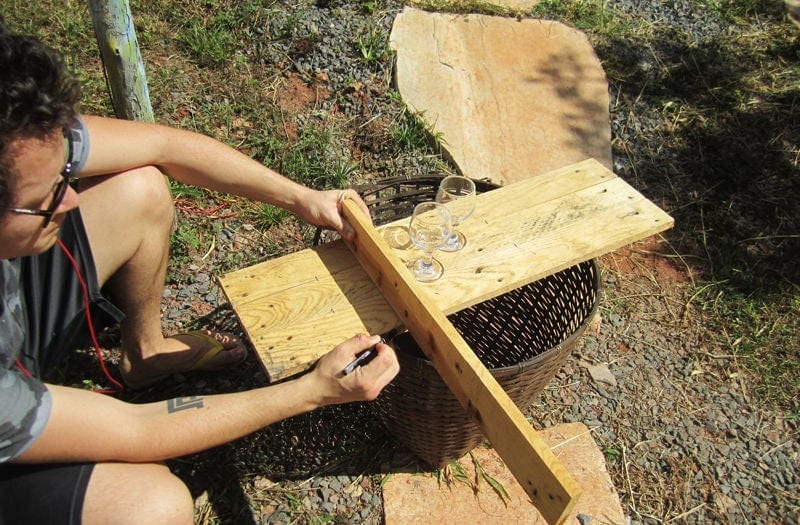
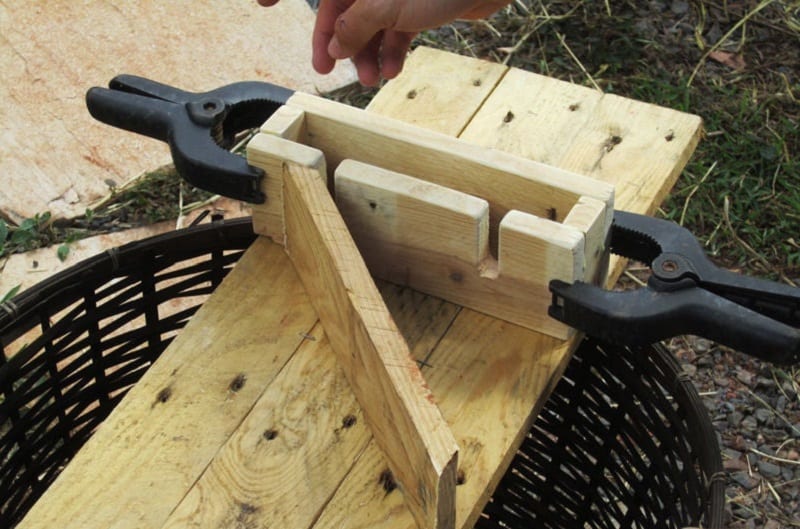
Step 8. Dry fit and cut the back panel.
The glue on the back panel should be dry by now. If not, then wait until it is completely dry. Then, use your circular saw to cut where you marked 60 cm on the panel earlier.
When that’s done, dry fit the entire assembly, making sure that all the pieces fit together snugly.
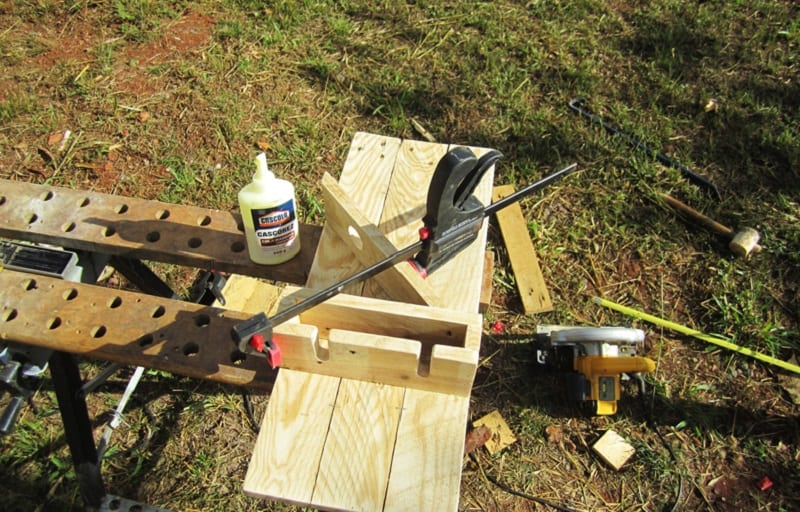
Step 9. Glue the pieces together.
Glue the entire assembly together. Use screws through the back panel to fasten everything tight.
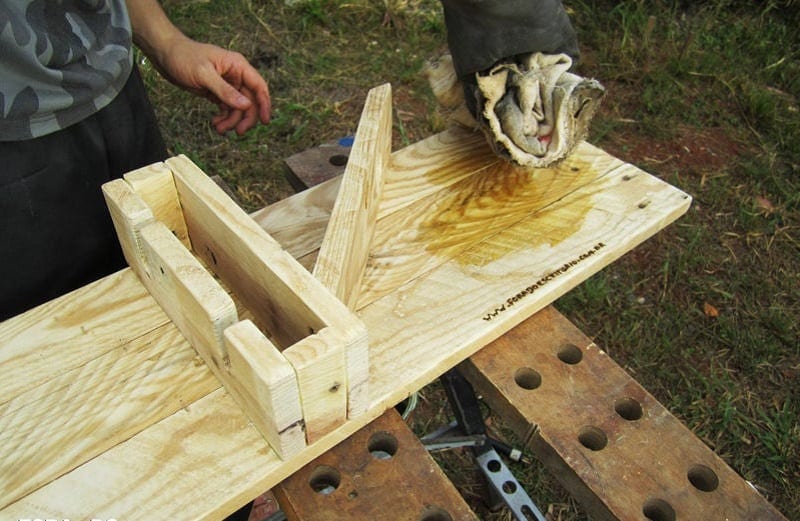
Step 10. Apply the finish.
As always, your workspace will need to be free of any dust or dirt before you can start applying the varnish. Clean everything with a damp cloth and let dry.
Apply 2 coats of varnish on the wine rack. Use a flat paintbrush, a rag, or a foam applicator to apply the varnish to the wood.
Use long, even strokes, and work along the wood grain. Then, let the varnish dry for at least 24 hours.
After that, you can hang your wine rack on the wall.
Wine can be a good, comforting friend in times of anxiety. And, like any dependable friend, a good bottle is deserving of a suitable place in our homes.
We thank foradoescritorio for this excellent wine rack project.