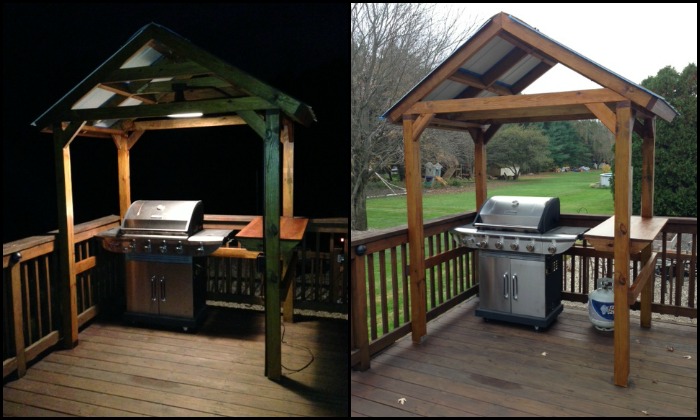
If you love hosting backyard BBQs but have limited space to work with, don’t worry – you can still create a great grilling station!
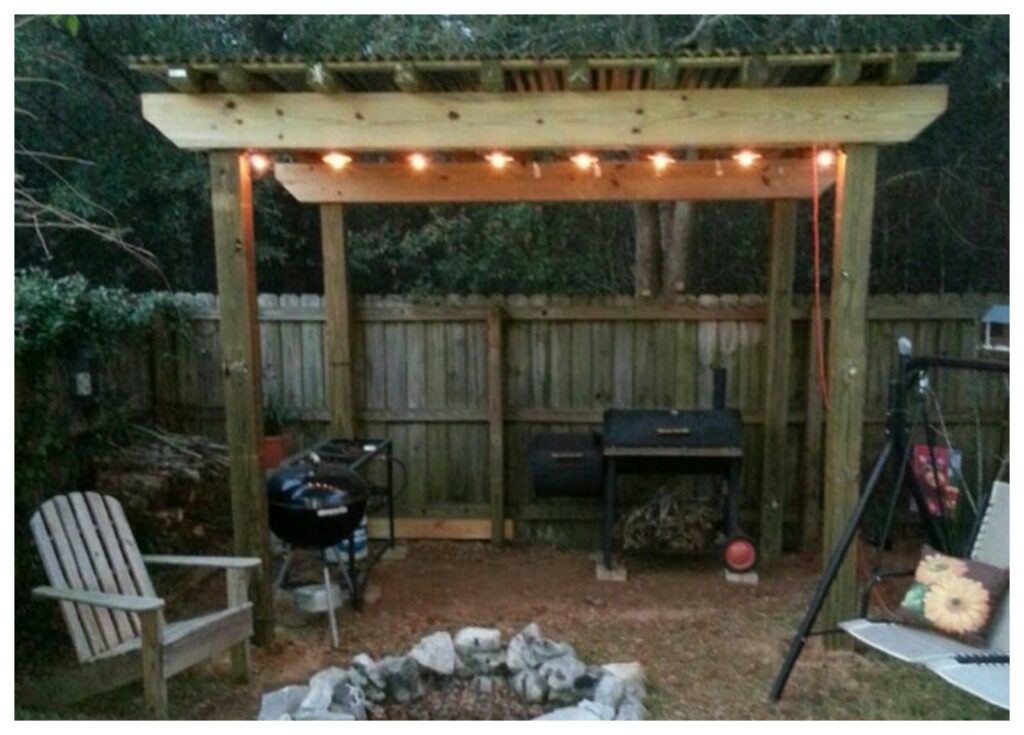
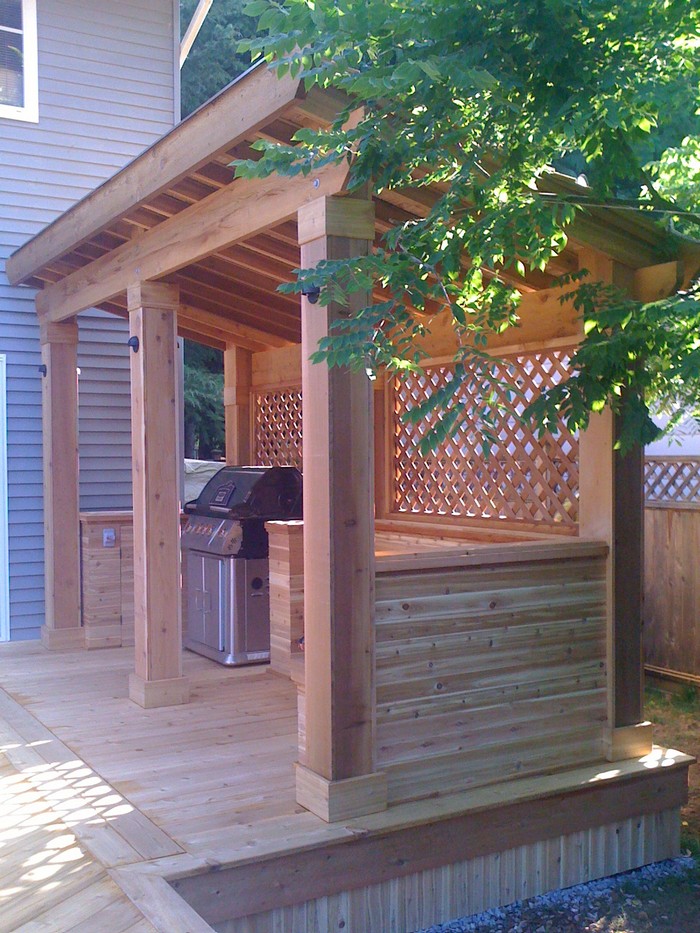
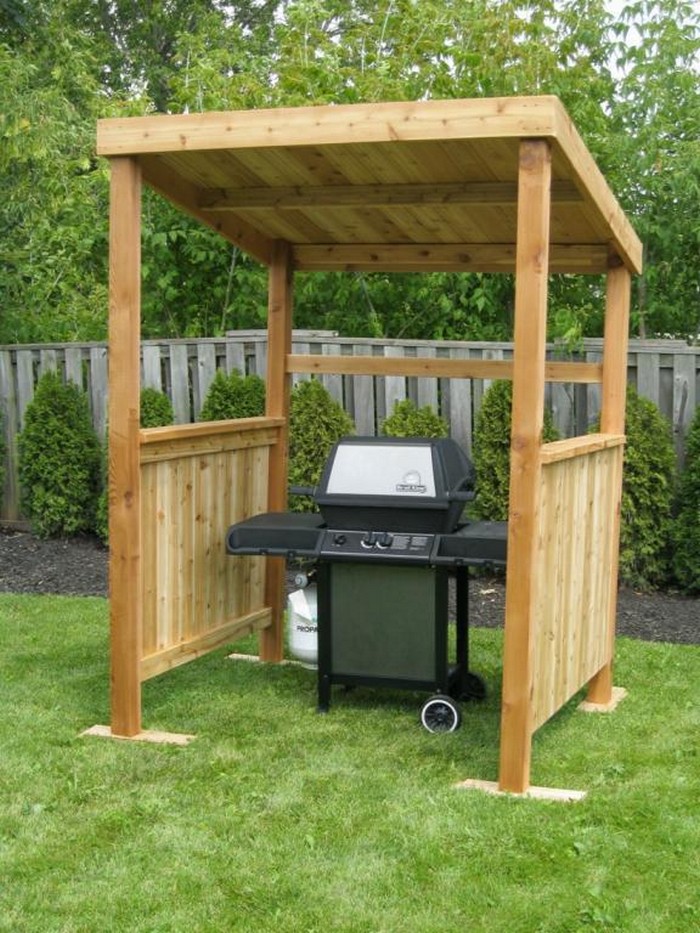
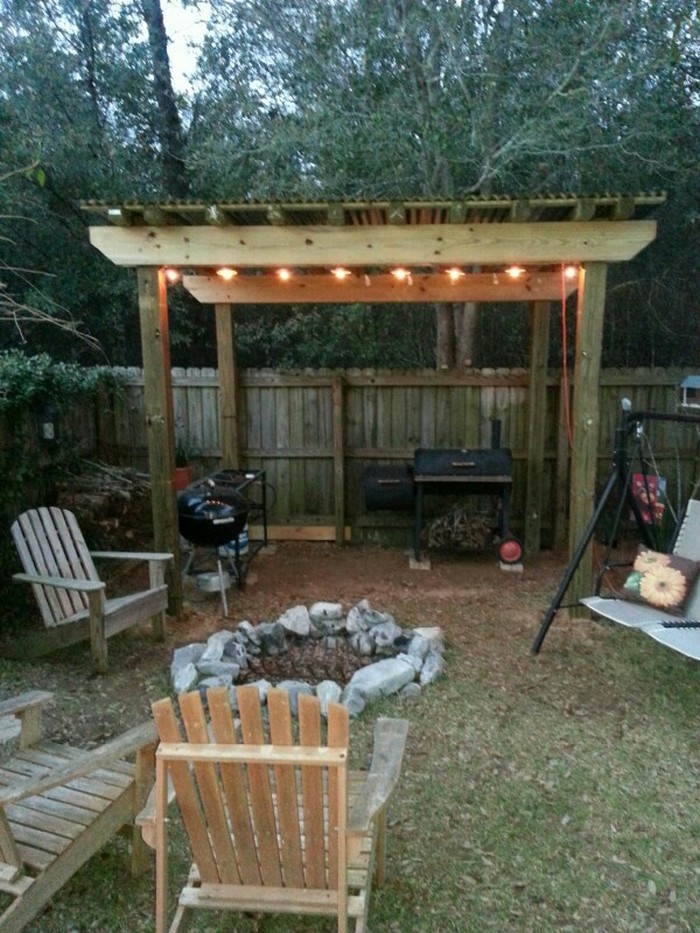
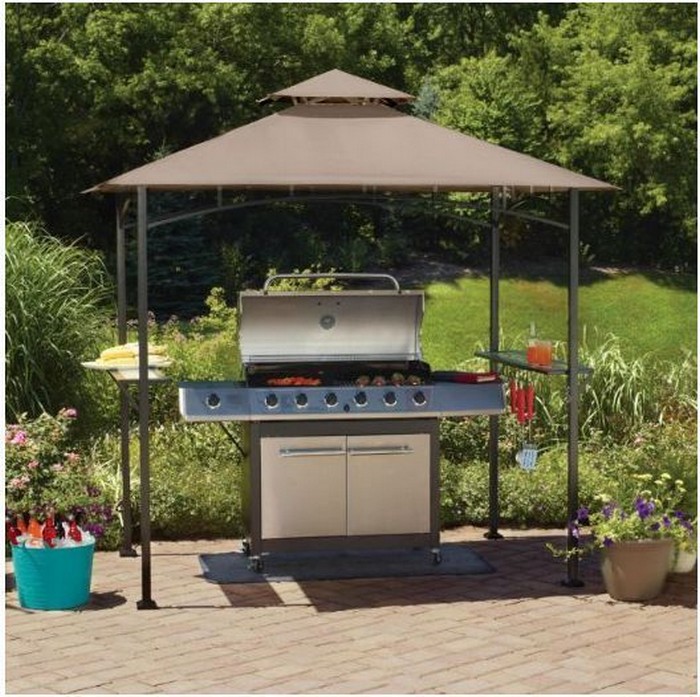
Just take inspiration from this simple yet effective grill gazebo design. With a little bit of planning and some basic carpentry skills, you can easily build a grill gazebo that will become the focal point of your outdoor entertaining area.
Not only will it provide shelter for your guests from the sun or rain, but it will also create a dedicated space for your grilling activities.
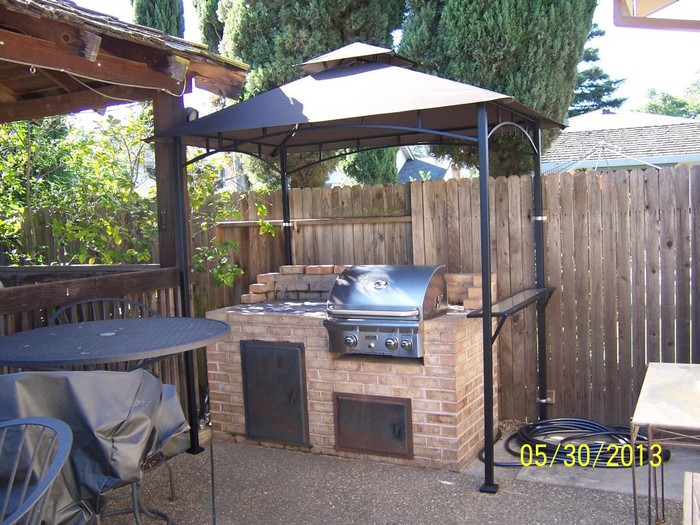
This grill gazebo design is easy, quick, and straightforward, but it’ll make a huge difference in your grilling experience. It gives you a dedicated work area with just enough counter space for you to move around efficiently.
It also protects you from the harsh sunlight during the summer, as well as from the elements like rain and wind. Plus, it’ll keep your grill clean and looking new for years to come. So if you’re serious about grilling, make sure to invest in a good grill gazebo.
This grill gazebo is perfect for those who love to grill outdoors. It is important to remember to allow for plenty of ventilation so as not to accidentally smoke yourself too! 😉
Contents
- 1 DIY Grill Gazebo Guide
- 2 FAQs for Building a Grill Gazebo
- 2.1 What is the ideal size for a grill gazebo?
- 2.2 Do I need a permit to build a grill gazebo?
- 2.3 What materials are best for a grill gazebo?
- 2.4 How do I ensure my grill gazebo is safe for grilling?
- 2.5 Can I customize my grill gazebo?
- 2.6 How do I maintain my grill gazebo?
- 2.7 What foundation is best for a grill gazebo?
- 2.8 How long does it take to build a grill gazebo?
- 2.9 Can I build a grill gazebo on uneven ground?
- 2.10 Are there any specific tools needed for building a grill gazebo?
- 3 Conclusion
DIY Grill Gazebo Guide
A gazebo is always a great addition to any porch or outdoor space. Follow our complete guide on building one for your home below:
Planning Your Grill Gazebo
Embarking on the journey to build a grill gazebo in your backyard promises both functional and aesthetic rewards. This stage is crucial for a successful project.
Selecting the Ideal Location
Choosing the right spot for your grill gazebo is the first step. Consider proximity to your house for ease of access. Ensure the chosen area is level and spacious enough to accommodate the grill gazebo without crowding your backyard. The location should also offer adequate ventilation for grilling.
Determining Size and Design
The size of your grill gazebo depends on available space and your needs. A larger gazebo can accommodate more guests, while a smaller one may blend more seamlessly into a modest backyard. Consider designs that complement your home’s architecture. Your grill gazebo should be both a functional space for cooking and a charming addition to your outdoor area.
Materials and Tools List
A comprehensive list of materials is key for an efficient building process. Include items like wood or metal for the frame, roofing materials, and hardware like screws and nails. The right tools are equally important. Ensure you have a hammer, saw, level, and measuring tape. Quality materials and tools will make your grill gazebo both durable and safe.
Materials for Grill Gazebo:
- Wood or metal for the frame (specific type depending on design)
- Roofing materials (e.g., shingles, metal panels)
- Screws and nails of various sizes
- Concrete for securing posts (if applicable)
- Paint or stain for finishing
- Weather-resistant materials for any additional features (shelves, hooks)
Tools Required:
- Hammer
- Saw (hand saw or power saw)
- Level
- Measuring tape
- Drill with various drill bits
- Screwdriver
- Shovel (for foundation work)
- Safety gear (gloves, goggles)
Does your backyard need a grill gazebo?
If you’re thinking about building your own grill gazebo, there are a few things you’ll need to take into consideration.
The size and shape of the gazebo
When planning to build a gazebo, you’ll need to take into account the size and shape. The gazebo should be big enough to comfortably fit your grill and all of your guests. You’ll also need to factor in the amount of space you have in your backyard. If you have a small backyard, you might want to consider a smaller gazebo.
When deciding on the shape of your gazebo, think about what will best suit your needs. A square or rectangular gazebo is a classic choice that will provide plenty of space for entertaining or relaxing. If you’re looking for something more unique, consider an octagonal or hexagonal gazebo. These shapes will add visual interest to your backyard while still providing ample space.
Click on any image to start the lightbox display. Use your Esc key to close the lightbox. ?
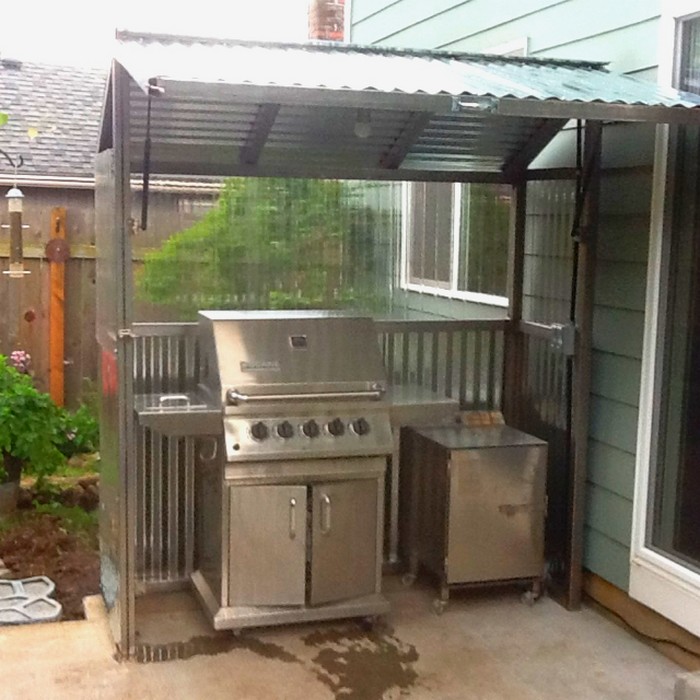
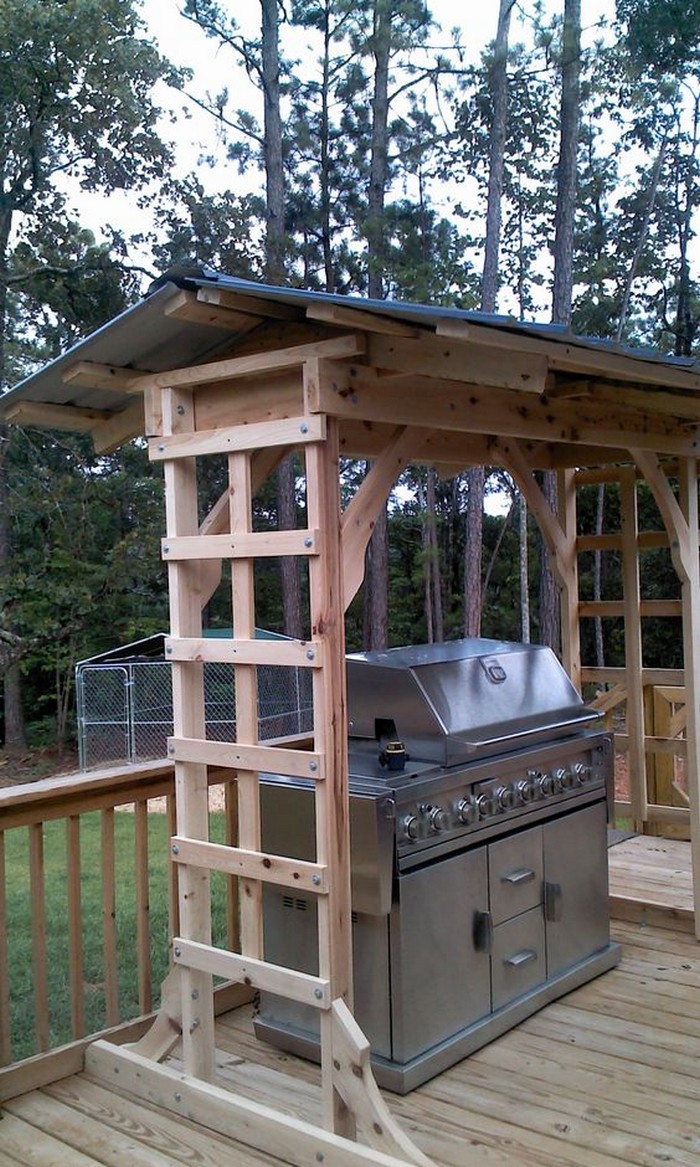

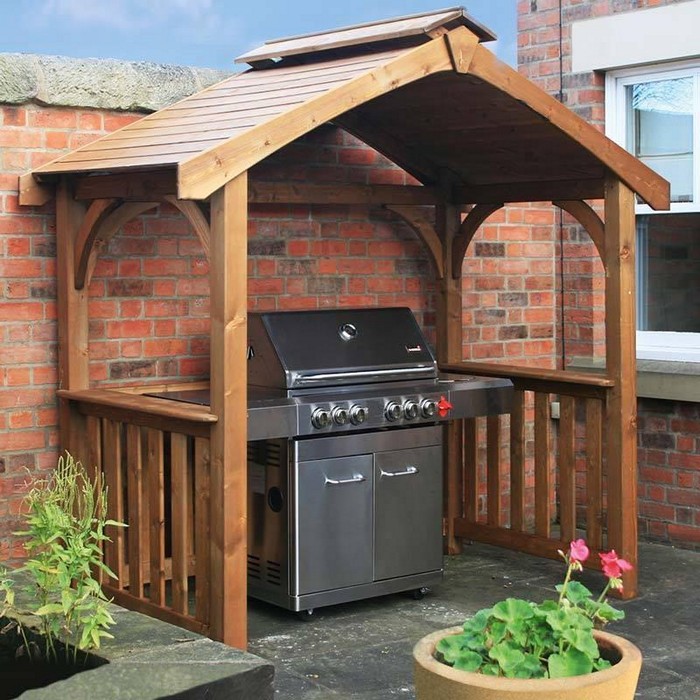
Building the Foundation
A solid foundation is crucial for a stable and long-lasting grill gazebo. This phase ensures your gazebo stands firmly, especially during various weather conditions.
Preparing the Ground
The journey to a perfect grill gazebo starts from the ground up. Begin by carefully selecting and preparing the site. Clear the area of any obstructions like grass, stones, or debris. This step ensures nothing interferes with the foundation.
Next, use a shovel to level the ground. This involves scraping away high spots and filling in low spots. After rough leveling, a rake can help refine the surface, creating a more even area. For larger gazebos, the ground should be exceptionally level.
In such cases, renting a compactor provides an added advantage. It compresses the soil, making it denser and more capable of supporting the gazebo. This process is vital as it prevents the gazebo from shifting or sinking in the future, ensuring its longevity and safety.
Laying the Foundation
The foundation is the bedrock of your grill gazebo’s stability and durability. There are several options to consider. A concrete slab is often preferred for its robustness. To lay a concrete foundation, first, mark the dimensions of your gazebo.
This marking guides where to dig. Excavate a few inches into the ground within these boundaries. This depth provides enough room for the concrete to form a solid base.
Next, pour concrete into the excavated area. Use a trowel to spread and smooth the concrete surface. Once poured, the concrete needs time to cure. Follow the manufacturer’s instructions for curing time to ensure the foundation sets properly.
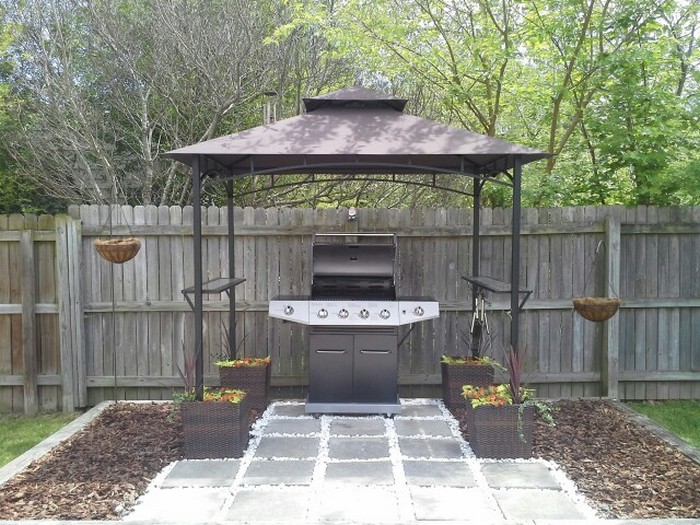
For smaller gazebos, or if you’re looking for a simpler method, concrete footings or pavers are great alternatives. These provide a stable base and are easier to install. Footings involve digging holes at the gazebo’s corners and filling them with concrete.
Pavers, on the other hand, can be laid directly on level ground. They offer flexibility in design and are easy to adjust if needed. Regardless of the method chosen, a sturdy foundation is critical for a durable and safe grill gazebo.
Ensuring Stability and Level
Achieving a stable and level foundation is essential for the longevity and safety of your grill gazebo. It’s important to meticulously check the evenness of your foundation throughout the building process.
Use a spirit level for this task. Place the level at different points across the foundation to ensure uniformity. An uneven foundation can cause significant structural problems in the future, like misalignment or uneven stress on the gazebo’s frame.
If you’re using a concrete slab, it’s crucial to make adjustments while the concrete is still wet. If you notice any uneven areas, use a trowel to smooth them out. For areas that are too low, add more concrete and level it. In case of high spots, press down and spread the excess concrete to surrounding areas. The goal is to achieve a perfectly flat surface before the concrete hardens.
When using pavers or concrete footings, leveling involves a slightly different approach. After placing each paver or footing, use the level to check its alignment with the others. If a paver or footing is too high, remove it, remove some of the underlying soil, and then reposition it. If it’s too low, add more soil or sand underneath to raise it to the right height.
Ensuring a stable and level foundation requires patience and attention to detail. This careful process lays the groundwork for a grill gazebo that stands strong and looks great in your backyard. Remember, a small effort at this stage can prevent big problems in the future.
Constructing the Frame
Building the frame is a pivotal step in creating your grill gazebo. This stage shapes the gazebo’s structure, requiring precision and attention to detail.
Assembling the Posts
The assembly of posts is a foundational step in constructing your grill gazebo. Begin by positioning the posts at each corner. These are the main supports of your grill gazebo and must be set accurately. Whether your foundation is a concrete slab or individual footings, it’s vital to anchor each post securely.
If you’re working with concrete, use anchor brackets embedded into the concrete. For footings, ensure the posts are fixed firmly into the ground. Once in position, use a spirit level to check that each post is perfectly vertical. This precision is critical for the overall stability of your grill gazebo, as even a slight angle in the posts can compromise the structure’s integrity.
Attaching Horizontal Beams
With the posts firmly in place, the next step is to attach horizontal beams at the top. These beams are pivotal in forming the basic skeleton of your grill gazebo. They connect the vertical posts and provide the framework upon which the rest of the structure is built.
When attaching these beams, ensure they are perfectly level and firmly secured to the posts. This can typically be achieved using heavy-duty screws or bolts, ensuring a tight and secure connection.
The horizontal beams not only support the roof but also significantly contribute to the gazebo’s overall structural integrity, bearing weight and withstanding various weather conditions. Double-check the alignment and security of these beams, as they are fundamental to a stable and durable grill gazebo.
Adding Cross Beams for Support
To enhance the sturdiness of your grill gazebo, the addition of cross beams is essential. These beams should be installed between the horizontal beams already in place. The cross beams play a crucial role in reinforcing the frame of your grill gazebo, providing extra support and enhancing stability.
This is especially important in areas with heavy winds or frequent storms. When installing these beams, make sure they are evenly spaced and securely attached to the horizontal beams. This not only ensures structural integrity but also contributes to the aesthetic appeal of your gazebo.
The cross beams also create a framework for additional features. You can use them to mount decorative elements, lighting fixtures, or even hanging plants, adding both functionality and style to your grill gazebo.
Finalizing the Frame Structure
With all beams securely in place, it’s time to conduct a thorough inspection of the frame. Check each part of the frame for stability and alignment. This includes verifying that all posts are vertical, beams are level, and connections are tight.
Make any necessary adjustments to ensure the frame is perfectly aligned and structurally sound. A well-constructed frame is essential for the longevity and safety of your grill gazebo. It forms the backbone of your structure, supporting the weight of the roof and withstanding external elements.
This final check is crucial to ensure that your grill gazebo is not only visually pleasing but also a safe and durable addition to your backyard. With a solid frame in place, you are now ready to move forward with confidence to the next phases of your gazebo project.
Adding the Roof and Features
The roof installation and feature addition are exciting stages in constructing your grill gazebo. They bring functionality and character to your outdoor structure.
Installing the Roof
Choose a roofing material that complements your home and provides sufficient protection. Common choices include metal panels, shingles, or polycarbonate sheets. Start by laying the roofing material on the top of the frame. Secure each piece to the frame using appropriate fasteners, such as screws or nails.
Ensure that the roofing overlaps correctly to prevent water leakage. If you’re using shingles, start from the bottom edge and work your way up. For metal panels or polycarbonate sheets, align them for maximum coverage and aesthetic appeal. Proper installation of the roof is vital for weatherproofing your grill gazebo.
Adding Functional and Decorative Features
With the roof in place, focus on enhancing your grill gazebo with features that boost functionality and style. Consider installing hooks for grilling tools or shelves for spices and condiments. These small additions can greatly enhance your grilling experience. For decoration, you might add string lights for a cozy evening ambiance or hanging plants for a touch of greenery. These features make your grill gazebo not just a cooking space but also a delightful outdoor retreat.
Safety Considerations
While adding features, prioritize safety, especially around the grill area. Ensure good ventilation to prevent smoke accumulation. Use materials that are heat resistant and non-flammable near the grill. This attention to safety will make your grill gazebo a secure and enjoyable space for cooking and entertaining.
With the roof and features in place, your grill gazebo is now a functional and attractive addition to your backyard. It’s ready to host memorable outdoor cooking sessions and gatherings.
Finishing Touches
As your grill gazebo nears completion, the finishing touches are what transform it from a structure to a standout feature in your backyard.
Painting and Staining
Choose a paint or stain that not only matches your home’s exterior but also offers protection against the elements. Apply a coat of primer first, if necessary, followed by your chosen paint or stain. Use a brush or sprayer for even coverage. Remember to cover all exposed wood surfaces. This not only enhances the look of your grill gazebo but also extends its life by protecting it from weather damage.
Decorating Your Grill Gazebo
Now it’s time to personalize your grill gazebo. Consider outdoor-friendly furnishings like a small table and chairs for dining or relaxation. Add cushions and throws for comfort and color. You might also hang outdoor curtains for added privacy and a touch of elegance. These decorations can make your grill gazebo an inviting space for family and friends.
Landscaping Around the Gazebo
Finally, consider the landscaping around your grill gazebo. Planting flowers or shrubs can integrate the gazebo into your garden seamlessly. You could also install lighting along pathways leading to the gazebo for beauty and safety at night.
With these finishing touches, your grill gazebo is not just a functional space but a beautiful extension of your home. It’s a place for cooking, entertaining, and enjoying your backyard in style.
FAQs for Building a Grill Gazebo
What is the ideal size for a grill gazebo?
The size depends on your space and needs. A standard size is about 8×8 feet, providing enough space for grilling and a few guests.
Do I need a permit to build a grill gazebo?
This varies by location. Always check with your local building authority before starting your project.
What materials are best for a grill gazebo?
Durable materials like treated wood or metal are ideal. They withstand weather conditions and provide stability.
How do I ensure my grill gazebo is safe for grilling?
Ensure good ventilation and use non-flammable materials near the grill. Regularly inspect for any safety hazards.
Can I customize my grill gazebo?
Absolutely! Add shelves, hooks, lighting, or decorations to make it suit your style and needs.
How do I maintain my grill gazebo?
Regularly check and repair any damage. Clean and reapply paint or stain as needed to protect the wood.
What foundation is best for a grill gazebo?
A concrete slab is typically best for stability. However, pavers or concrete footings can also be used.
How long does it take to build a grill gazebo?
This varies based on size and complexity. Generally, it can take a few days to a couple of weeks.
Can I build a grill gazebo on uneven ground?
It’s possible, but the ground should be leveled first for stability.
Are there any specific tools needed for building a grill gazebo?
Basic tools include a hammer, saw, level, drill, and measuring tape. Rent specialized tools if necessary.
Conclusion
Building a grill gazebo in your backyard is a rewarding project that enhances your outdoor living experience. It provides a dedicated space for grilling, entertaining, and enjoying the outdoors. By following the steps outlined in this guide, you can construct a grill gazebo that is not only functional but also adds aesthetic value to your home.
You can see more details over at imgur…

