Whether your space is just too small or your storage options are simply limited, you might find yourself at a loss as to where to store pots and pans in your kitchen. If you’re struggling to find a place to store all your pots and pans, there are a few things you can do. First, take a look at all the other items in your kitchen and see if there’s anything you can get rid of to make more space.
If that’s not possible, try rearranging your kitchen shelves and cabinets to make more space. Finally, if you’re still struggling, you can invest in some pot and pan storage solutions, like pot and pan racks. Don’t despair. There are ways to store your pots out in the open that won’t hurt your eyes!
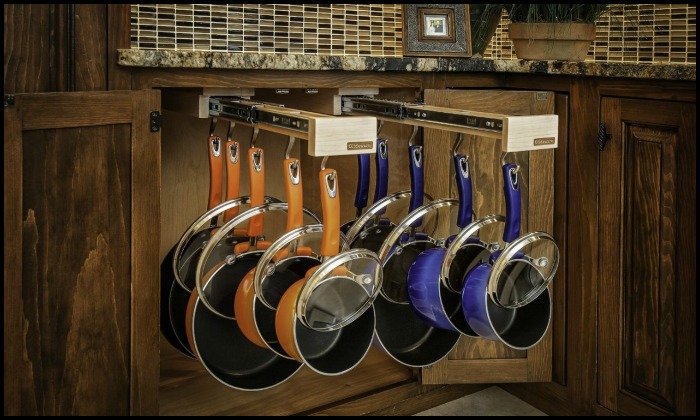
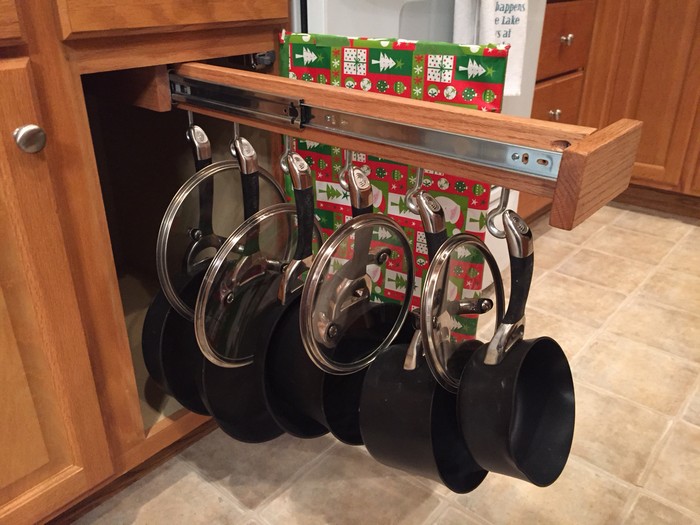
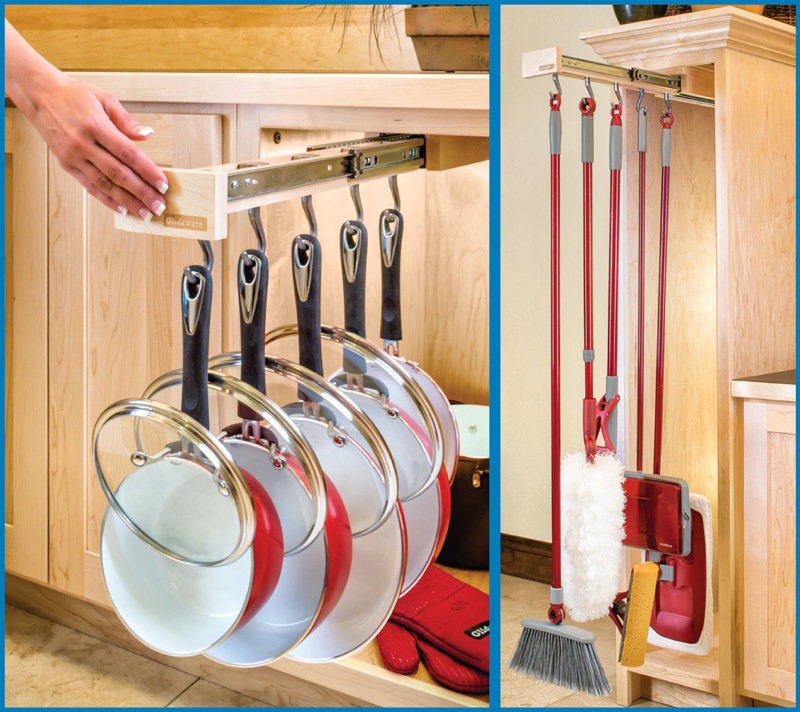
Many of you have liked this style of storage system but not its store-bought price. 🙁
If this is the kind of pots and pans storage idea you’re looking for, you can definitely DIY!
Making this storage system yourself can save you a huge amount of money compared to buying from the store. And what’s great is that it is not a difficult DIY project to do!
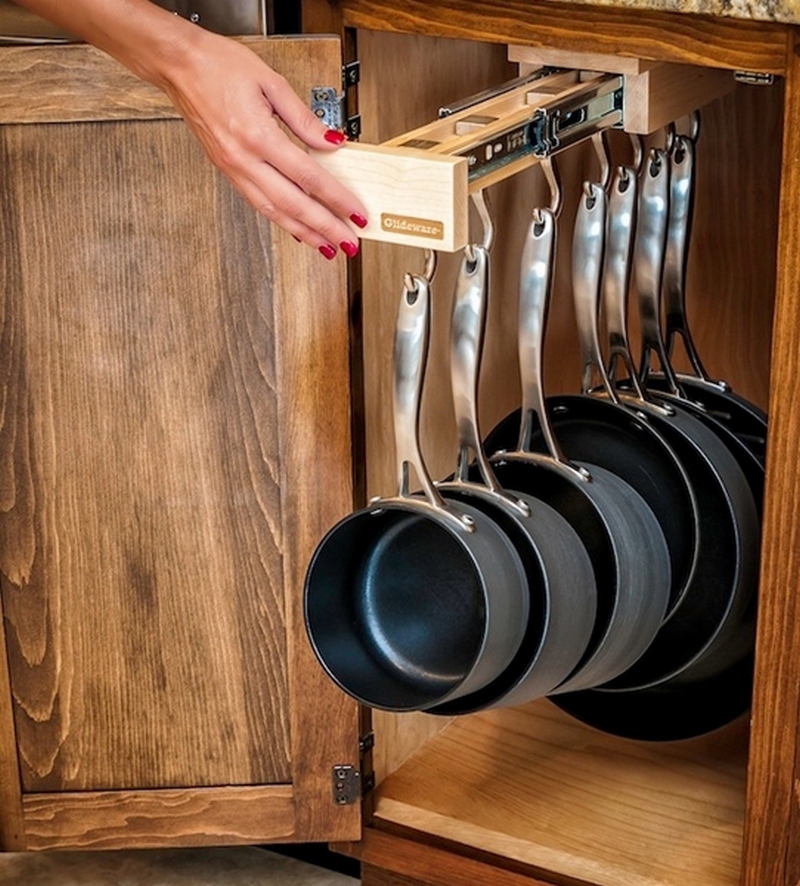
The pull-out cabinet organizer is a simple mechanism, requiring only basic skills and tools. Just be sure to invest in heavy-duty hardware and good timber boards to have a storage system as strong and long-lasting as its store-bought version.
See more DIY sliding pots and pans rack examples from our album below and other DIY under-the-counter/cabinet storage ideas that might better suit your needs. You can also find the link to a tutorial for the sliding pots and pans rack below. 🙂
Design and Size
Consider the layout and dimensions of your kitchen space when designing your rack. Measure the area where you plan to install it, taking into account the height, width, and depth available. Additionally, assess the size and number of pots and pans you need to accommodate.
Design your rack to provide sufficient clearance for easy access to each item. Opting for a sliding mechanism allows for seamless retrieval and storage.
Mounting Options
There are several mounting options to choose from, depending on your kitchen layout:
- Side-mounted slides attach to the sides of cabinets, enabling horizontal sliding.
- Undermount slides mount beneath shelves or cabinets, providing a sleek look.
- Wall-mounted racks offer easy access and visibility for your cookware.
- Ceiling-mounted racks utilize overhead space, ideal for kitchens with limited cabinet space. Select the mounting option that best suits your kitchen configuration and preferences, ensuring a stable and secure installation.
Safety and Accessibility
Prioritize safety by securely anchoring the rack to prevent accidents or injuries. Use appropriate hardware and follow weight capacity guidelines to ensure stability. Consider accessibility when positioning the rack—install it at a height that allows for easy reach without straining. A well-designed rack enhances safety and accessibility while optimizing your kitchen’s functionality.
Customization and Finishing Touches
Personalize your rack to match your kitchen’s style and storage needs. Choose a finish that complements your cabinetry and hardware. Consider incorporating hooks or dividers to enhance organization and storage efficiency.
Customize the rack to accommodate specific sizes and shapes of cookware, maximizing its functionality. Applying a protective coating or sealant can prolong its lifespan and durability.
Crafting your sliding pots and pans rack is a rewarding project that can transform your kitchen organization. By carefully considering materials, design, mounting options, safety, and customization, you can create a customized solution that meets your unique needs.
Whether you have ample space or a compact kitchen, a sliding rack offers practicality and efficiency in storing your cookware. With attention to detail and proper planning, your homemade rack will enhance both the functionality and aesthetics of your kitchen for years to come.
Have you finally found the perfect storage solution for your pots and pans?
Contents
How to Make your Sliding Pots and Pans Rack
You’ll need these materials:
- Set of 24″ Heavy-duty Drawer Slides
- 2 pcs of 1″x3″x24″ Finished Pine Boards
- Plastic-Dip Spray Paint
- 8 pcs of #4 3-7/8″ Screw in Hooks-Ceiling Hook
- Knob
- Screws
And these tools:
- Measuring Tape
- Marker
- Drill
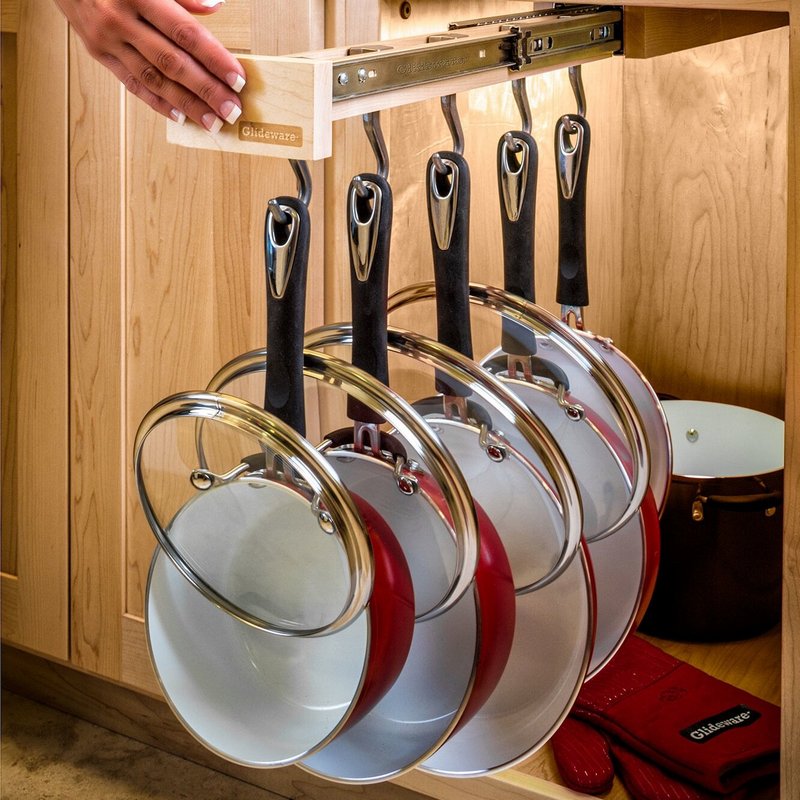
This sliding pots and pans rack is easy to build with just a few simple steps. All you need to do is gather the materials we’ve listed below. Once you have all the materials, find a kitchen cabinet or cupboard where you can attach your sliding pots and pans rack.
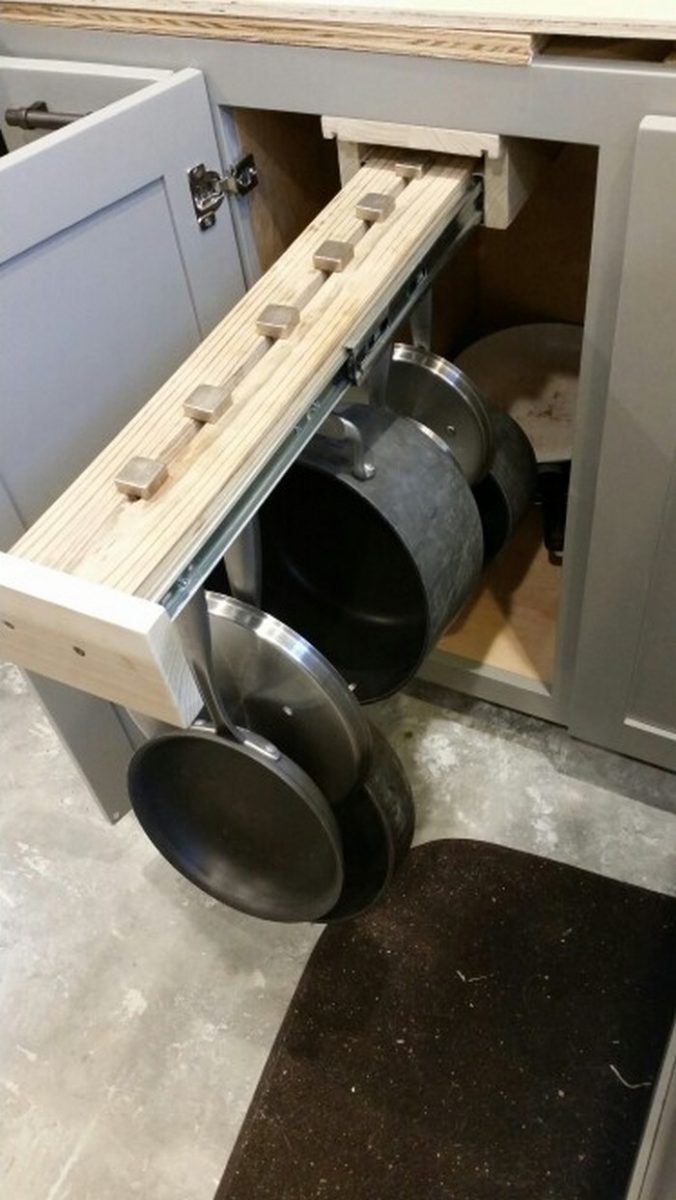
Now that you have your heavy-duty drawer slides, it’s time to attach them to your finished pine board. You’ll need to use your drill and screws to do this. Make sure that the screws are long enough to go through the thickness of the board and into the drawer slide. You’ll also want to make sure that the drawer slide is level with the board. Once you have the drawer slide in place, you can start attaching the screws.
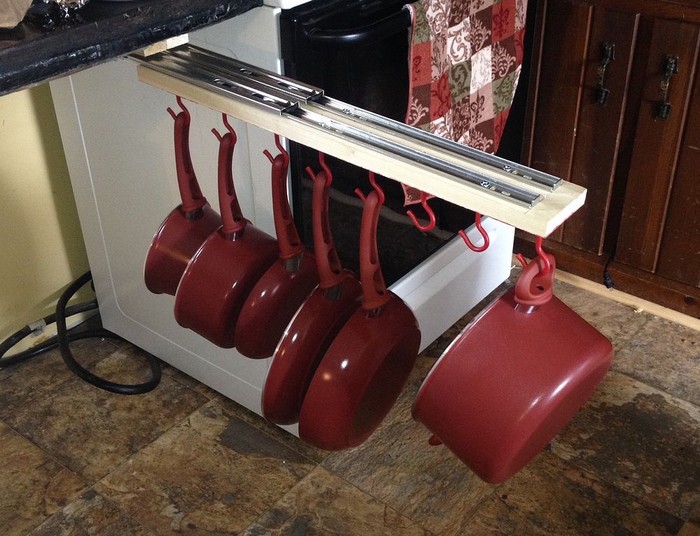
After attaching the drawer slides to your finished pine board, attach the screw-in ceiling hooks on the other side of the board. Attach as many as you need, making sure to leave enough distance between each one to fit a pan. Make sure the hooks are screwed in tightly so that the pans will be secure. You can now hang your pans from the hooks, freeing up space in your cabinets.
You can opt to paint your sliding pots and pans rack the same colours of your pans collection. This will give your kitchen a more uniform and polished look. If you have a lot of different colours in your pan collection, you can opt to paint your rack with neutral colours like white or black.
Click on any image to start the lightbox display. Use your Esc key to close the lightbox.![]()


You can get step-by-step instructions from Tanya Marie Davis over at Hometalk…
The Importance of a DIY Sliding Pots and Pans Rack for Kitchen Organization
A DIY sliding pots and pans rack is a practical and customizable solution to enhance kitchen organization. This article explores the importance of implementing such a project, highlighting its benefits and significance in optimizing kitchen space and workflow.
Maximizing Space
A DIY sliding pots and pans rack effectively utilizes vertical space in the kitchen, freeing up valuable countertop and cabinet space. By storing pots and pans vertically, it reduces clutter and creates a more organized environment.
Enhanced Accessibility
The accessibility of cookware is crucial for efficient meal preparation. With a sliding rack, pots and pans are easily accessible, streamlining cooking processes and reducing the time spent searching for items. This accessibility promotes a smoother workflow and enhances overall kitchen efficiency.
Reduced Clutter
A well-organized kitchen contributes to a stress-free cooking experience. By providing designated storage for pots and pans, a sliding rack minimizes clutter on countertops and in cabinets, creating a clean and inviting cooking space.
Tailored Design
One of the key advantages of a DIY sliding pots and pans rack is its ability to be customized to fit specific kitchen dimensions and design preferences. Homeowners can tailor the rack to accommodate the size and layout of their kitchen, ensuring a seamless integration with existing theme and cabinetry.
The ability to customize a DIY sliding pots and pans rack to fit specific kitchen dimensions and design preferences is a significant advantage that empowers homeowners to create a storage solution that is not only highly functional but also seamlessly integrated and aesthetically pleasing
Adaptability
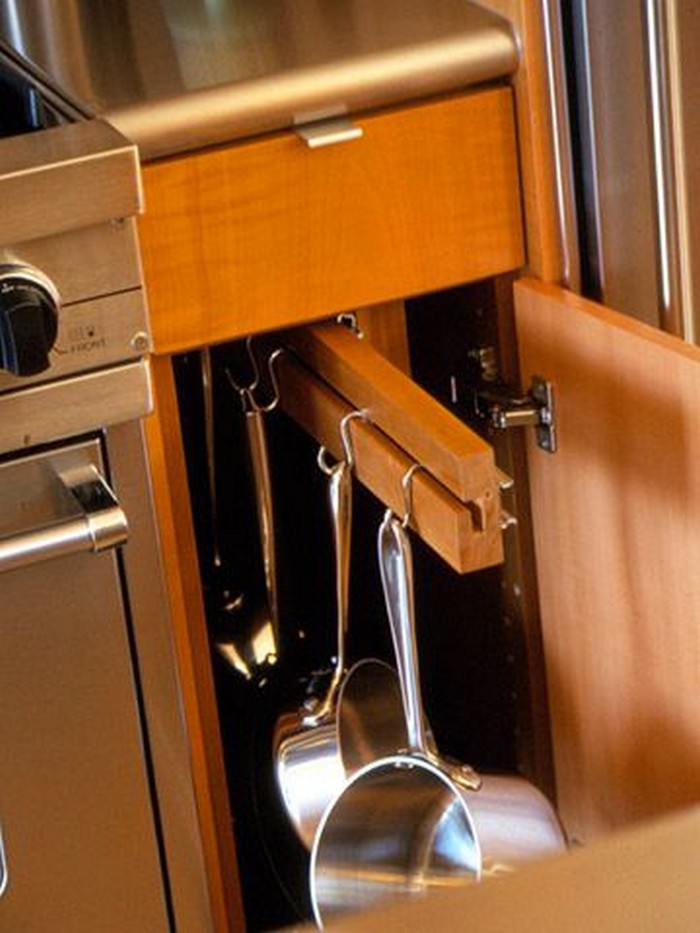
In addition to storing pots and pans, a sliding rack can be designed to hold other kitchen essentials, such as lids, cutting boards, or utensils. This versatility allows homeowners to maximize storage space and keep all necessary items within easy reach.
Allocate space on the rack for storing cookware accessories such as trivets, pot holders, and oven mitts. Consider adding hooks or racks along the sides or bottom of the rack to hang these items conveniently.
Integrate a shelf or ledge into the design where you can place recipe books or tablets for easy reference while cooking. This keeps recipes off the counter and protects them from spills and splatters.
Cost-Efficient
Building a sliding pots and pans rack yourself can be a cost-effective alternative to purchasing pre-made options. By sourcing materials and undertaking the construction process independently, homeowners can achieve significant savings while still achieving their organizational goals.
Hands-On Experience
Engaging in DIY projects fosters practical skills such as woodworking, measuring, and assembly. By taking on the challenge of building a sliding rack, individuals can develop valuable skills that can be applied to future projects and household tasks.
Sense of Achievement
Completing a DIY project brings a profound sense of satisfaction and pride. As individuals witness their efforts translate into tangible, functional solutions for their homes, they gain a newfound appreciation for their creativity and resourcefulness.
Creative Expression
DIY projects offer opportunities for creative expression, allowing individuals to showcase their unique style and personality. From choosing materials and finishes to incorporating decorative elements, homeowners can infuse their sliding rack with personal touches that reflect their tastes and aesthetic preferences.
A DIY sliding pots and pans rack is more than just a storage solution—it is a testament to creativity, resourcefulness, and practicality. By maximizing space, promoting accessibility, and fostering skill development, this project offers numerous advantages for homeowners seeking to enhance their kitchen organization.
Whether you’re a seasoned DIY enthusiast or embarking on your first project, building a sliding rack is a rewarding endeavour that can transform your kitchen into a more functional and enjoyable space.
The Wrap Up
In wrapping up the discussion on creating your amazing sliding pots and pans rack, it’s evident that this DIY project offers a multitude of benefits for kitchen organization and functionality. By focusing on the five essential components—sturdy frame, sliding mechanism, hooks or holders, space optimization, and aesthetic appeal—you can craft a customized solution perfectly tailored to your kitchen’s needs and style.
Through careful planning and execution, you can maximize space utilization, streamline your cooking process, and significantly reduce clutter in your kitchen. Whether you’re dealing with a small kitchen or simply looking to optimize your storage space, a sliding pots and pans rack can be a game-changer.
In essence, implementing a sliding pots and pans rack offers numerous advantages for kitchen organization and functionality. Whether you’re facing the challenges of a small kitchen or simply seeking to optimize your storage space, this versatile storage solution can help you make the most of your available space, streamline your cooking process, and significantly reduce clutter.
By carefully planning and executing this project, you can transform your kitchen into a more organized, efficient, and enjoyable space for cooking and entertaining.
Additionally, the satisfaction that comes from completing a project like this goes beyond just the practical advantages. Engaging in DIY endeavours fosters creativity, hones practical skills, and instils a sense of pride in the finished product.
It’s an opportunity to express your style and make a meaningful improvement to your living space. So, as you embark on the journey of creating your sliding pots and pans rack, embrace the process with enthusiasm and attention to detail. Remember to enjoy the journey as much as the destination, and don’t hesitate to put your unique spin on the project.
With a bit of effort and creativity, you’ll not only achieve a more organized and efficient kitchen but also gain a sense of accomplishment and satisfaction from a job well done.
Frequently Asked Questions
1. What materials do you need to build a sliding pots and pans rack?
The materials you’ll need include wood boards for the frame, screws, sliders for smooth movement, hooks or holders for hanging cookware, and any additional decorative elements or finishes you desire.
2. Do you need special tools for this project?
Yes, you’ll need basic woodworking tools such as a saw for cutting wood, a drill for making holes, a screwdriver for fastening screws, a measuring tape for precise dimensions, and possibly a level to ensure the rack is installed evenly.
With patience, precision, and a touch of craftsmanship, you’ll soon have a functional and stylish addition to your kitchen that reflects your unique flair and enhances your culinary adventures.
3. How do you determine the size of the sliding pots and pans rack?
Measure the available space in your kitchen where you intend to install the rack. Consider the dimensions of your pots and pans to ensure they’ll fit comfortably on the rack. Additionally, take into account any height restrictions or clearance requirements.
By carefully measuring the available space in your kitchen, considering the dimensions of your pots and pans, and accounting for any height restrictions or clearance requirements, you can ensure that your sliding pots and pans rack fits seamlessly into your kitchen layout and enhances its functionality.
4. What type of sliders should you incorporate for smooth movement?
There are various types of sliders available, including ball-bearing drawer slides and roller sliders. Choose sliders that are sturdy and can support the weight of your pots and pans. Follow the manufacturer’s instructions for installation to ensure smooth movement.
5. Can you customize the design of the sliding pots and pans rack?
Absolutely! One of the advantages of a DIY project is the ability to customize the design to fit your specific needs and preferences. You can adjust the dimensions, add additional features like shelves or compartments, and choose finishes or elements that complement your kitchen theme.
By harnessing the flexibility of DIY, you can craft a sliding pots and pans rack that seamlessly integrates into your kitchen, optimizes functionality, and resonates with your unique aesthetic sensibilities. Embrace the creative process and explore myriad design possibilities to fashion a bespoke storage solution that enhances both the form and function of your culinary space.
6. How do you ensure the rack is sturdy enough to hold the weight of pots and pans?
Opt for sturdy materials such as hardwood or plywood for the frame, and make sure the frame is securely assembled using screws or other fasteners. Test the stability of the rack before installing it by applying pressure to ensure it can support the weight of your cookware.
7. Is it difficult to install the sliding mechanism for the rack?
The installation of the sliding mechanism may require some basic carpentry skills, but it’s typically straightforward if you follow the manufacturer’s instructions. Take your time to ensure the sliders are installed evenly and securely for smooth movement.
8. How do you maintain and clean the sliding pots and pans rack?
Regular maintenance involves wiping down the rack with a damp cloth to remove any dust or debris. Lubricate the sliders periodically to ensure smooth movement. If the rack has any decorative elements or finishes, follow the manufacturer’s recommendations for cleaning and care.
By incorporating these maintenance practices into your regular cleaning routine, you can ensure that your sliding pots and pans rack remains in optimal condition for years to come. With proper care and attention, your rack will continue to enhance the organization and functionality of your kitchen while maintaining its aesthetic appeal.