Contents
- 0.1 What’s a daybed for?
- 0.2 How much weight can a daybed hold?
- 0.3 DIY Hanging Daybed Plans
- 0.4 You’ll need these materials for the hanging daybed project:
- 1 How to build a hanging daybed?
- 1.1 1. Gather the Materials Needed
- 1.2 2. Build the Footer
- 1.3 3. The Bottom Supports
- 1.4 4. Attaching the supports to the footer
- 1.5 5. The Deck
- 1.6 6. The Back Supports
- 1.7 7. The Back Assembly
- 1.8 8. Finishing / Painting
- 1.9 9. Assembling the Parts Together
- 1.10 10. The Arm Design
- 1.11 11. Attaching the hardware
- 1.12 12. Attaching it to a Platform
What’s a daybed for?
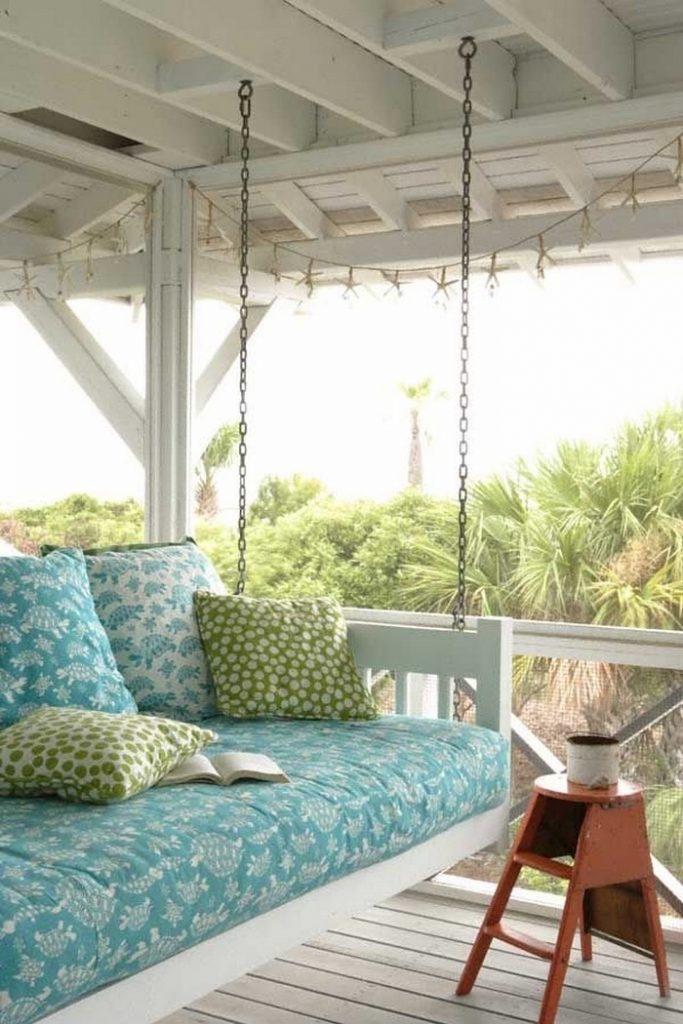
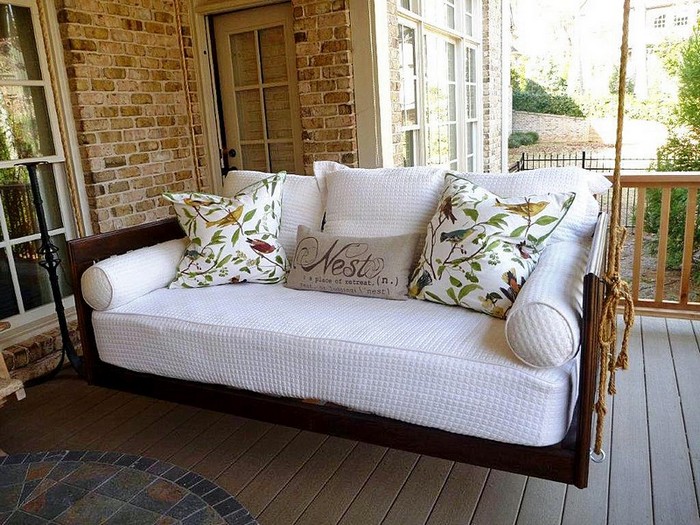
An outdoor hanging daybed is a versatile piece of furniture that can be used in a variety of ways. It can be used as a place to relax, or it can be used as a place to sleep. It can also be used as a place to lounge, a place to read a book or a place to work. There are many different ways to use an outdoor hanging daybed, and it can be a great addition to any home.
How much weight can a daybed hold?
The average daybed can hold between 250 and 300 pounds. However, some daybeds are designed to hold more weight, and some are designed to hold less. It is important to check the weight limit of your daybed before purchasing it, to ensure that it will be able to accommodate your needs.
DIY Hanging Daybed Plans
Building a hanging daybed isn’t exactly a quick weekend project! But anybody who’s simply willing to squeeze in a couple of hours every day can make their own hanging daybed swing in a week! This DIY project doesn’t require any special tools or skills.
However, if you are thinking of taking on this project we recommend you consult a professional builder or carpenter (unless you already are one 😉) to assess your ceiling joists first. It’s a necessary step to ensure that everything is strong enough to carry the weight of both the daybed and its occupants!
As long as you’ve sought advice from a professional and have taken your time in building a strong and sturdy daybed frame, you’ll be able to enjoy many relaxing and super-comfortable hours in your DIY hanging daybed swing. With a little bit of care and upkeep, your daybed swing will provide you with years of enjoyment.
Just imagine getting your much-needed afternoon nap or reading a great book on your hanging daybed! It sure is worth the time and all the work needed, isn’t it? 🙂
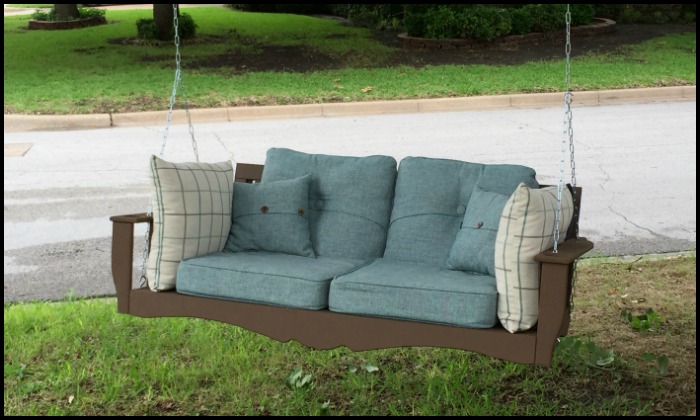
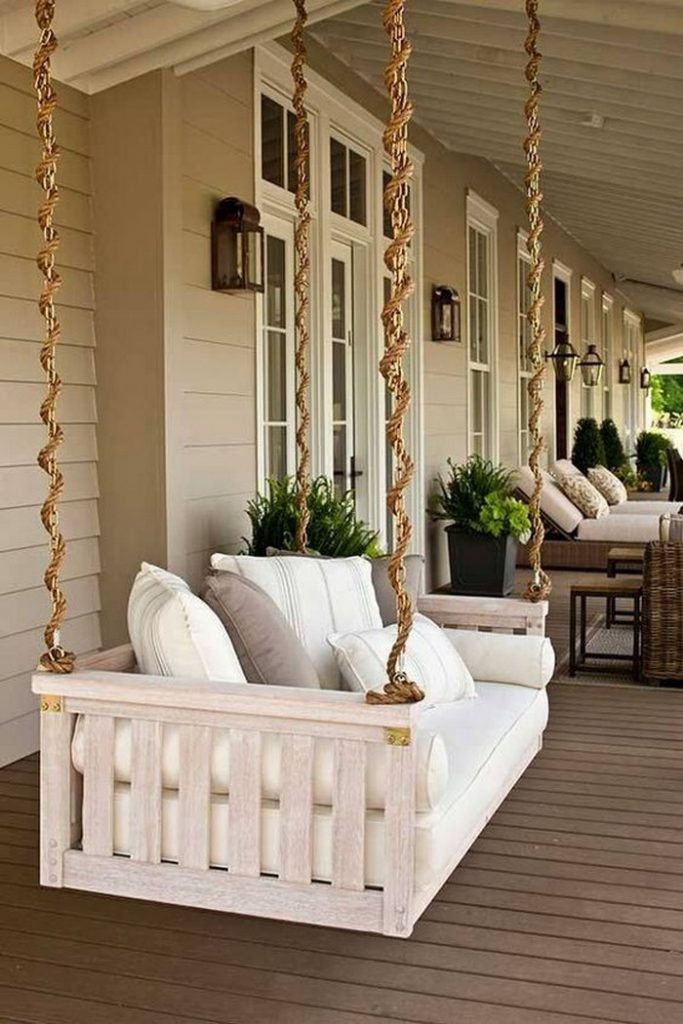
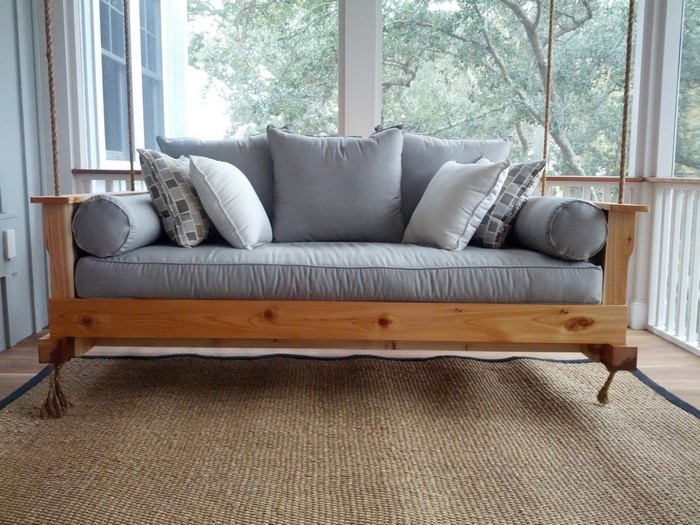
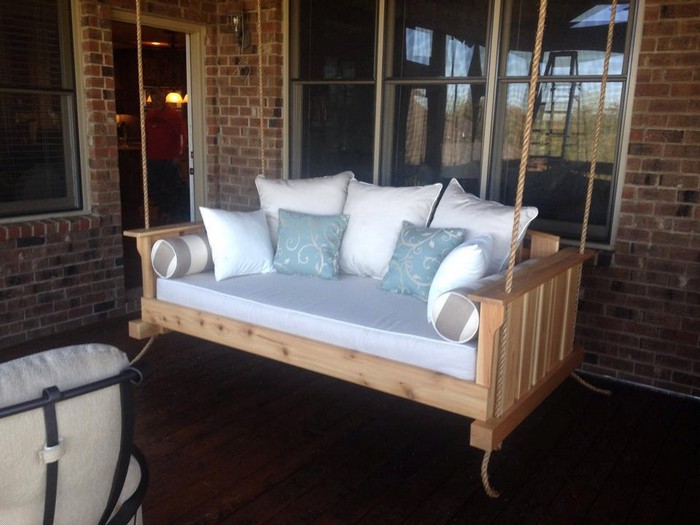
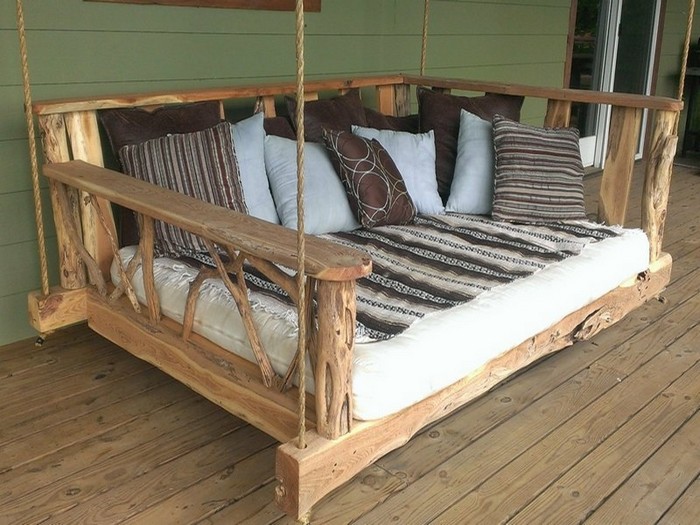
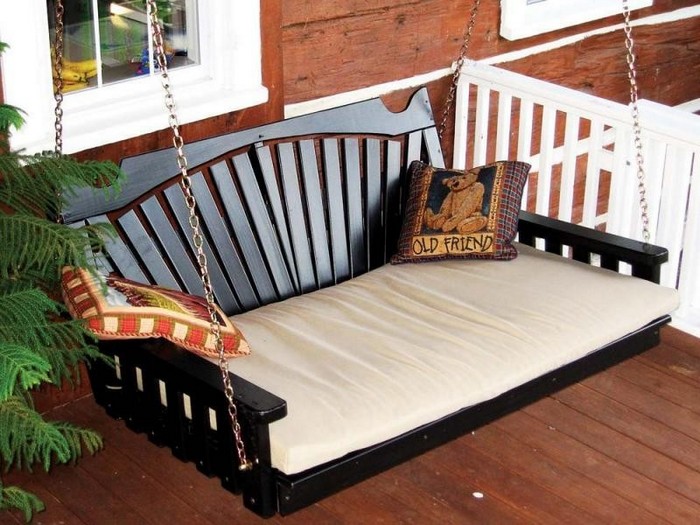
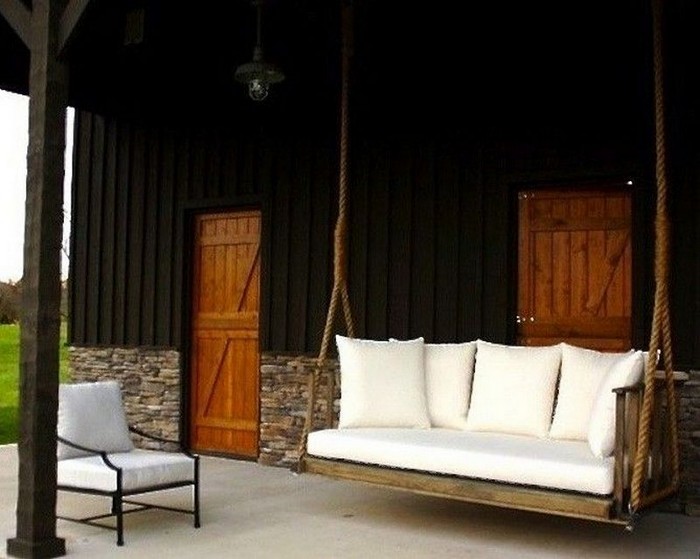
Be inspired by taking a look at our album of hanging daybed swings below, and learn how to build one by heading over to the step-by-step tutorial by Jordan Valley Home and Garden Club.
You’ll need these materials for the hanging daybed project:
- 6 – 1 x 6 x 8 Pine Boards
- 8 – 1 x 4 x 8 Pine Boards
- 2 – 1/4″ x 3″ Carriage Bolts
- 2 – 1/4″ x 2″ Carriage Bolts
- 4 – 1/4″ Washers
- 4 – 1/4″ Nylon Nuts
- 2 – 3/8″ Eyebolts
- 2 – 3/8″ Nylon Nuts
- 4 – 3/8″ Fender Washers
- 2 – Large S Hooks
- 2 – Small S Hooks
- Paint
- 30′ Chain – rated at 340 lbs
And these tools:
- Measuring Tape
- Miter Saw
- Band Saw
- Jigsaw
- Cordless Drill
- Sander
- Paintbrush
- Router
- Wood Clamps
How to build a hanging daybed?
1. Gather the Materials Needed
Before beginning any project, it is crucial to ensure that you have all of the necessary materials on hand, as well as the right tools for the job. This will save you time and frustration later on. For this particular project, you will need to gather all the materials and tools listed above.
When choosing the materials for your daybed, it is important to consider the weight capacity. Make sure to pick materials that are strong enough to support both the daybed and its users. This is a necessary step to ensure that your daybed is safe and stable.
When it comes to designing your hanging daybed, you have a few options for the footer. You can go with a plain rectangle, or you can get creative and sketch up a design of your own! If you’re not sure what you want, take a look at some examples online or in magazines to get some inspiration.
Once you have an idea of what you want, get to work planning out your design. Keep in mind the size and shape of your footer, as well as the overall look you’re going for.
3. The Bottom Supports
When building a hanging daybed, one of the key elements is ensuring that it is properly supported. This means having enough bottom supports to evenly distribute the weight of the daybed and prevent it from sagging or collapsing.
Depending on the size of your daybed, you should have at least five (5) bottom supports attached to the footer. If you have a larger daybed, you may need to add additional support.
Lined up the side supports flush with the top of the footer and screw them down. Then you should clamp a board into place so that you can mount the other three supports against it and screw them down to the footer.
5. The Deck
Cut 5 pcs of 1 x 6 to length and then put in pocket holes on each end. Then, attach the first board, start on the side supports first then on the other three bottom supports. Make sure that the pocket holes are facing inwards so that they are not visible.
Once all the boards are in place, use a drill to attach the screws. After the first board was complete, repeat the steps to attach the other 4 boards.
6. The Back Supports
Later, two of the back sides will be getting a carriage bolt and a chain through them, so to beat them up, you should cut seven supports and glue together two boards twice. If necessary, use a clamp to hold the glued supports together and let them dry up. That will give you three normal supports and 2 thicker ones.
7. The Back Assembly
Cut two rails (the top and the bottom) and a bunch of stiles (which you can do by setting up a stop block on your mitre saw). Then, lay them out to get a visual of your back assembly. This will help you determine the placement of the stiles and how they will fit then screw them together.
8. Finishing / Painting
If you choose to paint your outdoor hanging daybed, you can sand them first and paint it with the colour of your choice. But if you want to leave it be, make sure to have a clear finish. This will help protect the wood from weathering and also give it a nice shine.
9. Assembling the Parts Together
This step is a little critical though, you need to first figure out the angle that would look nice and use a drill press to drill a quarter-inch hole. Then you can start clamping it into place so you will have a guide when you drill a hole into the bottom support. Next, put in the carriage bolt, flash washer and nylon net.
You can use an angle finder to repeat the steps on the other side, and now, you’ll have the beginning of the back which you can attach the back assembly. Next, attach the rest of the back support, and make sure to space out the slots so that you can’t see them in front of the swing.
10. The Arm Design
Now that you have assembled the necessary parts, you can proceed to design your arms support. Keep in mind the weight and size of the object you will be supporting, as well as the range of motion you will need. With these factors in mind, sketch out a few potential designs. Once you have a few potential designs, select the one you think will work best and work it out.
When everything else is fastened and done, it was just a matter of hanging it out
11. Attaching the hardware
For the front of the hanging daybed, you can use heavy-duty eyebolts with a fender washer and a nylon nut on each side. And on the back, you can simply move out the carriage bolt and attach the chain. Then grab a paddle bit with the same diameter as the chain and drill the part of the arm, where the chain should go through.
You can then combine the back chain and the front chain by attaching them together with S hooks. This will create a more secure connection and help to prevent the chains from becoming tangled. You will have to do the same on the other side of the hanging daybed.
12. Attaching it to a Platform
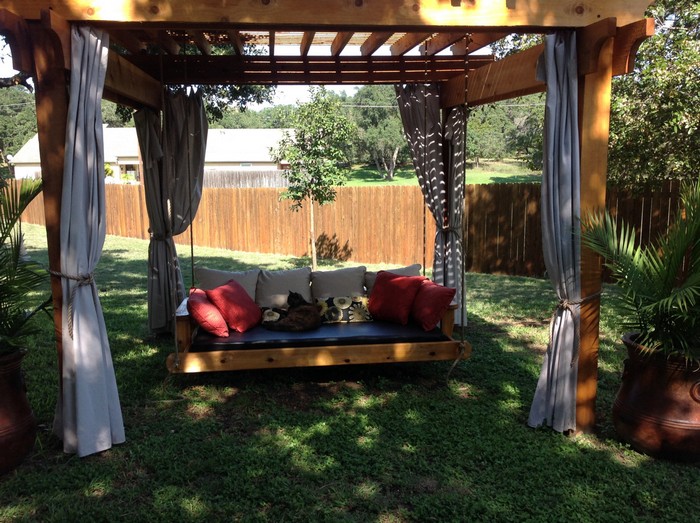
Now that your outdoor hanging daybed is complete, you can finally look for a sturdy platform or tree to hang it from and start enjoying your DIY hanging daybed. Keep in mind, however, that you’ll need to ensure that the platform or tree you choose can support the weight of the daybed and anyone who may use it.
Click on any image to start the lightbox display. Use your Esc key to close the lightbox.![]()


You can watch the step-by-step instructions from April Wilkerson here: