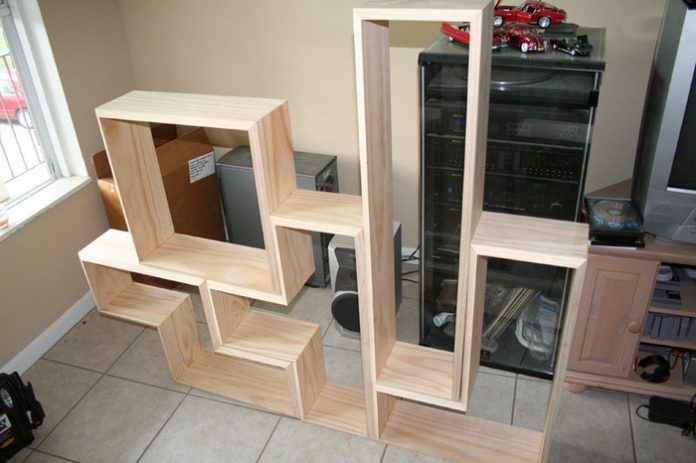
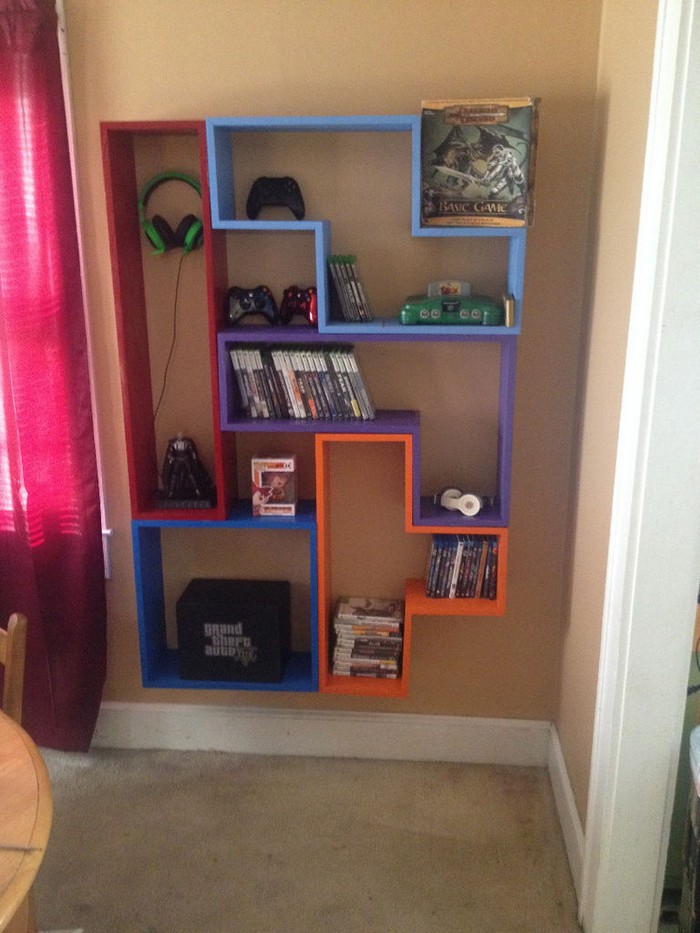
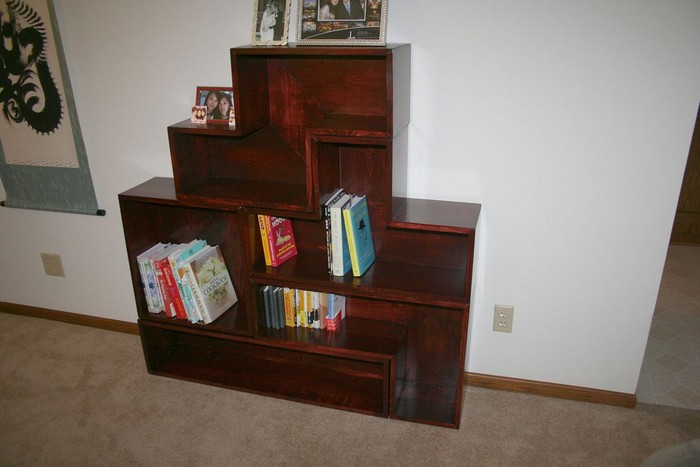
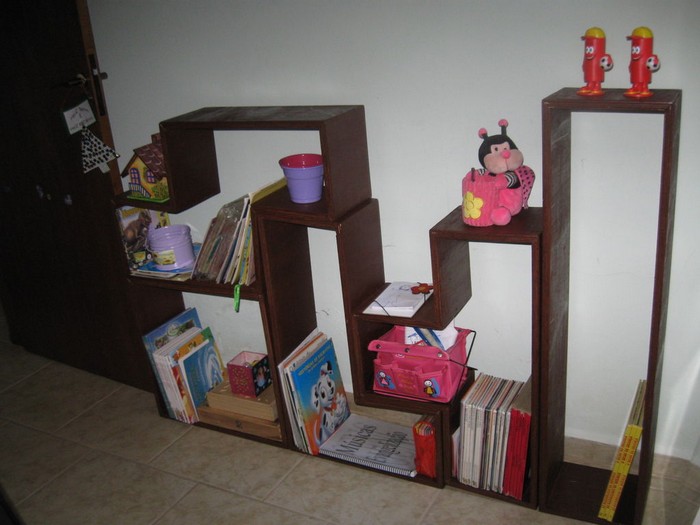
This Tetris DVD/bookcase is a clever bookshelf idea that lets you configure its blocks in various ways. The Tetris bookshelf all depends on the available space that you have! This unique bookshelf will surely be a hit!
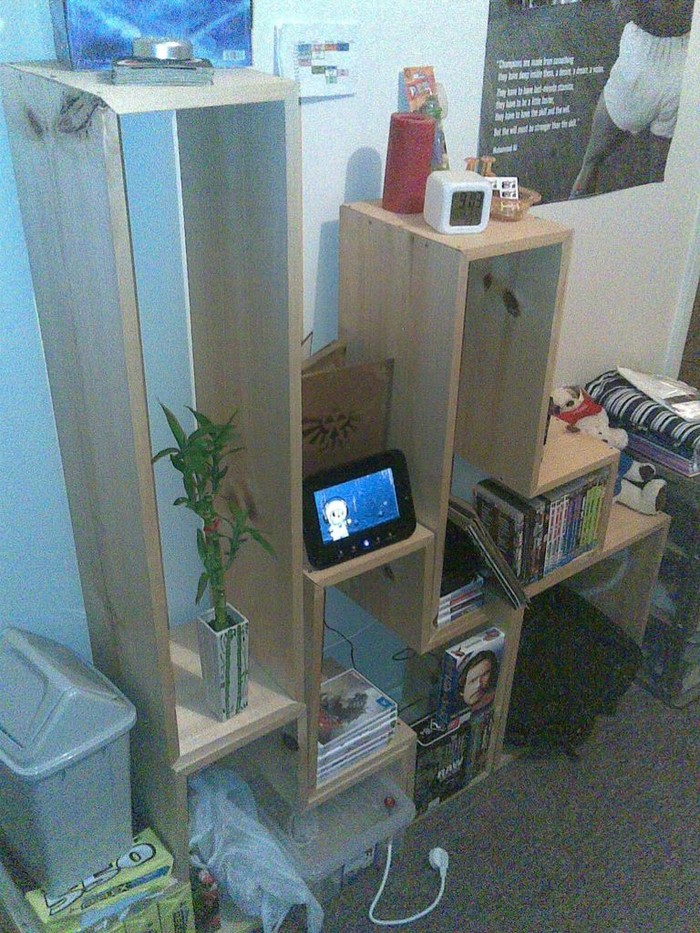
This Tetris bookshelf is perfect for many other things that you wish to store or display.
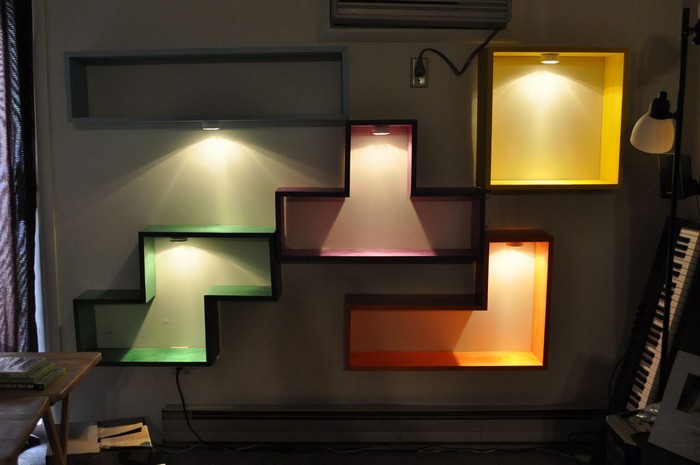
You can also personalize the Tetris bookshelf any way you want. You can stain-finish it, for a serious and mature look. But if you’re building the Tetris bookshelf for kids, then you can paint it in different bright colors – just like the colors of Tetris bricks. Your kids will love the Tetris bookshelf!
You can simply have it stand against or mount it on a wall. You can also add lighting, which is perfect if you want to use it as a place to display a collection!
Indeed there are many ways you can make your own Tetris bookshelf unique. Have a look at some examples from this gallery, and then start building your own by following the step-by-step tutorial below!
Do you know someone who would like to try this DIY Tetris bookshelf project, too?
Click on any image to start the lightbox display. Use your Esc key to close the lightbox.![]()

You’ll need these materials:
- 6 pcs 1″x8″x8′ Wood Planks
- Wood Putty
- Wood Glue
- 220 grit Sandpaper
- Stain and Varnish
And these tools:
- Measuring Tape
- Nail Gun
- Table Saw
- Mitre Saw
Steps:
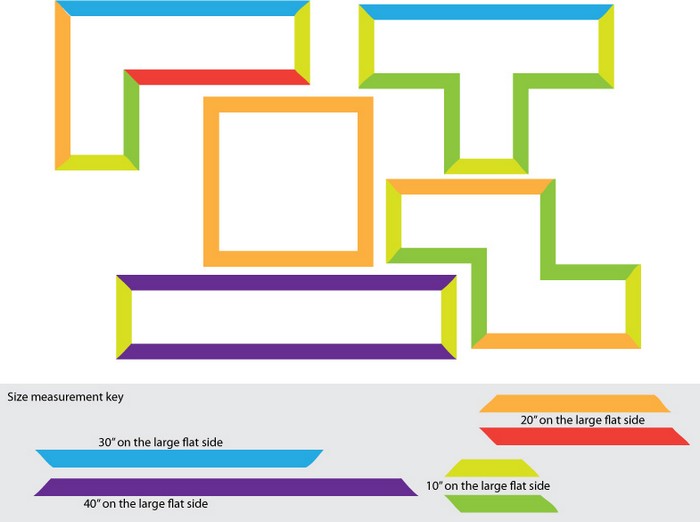
Measure up: The first thing we need to do is figure out the right measurements for our Tetris bookshelf. There are five pieces that we need to build for one set. You can build as many sets as you choose, but you’re going to have to do your own math there. I have attached a quick drawing of said five pieces that we will construct. They are all in a nice block format, all in increments of the same amount. The lengths of wood needed are 10″, 20″, 30″, and 40″.
However, there is something important to note here. The length that is measured is the length of the flat surface that will be OUTSIDE of the Tetris shape. This means that some pieces will have an overall length somewhat longer than 10 or 20 inches. You will see as we get into the Tetris bookshelf project what I mean (and this is where the mitre saw comes in pretty handy).
Forgive my lack of drawing abilities, but you can see the crude drawing I made, with one colour representing each size and shape of the piece of the Tetris bookshelf you will need.
As you see, you need 2 blue ones (30″), 2 purple ones (40″), 7 orange ones and 1 red one (20″), 9 green and 9 yellow ones (10″).
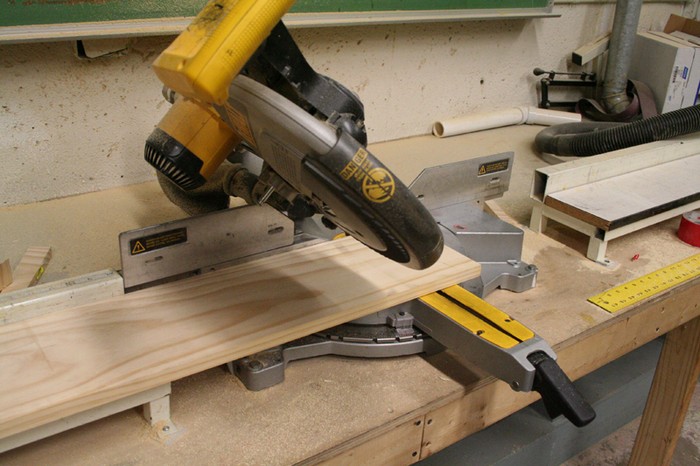
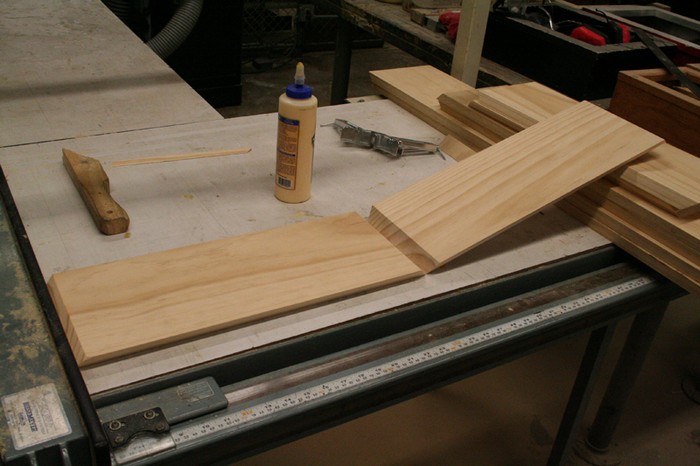
Measure and cut: You are almost ready for your first cut! The thing now to do is take your first board over to the mitre saw. If you have one slightly curved board, these first pieces will be the ones to use them on. Since they will only be 10″ long, they will be the least likely to warp over time or give you problems later on.
First set the mitre saw to a 45-degree angle as you see. If you’ve got safety goggles, put ’em on, because sawdust goes in your eyes. But if you like the feeling of sawdust in your eyes, then, by all means, leave them off. Now make your first test cut a couple of inches off the edge of the board, just so you can see what we’re going to be dealing with.
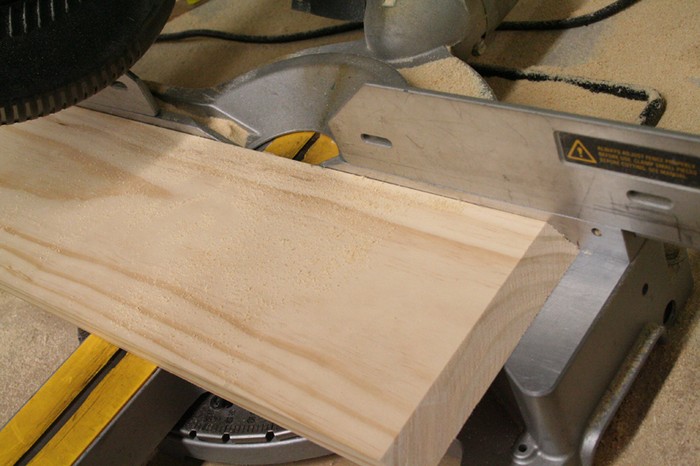
Once you have done this, measure exactly (or as close to exact as you can get) 10″ from the right edge of the blade, and mark that spot right on the mitre saw. Move the board to that position, make sure it is level, pray to whatever god or gods you pray to and make the cut. You now have your first 10″ piece.
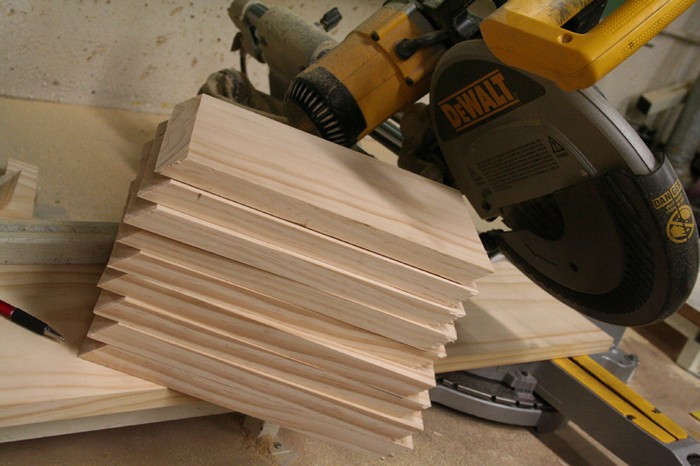
Next, slide the board to that same exact spot, and cut again. Do this until you get to the last piece on that board. In all, you should have been able to fit nine pieces on there with a few leftover scraps, as shown.
Still, have all 10 fingers? Good! Let’s carry on.
Cut the rest: Now that you’ve gotten the hang of it, use the next board to cut the other nine 10″ pieces, but do it the exact same way. We will take care of the opposite angle on the table saw.
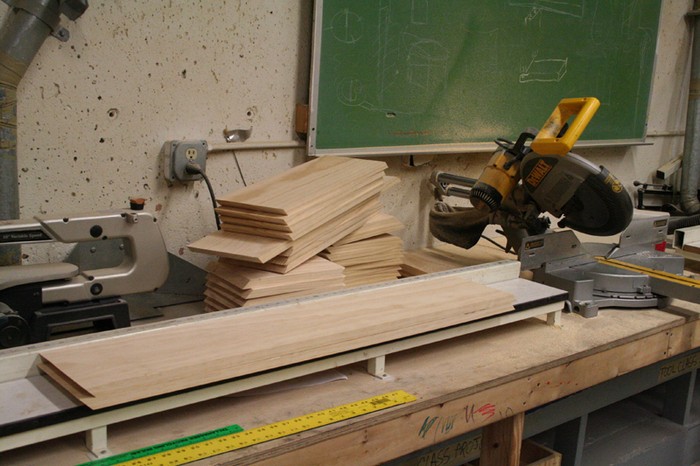
From there, move on to the 20″ boards (I hope you marked out 20, 30 and 40 inches on the mitre saw). You can fit four 20″ pieces on one length of the board, and the other three on the next board. This will leave you approximately 26″ of leftover scrap. don’t throw it away, put it to the side. you might need it later.
At this point, you should still have two untouched boards. Cut the two 30″ on one (save the scrap again), and the two 40″ pieces on the other board (and save the scrap). You now have all of the pieces cut to length. However, you may have noticed something. They are all going parallel ( / / ) instead of perpendicular like many of the boards require ( / \ ). Fear not! This is why we are moving to the table saw next.
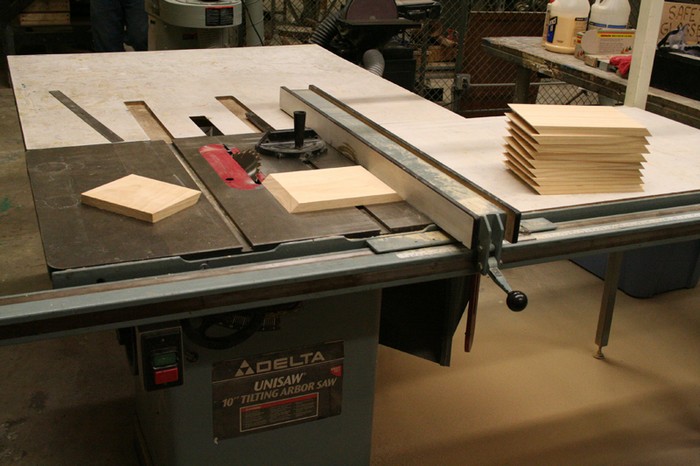
The table saw: Here we are at the table saw. Take nine of your now eighteen 10″ boards and move them aside, because they are cut correctly. Adjust the table saw to a 45-degree angle titled toward the wood. Set the height so that the saw blade is just barely above the height of the wood.
You don’t want to lose a finger. The guide on the right side of the board has a handy little measuring tool, so adjust it to exactly 10″. With the long end at the bottom, cut the board using a scrap piece first to test it. Look good? Okay, then continue.
Take each of those boards in that stack and run them through the machine one by one. Do both sides so they are trimmed nice and evenly. With those guides, you should be able to get them through with no problem.

Next, do the same with six of the 20″ boards (remember the 7th is already correctly cut). If your table saw is not large enough to cut the 30″ and 40″ boards like this, then you take it back to the mitre saw and just flip it around.
But be SURE that the cut goes on the right side and that you don’t cut it too short. Remember the rule, measure five times, cut once.
Congratulations, you have now done the hard part of building the Tetris bookshelf. There is just one more thing we need to cut in order to make these pieces perfect.
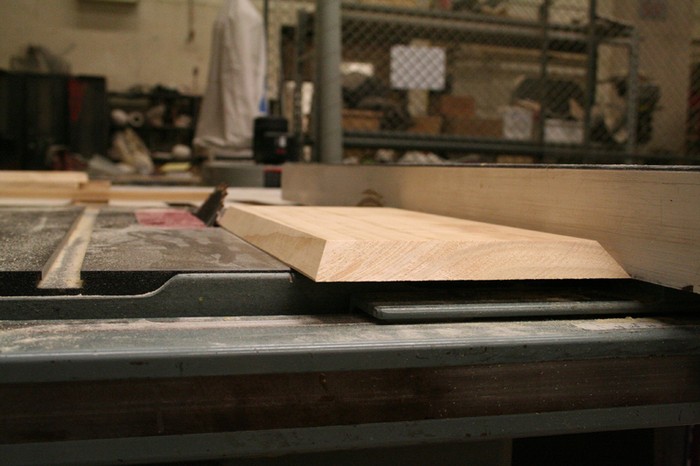
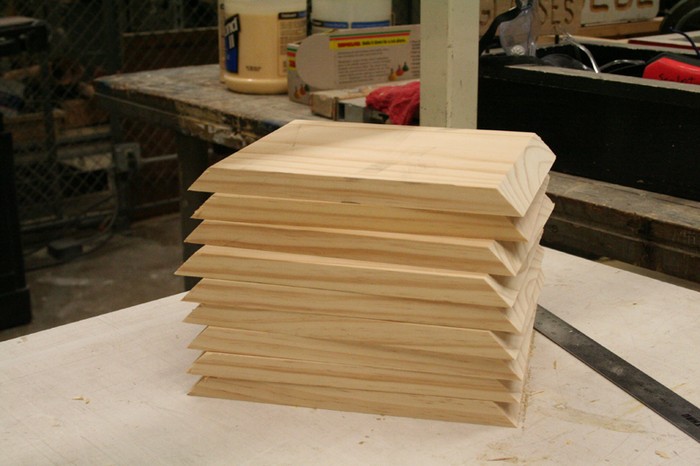
Ripping the boards: I’m not entirely sure if this is the “proper” term to use, but essentially what we are going to do is add a bevel to these boards so that when assembled, they look more like Tetris pieces. It just adds a little bit of dimensional class. You can skip this step if you so desire, but I have to tell you it contributes a whole lot to the final look.
After you are done cutting all the boards at length, adjust the angle to about 30 degrees for the bevel. Adjust the blade to be lower once again. You can see in this image that mine is too high. Set the width of the board (the guide on the right-hand side) to be 7.5 inches wide.
Then just guide each of the boards through (length-wise!) to give it that bevelled edge. On the perpendicular pieces ( / \ ) you want to make SURE that the longer edge is on the bottom, otherwise, it will be backwards. This spells bad things, obviously.
For the parallel pieces, either way, is fine, since those are reversible. Anyway, just do this process to all of the boards and you are FINALLY done cutting.
Put the blade down, clean the table and get out the nail gun, we’re ready to assemble our Tetris bookshelf.
Continued Page 2…