Having a good oven is important if you love to bake your own pizza. A good oven will ensure that your pizza comes out cooked evenly, with a crispy crust. Ovens come in a variety of sizes and with a variety of features, so it’s important to choose one that will suit your needs.
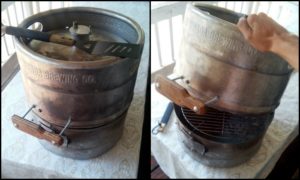
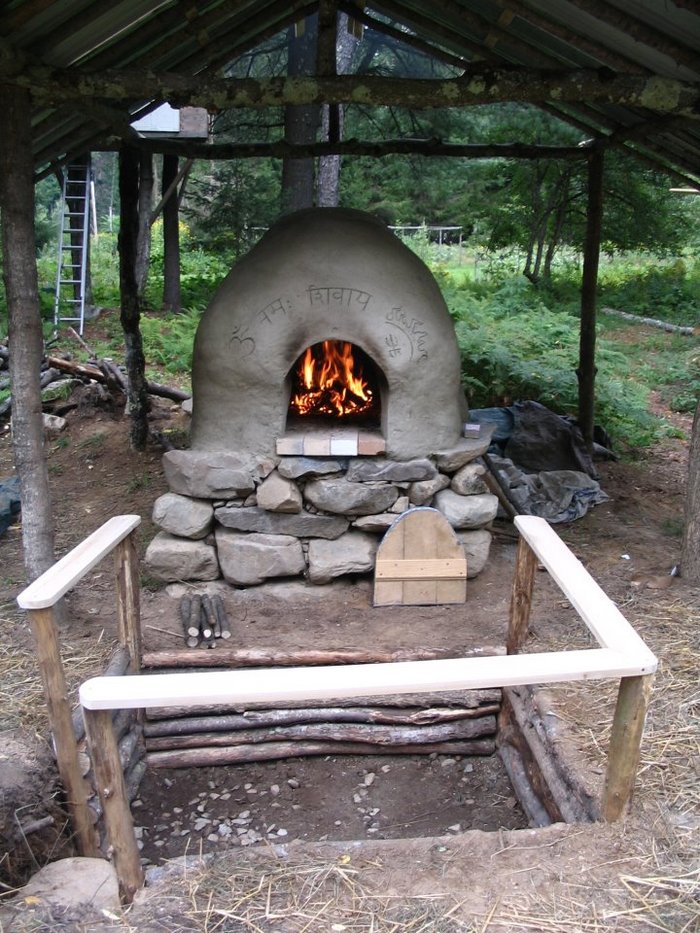
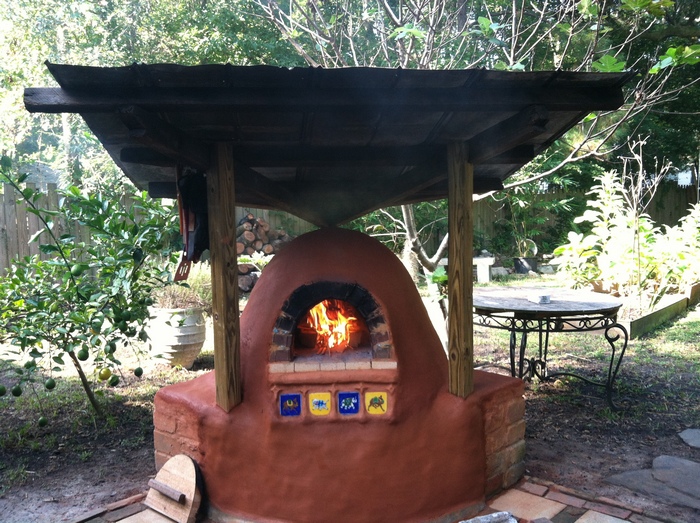
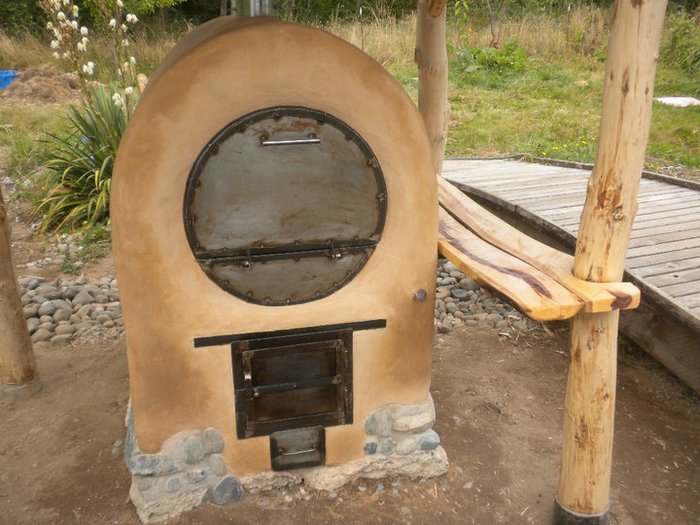
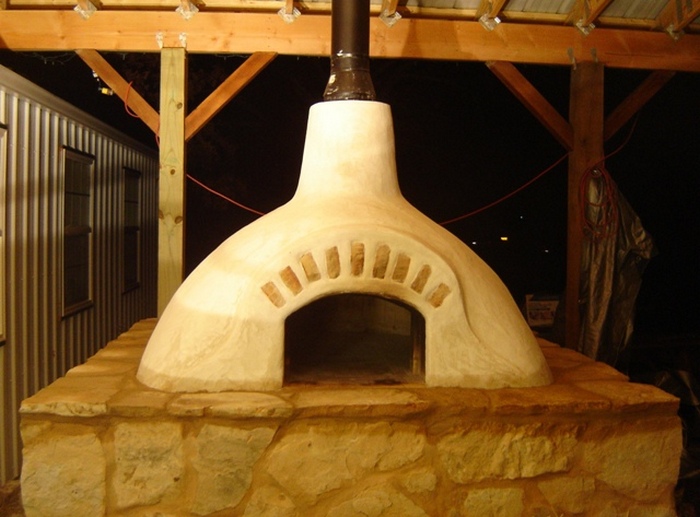
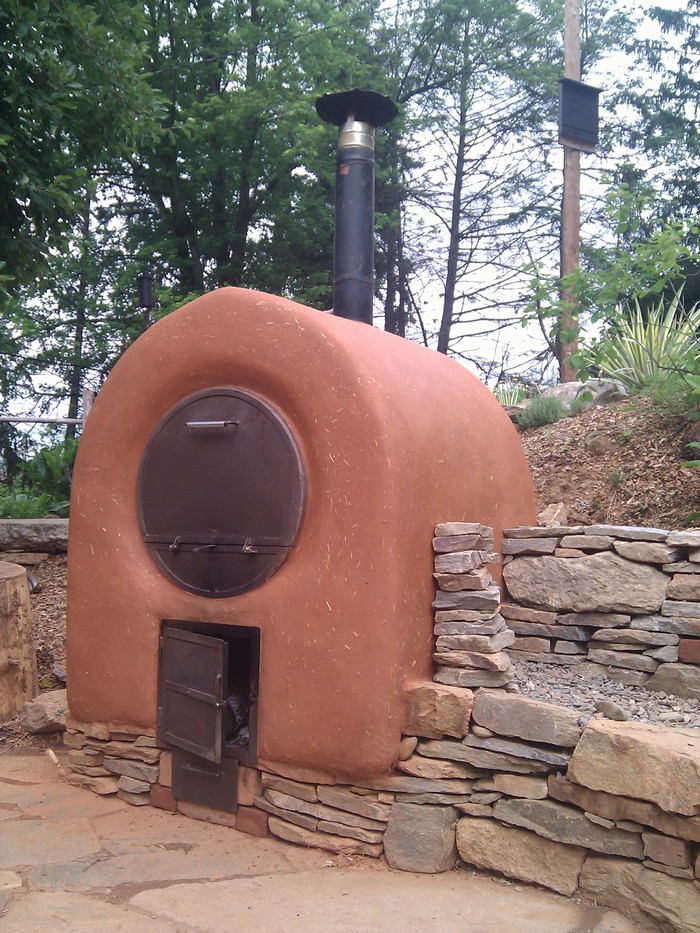
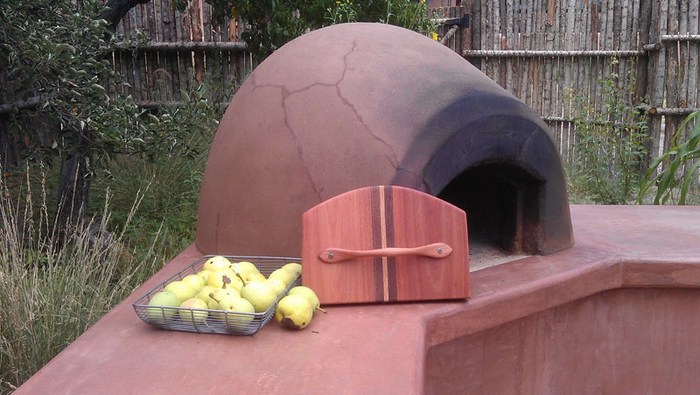
An earthen oven! An earthen oven is a type of oven that is built out of natural materials like clay, sand, and rocks. These ovens have been used for centuries to cook food and they are still popular in many parts of the world. Earthen ovens are very efficient at cooking food and they can reach very high temperatures, making them ideal for baking pieces of bread and pizzas.
There are many benefits to baking bread and pizza in a natural oven, as opposed to an electric one. Natural ovens require no electricity, which can save you money on your energy bill. They also tend to produce tastier food, as the heat is more evenly distributed.
Finally, baking in a natural oven can be more fun and exciting, as you never know quite how your food will turn out. Plus, It’s more fun and thrilling to use, yields better-tasting food, and of course, do not consume electricity!
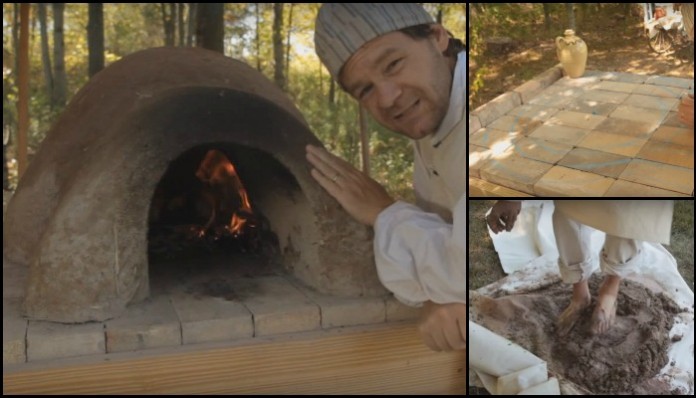
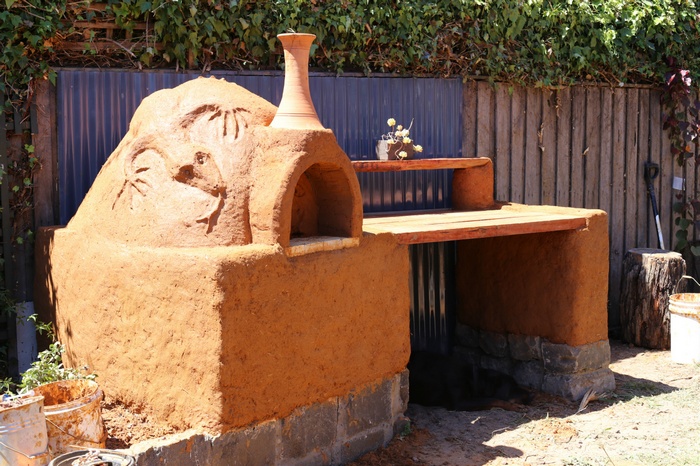
Earthen ovens like this have existed since the 18th century. Given that, one can already figure that the building process is very basic, and can be done even by first-time DIY-ers. You don’t even need any tools to put everything together.
Watch the video below for more details on the materials and the tutorial. You’ll see an earthen oven is actually fun to build just as it is to use!
Do you want to have this kind of oven in your backyard? 🙂
Contents
Constructing an Earthen Oven
Materials
- Bricks
- Sand
- Dry Clay
- Straw, Hay, Dry Grass
- Canvas Tarp
- Water
- Paper
Instructions
Prepare the Foundation
- Location: Choose a level, fire-safe area.
- Foundation: Lay a circular or square foundation of bricks as the base. The size depends on the desired oven size but ensure enough room for insulation and baking space.
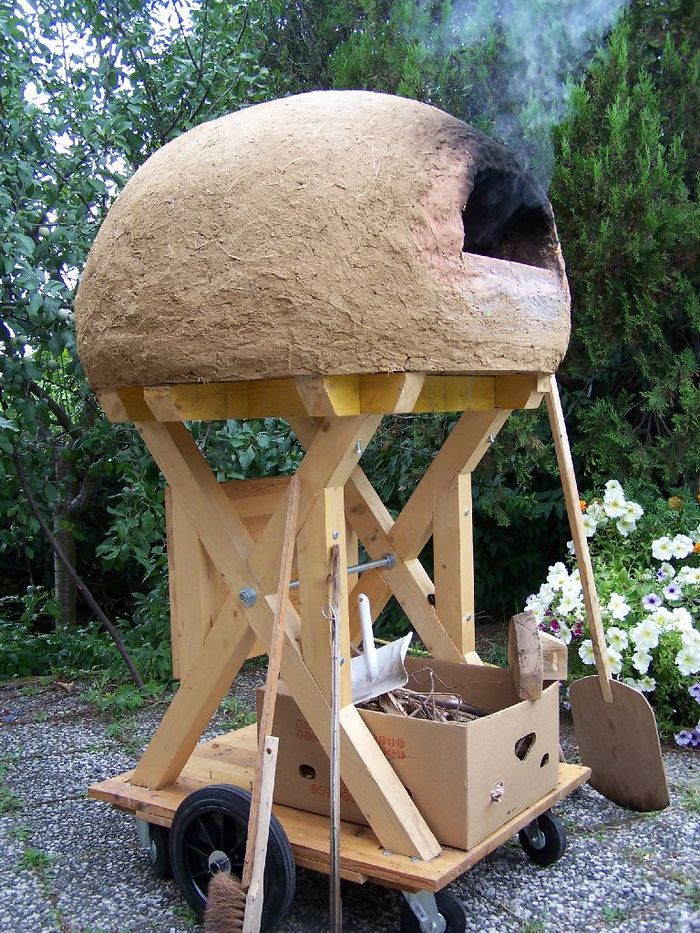
Create the Sand Form
- Mound Formation: Pile sand to form a dome. This acts as the mold over which you’ll apply clay. The size should mirror the interior space of your desired oven.
- Shape: Perfect the dome with wet hands for a smooth, rounded shape.
Mix the Clay Mixture
- Materials: In a large container, mix dry clay with water. Aim for a consistency similar to playdough.
- Straw Incorporation: Add straw, hay, or dry grass to the mix. This acts as reinforcement.
Apply the Clay Mixture
- First Layer: Cover the sand form with a thick layer of the clay mixture. Ensure it’s uniform to avoid weak spots.
- Smooth Out: Use your hands or a small trowel to smooth out the clay surface.
Create the Oven Entrance
- Marking: Before the clay sets, outline the entrance. It should be large enough to insert and remove items easily but not so large that it compromises the oven’s ability to retain heat.
- Cut Out: Remove the marked clay to form the entrance.
Allow to Dry
- Drying Time: Leave the clay to dry slowly. This may take a few days, depending on weather conditions. Avoid rushing the process, as premature drying can cause cracks.
Remove the Sand
- Removing Sand: Once the clay is dry, reach inside and carefully excavate the sand. Remove all sand to reveal the hollow interior of your oven.
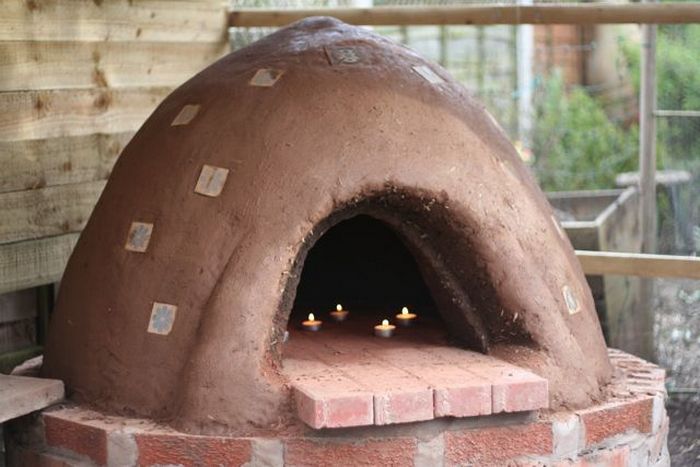
Insulate and Protect
- Insulation Layer: Apply another layer of clay mixed with straw around the oven for additional insulation.
- Protection: Cover the oven with a canvas tarp when not in use to protect it from rain and to extend its lifespan.
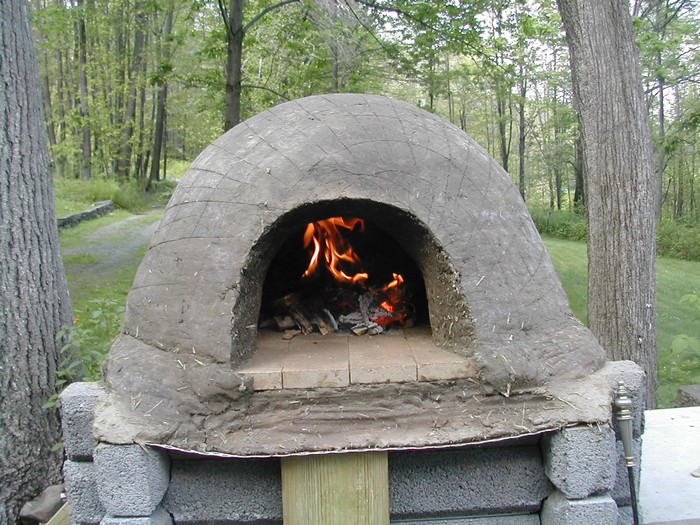
First Firing
- Initial Heating: Light a small fire inside the oven to further harden the interior. This step is crucial for strengthening the structure.
- Gradual Increase: Slowly increase the fire size, ensuring the heat is distributed evenly.
Baking
- Heat Management: Once the oven walls have absorbed enough heat, remove the ashes.
- Cooking: Place your bread, pizza, or other dishes inside. The retained heat in the clay will cook the food evenly.
For visual instruction, check out this guide video.
Click on any image to start the lightbox display. Use your Esc key to close the lightbox.![]()
Cooking and Baking Techniques Specific to Earthen Ovens
Cooking and baking in an earthen oven is both an art and a science. The natural cooking fixture offers a unique way to prepare food that has been used for centuries. These traditional ovens, made from natural materials, are celebrated for their ability to cook food evenly and impart a distinct flavor unmatched by modern appliances. Whether you’re a seasoned chef or a culinary enthusiast, mastering the techniques specific to earthen ovens can elevate your dishes to new heights.
Preheating the Oven
Preheating is crucial in earthen oven cooking. The process involves lighting a fire directly inside the oven and letting it burn for a few hours, depending on the size of the oven and the desired cooking temperature. The goal is to allow the oven walls to absorb heat thoroughly. Once preheated, the ashes are removed, and the oven is ready for baking. The retained heat in the walls and the floor will be the primary source of cooking energy.
Managing Cooking Temperatures
Unlike conventional ovens with temperature controls, managing the heat in an earthen oven requires experience and intuition. The temperature is regulated by the size of the fire and the length of the preheating time.
High temperatures are ideal for baking pizzas and bread with a crispy crust. For these, the oven should be preheated until it reaches a white-hot interior. For slower-cooked items like roasts or casseroles, the oven is allowed to cool to a lower temperature after removing the fire.
Baking Bread
Baking bread in an earthen oven is an unparalleled experience. The key is to harness the initial high heat for a crusty exterior while ensuring the inside is perfectly baked. Loaves should be placed directly on the oven floor for the best heat conduction. Steam can be introduced by spraying water inside the oven right before baking, creating a crispy crust.
Cooking Pizza
Pizza and earthen ovens are a match made in culinary heaven. The intense, even heat creates a perfectly charred crust in just a few minutes. Pizzas should be cooked directly on the oven floor, where the highest temperatures are reached. Rotating the pizza halfway through the cooking process ensures an evenly baked crust.
Roasting and Slow Cooking
Earthen ovens excel at slow roasting meats and vegetables, locking in flavors and tenderizing over several hours. Place your roast or vegetables inside after the oven has cooled from its peak temperature. The earthen oven’s ability to retain and evenly distribute heat means that food can cook slowly, developing deep flavors and tenderness.
Baking Casseroles and Pies
Casseroles, pies, and other dishes benefit from the earthen oven’s consistent heat. These dishes should be placed in the oven when it reaches a moderate temperature, ideal for cooking without burning the top. The thermal mass of the earthen oven walls ensures a steady temperature, perfect for dishes that need time to set or bake through.
Cooling Cycle Cooking
Even as the earthen oven naturally cools, it remains an efficient cooking environment. This gradual cooling process is perfect for foods that require low and slow cooking, such as dried fruits, dehydrated vegetables, or even slow-cooked beans. Utilizing the oven’s entire heat cycle maximises its efficiency and the range of dishes you can prepare.
Mastering cooking and baking techniques in an earthen oven opens up a world of culinary possibilities. Each dish benefits from the oven’s unique heat characteristics, adding depth and flavor that modern ovens can’t replicate. With practice, cooking in an earthen oven not only becomes an enjoyable process but also a meaningful connection to a rich culinary heritage.
Maintenance and Care for Your Earthen Oven
Regular Inspection
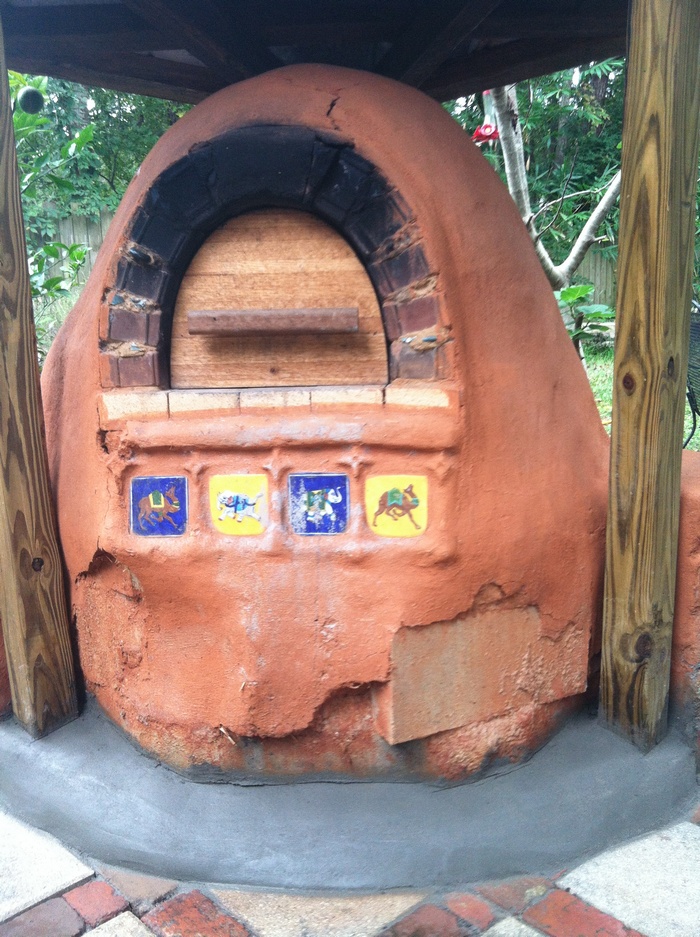
- Check for Cracks: Regularly inspect your oven for any signs of wear or damage, especially after heavy use or extreme weather conditions. Small cracks in the dome or base are common and can be easily repaired.
- Monitor the Oven Floor: Pay special attention to the oven floor, as it undergoes the most stress during the heating process. Look for any significant wear or uneven surfaces that could affect cooking performance.
Repairing Cracks
- Small Cracks: Minor cracks can be filled with the same mixture of clay, sand, and straw used to build the oven. Apply the mixture to the cracks and smooth it out to ensure an even surface.
- Large Repairs: For larger cracks or damage, you may need to apply a new layer of clay mixture over a larger area or even reconstruct parts of the oven. Allow any repairs to dry completely before using the oven again.
Cleaning the Oven
- Removing Ashes: After each use, once the oven has cooled down, remove ashes and food debris. This prevents the buildup of materials that could catch fire or affect the flavor of your dishes.
- Avoid Water: While it might be tempting to hose down the inside of the oven, excessive moisture can weaken the structure. Instead, use a brush or a dry cloth to clean the interior.
Protecting the Oven
- Weather Protection: If your earthen oven is outdoors, cover it with a waterproof but breathable cover, like a canvas tarp, to protect it from rain and snow. This helps prevent moisture from seeping into the clay and causing damage.
- Insulation and Shelter: Consider building a shelter over the oven or enhancing its insulation to protect it from weather extremes and to keep it dry.
Fire Management
- Start Small: When lighting your oven, start with a small fire and gradually increase its size. This prevents thermal shock, which can cause cracks.
- Use Proper Fuel: Hardwoods are ideal for heating your oven as they burn hot and clean. Avoid using treated woods or materials that can release harmful chemicals.
Seasonal Maintenance
- Winter Care: In regions with harsh winters, consider a more thorough protection strategy. This might include additional waterproof covers or even temporary structures to shield the oven from snow and ice.
- Spring Check-Up: At the start of warmer seasons, conduct a thorough inspection and maintenance check to prepare the oven for increased use.
Longevity Tips
- Regular Use: Interestingly, regular use can help maintain the integrity of the oven. The heat from fires can help keep the oven dry and prevent the clay from becoming too brittle.
- Community Involvement: Sharing maintenance responsibilities and usage tips with friends or community members who also use the oven can lead to the discovery of new maintenance techniques and enhance the communal experience of cooking.
Caring for your earthen oven with these practices ensures that it remains a functional and cherished part of your cooking routine for years to come. Regular maintenance not only preserves this unique culinary tool but also deepens your connection to traditional cooking methods.
Conclusion
Building an earthen oven is a rewarding experience that connects you with traditional cooking methods and brings a unique flavor to your food. With patience and care, your oven will become a centerpiece for gatherings and a source of culinary exploration. Embrace the process, and soon you’ll enjoy the fruits of your labor, one perfectly baked loaf or pizza at a time.
We have more interesting oven ideas. Check out our propane tank pizza oven project next!