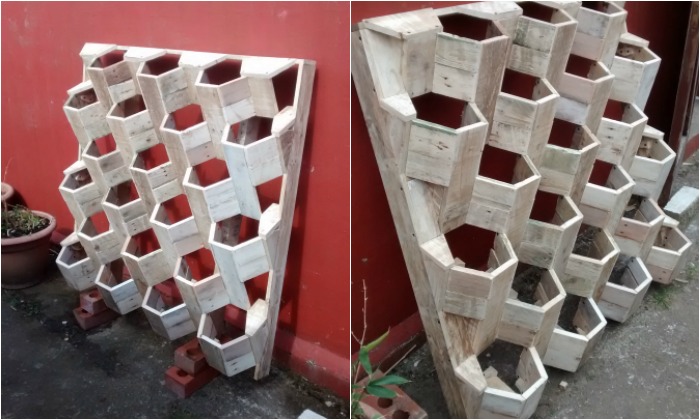
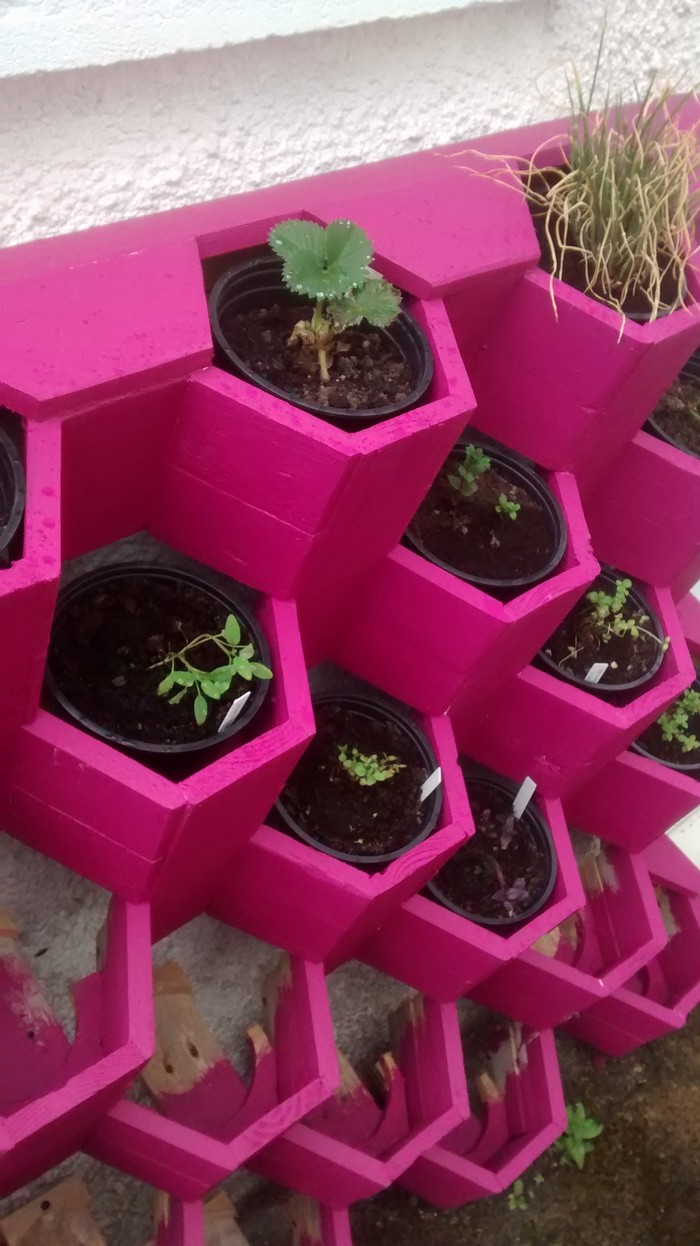
Forget about boring shelves for your herb garden and instead make this gorgeous vertical herb hive planter resembling a beehive! It will definitely look better in your garden.
No, this herb hive is not a 3D-printed structure but a DIY project designed by the owner-builder himself. You can DIY this herb hive too since he has shared the complete step-by-step tutorial which you’ll find below…
OK – we’ll admit this herb hive requires a little bit of patience and some proper tools to build. But this herb hive is a great project to tackle if you want to improve your woodworking (and math!) skills.
Now you don’t be intimidated as the tutorial is detailed, and it should guide you well and make it easy for you to follow. It even includes an explanation of how the owner-builder came up with the measurements.
To further make this DIY project easy for you, simply get the same size of pots that he got and follow the measurements indicated in the tutorial! 🙂

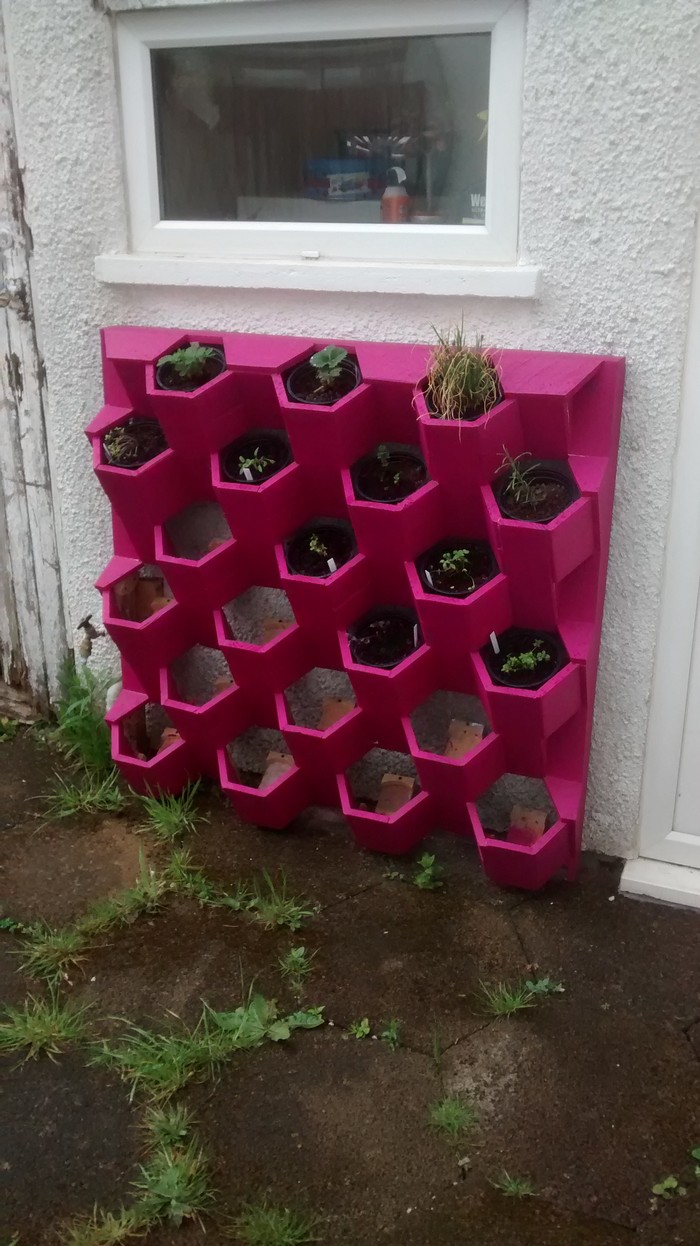
This herb hive is best mounted on a wall near your kitchen so it’s easy to get the herbs while you’re preparing the family’s meal!
Is this herb hive going to be your next project?
Get started on making your own Herb Hive and tell us about it. We’d love to know what you think about it.
Click on any image to start the lightbox display. Use your Esc key to close the lightbox.![]()

You’ll need these materials:
- 25 ft of 3-1/2″ x 3/4″ Board
- 70 ft of 2-3/4″ x 3/4″ Board
- 21 pcs of 6″ diameter pots
- Wood Glue
- Tack Nails
- Drywall Screws
- Wood Putty
- Paint or Varnish
And these tools:
- Measuring Tape
- Pencil/Marker
- Bandsaw
- Table Saw
- Wood Clamps
- Cordless Drill
- Sander
Steps to make a DIY herb hive:
Understanding the design: I barely understood my own herb hive design at this stage. If my wife was involved in this project she would have been asking all kinds of questions that I wouldn’t have been able to answer, and I’m sure the whole project would have turned out more complete, been easier to build, and looked neater come to the finish. However, she wasn’t – so I just put it together and dealt with my lack of planning when the herb hive occurred.
This herb hive tutorial has been written in some vague logical order, but this isn’t necessarily easy to visualize. If you are struggling, skip forward to assembly and take a look at the finished object.
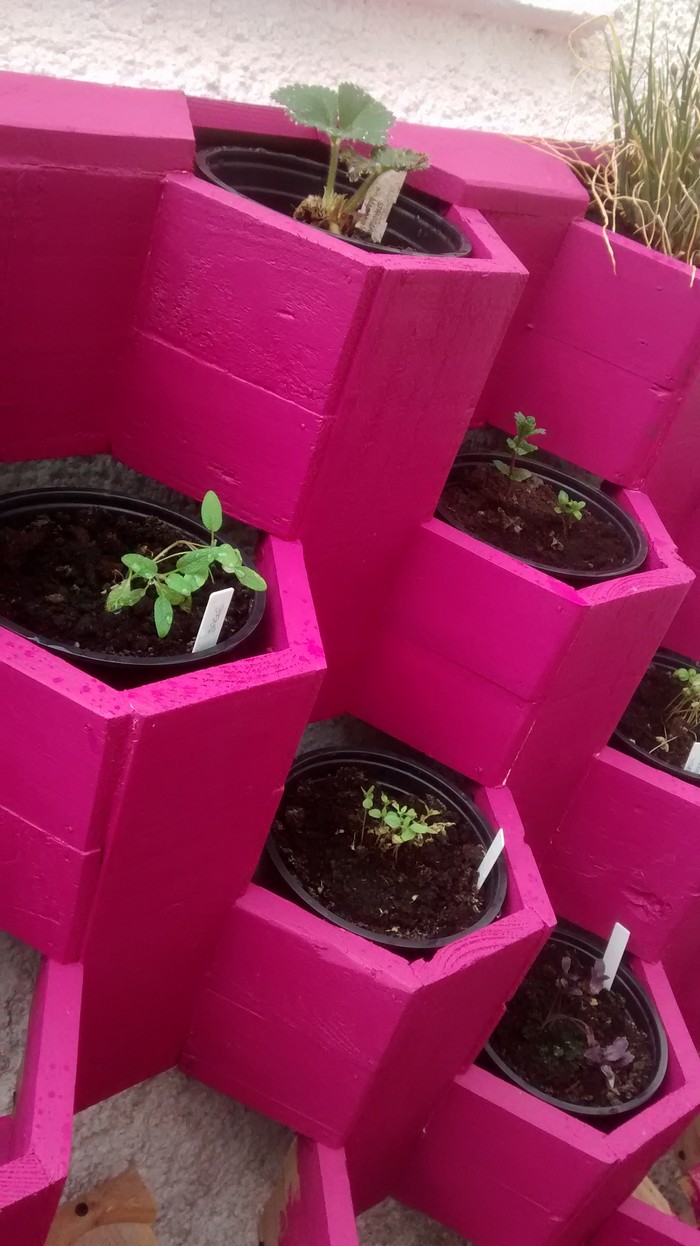
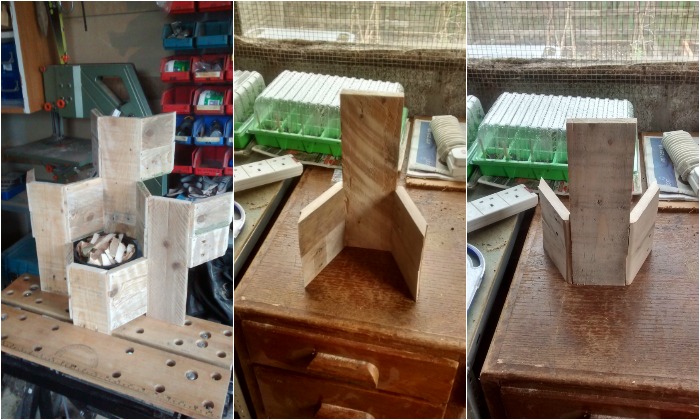
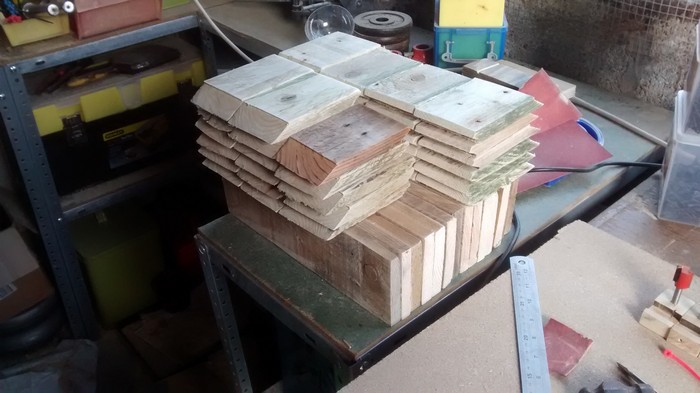
I built this planter by making 21 modules that screwed together to form the beehive shape. Each module was made out of 5 pieces of wood (one upright, and 4 side pieces). For 6″ pots, the sides of the hexes need to be 3.5″ (just take this as read, for now, I’ll explain why in an appendix-type step).
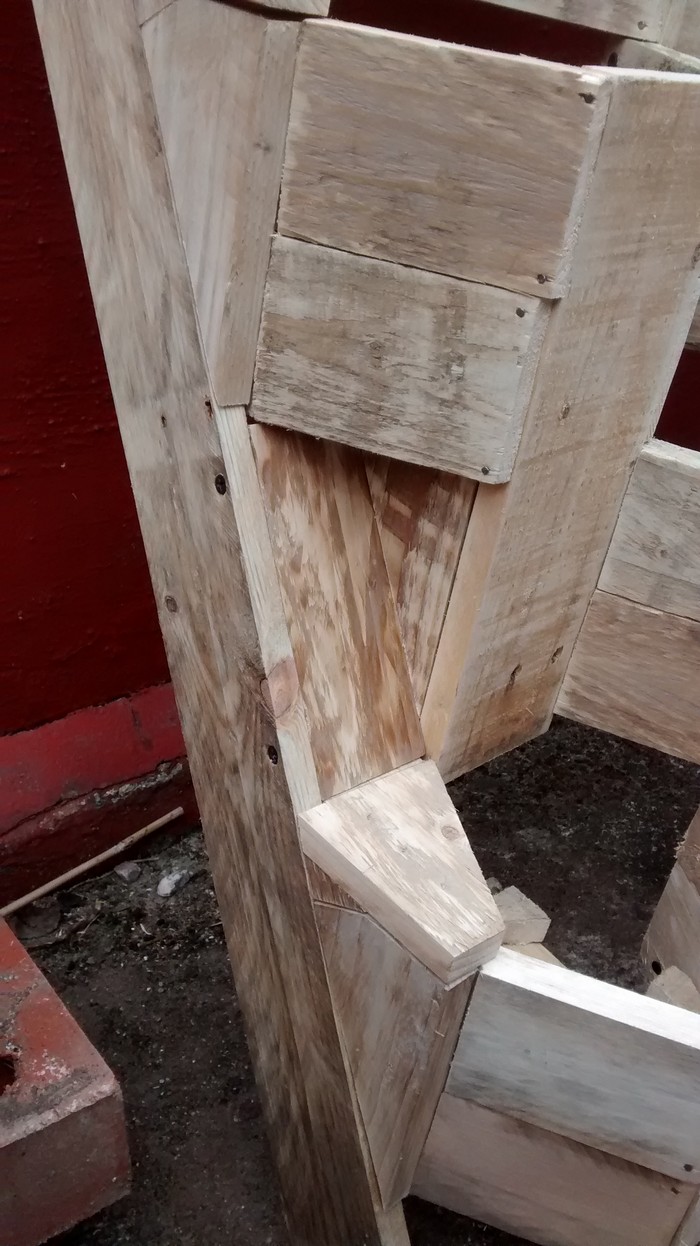
As the widest wood, I had for this herb hive project was 3.5″, this gave me no margin for any angled cuts on the sides of the uprights. This meant that instead of many 30-degree cuts, I needed to make half as many 60-degree cuts.
The pots I used are about 5″ tall, so two panels of my thinner stock are sufficient to cover that (2×2.75″ is 5.5″). The uprights need to be at least 11″ (twice the height of the sides) because the upright will cover two tiers of pots.
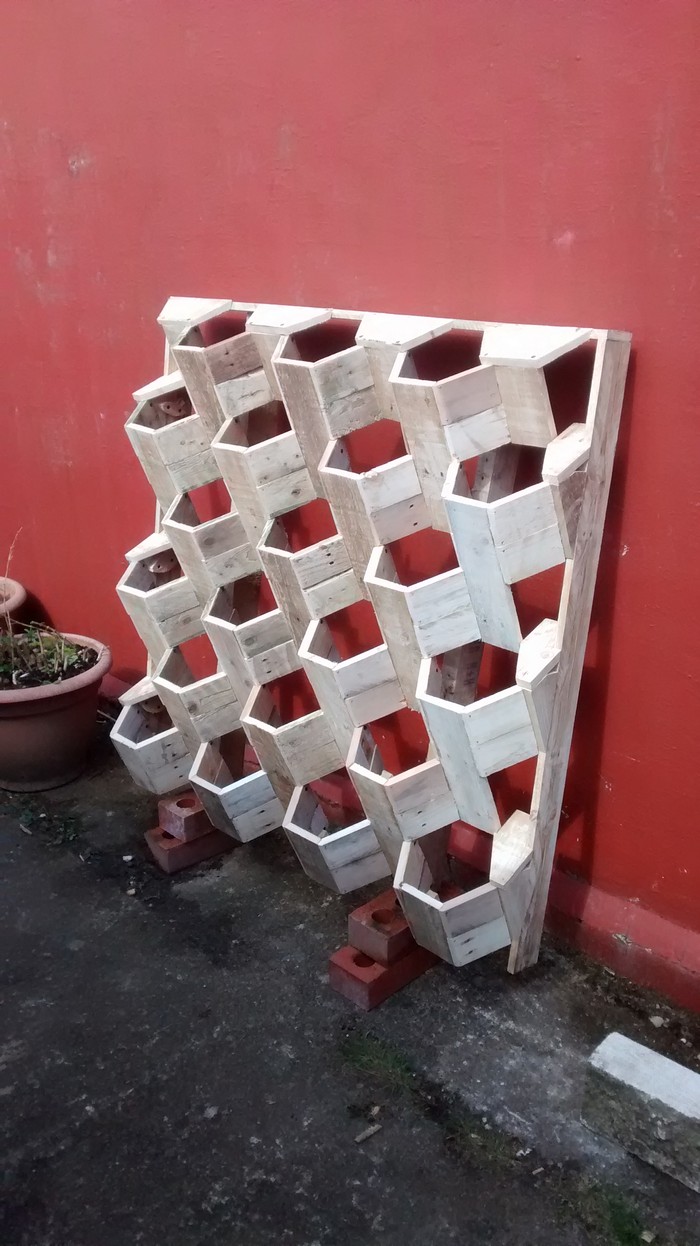
The sides of the herb hive needed to be a parallelogram shape with very sharp angles, to hold the uprights 3.5″ away from each other (see final photo for a view of the final profile). Happily, the lengths here resulted in the modules tilting by 30 degrees from the wall.
I did some maths (wait until that final step again) and worked out that the overall lengths of these bits would be 6.1″ (seems long, I know). I also wasn’t sure how I was going to make these angled cuts at this point, so I cut a few 7″ x 2.75″ pieces to test with (I could always cut some more off). I also made a couple of uprights (11″x3.5″).
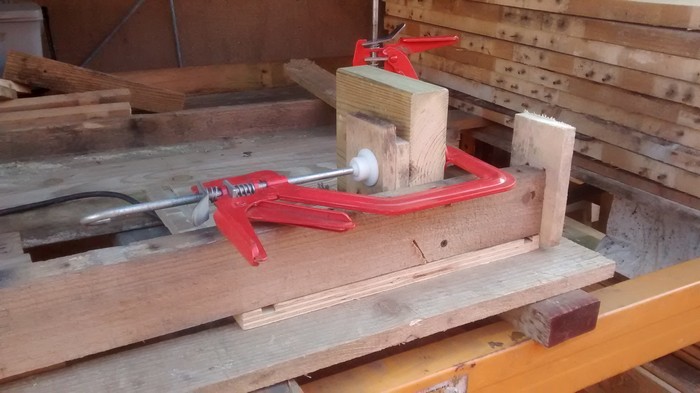
Making test cuts and test fitting: It took me a little effort and a few tries to build a sled/jig I was happy with to produce the cuts I needed repeatably.
It’s essentially a normal crosscut sled, with an upright screwed to it as close to the blade as I could get away with. To use it, I clamped the workpiece between a sacrificial board and the upright. The sacrificial board is to avoid clamp marks on the work piece and to stop it from splintering more than necessary.
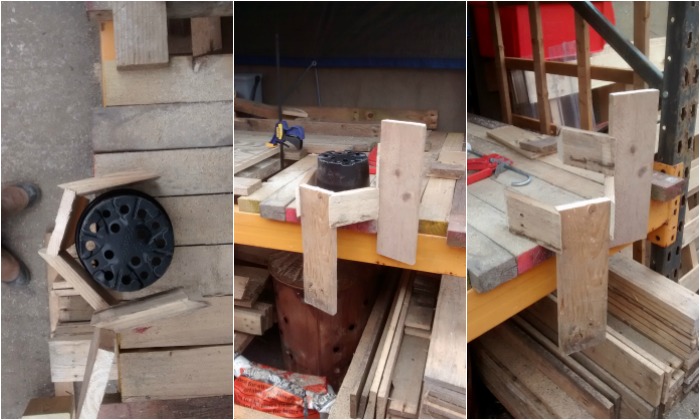
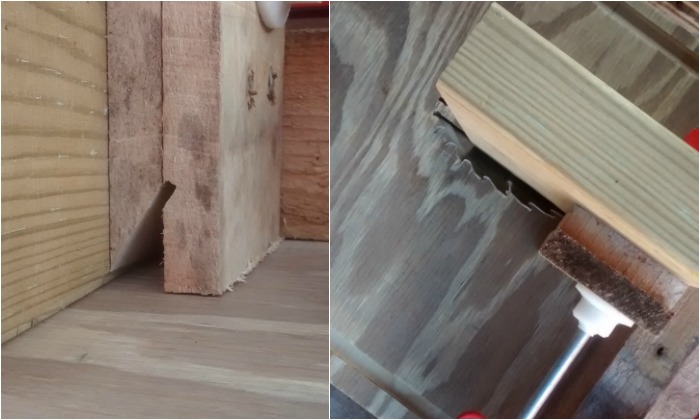
This sled worked admirably, and produced me an angled piece that was about half an inch too long (so I cut the rest of my 2.75″ stock at 6.5″ rather than 7″) and had a rather useful (if accidental) geometry.
My circular saw didn’t reach all the way through the workpiece and left a lip at the end of the angled cut. This allowed me to repeatably seat all of the modules of the herb hive. A happy accident indeed. Fitting these bits together showed me that the side pieces of the herb hive also protruded past the front of the uprights, so they would need slicing off.
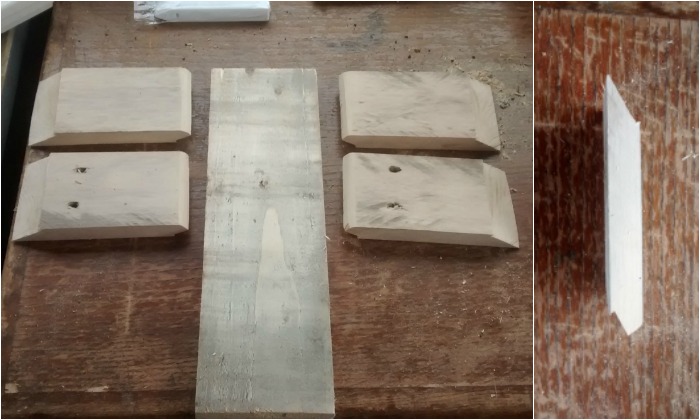
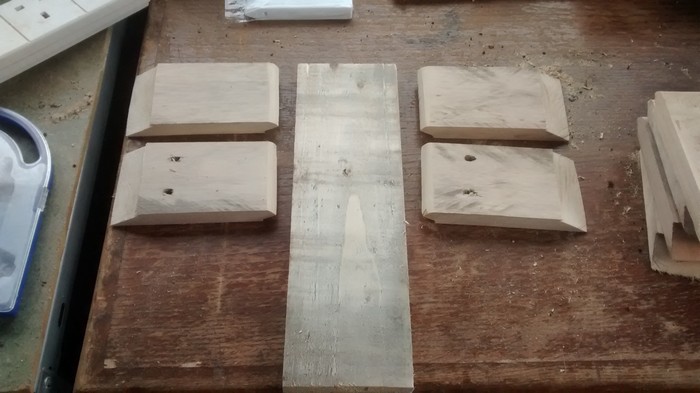
For each unit of the herb hive, I needed 1 x 11″ by 3.5″ piece, and 4 x angled pieces. Each angled piece started out at 6.5″ by 2.75″, then two 30-degree angled cuts were made, and then a final cut to make the front angle flush with the level of the upright.
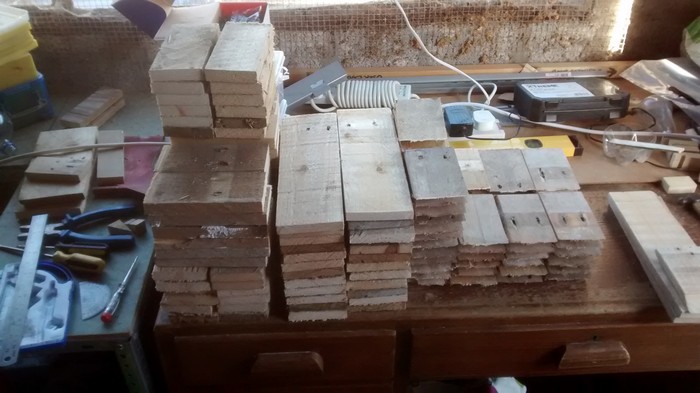
Cut, cut, cut… Sand, sand, sand: This took an age and a half… easily the longest step in time for building a great herb hive, but there isn’t too much to say here.
I made all of these cuts on my table-saw, with the help of some sleds. This made it quicker and easier than it would otherwise have been to make clean, repeatable, consistent cuts. I only needed to measure once (then cut, and check before doing 80 cuts wrong). You could do these by hand I’m sure (though I don’t know how I’d do the angles).
I also made a good stack of more 6.5″ by 2.75″ pieces than I needed, because I got carried away, but they came in useful later. When you make this many cuts (at least 100 slices, plus 160 angled slices) it’s easy to become complacent.
Be careful, be gentle, and be focused. If it’s getting dark, stop. If you feel thirsty, stop. If you need the loo, stop. Getting it done 5 minutes quicker is no good if you lose a finger. Power tools are dangerous. But to be fair, so are hand tools.
Once all your cuts for the herb hive project are done, clean all those bits of wood up! I knew I was going to paint/varnish mine, so I wanted a good, smooth finish. Again, it is easy to skin yourself here. Be patient, take your time, and have a cup of tea when you need one.
It’s nice to see the change in the material at this point. The herb hive projects seem to come together for me at this stage.
Continued Page 2…