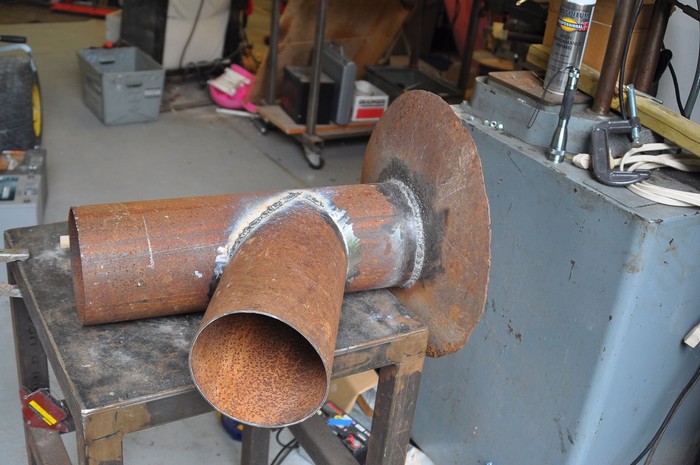
Welding: Weld together the vertical and feeder pipes.
That’s easiest to do with both pipes laying flat and sideways. Weld around one side, then flip it over and weld the other side.

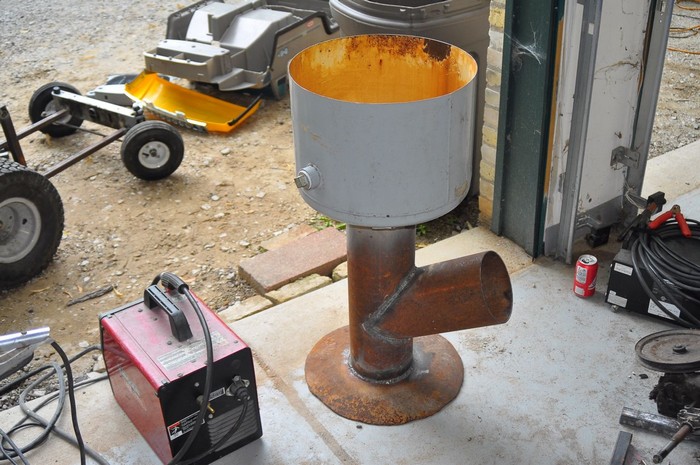
Next, stand the Y of the pipes on top of the base. Make sure it is centred, and that it is plumb and level. Weld the pipes to the base. (Make sure to always brush down the metal where you will be welding, and where the ground clamp connects.)
The bottom of the water tank needs a hole cut in it, the same diameter as the vertical pipe. Mark that diameter hole on the bottom. One way to do that is just to set the other parts right on top of the tank and trace it.

Then cut the hole at the bottom of the tank. I had a plasma cutter at a friend’s house, so I used that. Otherwise, a cut-off disc, Sawzall, or large diameter hole-saw would also work.
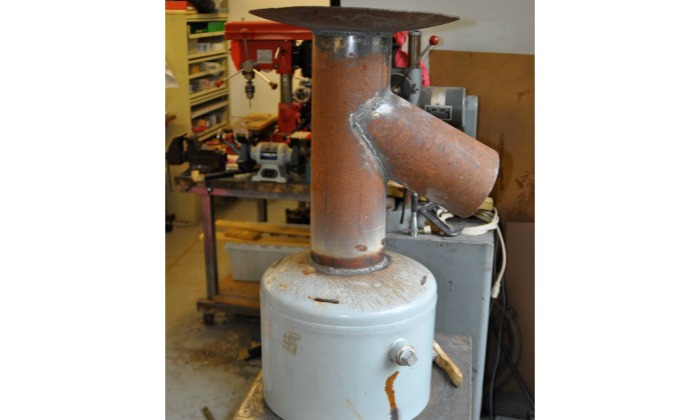
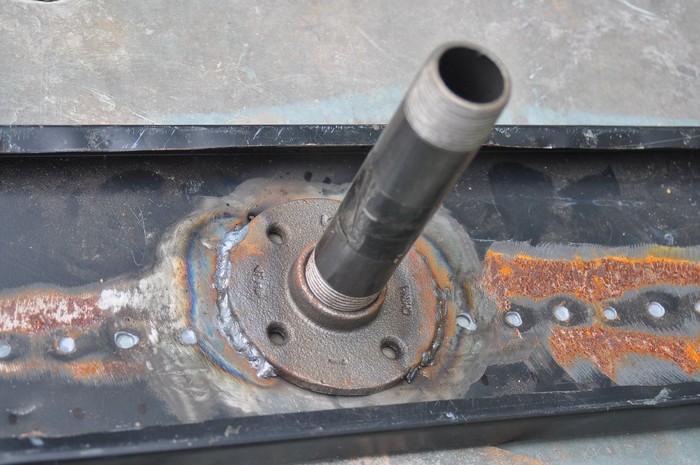
Stack the whole rocket grill together upside down and weld the vertical tube to the water tank section. Again, make sure the parts are plumb and level. If there is a “front” to the water tank, make sure it’s where you want it to be. On mine, there were two pipe ports that I wanted to be placed left and right, with the feeder tube on an angle to my right as I faced it.
At this point, the basic rocket grill is done, but we still need the lid and a few other details.
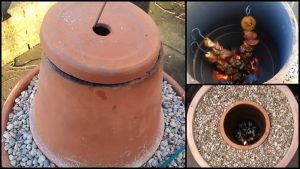
Fuel/Air Plate: Another distinct feature of the Rocket Grill is the Fuel/Air plate.
The rocket grill holds the fuel up and in place, it allows plenty of air to naturally draft into the rocket grill and up through the fuel for a very hot and clean burn.
The plate needs to be able to hold up to high temperatures.
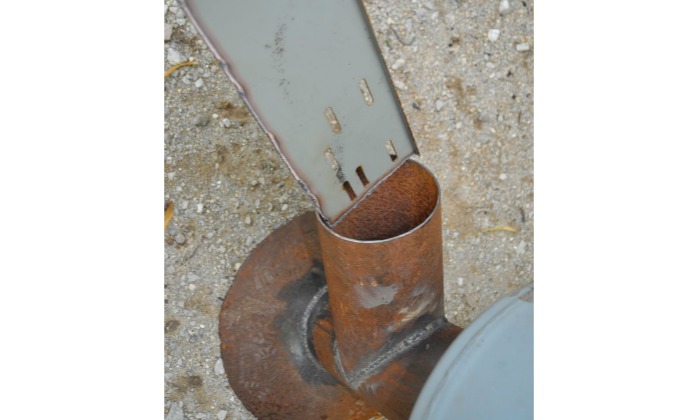
Take some scrap steel plate and cut it to a width just slightly smaller than the diameter of the feeder pipe, and about the same length. This way, the plate sits INSIDE the feeder pipe and divides it into an upper and lower area.
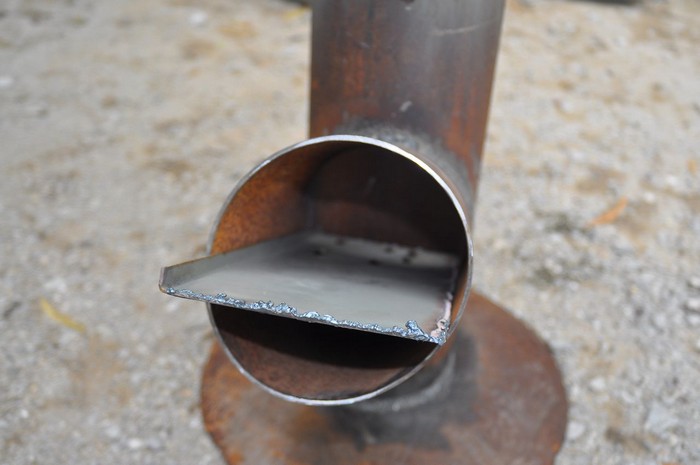
The fuel of the rocket grill goes in ABOVE the plate, and air goes in BELOW the plate.
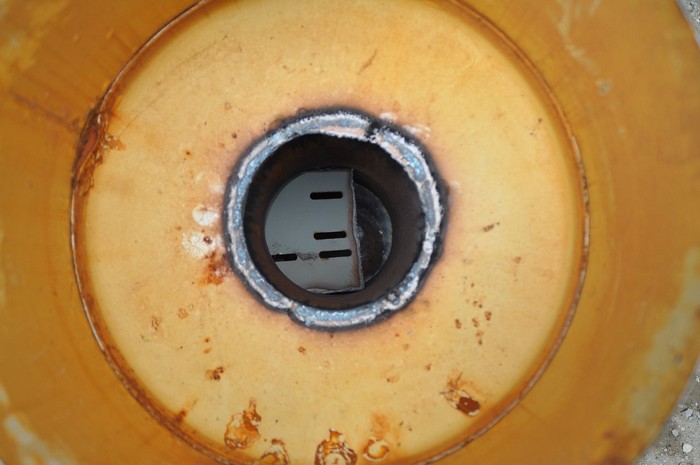
The plate has holes or slots in it at the far end so that it supports the fuel, but allows plenty of air through. The plate I used was already slotted, but I added a few more for good measure.
You could also use a heavy-duty grate, or weld together a re-bar to serve the same purpose.
When you are ready, just slide the plate into the feeder tube. Gravity and friction will hold it in place for you.
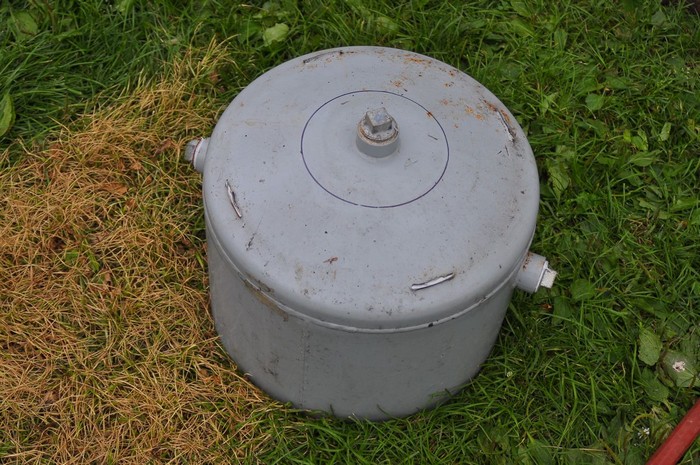
Building the lid of the rocket grill: When I cut the water tank apart, I also cut off the top and saved it for use as a lid.
It’s already the same diameter as the top of the rocket grill, so it should fit perfect. It really just needs two modifications, a handle, and a way to let air through.
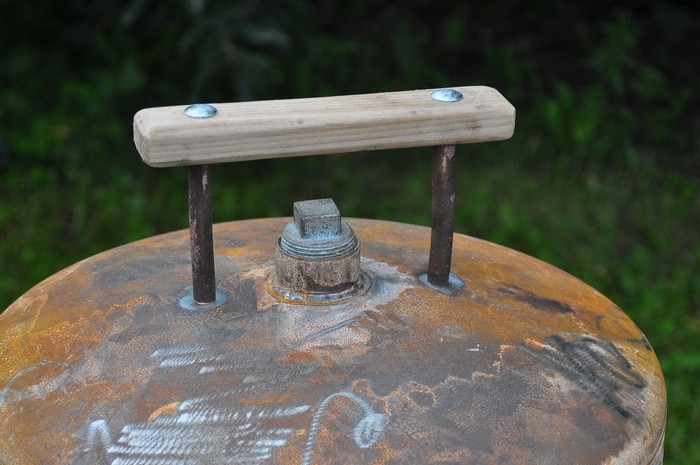
The Handle: The length and width of the handle is based on the size of the user’s hand, preferably with enough room for an oven mitt.
I found a scrap of Oak firewood, about the right diameter for a handle, and left it long to start with. I could always shorten it later.
Drill two holes in the wood, and push the carriage bolts through. Use these to mark where they should go through on the lid. Drill two holes in the lid.
Cut two sections of pipe a little shorter than the length of the carriage bolts. These will be spacers to hold the handle the right distance from the lid. I had some scrap copper pipe around, which is easy to cut and looks very nice.
Slide a washer and then the pipe over the carriage bolts, and then the carriage bolts into the holes in the lid. On the bottom side of the lid, attach washers and nuts, and then tighten.
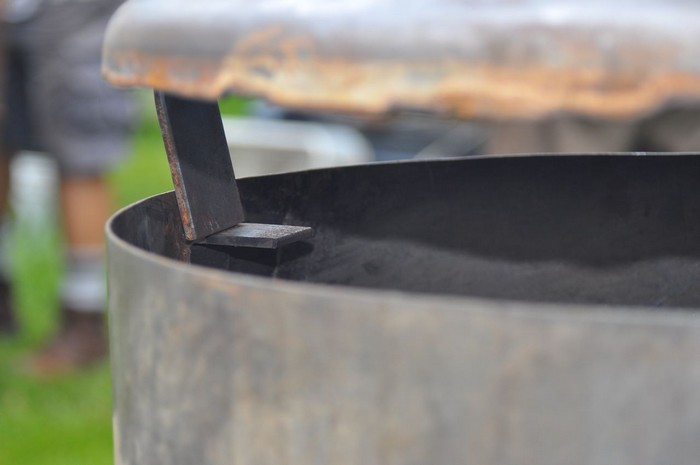
Air Spacers: The lid also needs some way for hot air to constantly exit the grill to continue the chimney effect.
You could make a vent, similar to one Weber brand grill, or even make some sort of chimney right on the lid, but it seemed much easier just to add some small steel tabs. These tabs space the lid away from the grill to allow airflow.
I cut three steel tabs from scrap metal and welded them evenly around the lid.
On the inside of the grill, I welded in three matching tabs that line up with the ones on the lid. Three tabs prevent the lid from wobbling.
By simply rotating the lid a little, it can sit still all the way down to the grill (such as when you are done with the grill and want to smother it, or for storage).
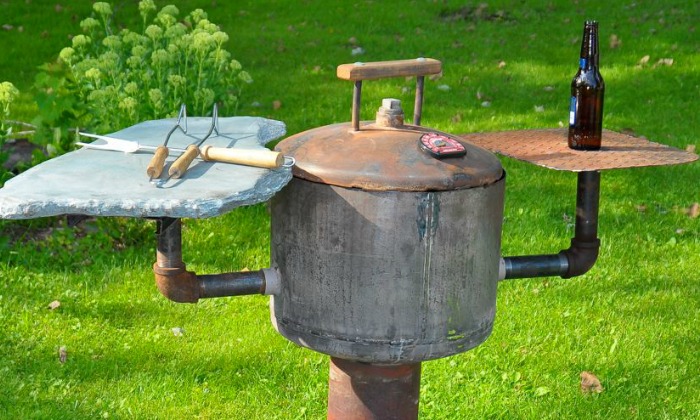
Side tables: What’s a grill without some workspace to hold your utensils, your plate of meat, and your favourite beer? That’s why the grill needs side tables.
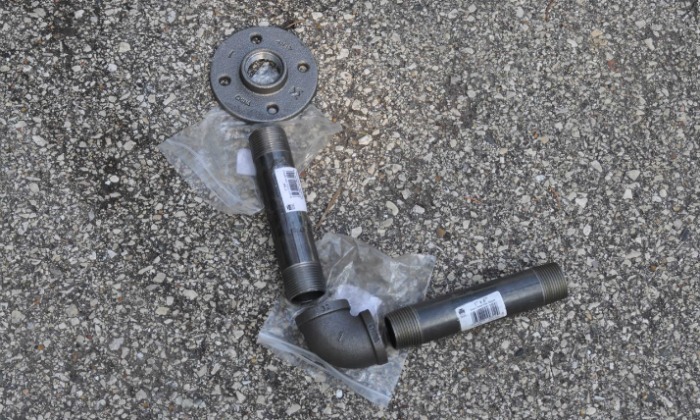
The water pressure tank used to make the top of the grill, included pipe connections on the sides. I purchased just a couple of short sections of pipe and elbows so that these could support the side tables.
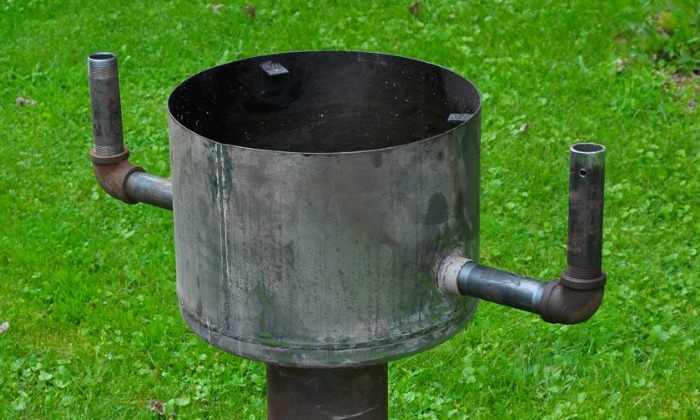
I threaded in a horizontal pipe into each side, then a 90-degree elbow into that, A vertical pipe section then completes an “L” on either side of the grill.
Both side tables have a pipe flange going to a short piece of pipe SMALLER in diameter than the vertical side pipe. That way, the side table pipe sits INSIDE the vertical pipe.
This makes it easy to remove the side tables for travel. Drilling a hole through both pipes allows me to slide a small bolt through, preventing the side table from accidentally rotating.
Continued Page 3…