Test tubes are commonly used in scientific experiments because they are transparent and sealable, allowing for easy observation and heating of contents on a Bunsen burner. Typically, they are made from Borosilicate glass, which is ideal for withstanding high temperatures and resisting chemicals. While plastic test tubes are available, they aren’t suitable for heating.
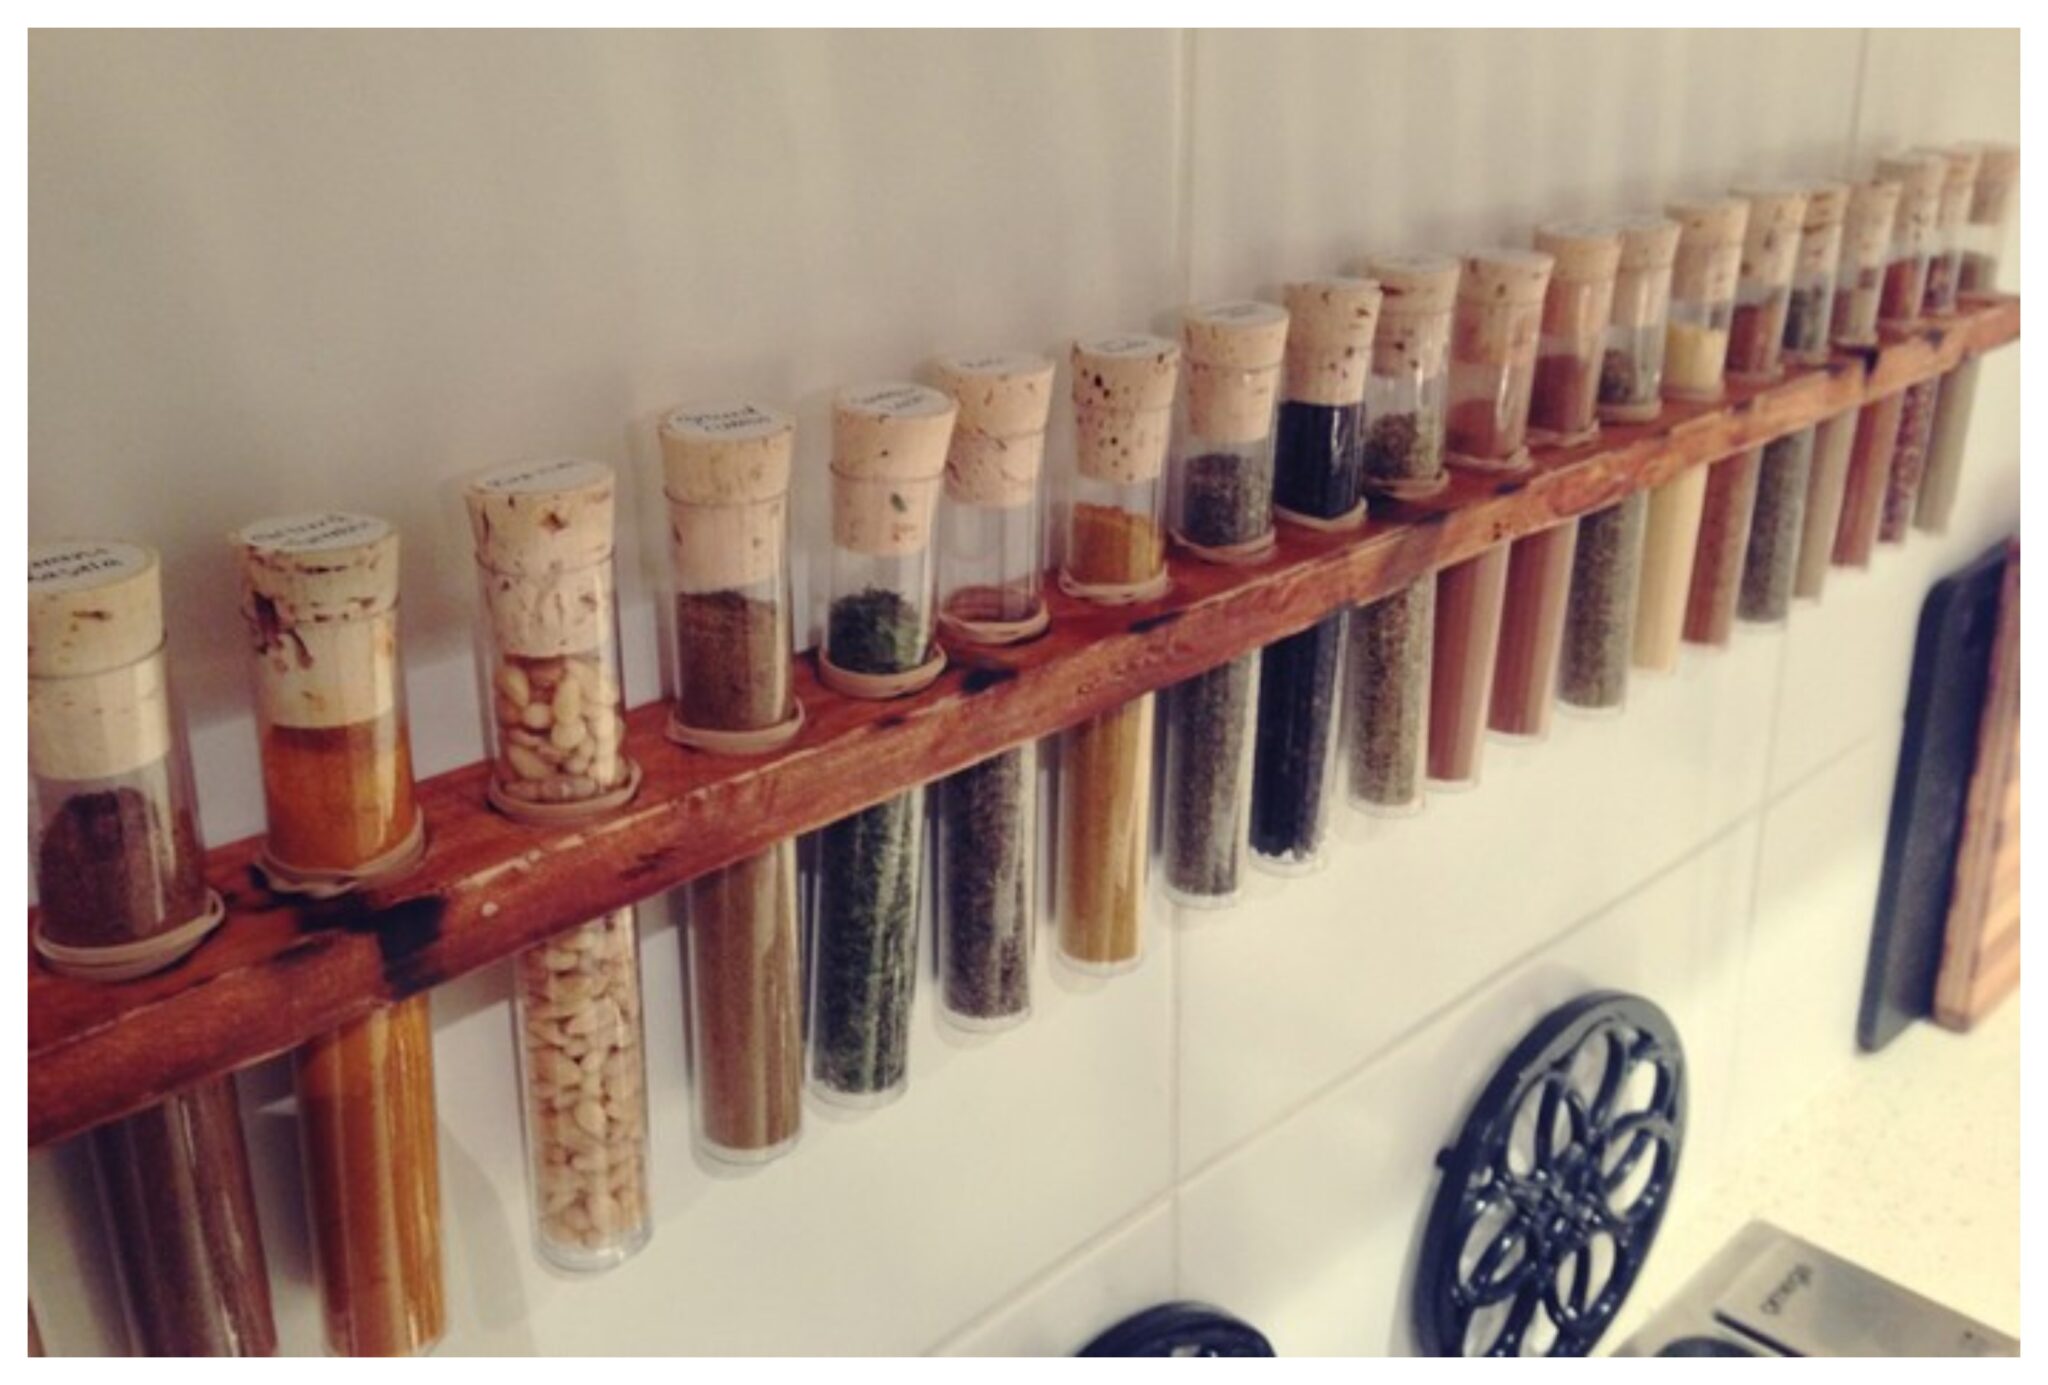
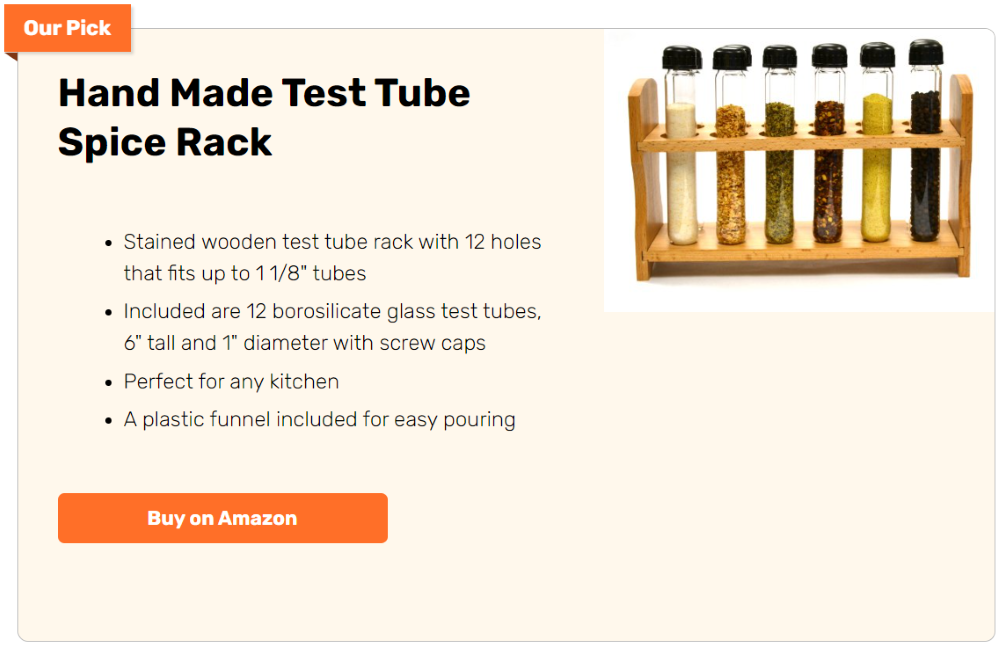
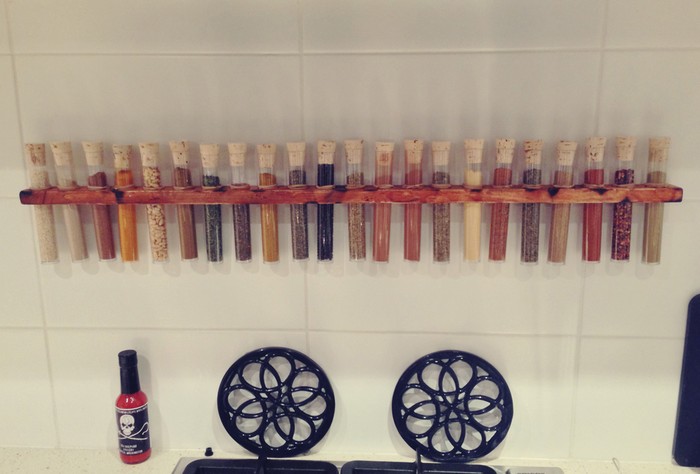
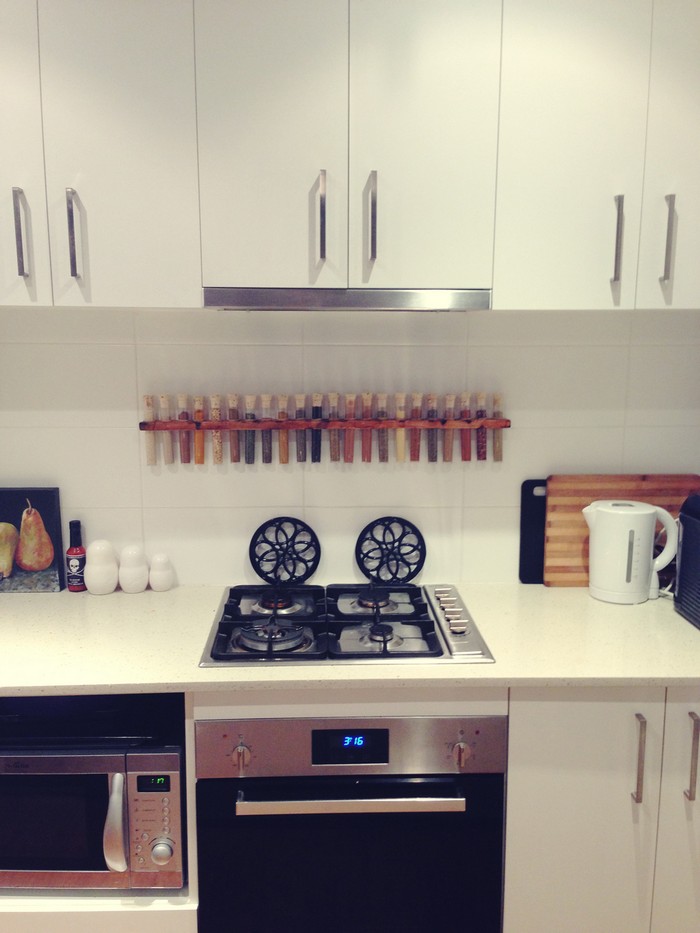
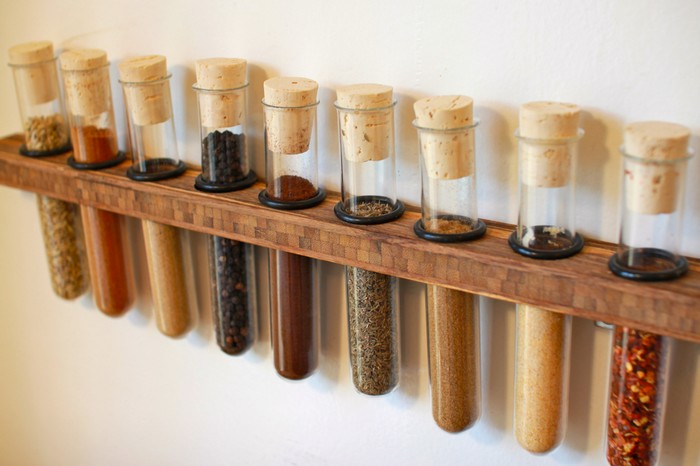
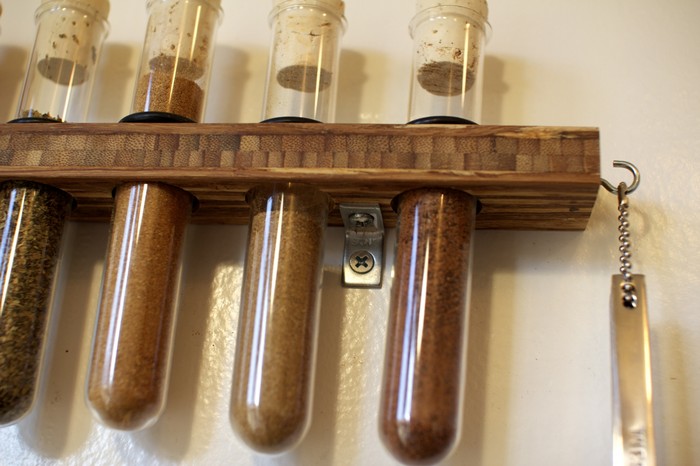
Surprisingly, test tubes can be repurposed outside the lab, but they make fantastic spice racks! They’re perfect for small kitchens, offering a stylish and accessible way to store spices. Imagine transforming your kitchen into a science lab with a DIY test tube spice rack! You can find these racks in stores, which may cost hundreds of dollars. You can make your own at less than a hundred bucks.
An organized spice rack is essential if you love cooking with spices. However, high-quality racks can be pricey and hard to find. That’s what makes the DIY test tube spice rack so appealing. You can find all you need at a nearby store. This project is not unique and affordable but also quick and easy, perfect for a weekend activity. You just need some leftover timber and enough test tubes for all your spices.
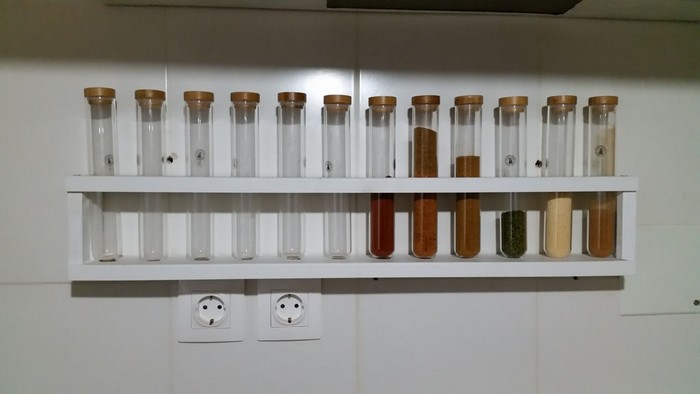
If you’re looking for a storage solution for your spices that are a bit more spacious than the average bottle, large test tubes are also available. You can usually fit the contents of a 35-spice bottle into a single test tube, making it a great way to save space in your kitchen. Plus, the clear glass material makes it easy to see which spice you need, so you can grab it and get cooking without any hassle.
Indeed, this is a beautiful, convenient, and space-saving idea perfect for storing your spices!
Contents
Crafting a Test Tube Spice Rack
Materials
- Test Tubes with Cork Stoppers
- Rubber Bands or O-rings
- Piece of wood
- Sandpaper
- Wood stain
- Bonding Tape (for mounting)
Tools
- Drill (with spade drill bit)
- Hammer
- Lighter
- Paintbrush
- Ruler and Pencil Marker
Instructions
Step 1: Marking Your Wood
- Grab your ruler and pencil to mark where you want your test tubes to go on the wood. Space them out evenly to keep things looking tidy.
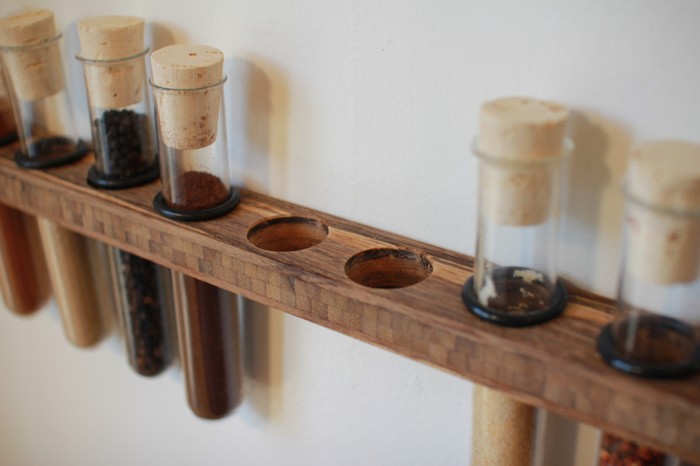
Step 2: Drilling Time
- Fit your drill with the spade bit. Make sure it’s just a bit wider than your test tubes so they’ll fit snugly.
- Drill down at each pencil mark. Be careful to not go deeper than your test tubes.
Step 3: Sanding
- Smooth out all the surfaces with your sandpaper, paying extra attention to the edges of the holes. You want everything nice and smooth to the touch.
Step 4: Staining the Wood
- Dip your paintbrush in the wood stain and paint your piece evenly. Get right into those holes too.
- Let the stain dry completely. It might take a while, but it’s worth the wait for that finished look.
Step 5: Get Those Test Tubes Ready
- Place a rubber band or O-ring around the bottom of each test tube. This is what’ll keep them from sliding all the way through.
Step 6: Test Tubes In
- Insert each test tube into the holes you’ve made. They should fit perfectly if your measurements were on point!
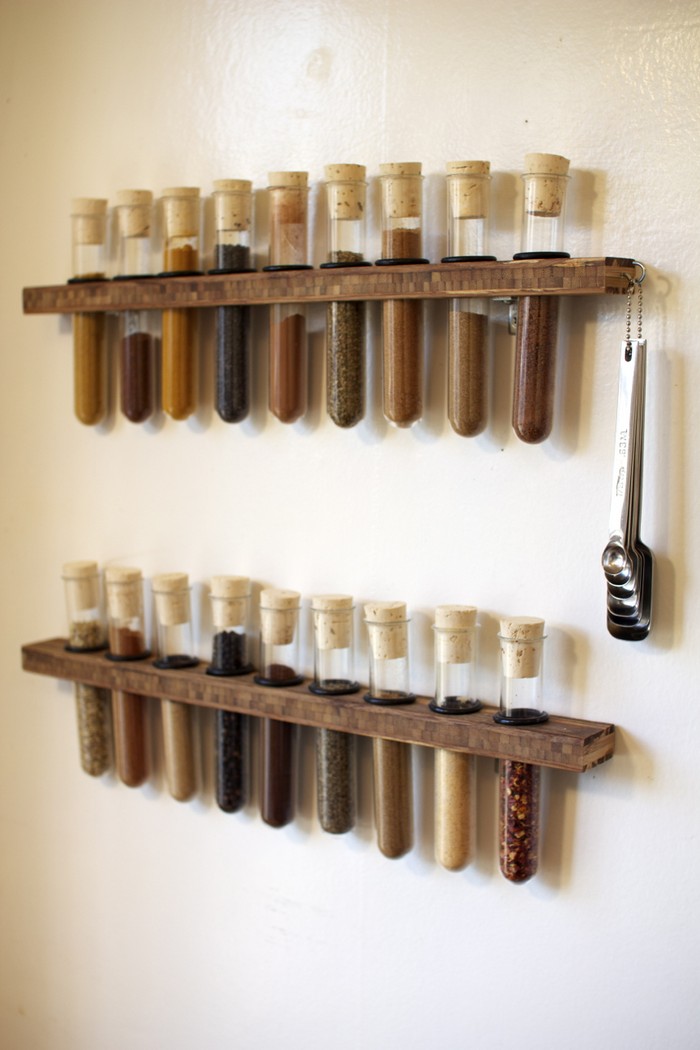
Step 7: Mounting Your Rack
- Think about where you want this spice rack to live. Once you’ve got the perfect spot, attach the bonding tape to the back of your wood.
- Press it firmly against the wall or cabinet to make sure it sticks well.
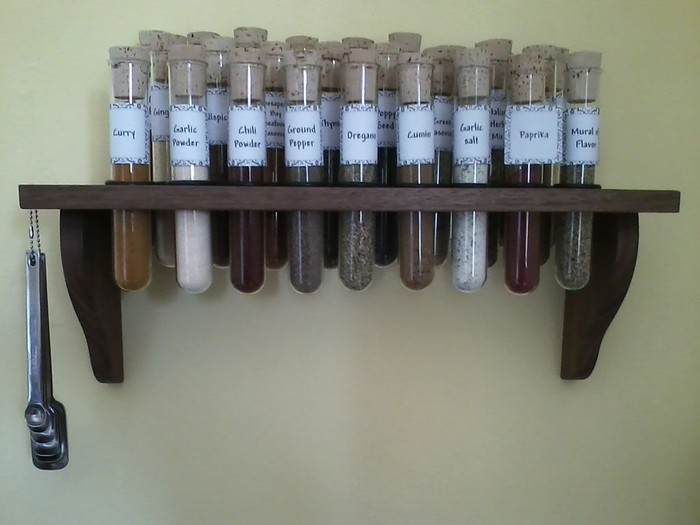
Step 8: Filling Up
- Use a funnel to pour spices into each test tube. This keeps things neat—no messy spice spills!
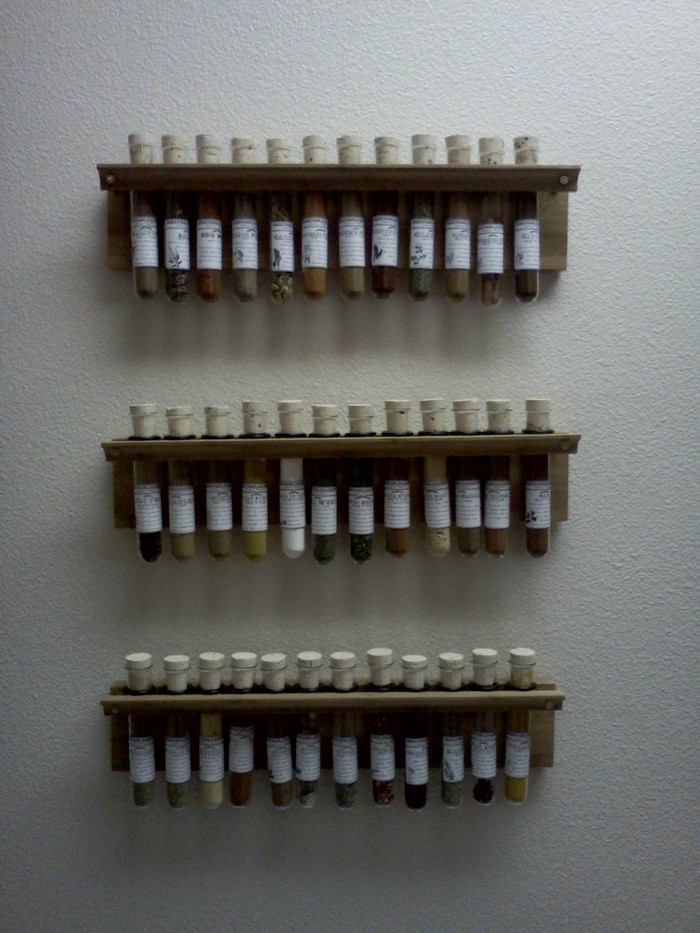
- Label each one so you’ll know exactly where to reach when you’re cooking.
Step 9: Ready to Use
- Take a step back and admire your handiwork. Your new spice rack is not only functional but also adds a cool, scientific vibe to your kitchen!
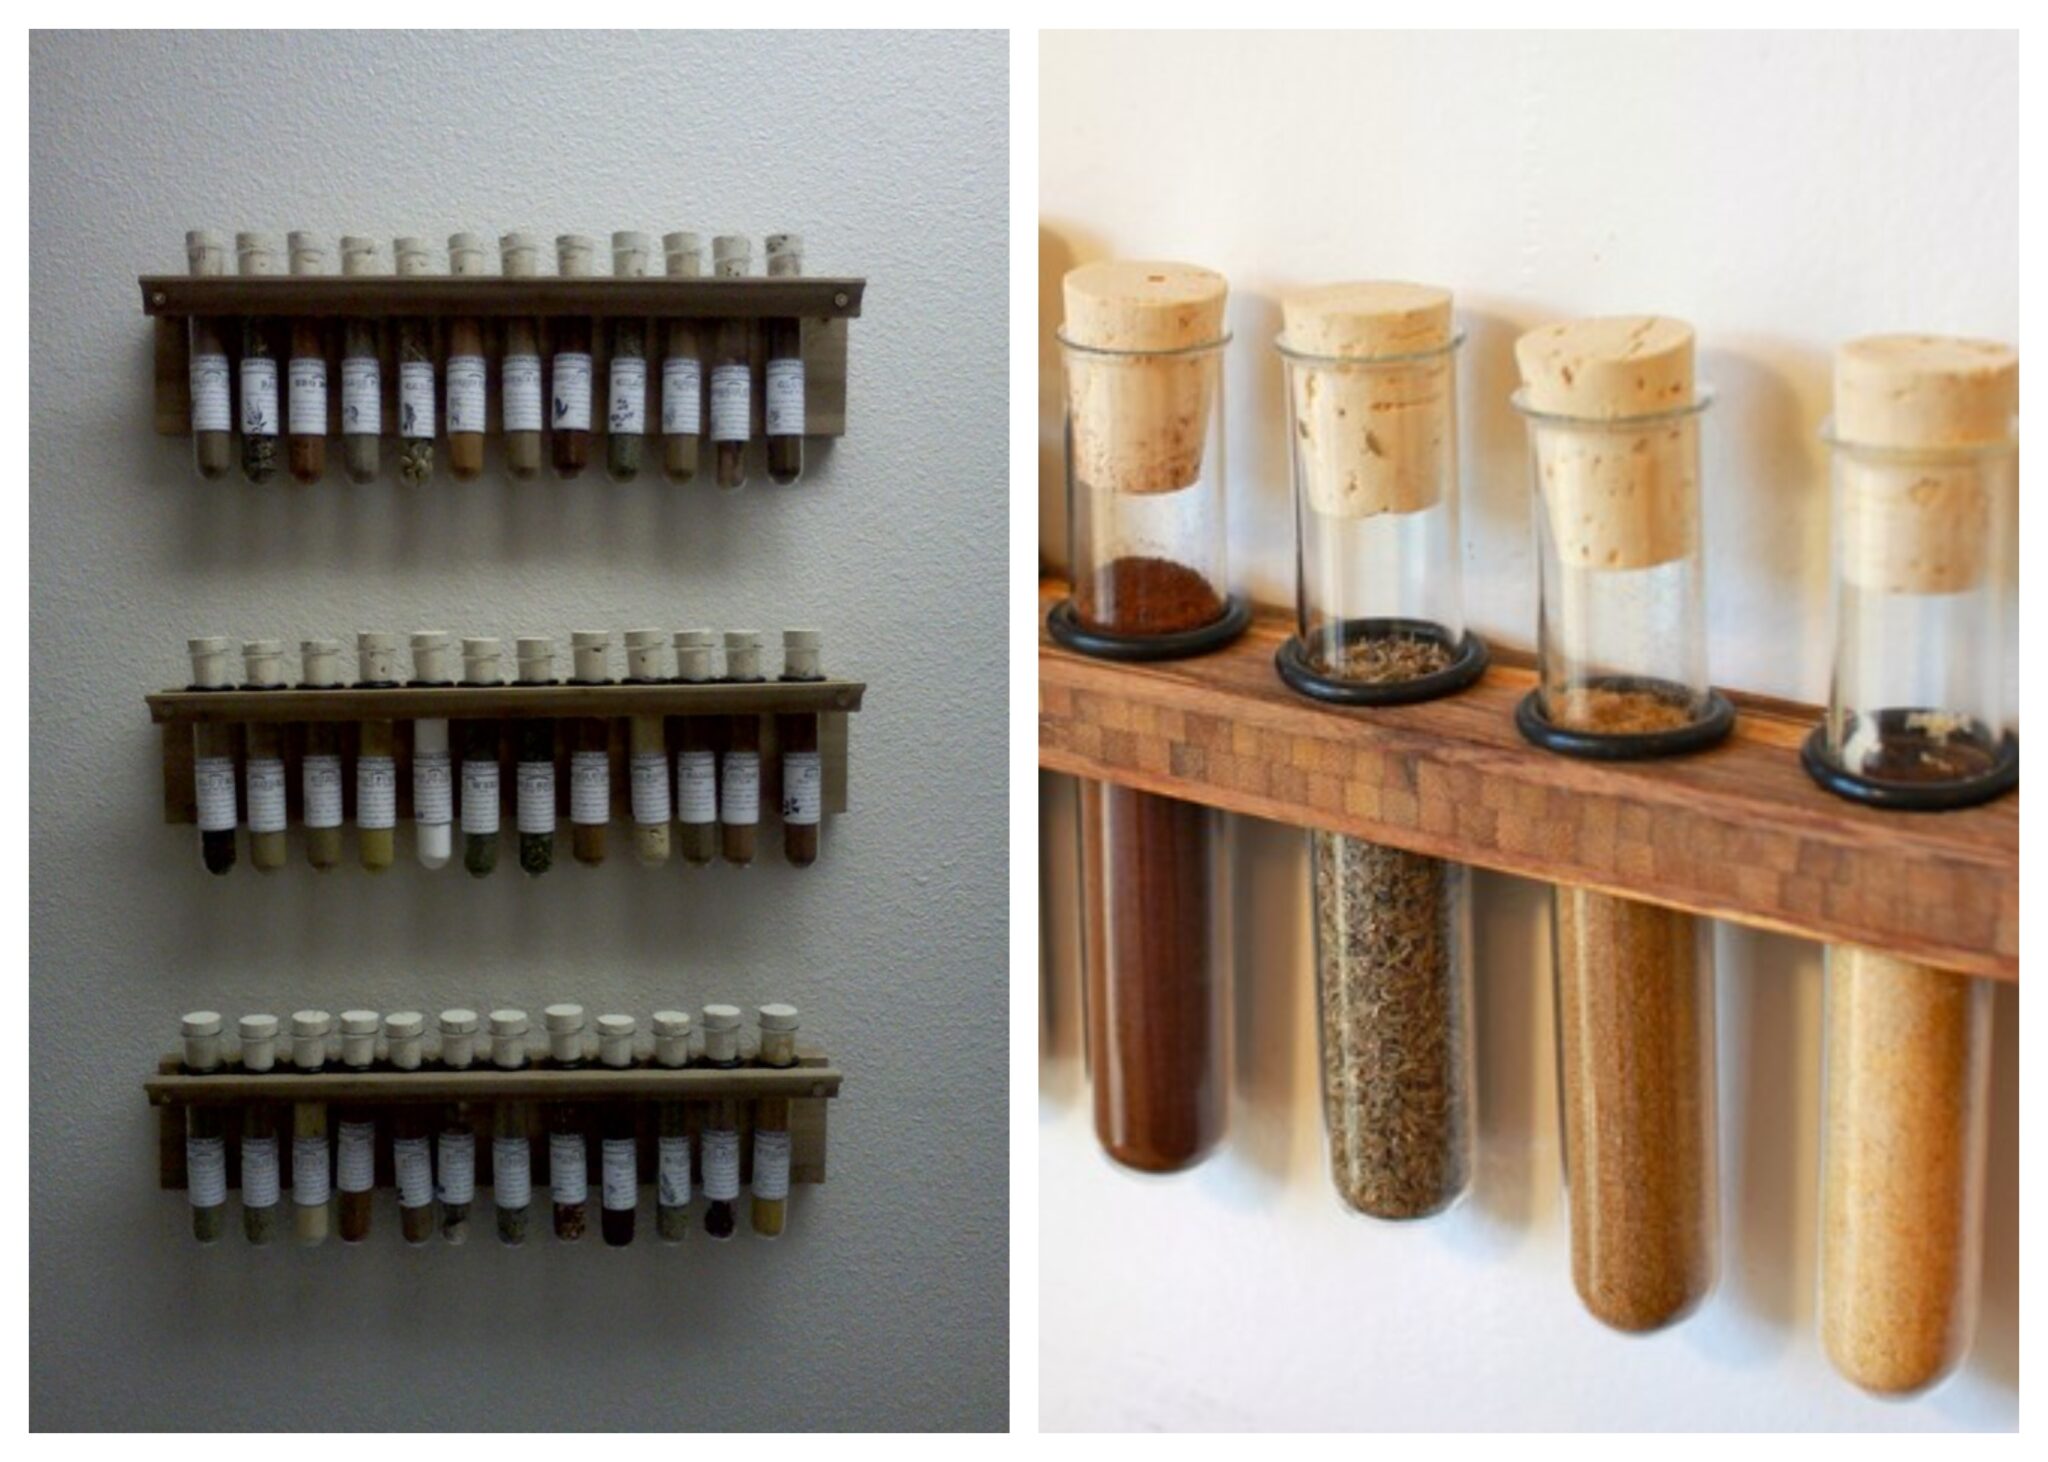
Click on any image to start the lightbox display. Use your Esc key to close the lightbox. ![]()


Thanks to helloyounglionsxo for this great project. You can get more step-by-step instructions here…
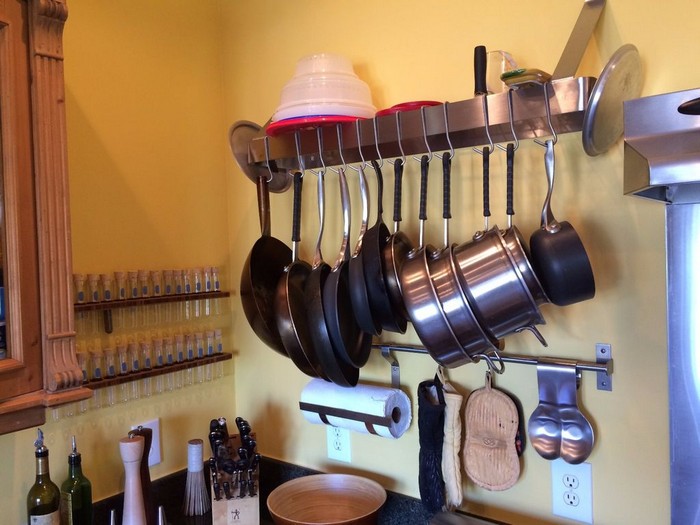
Alternative Uses for Test Tube Racks in Kitchens
Test tube racks aren’t just for laboratories; they’re versatile tools that can enhance the functionality and style of your kitchen. Initially repurposed for spice storage, test tube racks have proven their utility beyond just holding spices.
Let’s explore some creative and practical ways to use test tube racks in your kitchen.
Herb Garden Holder
Grow Your Own Herbs: Test tube spice racks can be repurposed to create a mini herb garden right on your kitchen window. Fill each test tube with water and add cuttings of herbs like basil, mint, or rosemary. It’s a fresh, green touch that’s also incredibly handy for cooking.
Loose Tea Organizer
Organize Your Tea Collection: If you’re a tea lover, use a test tube rack to organize and display your loose tea leaves. The clear test tubes not only keep your teas fresh but also add a visually appealing element to your kitchen decor. Just like with a test tube spice rack, you can see exactly what you have at a glance.
Infused Oils Display
Infuse and Display Oils: Test tube racks are perfect for storing and displaying homemade infused oils. Fill the tubes with oil and your choice of herbs or spices, and let the infusion work its magic. The rack will hold them beautifully on your countertop, making it easy to grab the right flavor when cooking or dressing salads.
Kitchen Utensil Holder
Store Small Utensils: For kitchens where space is at a premium, a test tube spice rack can double as a storage solution for small kitchen utensils, like skewers, toothpicks, or stirrers. It’s a creative way to keep these items organized and within easy reach.
Grain and Seeds Dispenser
Store and Pour Grains and Seeds: Use test tubes and their racks to store grains, seeds, or even baking beads. They’re particularly useful for items you need in small quantities, like sesame seeds or chia seeds. The test tube spice rack becomes a functional and decorative element in your kitchen.
Dessert Server
Serve Desserts in Style: Test tube racks can turn into a unique serving piece for individual dessert servings, such as chocolate mousse, layered fruit parfaits, or yogurt. It’s an unexpected and charming way to impress guests during dinner parties.
By rethinking the use of everyday items like test tube racks, you can add both function and flair to your kitchen. Whether it’s storing spices or serving desserts, the versatility of a test tube spice rack can be leveraged to make your kitchen both more organized and more interesting.
Tips for Choosing and Using Spices
Spices are the backbone of flavorful cooking, and how you choose and store them can make a big difference in your culinary creations. Using a test tube spice rack not only keeps your spices organized but also adds a touch of style to your kitchen.
Here are some tips to help you select and use spices effectively, making the most of your test tube spice rack.
Selecting Quality Spices
- Buy in Small Quantities: Spices lose their potency over time, so it’s best to buy them in small amounts. Storing them in a test tube spice rack means you can keep smaller quantities visible and fresh.
- Choose Whole Spices When Possible: Whole spices tend to maintain their flavor longer than ground spices. You can grind them as needed and store them in your test tube spice rack for immediate use, ensuring maximum freshness.
- Know Your Sources: Purchase spices from reputable sources that offer high turnover to ensure freshness. High-quality spices might cost more, but the flavor payoff is worth it.
Storing Spices
- Keep Away from Heat and Light: Store your test tube spice rack away from direct sunlight and heat sources like the stove. These elements can degrade the quality of spices quickly.
- Use Airtight Seals: Ensure your test tubes have cork stoppers or airtight seals to keep the spices from getting stale. The test tube spice rack is perfect for maintaining airtight conditions.
- Label Clearly: Use clear labeling on each test tube in your rack to keep track of what’s inside and when it was stored. This helps in using the oldest spices first and keeping your inventory fresh.
Using Spices
- Toast for Enhanced Flavor: Before adding them to your dishes, toast whole spices in a dry pan. This step releases their essential oils, boosting the flavor profile before grinding and adding to your test tube spice rack.
- Mix Your Own Blends: Experiment with creating your own spice blends. Store these custom blends in your test tube spice rack for unique flavors that aren’t available in stores.
- Refresh Your Stock Regularly: Spices don’t have an indefinite shelf life. Refresh your spice stock every six to twelve months, especially for ground spices, to keep the flavors in your dishes vibrant.
You can greatly enhance your cooking by carefully selecting, storing, and using spices. A test tube spice rack not only organizes your spices beautifully but also keeps them at their aromatic and flavorful best.
Conclusion
Building your own test tube spice rack is a creative and practical project that adds a unique touch to any kitchen. It allows you to keep your spices organized and within easy reach, enhancing both the functionality and aesthetics of your cooking space. With just a few materials and some simple steps, you can create a stylish spice storage solution that showcases your culinary spices beautifully.
Are you still looking for a great spice rack for your kitchen? Check out our guide on the best spice racks in the market.