Isn’t it nice when you get to work on your project with all the needed tools readily available? When you don’t have to stop to find the tape measure or the screw that fell of the ground? An all-in-one handy tool is the perfect idea. It makes the job faster and less tiring.
Right now, there hasn’t been any tool invention yet that would change form when you try to command ‘screw driver!’ or ‘tape measure!’ But we have found a pretty close idea. This really comes in handy especially when working on quick and easy projects!
This hammer also serves as a nail holder, a screw driver, a measuring tool for making rough estimates, and a bottle opener for when the job is done! Want to turn your old hammer into the Ultimate Hammer? Here’s what you’ll need:
Materials:
- Old Hammer
- Tape Measure
- Epoxy
- Masking Tape
- Sharpie
- Strong Magnet
- Nail – with a large head
- Magnetic Bit Holder
- Clear Varnish
Tools:
- Hack Saw
- Drill
- Paint Brush
Steps:
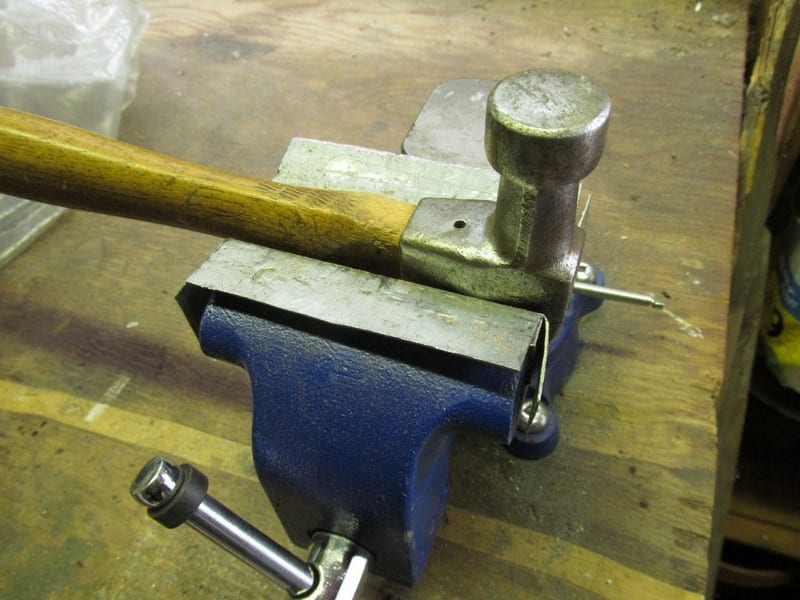
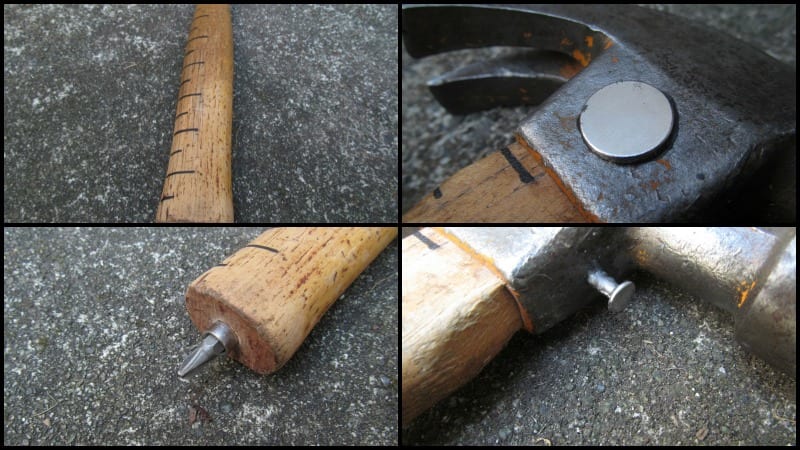
Start off with the bottle opener. Drill a hole that is of the same size as the nail that you have, in roughly the same position as shown in the photo below. Drill about halfway through the hammer.

Insert the nail into the whole to determine the depth.

Add 3/8″ to your measurement.

This is how you’ll want the nail to look like – with the head sticking out at about 3/8″. Use epoxy to put it in place.

Next – the magnetic bit holder. It is basically a tube that has magnet on one end and the bit you insert into the drill at the other. Cut about 1/4″ below the magnet using a hacksaw and keep the one with the bit .
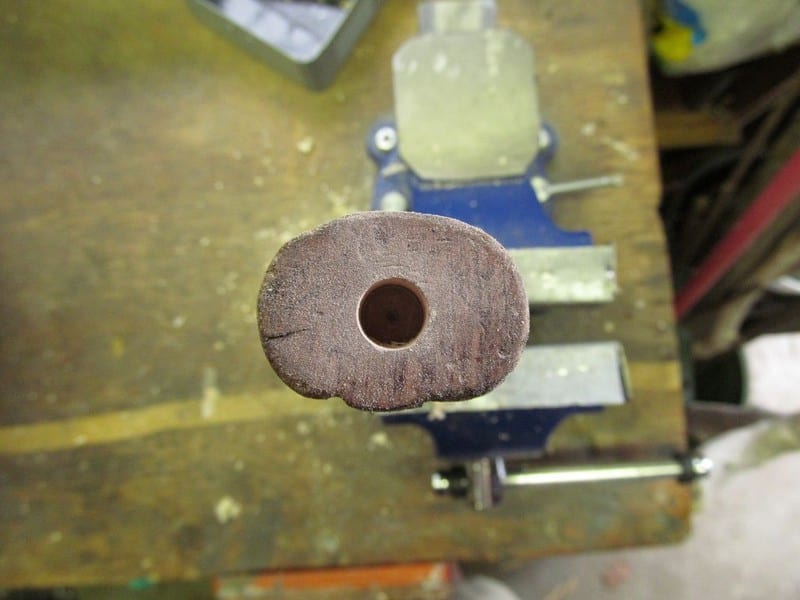
Drill a hole at the bottom of the hammer about 1/4″ more shallow than the bit holder. Use a drill bit that has roughly the same diameter as the bit holder you are about to attach. Make sure the hole is at the center.
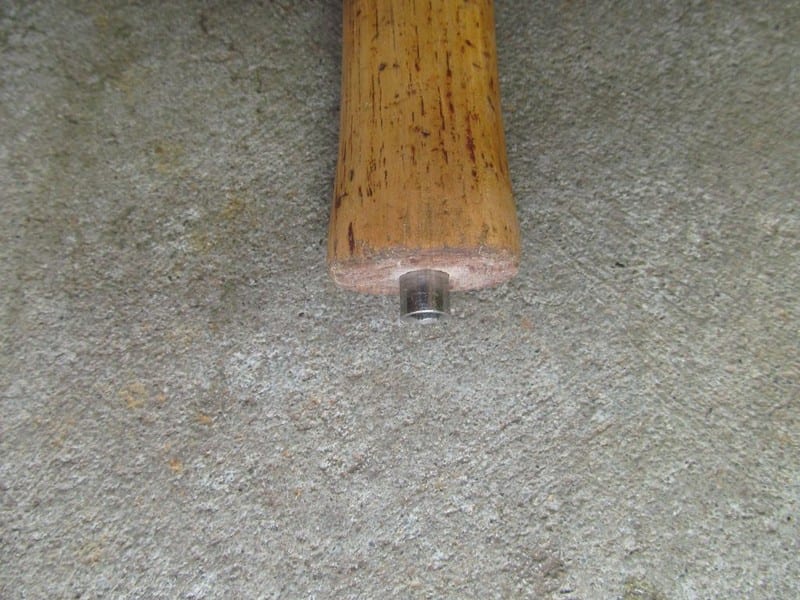
Insert the bit holder. Apply epoxy if needed.
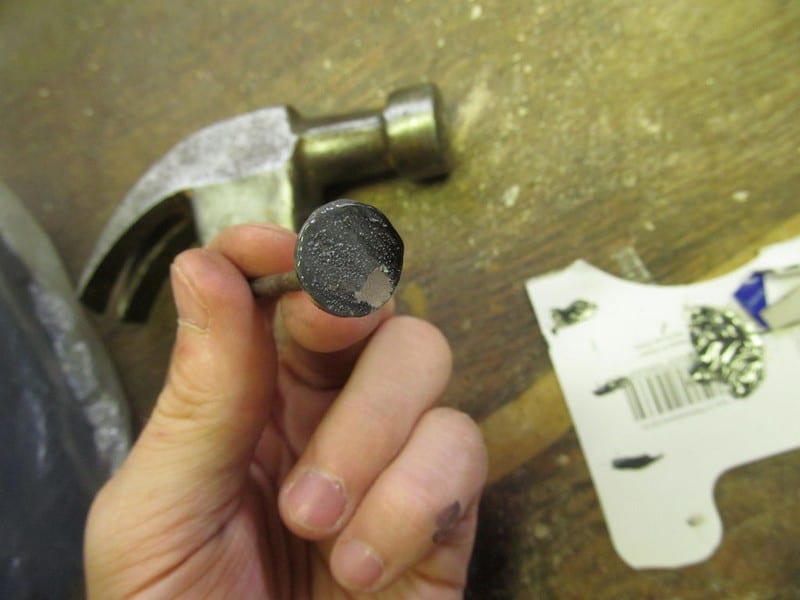
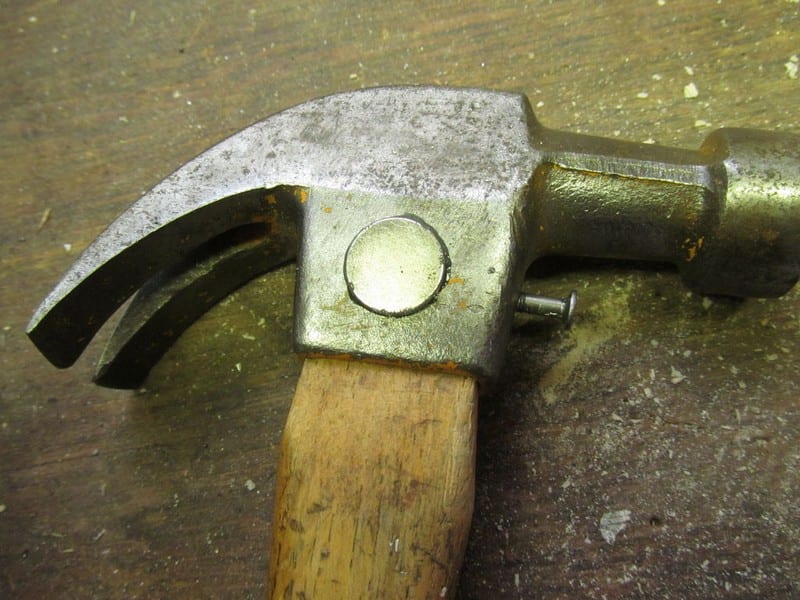
For the nail holder, simply epoxy the magnet on one side of the hammer.

Lastly, to add a ruler feature to your hammer simply put two strips of masking tape along the handle perpendicular to the base…

Then draw a straight line between the strips of tape to mark every inch. Put another strip of masking tape along the handle, between the first two strips as your guide to marking the half inches.
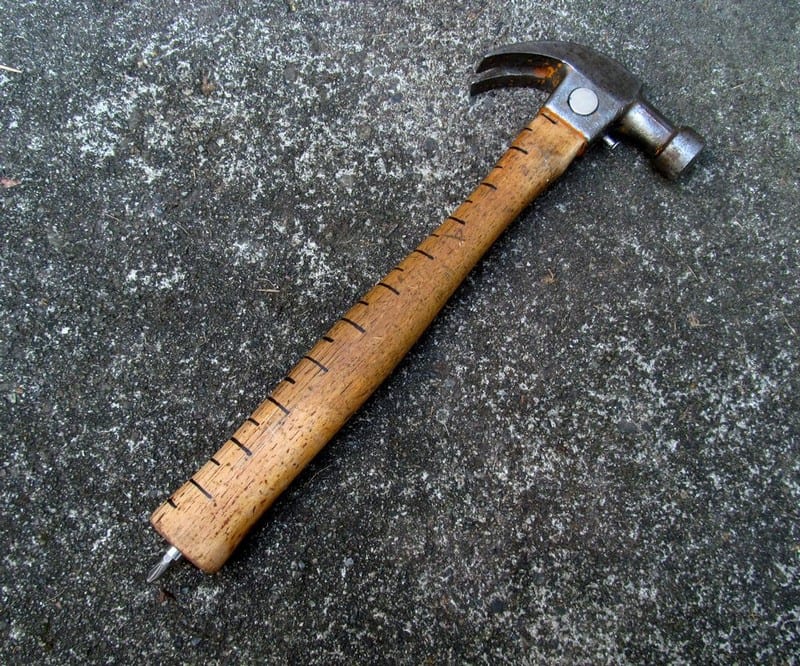
Coat the handle with clear varnish to protect the lines. And that’s it!
Thanks to M3G for this great project.