Once everything’s in place: time to dismantle & give it a final drying session.

Once completely dry you can reassemble your beer mug for the last time. You’ll discover soon that in this step your bushcraft beer mug will come to life. No matter how hard I tried, it just kept falling apart. So that bad bad little voice came again saying ‘FORGET ABOUT THAT MUG, LET’S BUUUUUUUURN IT!!!
Again, I didn’t listen, managed finally to get it all in place and secure it with polyester rope. Sliding knots.

Once the beer mug is tightened as hell you can round the upper edge to get a smoother zone ‘where the lips will meet the liquid’. Again, be careful with that knife.

(Sorry, I really couldn’t resist that tiny piece of sanding paper to smooth the overall surface a tiny little bit. Another penalty point.)

You surely want that beer mug to be watertight, right? You won’t spill any beer, no? No matter how well you did that carving, leaks there will be. So our beer mug needs to be sealed. Resin is good, but, reminding this is bushcraft! So?
Let’s bio-resin! Mother nature gifted this world with magic sticky stuff, PROPOLIS! Produced by bees, this all-natural product is the perfect sealant. It’s hard at room temperature, melts, veeeeeeery sticky, eatable, antibacterial & disinfectant.

Get some – those insects use it to get the wind out of the beehive – or buy it (I got a handful from a neighbour beekeeper). Heat it in a cooking pot and pour/stick it in the junctions of the beer mug. It will harden rapidly. A little sanding (yet another penalty) and the job is done. You can use bee wax also: less sticky but somewhat weaker than propolis.
You’ve got walnut oil? Use it! Multiple layers.
Note 1: heating propolis in the kitchen is somehow kinda risky business. It smells extremely hard (I liked it, indeed) and depending on the tolerance of your partner you’ll spend the night in the car, with your propolis. Or not. My wife wasn’t home during the crime, but she discovered it anyway (after a few days the smell was still there – that’s why I made her those hairpins – KIDDING!).
Note 2: a few people mentioned that soaking the mug a few minutes in water before use will make the mug water-tight without the use of propolis. The wood will swell and seal every junction. All you need are clean cuts & contact zones and a rockhard rope fixation (that’s maybe the reason the Vikings used metal loops at the time).
Avoiding propolis will allow you to drink hot beverages in it – an activity I can’t do because the propolis will melt.
Note 3: instead of using rope you can use rawhide. Let it soak a while in water until it’s nicely flexible, wrap it around the mug & let it dry. While drying the rawhide will shrink and tighten the whole. The best source of rawhide is dog chews. Some people are really inventive, I must say.

After many hours of hard basic labour my first bushcraft beer mug was finally ready (it’s still sticky a bit). What do you think?
If you ask me, it’s time for a beer!
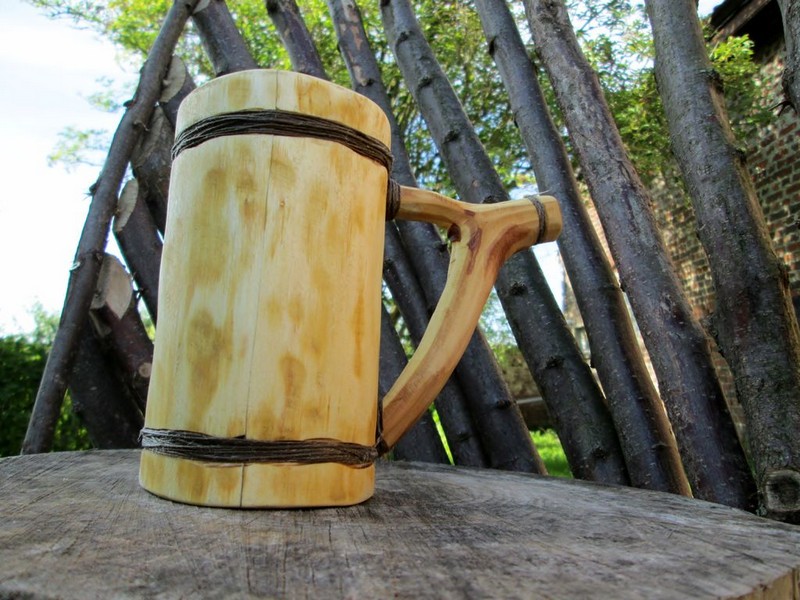
Here’s another version! Hope you like it!