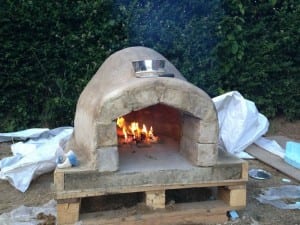
With the broad concept in mind, I began collecting materials for the DIY backyard kitchen on the weekends.
We have a construction reuse depot called Construction Junction here in Pittsburgh, where I happened to find a small sink (the dimensions of which then became part of the constraints).
Additionally, I set up two alerts on Craigslist, one for free wood and the other for a turkey fryer. Doing this early was essential; it took only a few days to get some good structural wood from leftover garden timbers, but several weeks to find a turkey fryer.
After identifying these sources of reclaimed materials, I would check them on a regular basis for new and useful materials, until I felt I had collected enough to begin working on the DIY backyard kitchen project in earnest. Before designing the final project, however, I needed to create a consistent stock from the materials I had sourced.

Many projects I see that use reclaimed materials (especially pallets) end up incorporating materials without much modification, creating a hodge-podge aesthetic. I wanted a cleaner look for my DIY backyard kitchen project, and because I was using half-lap and tongue-and-groove joints, I needed wood of consistent sizes.

The pallet wood and garden timbers make up the carcass of the units – they’re the “bones,” and therefore were the pieces where consistent dimensions would be most essential. The important dimensions for consistency were width and thickness; since I didn’t have a complete design yet there was no reason to cut boards to a specific length, and I knew I could join boards to make them longer if necessary.

I jointed and planed the pallet wood to the largest “whole” thicknesses that were possible; 1″, 3/4″, 1/2″, and 1/4″. Additionally, I ripped the wood to the largest whole widths I could – this ranged from 5 1/2″ down to about 2″. The majority of the wood that I was able to source ended up being planed down to a 1/2″ thickness and ripped to about 3″ wide.

After taking inventory of the stock that I now had available for my DIY backyard kitchen project, along with the other constraints, I was ready to make the final design. I tried several methods to learn to design the units, including drawing them by hand, cutting the components out of paper, and actually laying out all of the materials to see what would work best.

Eventually, I gave up on making the drawings by hand; I’m not much of an artist and the overall construction of the units was complex enough that I was having difficulty visualizing it in my head.
I decided to use this as an opportunity to learn to use SketchUp, and I found that being able to manipulate the parts in 3D was exceptionally useful. Within about a day, I had learned enough to use SketchUp effectively, and within about another day I had produced a basic model for the project.

With the designs of the DIY backyard kitchen created and each part measured, I started marking my stock with cuts and joints. Because I had to make several identical or very similar components, it was great to be able to batch the work and do all of those components at the same time. With all of the components clearly marked, it was very easy to move quickly through cutting.

Since I work in a shared workspace, it was important to me that I didn’t completely take over the shop with my DIY backyard kitchen project – not only would it prevent others from using the workspace, it would significantly increase the chances that I would forget to cut a particular component or lose track of some of my stock. Doing the layout of the DIY backyard kitchen project ahead of time made that much easier.

The large garden timbers I had sourced for this project were eventually ripped down to consistent 2″x3″ beams. I cut eight upright posts about 34″ in length, each with a half-lap at the top and a dado at 18″ from the bottom (this dado was cut both to accept the crossbar and the span along the outside).

I also cut eight crossbars 47″ in length, and four spans about 30″ in length, each with half-lap joints on the ends.

Using 3×1/2″ pine pallet stock, I cut about a two-dozen slats for the middle shelf 28″ long and about 21 15″ side slats. I used a dado blade to cut a 1/2″x1/4″ tongue on each end of each slat.
Continued Page 3…

