Do you need to keep critters away from your herbs? Does tending to your plants make it hard for your back? Then a raised planter like this may be the solution.
One of the advantages this planter offers is that your herbs are not planted directly on the ground. Your plants are safe as this makes it difficult for critters to reach them.
The height of this planter is ideal for those of you who have mobility issues. It’s easier on your back as you don’t have to hunch over to tend to your plants.
Contents
How to Make a DIY Raised Herb Planter
In this part, learn the step-by-step process of crafting a raised herb planter, an endeavour that promises to bring both the joys of gardening and the satisfaction of hands-on craftsmanship right to your backyard. Are you ready to dig into the art of building your very own raised herb planter? Gather the essential materials and tools to get started.
Materials
- 2 pieces 4″x4″ Fir or Cedar post
- 2 pieces 1″x6″x8″ Cedar boards
- 2 pieces 1″x4″x8″ Cedar boards
- 1 piece 1/4″ Hardware Cloth – at least 24″ wide
- 16 pieces 2″ Long Hex Bolts
- 16 pieces Washers
- 16 pieces 3/8″ Nuts
- 24 pieces 1.5″ Galvanized Screws
- Sandpaper
Tools
- Cordless Drill
- 1/2″ Wood Bit
- Mitre or Table Saw
- Wire Cutters or Heavy Duty Shears
- Staple Gun with 1/2″ Staples
- Hammer
- Screwdrivers
- Hex Wrench
- Measuring Tape
- Pencil
- Safety Glasses
Steps
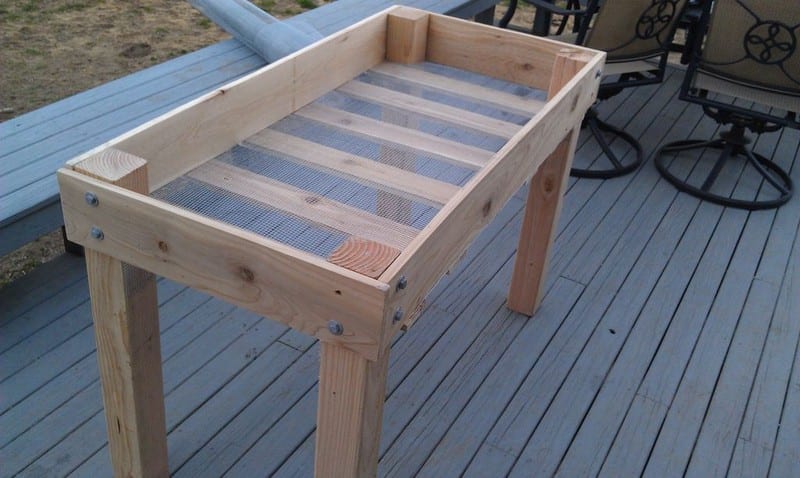
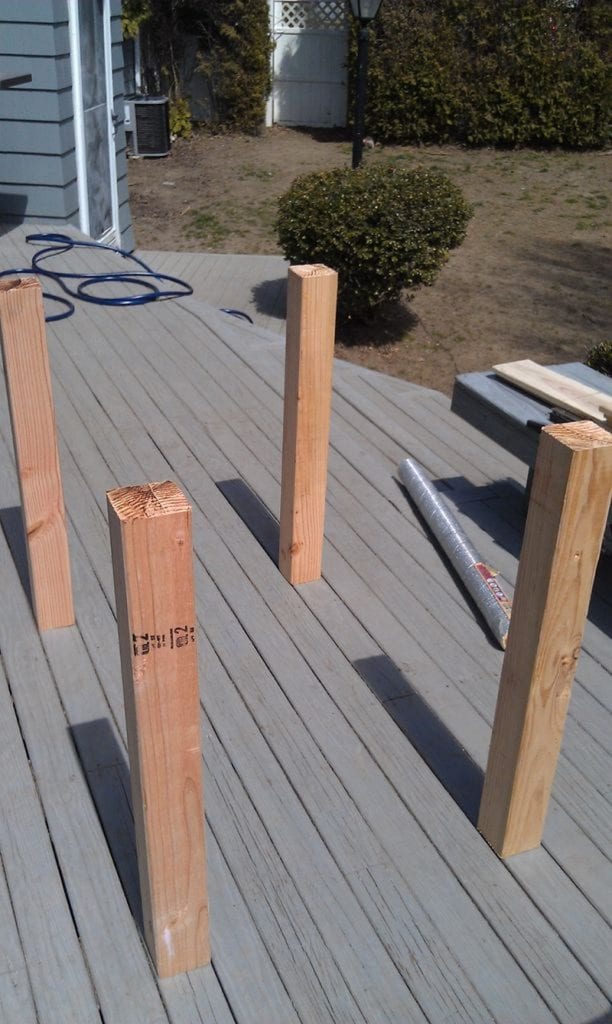
This raised herb planter sits about 30″ off the ground. If you don’t have Lowe’s or a local hardware store to help out with cutting, you will need to make the cuts yourself before starting any other aspect of the project. Make sure you remember the golden rule of carpentry – measure twice, cut once.
1. Sand down the corners and edges of your wood. You don’t want to get splinters when you’re working in your garden, so spend some time before you start drilling and sand down the pieces of wood. Spend extra time on the surfaces that will be showing, as you won’t want any snags or large pieces sticking out on those.
I used medium grit sandpaper and sanded down the edges and the flat ends of all my boards, but not on the 4″x 4″ posts. If you’d like to do those too, feel free. My saw didn’t leave anything sharp, so I didn’t feel the need to do that.
Begin by setting the 4″x 4″ posts in a vertical position on a flat and even surface, imitating the inverse configuration of your raised herb planter. This initial step enables you to assess your workspace for adequate room and visualize the assembly of the pieces.
Your end boards will go against the two posts, on the outside. Ensure that the boards extend approximately 3/4″ beyond the side of the post, allowing them to form a 90-degree angle with the post when you install the longer side boards.
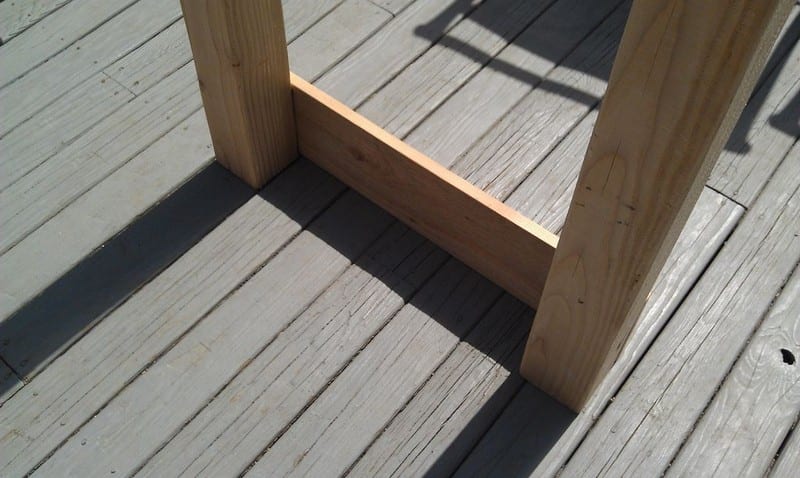
After you have the side boards up, make sure that your width is accurate by placing one of the bottom support 1×4 pieces across the bottom to make sure they fit.
Repeat this step on the other side of the raised herb planter.

2. Measure your drill holes for your posts. Since you will be using 2″ Hex Bolts on the post, you will need to stagger the holes that you drill so that they do not interfere with each other in the centre of the post.
Use your measuring tape, and mark holes using your pencil at 1.5″ and 4″ from the bottom of your post, at 3″ from the left side. Rotate your post to the right, and then mark holes at 1.5″ and 4″ from the bottom of your post, at 1″ from the left side. This will make sure that your screws do not touch each other in the centre of your post.
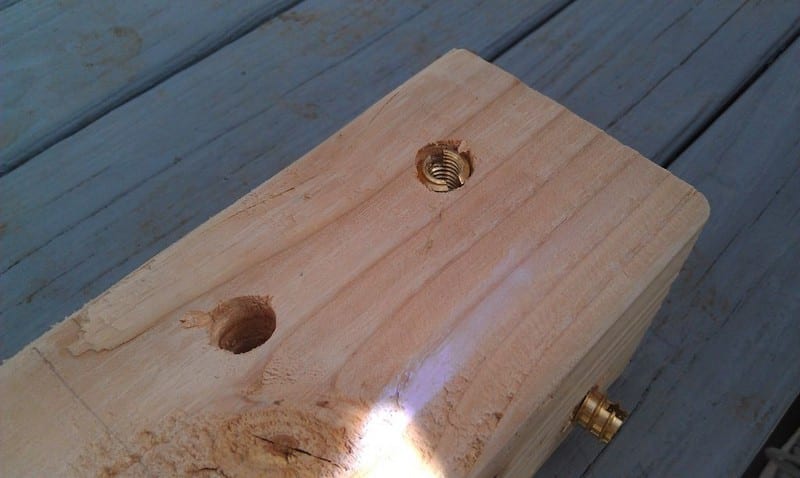
3. Drill holes in your posts. Utilize a 1/2″ drill bit to bore holes at the locations you’ve marked as measurements. These holes should reach a depth of 1.5 inches, as the hex bolt will also pass through another board. To ensure you maintain the correct depth, you can mark the drill bit with a marker or apply a piece of tape as a depth reference.
When using the drill, ensure that your board is firmly stabilized. You can accomplish this by utilizing a workbench featuring a clamp or by exerting pressure with your leg against a flat surface, like a bench.
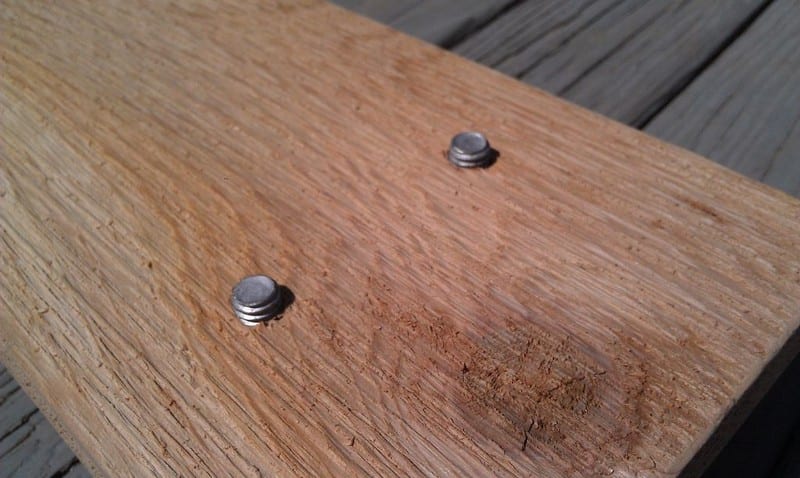
Drill vertically into the wood, aiming to maintain a level position to prevent damaging the drill bit. For each hole you’ve drilled into your posts, you’ll need to insert an Insert Nut. These nuts are essential to ensure the secure fastening of your hex bolts.

With a sizable flat-headed screwdriver, hand-thread the insert nuts into the holes. Ensure they are inserted in a straight manner and screw them into the wood until they are level with the surface.
4. Measure the drill holes for your sideboards. First, measure the holes for the long side boards. With your measuring tape, make pencil marks at 1.5″ and 4″ from the top of the board, positioning them 3″ from the right side. Ensure that you mark these holes on the side of the board that will be visible on the exterior of the raised herb planter.
When working with the shorter side boards, indicate hole positions at 1.5″ and 4″ from the top of the board, with a 1.75″ distance from the right side. The additional 3/4″ is to accommodate the slight overhang of the short boards from the side of the posts. Ensure that you mark these holes on the side of the board that will be visible on the exterior of the raised planter.
Utilizing a 1/2″ drill bit, bore holes at the marked measurement points. These holes should extend completely through these boards because the hex bolts will also pass through into the posts. Ensure that you drill the holes from the side of the board that will be visible on the exterior of the raised herb planter, moving towards the side that will not be visible. This approach will minimize the risk of the board splintering on the visible side.
While drilling, ensure the board is firmly anchored, either by employing a workbench with a clamp or by applying pressure using your leg against a flat surface, such as a bench. Drill vertically into the wood and strive to maintain a level orientation to prevent damaging the drill bit.

5. Check your hole placement. Line everything back up, as you did in Step 4, and make sure that the holes that you drilled in the boards match up with the holes in the posts.
This is the most difficult part of the raised herb planter. You might encounter slight discrepancies in your measurements, which may require you to slightly enlarge the hole to accommodate these variations. There’s no cause for alarm even if the hole ends up slightly larger than the hex bolt’s head. This is because you’ll be using washers between the board and the bolt, ensuring that as long as the hole in the wood isn’t larger than the washer, your assembly will maintain its stability and functionality.
Keep checking the hole placement until they all line up. I had to make a bunch of adjustments to my holes too. You could avoid this issue if you had clamps or vices and could put your post and board together and then use a drill press to drill through both boards. However, it’s likely that you don’t possess one of those.
Once your holes line up, start screwing in the hex bolts using a hex wrench. Make sure you put a washer over the bolt before you start twisting it into the sideboards.
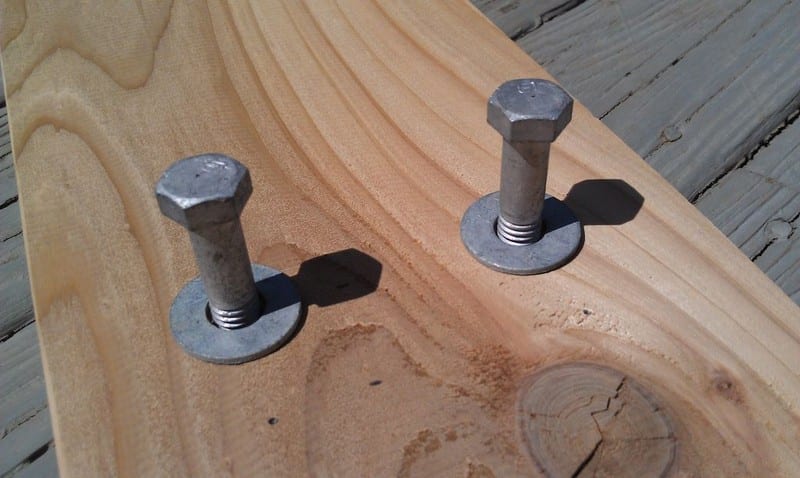
Don’t put the bolts through all the way. You aim for them to protrude slightly to the other side, yet you also require enough space on the bolt to thread them into the posts.
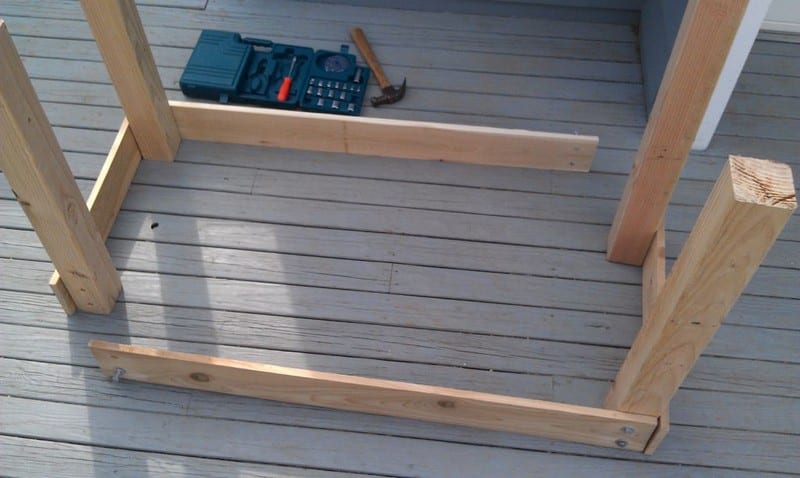
Once all of your side boards have hex bolts and washers on them, start attaching them to the posts. It is easiest to both side boards to one post, then do the post that is diagonally opposite, so you end up with two “L-shaped” pieces of the raised herb planter.
Once you have the two “L-shaped” pieces put together, you can attach the longer side boards to the remaining posts.
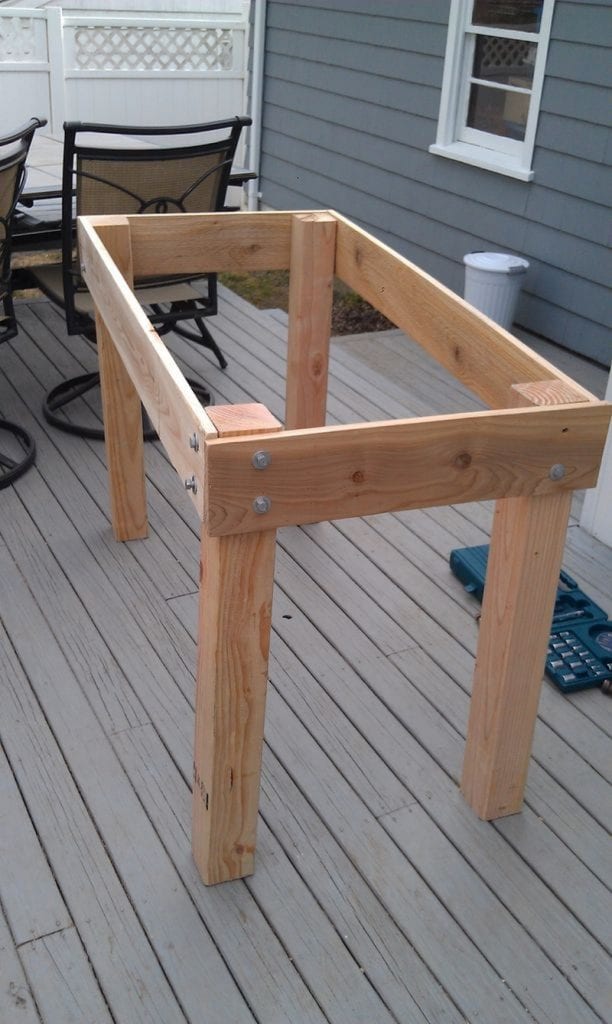
When all of your bolts have been tightened, flip over the raised herb planter, and check everything for sturdiness and for whether or not it is level. Just be mindful that you likely won’t get everything to be perfectly level – that’s okay. If you need to straighten out the legs a bit, loosen some of the hex bolts, and move the legs around, then tighten everything one last time while it is standing on the legs.
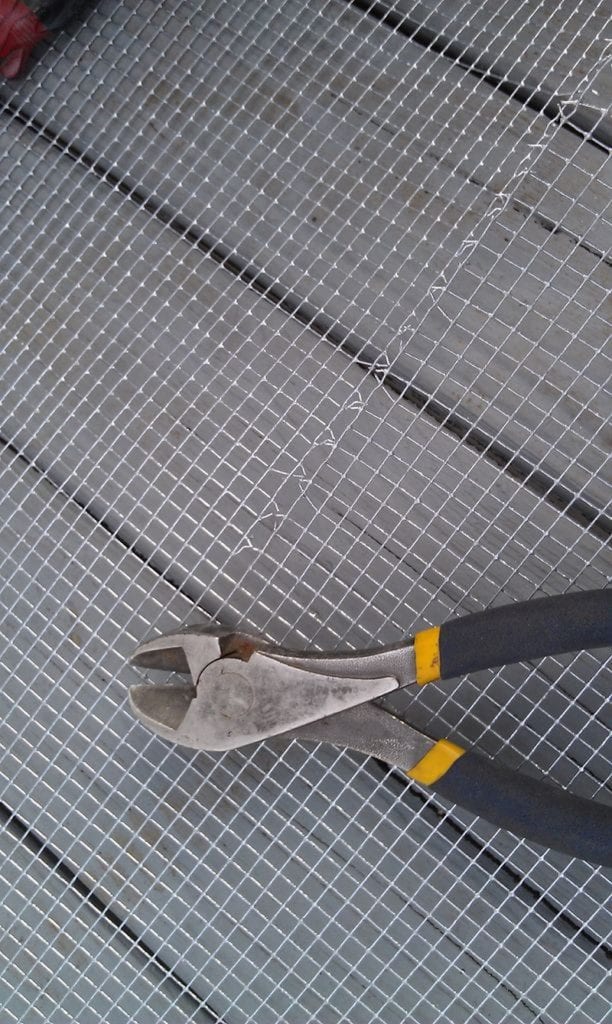
Using a pair of wire cutters or heavy-duty shears, cut a 24″x 50″ rectangle from your roll of hardware screen. The metal is very sharp, so use caution when cutting this.
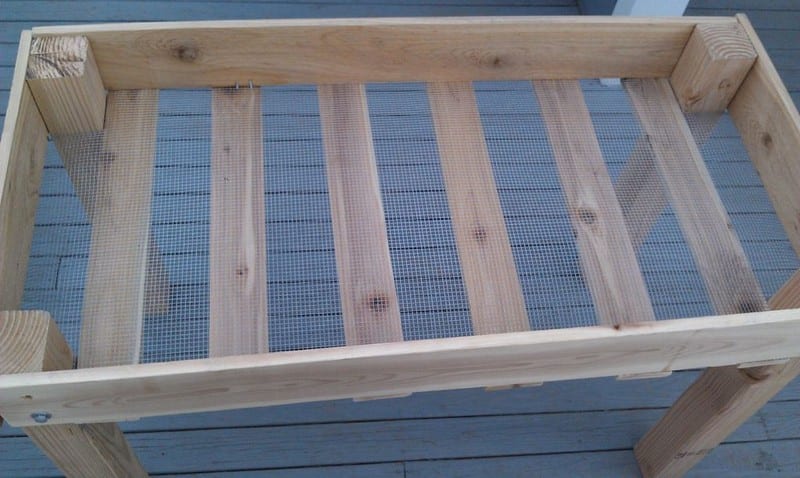
6. Attach the hardware screen to the bottom of the raised herb planter. Flip the planter back over so that the legs are sticking straight up in the air.
Make sure that your screen is centred vertically and horizontally, use your staple gun to staple the screen to the centre of all four sideboards. Once the centres are done, you can continue along the length and width of the screen, attaching it to the underside of the raised herb planter. You will need to use your wire cutters or heavy-duty shears to make a 4″ cut at each corner of the screen so that it fits around the raised herb planter. I suggest that you don’t remove the 4″ piece, and instead, just staple it along the inside of the planter leg.
Lay out the 1″x4″ boards that will be supporting the bottom. Space them out evenly, but you don’t have to be neurotic and measure.
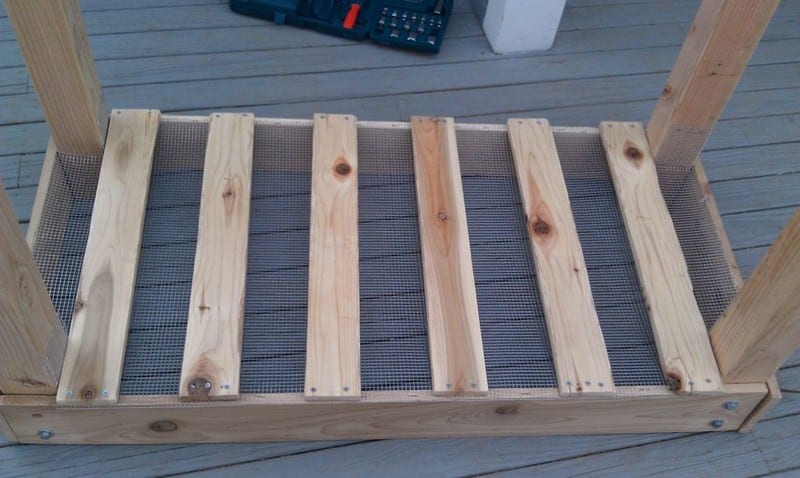
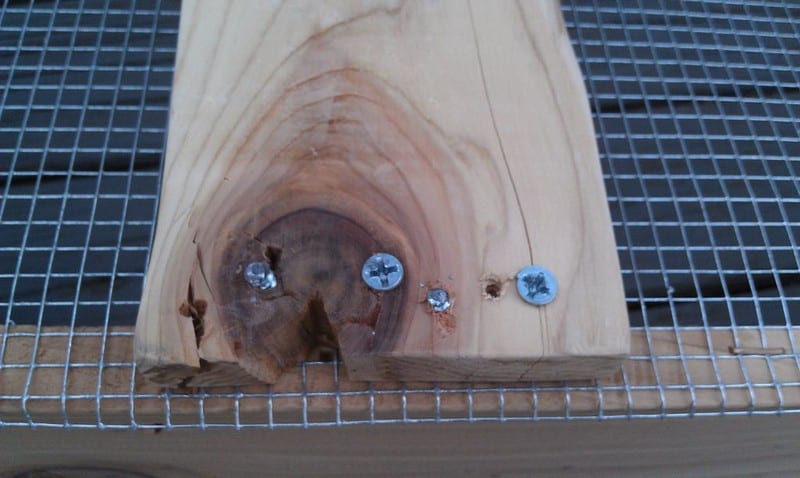
Using your 1.5″ galvanized screws, screw the boards into place.
If your boards have knots at the end, try to avoid them. The knots in wood are always the hardest parts, and they don’t like being hammered or screwed into. I found this out the hard way.
Flip your raised herb planter back over and admire your work! You’re done!
You have some options now as to how you want to keep the soil in. I plan on using newspaper since it’s biodegradable, recyclable, and cheap, but you may want to use something else, like a planter liner, or coconut cloth.
To keep the cost low use salvaged timber, and build it yourself. Be resourceful, and find materials in your surroundings that you can use as an alternative.
Thanks to Rhody Life for sharing invaluable insights into this raised herb planter project.
Effortless Raised Herb Gardening
With a clear and concise approach, the guide presents a comprehensive 10-step process to help you successfully build your raised herb planter. It commences with the foundational steps of measuring and accurately cutting the wood, which is essential to the planter’s structural integrity. From there, it meticulously guides you through the subsequent stages, culminating with the assembly of the raised herb planter itself.
This step-by-step approach ensures that even those with limited woodworking experience can confidently tackle the project, resulting in a functional and aesthetically pleasing raised herb planter. Are you excited to enjoy the fruits of your labour? The ease and practicality of raised herb gardening are coming your way.