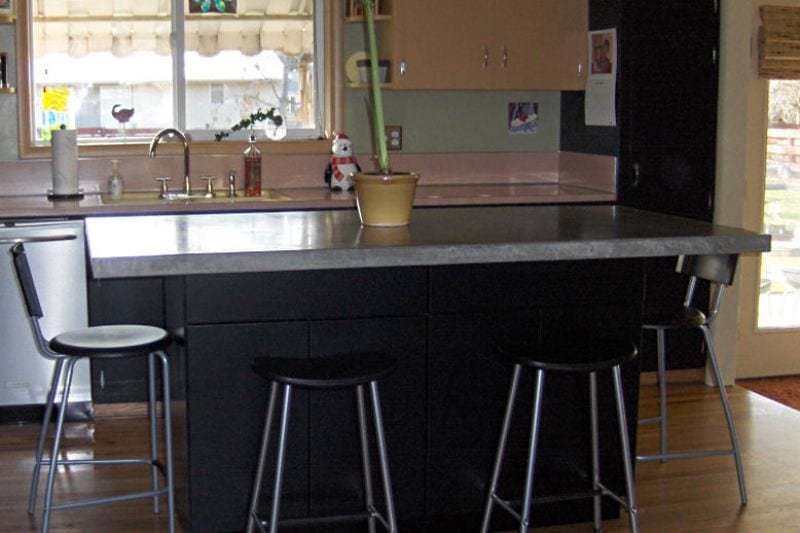
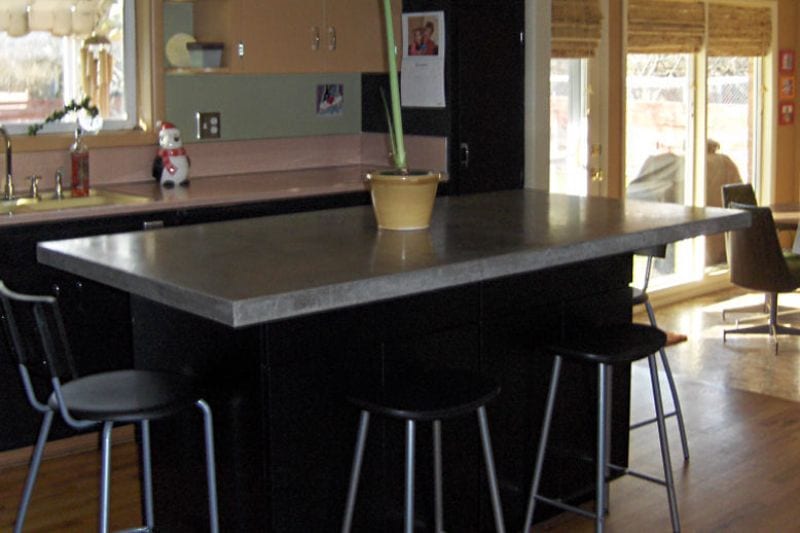
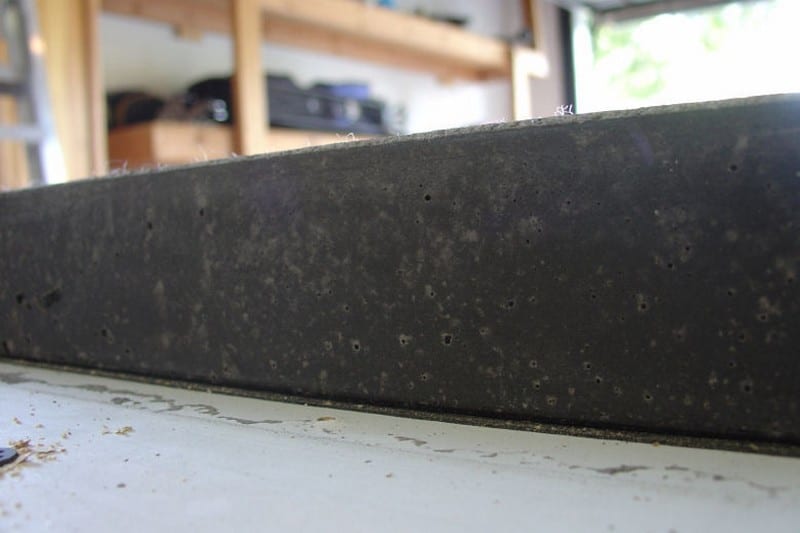
They say ‘nothing lasts forever, but you can be sure these benchtops will long outlast the cabinets under them. Concrete especially when polished has become increasingly popular as finished flooring in recent years. It makes sense given the permanency and thermal benefits. Yes, there is the argument about the environmental impact of cement making but is this offset by the lifetime environmental costs?
Of course, granite and synthetic stone products have been available, but the cost stops many of us.
Concrete can be cast into any shape. It can be pigmented, stained, or textured with all kinds of shades and finishes. You can even embed tiles and stones into them.
Of course, the cost of a concrete countertop will depend on whether you go the DIY route or have one professionally installed.
By making your own, you can save money and have it purpose-built for your kitchen area.

You’ll need these materials:
- Concrete (Quikrete 5000 without additives like fibres or water reducer)
- Melamine-coated particle boards (pieces larger than your desired finished dimensions)
- Additional melamine boards for the sides of the form
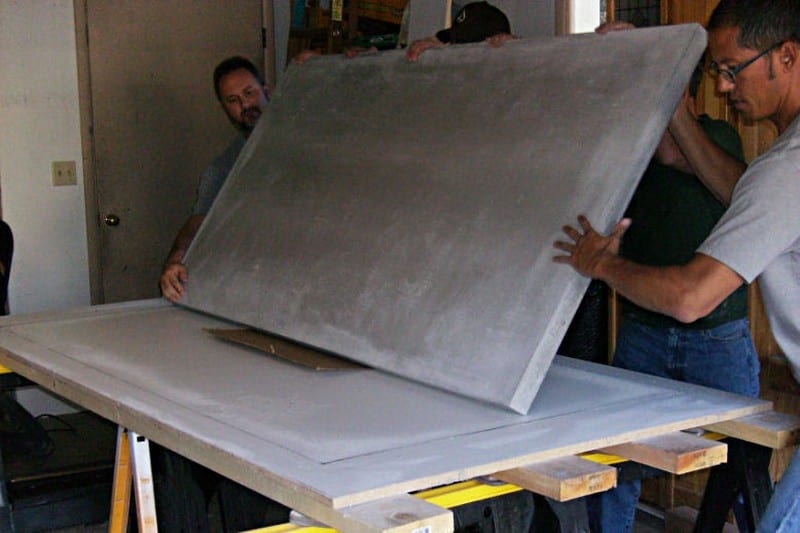
- Sturdy and LEVEL sawhorses to build on (our finished top weighed around 400 lbs)
- 3/8 inch rebar for inner support
- Remesh for more inner support
- Wire for attaching the rebar and remesh to the form
- Silicone caulk in a colour easily seen on your Melamine (we used black)
- Long screed board
- Rubbing alcohol
- Pigment of choice
And these tools:
- Level
- Drill (you MUST pre-drill the particle board to avoid splitting)
- Saw(s), circular hand saw and/or table saw to cut the form sides. We also used a chop saw
- Hacksaw/bolt cutter/wire cutters for cutting your rebar, remesh, and hanging wire
- Screws for building the form (we used 3-inch and 1 5/8 inch drywall screws)
- Concrete tools consisting of float(s) and trowel(s)
- Concrete mixer
How To Build A Basic Concrete Countertop
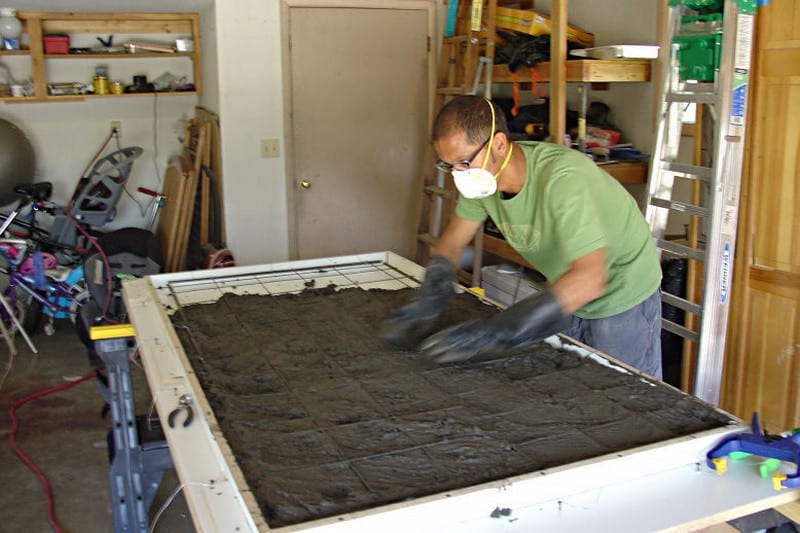
Before you build your countertop, you should definitely build a test form. We built two 1 x 2-foot forms with rebar and remesh to test pouring consistency, colour, technique etc. This also allows you to test finishing techniques on something other than the real countertop. Please don’t skip this step.
Plan the size and shape of your top and mark it out on the Melamine sheet. We didn’t need to make any templates since ours was a simple rectangle and was going on an island and not against a wall. Be sure to take into account the thickness of the boards being used for the walls when drawing the guidelines.
*While our sawhorses were both sturdy and level, they were only on the ends of the mould base. After curing, we noticed a very slight bow on the countertop. In retrospect, we should have had two additional supports across the length. *

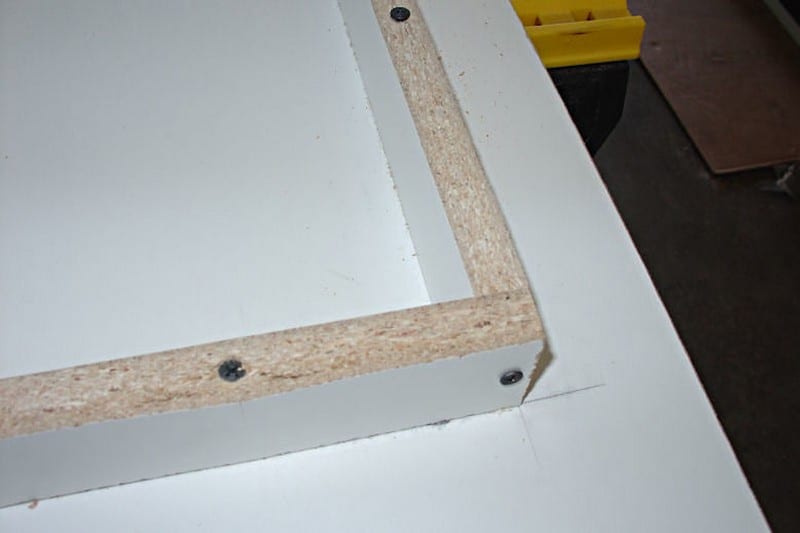
Once you’ve measured and marked out your countertop on the melamine, it’s time to set the sides. Building a simple rectangle made this pretty easy. Naturally, you’ll want the sides to be as tall as your finished thickness, in this case, 2 inches.
The sides were cut to length, clamped in place, and screwed down to the base using 3-inch drywall screws. Pre-drill the walls or they WILL split. Be sure the heads of the screws are sunk low enough that your screed board won’t catch on them. The particle board was soft enough that we didn’t bother using a countersink bit to drill the holes, but if you have one, go ahead and use it.
Also, be sure to add the additional length for the abutment. Since we used 3/4 inch melamine we added 1.5 inches to the end boards. You could, of course, just let those boards run as long as you’d like. An additional couple of inches of overrun would add support for corner brace boards.
Since the length of our sides was 74 inches, there was a tendency for them to want to bow. That’s why it’s important to have a guideline and clamp the board in a couple of places to assure it remains straight.

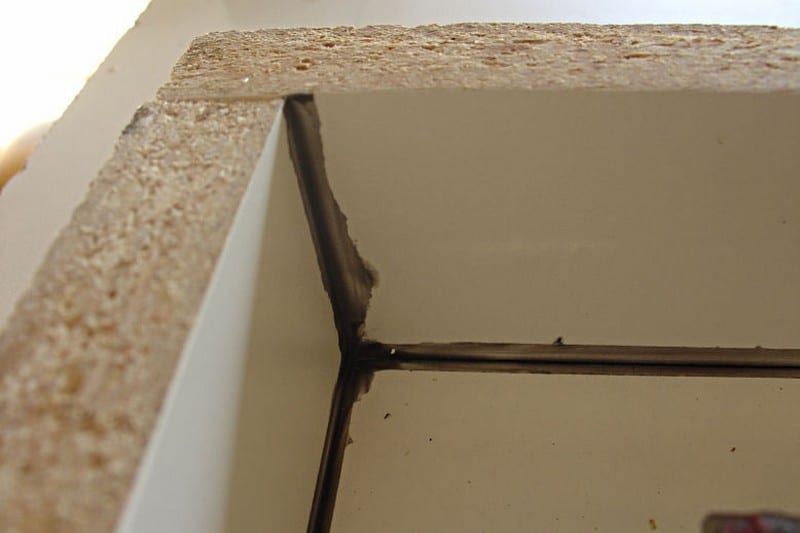
Now that the sides are ready, you need to seal all of the inside seams with silicone caulk. Pick a colour that stands out against melamine.
Tape off the insides of the walls and base using blue painter’s tape. Leave about 1/8 inch on either side of the seams. Apply the caulk and run your finger down the line to press it in and smooth it out. (What…you thought you were going to do a project like this and not get dirty?)
Remove the tape as soon as all the caulking is applied. You don’t want it to dry on the tape or you risk it tearing as the tape is removed. Let the caulk cure for a day then clean up the inside of the form with rubbing alcohol.
Next, you’re going to set your reinforcement grid. This is one of the longest and most important steps. We were planning for a 10-inch overhang from the cabinet base on three sides so we added 3/8 inch rebar around the edges.
You’ll probably want to do this regardless, especially with something this large. We didn’t bother with trying to bend the rebar around the corners, we just cut each piece about 4 inches shorter than the side. We wanted to maintain a 2-inch setback so we didn’t get ghosting when the concrete cured.

We set the rebar on styrofoam blocks about an inch thick to keep them in place as they were tied off. We used 1 5/8 inch drywall screws in the base, spaced every 16 inches or so. Use any type of sturdy wire to tie onto the rebar then hook it onto the screws.
The wire should be twisted around the rebar several times then one end clipped off. The other end of the wire hooks to the support screw and will be cut after the concrete is poured and the end is just pushed down into the wet concrete.
In order to add additional structural support and to hold the rebar in place after the styrofoam is removed, remesh is added. This is tied off with wire to the rebar at several points. If the remesh is cut to where there isn’t a solid wire that rests against the rebar, ties it off at the first one available.

Continued Page 2…