If the garage is full to bursting and you can’t find the space to store your harvest or new tools, it might be time to invest in a good old shed.
A humble storage shed can provide an adequate and safe area for keeping your garden tools or your harvest. If you have a big enough shed, it can even be a great place to start new hobbies.
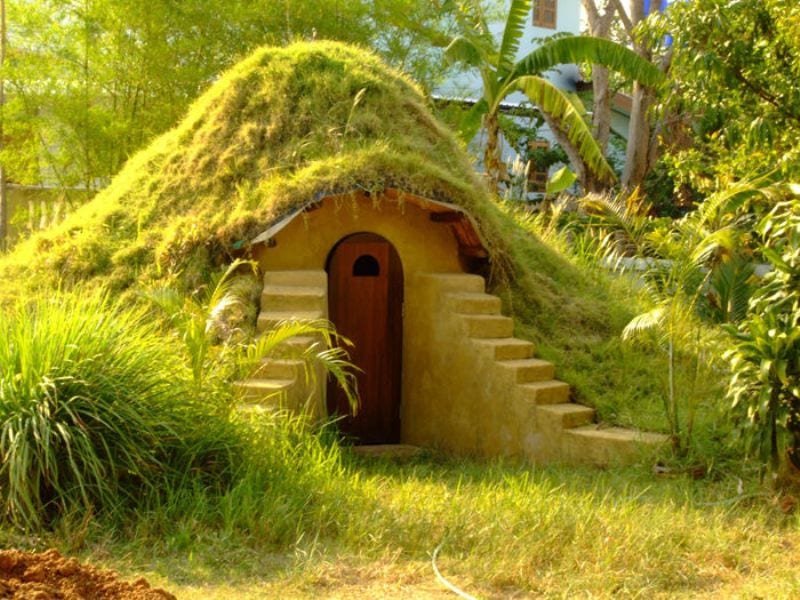
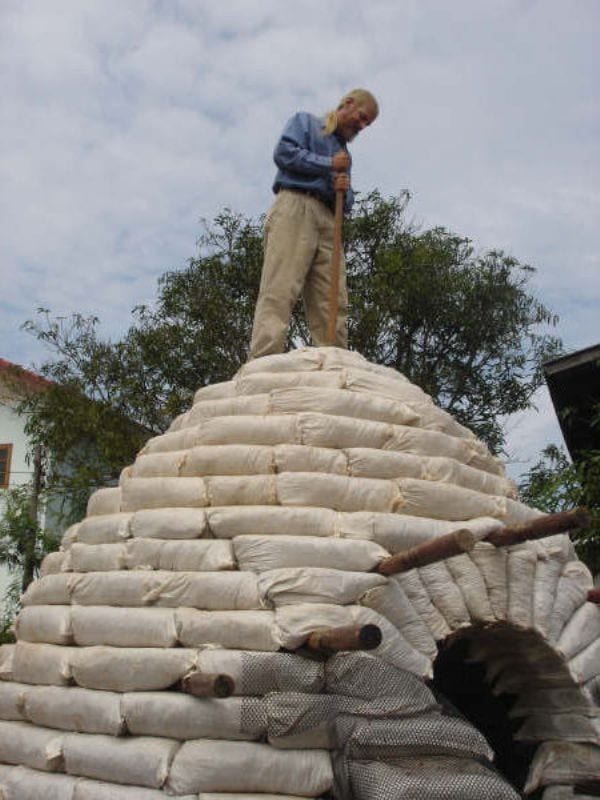
Now, this interesting structure is an earthbag dome. Earthbags, sometimes called sandbags, were originally used by the military as protective shelters, or for flood control. The concept is also applied to creating housing. The strong walls can resist harsh weather, they’re fully fireproof, and they can withstand natural calamities like earthquakes, cyclones, and even tornadoes.
The cost is minimal as the bags are usually filled with local and natural materials. This lowers the cost involved in manufacturing and logistics. With the wide variety of materials that can be used as fillers, earthbags can provide both thermal mass and insulation.
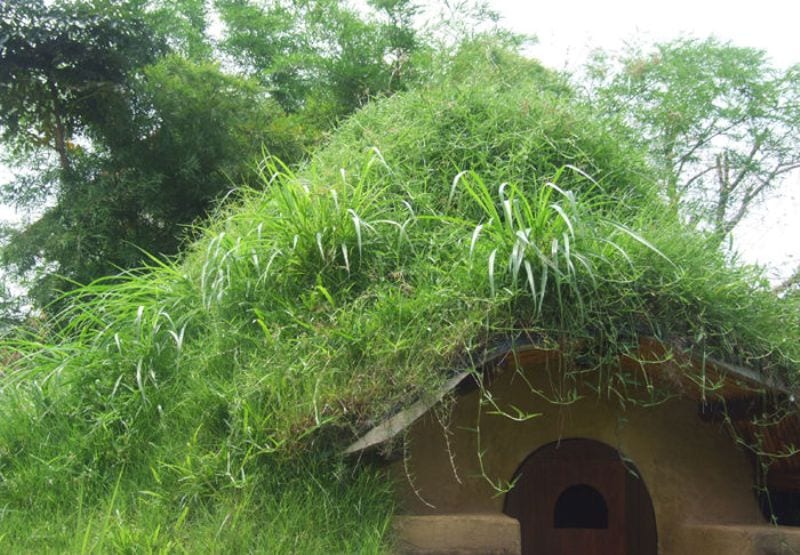
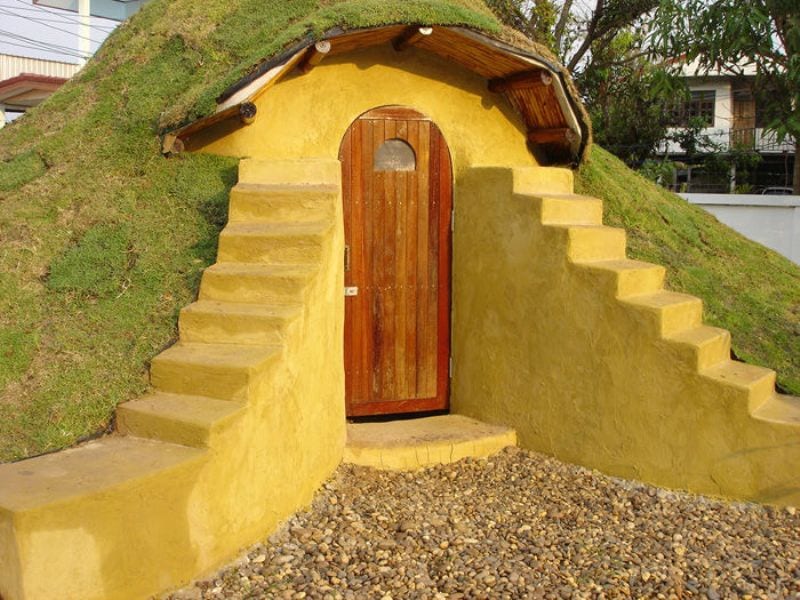
It’s well suited for many purposes. You can use it as a cool getaway space in summer or a warm escape for the winter. But earthbag buildings are also great as storage sheds, and disaster shelters, and are commonly used as root cellars. In most cases building one won’t require a permit as it’s below the minimum size required by building codes unless it’s inhabited or attached to a residence.
Click on any image to start the lightbox display. Use your Esc key to close the lightbox. You can also view the images as a slideshow if you prefer.

Project Details:
- Exterior walls: 18″
- Interior diameter: 8’
- Exterior diameter: 11’
- Interior floor space: 50 sq. ft.
- Materials cost: $300, $6/square foot
You’ll need these tools:
- Tampers
- Round nose shovels
- Grub Hoe and trowel
- 13” x 16” sheet metal slider
- Knife, hammer
- 2’ level
- 2” x 4” x 10’ levelling board
- Tape measure
- Fencing pliers
- Handsaw
- Step Ladder
Steps to DIY Earthbag Dome Home
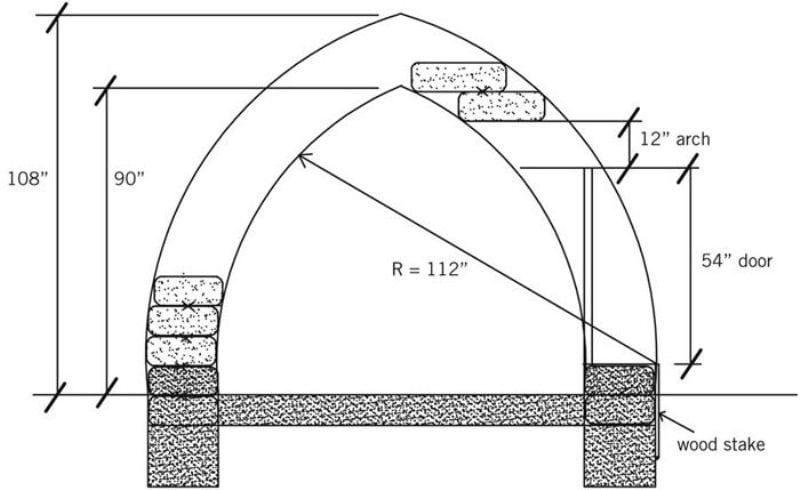
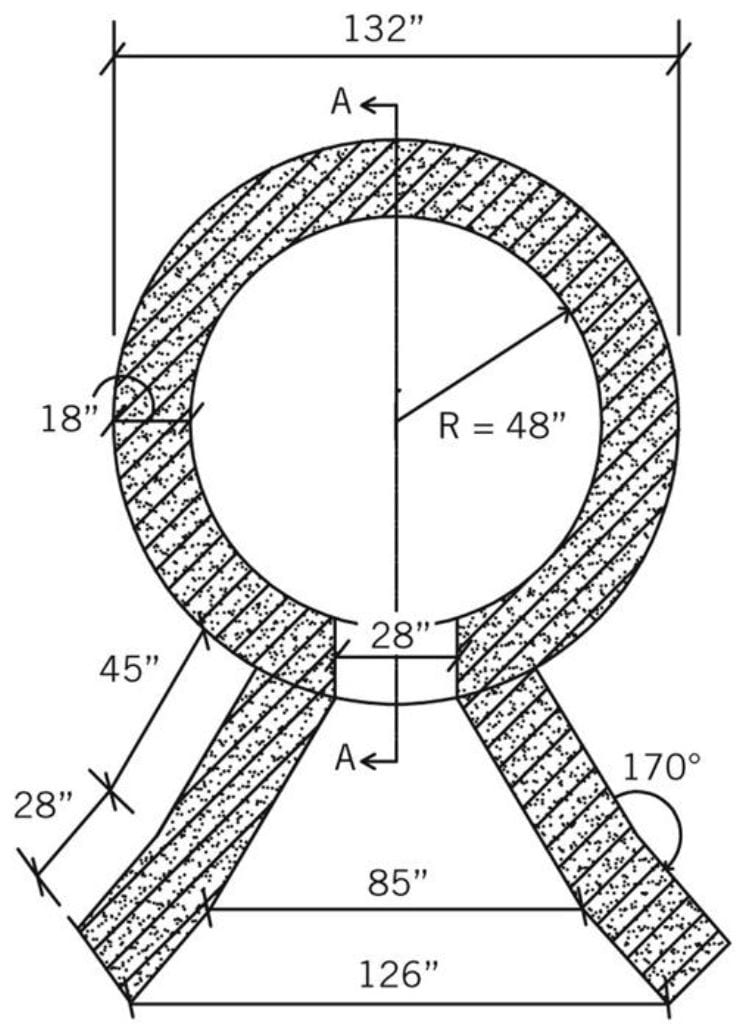
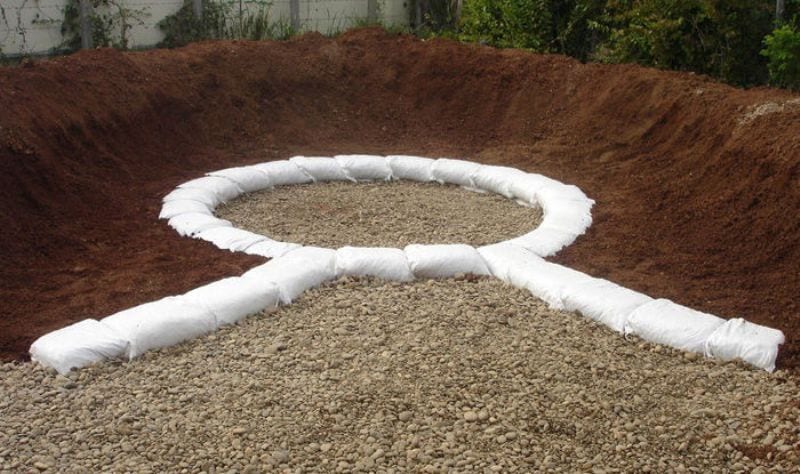
Let’s briefly take a look at the plans so you’ll better understand the building process. The first drawing is the floor plan that shows the dimensions for the dome base and the angled buttresses in front. The buttresses provide reinforcing on both sides of the door and also act as retaining walls to hold back the earth. Make a rubble trench under the buttresses the same as the dome, and interlock (overlap) each course where the dome and buttresses intersect.
The second drawing is the dome section that shows key vertical dimensions, earthbag foundation, door, and arch. Note the wood stake in front of the door. The string line on this stake guides the curvature of the dome (112” radius in this case). This dimension remains constant. Put the stake off to one side of the doorway so you’re not tripping on it during construction.

Use the same earthbag foundation building technique described in previous Instructables. This includes poly bags, double-bagged for strength, and filled with gravel to prevent wicking moisture into upper courses. The bags sit directly on the rubble trench. Build the buttresses at the same time, in the same way. After the two gravel bag courses are finished, add soil around the sides of the dome and tamp solid to prevent the bags from moving.
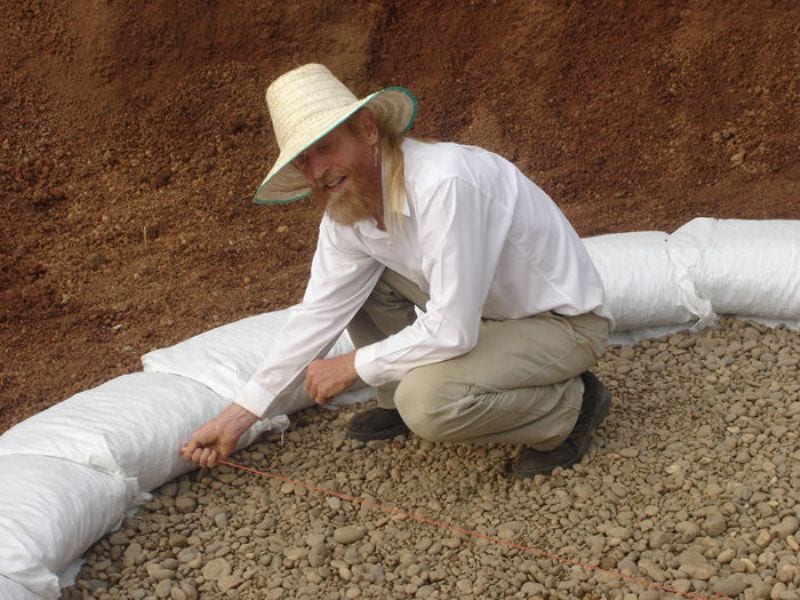
Use the string line on the center stake to measure the radius. Move the string to make sure each bag is the same distance from the center point. This creates a perfect circle. Repeat this step for every course except the very highest ones. By that point, the circles become so small that you can just eyeball them. Note: the string line on the center stake is lengthened to measure each course. Just make sure it remains a constant length for each entire course. (You could use temporary knots or pinch the string between your fingers.)
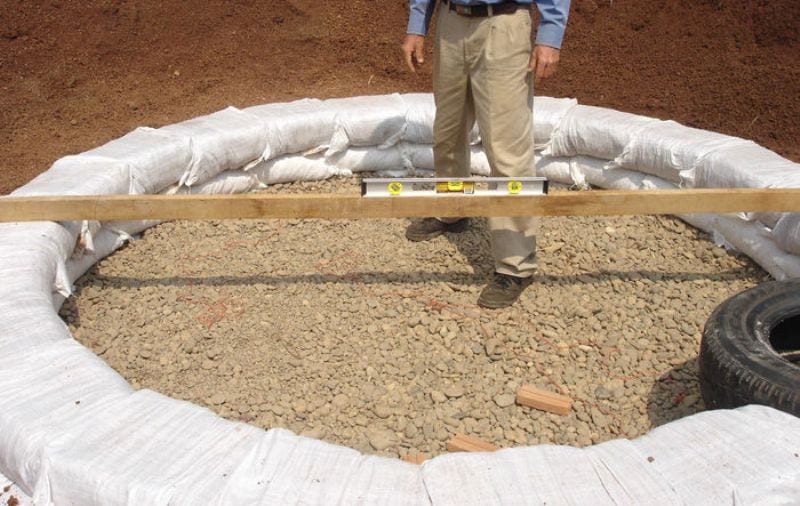
Check each course for level after tamping. For small domes like this one, a straight 2×4 works great. Put the level on the 2×4 and gradually move it around over the centre stake to check each bag. We fill each bag with the same number of buckets so the walls are almost self-levelling. Also, we’re careful to use the same technique for each bag.
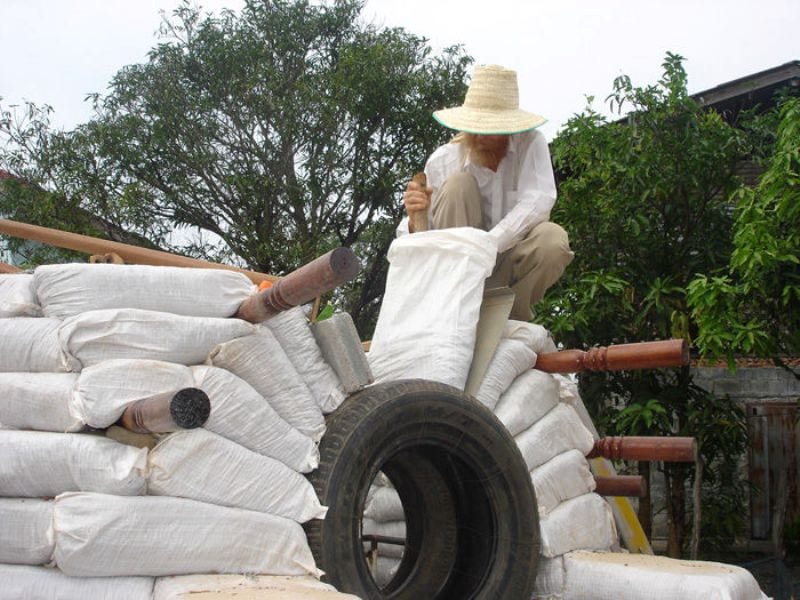
You’re almost ready to start laying soil-filled earthbags. The soil in the earthbags needs to be slightly moist – just enough to pack densely into the bags. Use a garden hose to mist the soil. Test the moisture content by making a ball in your hand. If it looks wet or if water oozes out of the bags, then there’s too much water.
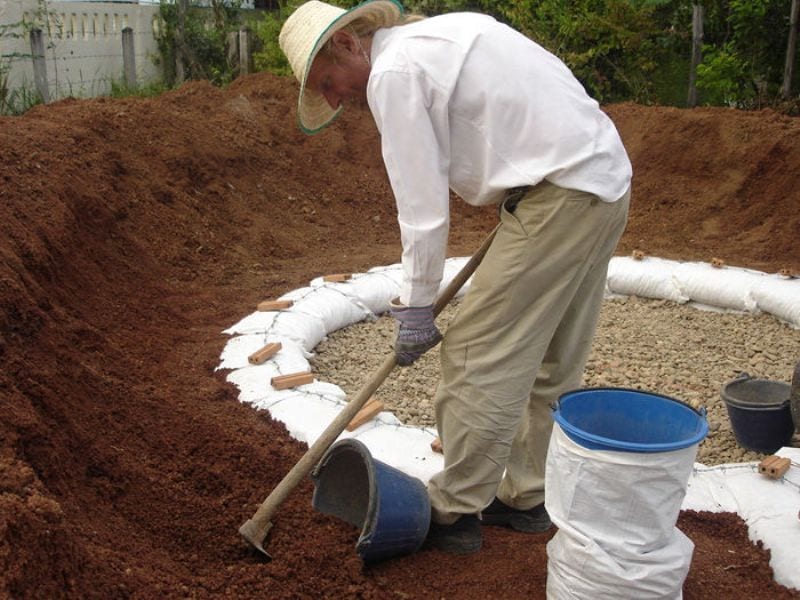
You’ll soon recognize the proper moisture content. Also, note how the soil in the photo below has been distributed around the dome to minimize labour. Each bucket load is only moved a few steps. The reddish soil is called a road base. It’s the same material used to build roads in many parts of the world and is ideal for earthbags.

Now that you’re above the level where moisture can cause problems, you can start filling bags with soil. We use 2-gallon buckets to fill bags. The easiest way to fill buckets is with a sturdy hoe that’s made for digging. We use a grape hoe to pull the soil into the buckets. And with just a flick of the tool, the bucket is pulled upright.
Tamp each course solid, starting with the high spots. Keep the tamper moving so you don’t create low spots. The first pass doesn’t require much force. After you’ve gone around once, you can start tamping more vigorously. Final tamping is usually done with more force. You’ll hear a change in pitch as the earthbags become solid.

Continued Page 2…