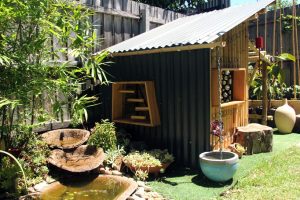
Love cooking and being outdoors close to nature? Here’s a space that combines the best of both worlds and is ideal for your lifestyle – an outdoor kitchen!
Have you missed entertaining and spending quality time with your friends and family because you’re so busy cooking in the kitchen?
Then what you need is an outdoor kitchen setup, so that you can join them without having to leave the activity you love the most.
Here’s a great example of an outdoor kitchen project that won’t break your bank.
Would you like your own outdoor kitchen?
Materials:
- Steel Studs
- Hardipanel
- 4×8 Sheet of Luan
- 4×8 Sheets of Melamine
- Synthetic Stucco
- Bags of Countertop Mix – plus liquid colour
- Spot Filler and Sealer
- Concrete Wax
- Galvanized Primer
- Screws
- Mesh Tape
- Thinset
- DryVit – wall finish especially made to withstand temperature changes
- Sawhorse
- #3 Rod Mesh – for reinforcement
- Silicone
- Dowel
- Tempered Glass Pieces
- Lighting – such as a lamp for some night cooking
- Outdoor Paint
- Stainless Doors – easily found online
Tools:
- Table Saw
- Trowel
- Drill Set
- Screw Drivers
- Angle Grinder
- Electric Mixer
Steps:
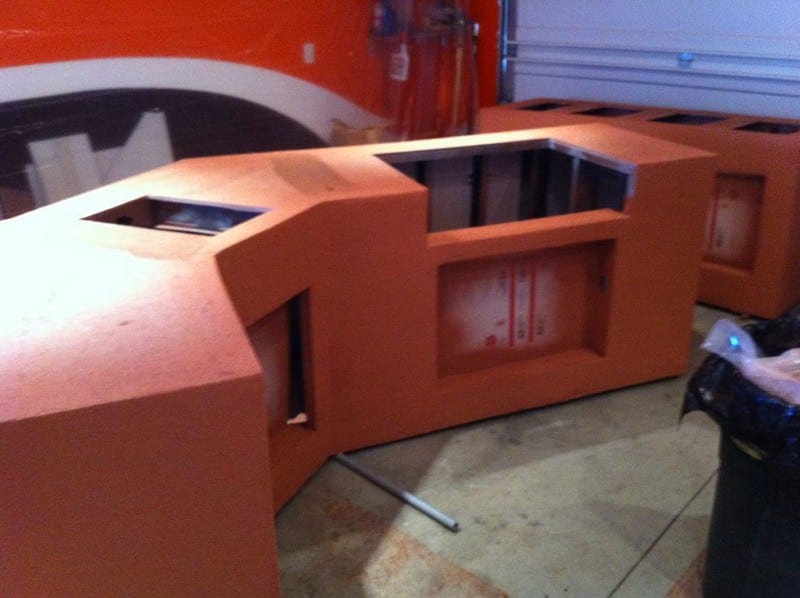
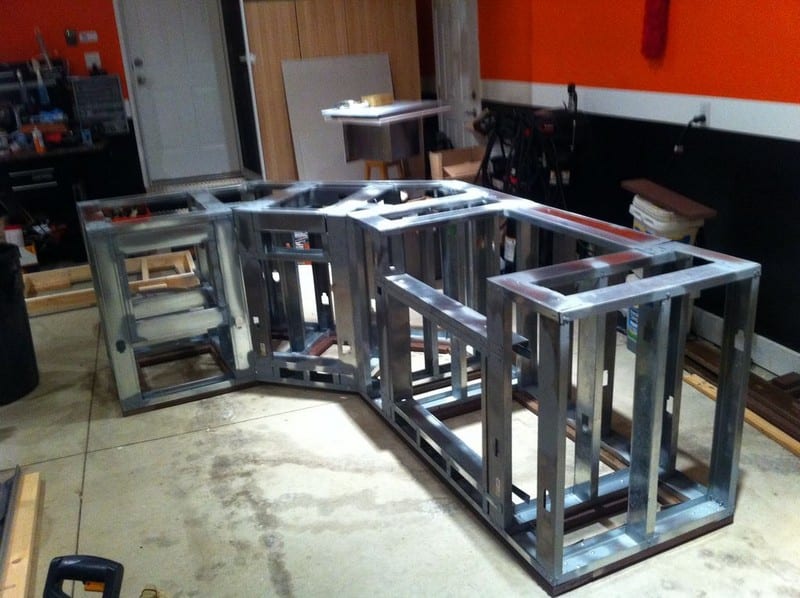
The first step in creating an outdoor kitchen was to create the frames with steel studs. You really need all of your components on-site to begin this framework, as grill dimensions and door openings must be exact to have a good fit and finish. All screw penetrations and cut edges of studs were spots primed with galvanized primer to deter rust and corrosion.
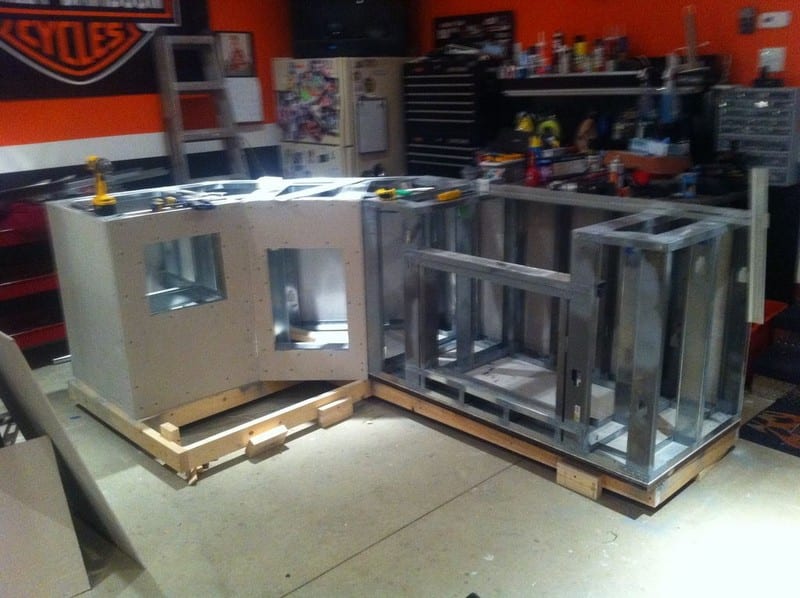
Hardipanel was selected as the substrate of the finished surface. This cuts easily and mounts with screws. Joints are taped with mesh tape and finished with a thin set. I also did the bottom to help with rigidity and also to keep critters out of the finished units.
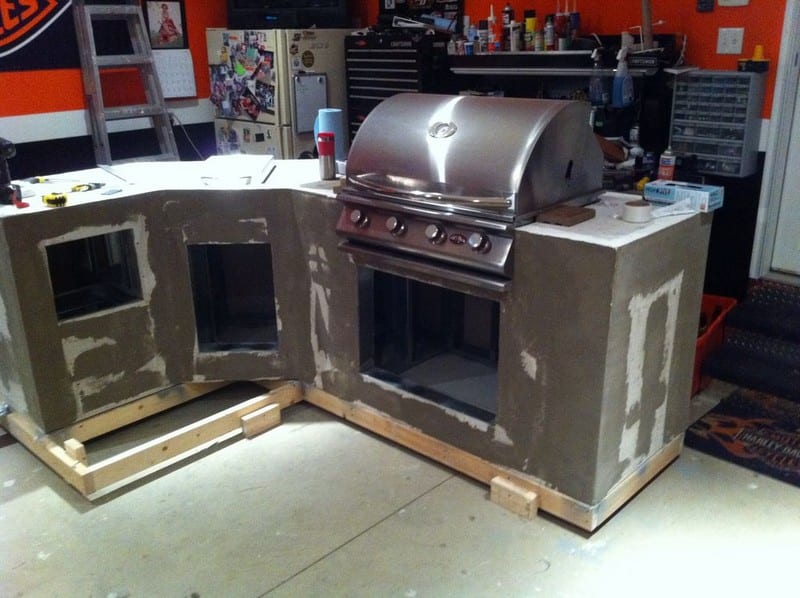
I used a product called DryVit as the finished surface of the outdoor kitchen. This is applied by troweling or spraying with a hopper – just like drywall texture. I sprayed this product. DryVit looks like traditional stucco but has some elastic qualities that allow it to expand and contract with temperature changes without cracking.

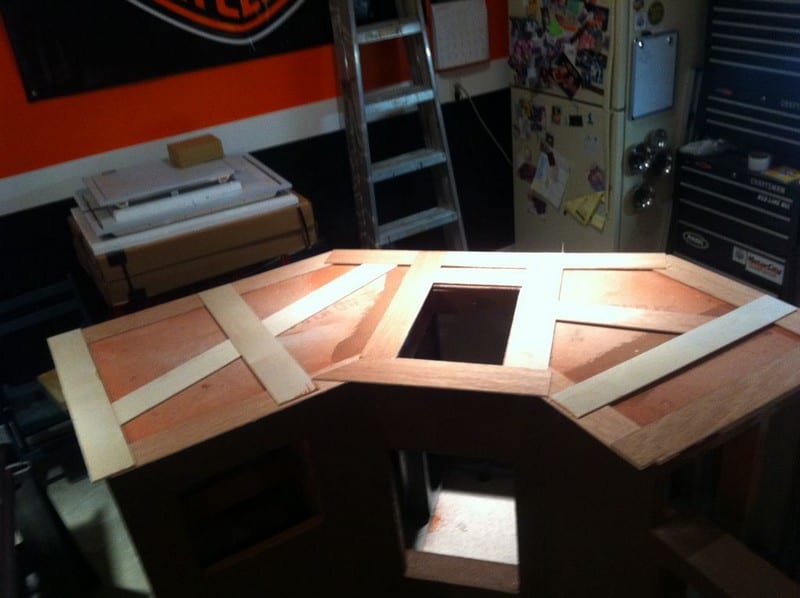
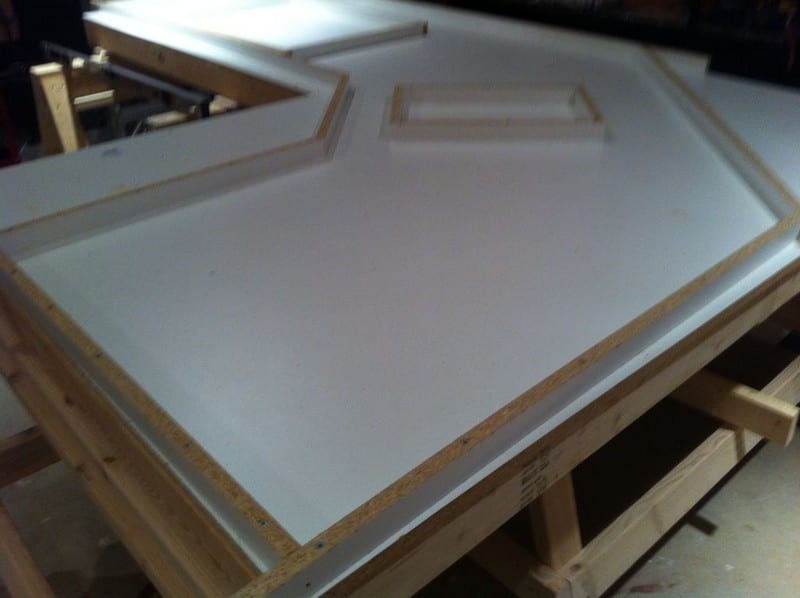
Strips of luan were cut from a 4’x8′ sheet and these were used to create the countertop template of the outdoor kitchen. This works pretty slickly, as you can make a perfect template without really measuring anything. These are glued together during the process. This makes easy work of odd-shaped counter shapes. You can get the proper overhang and perfectly placed cutouts.
Melamine was used for the countertop forming. 4’x8′ sheets are readily available. This counter was poured upside down. The melamine is a super smooth surface that produces a very smooth concrete surface. I built some very robust sawhorses to hold the main counter at a comfortable working level. Strips of melamine were cut for the edges and screwed down to the form base. One important thing here is that you need to fill the screw heads with wax or caulking before you pour. Otherwise, the screw heads will be filled with concrete and will not be very much fun to remove when it comes time to break down the forming.
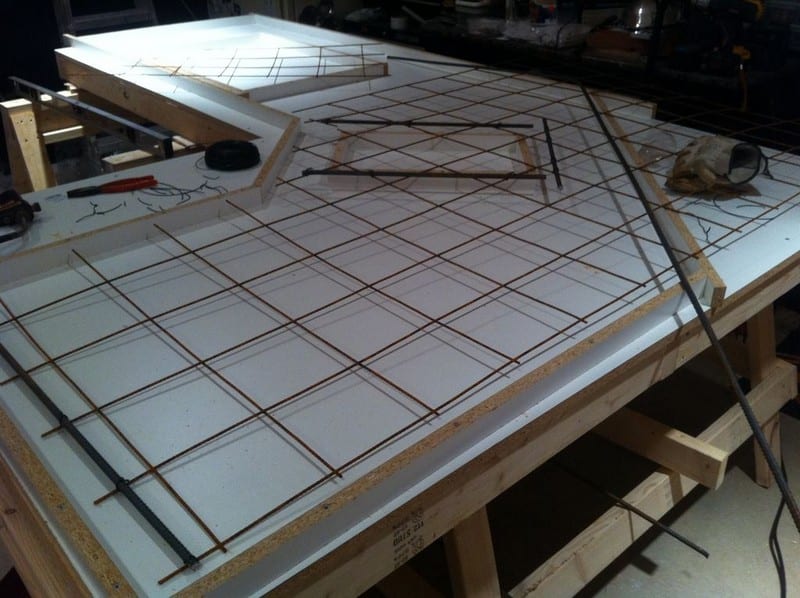
After the initial forming is anchored into place, I assembled the reinforcing rod mesh. I used #3 rod.
If there are any holes or seams, they can be filled with wax and scraped level.
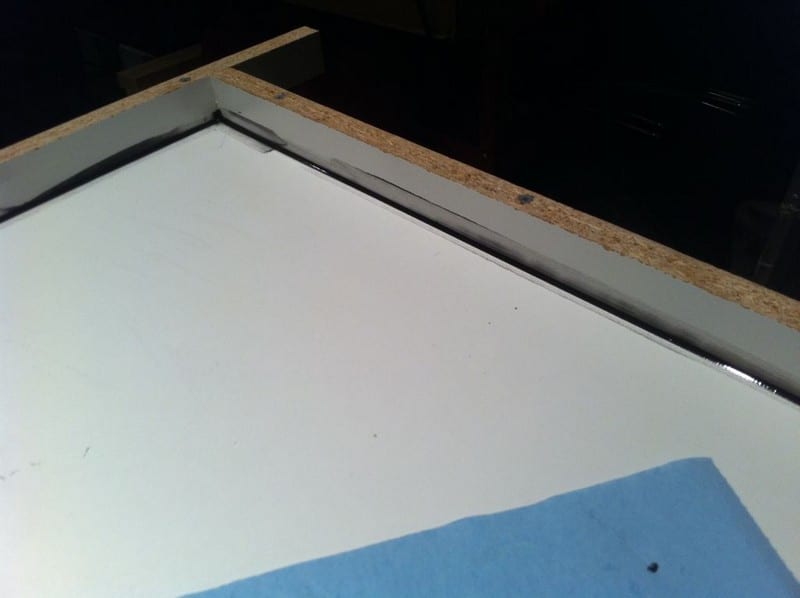
The seam where the form edges meet the large flat area of the form can be filled with a bead of silicone caulking, running a finger down the seam to create a nice radius on the counter edge. If you need any holes, it is best to put them in now.
I put in a couple of holes for the lights that I wanted to mount. I used a piece of dowel, drilled a hole in the centre of the dowel for a screw, and screwed them onto the bottom form. I also coated them with a little silicone so that they could be punched out easily. Putting these in now instead of drilling the countertop later eliminates the chance of drilling into some of the re-rod later.
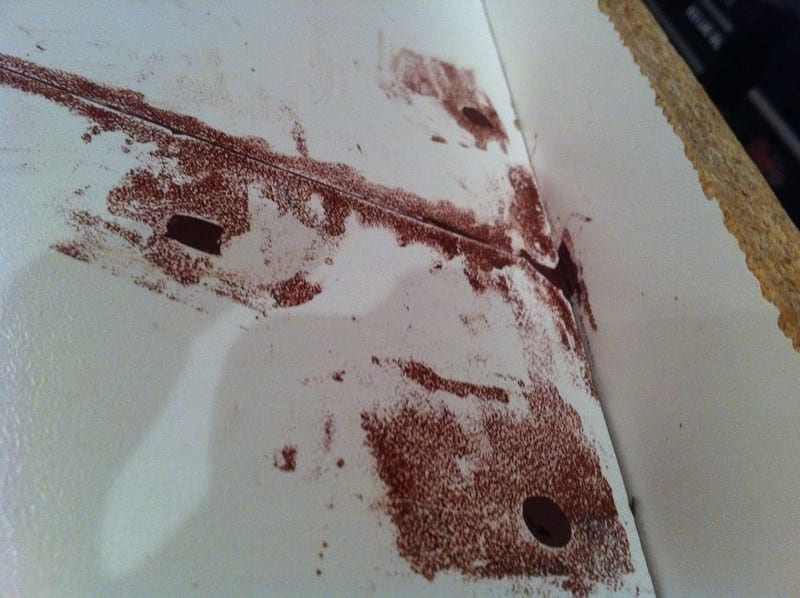
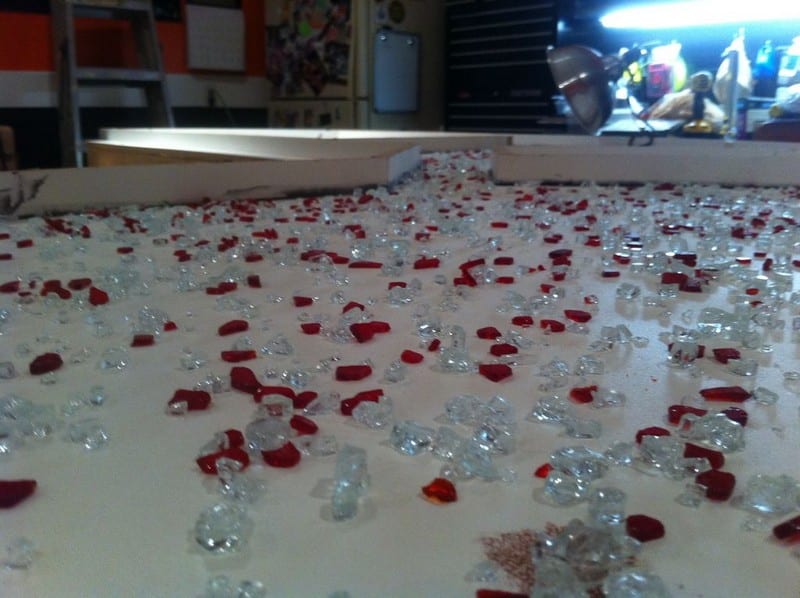
I used tempered glass pieces as an interesting inlay for my outdoor kitchen. These are red and clear. They were sprinkled over the form and will be exposed during the grinding/polishing process.
Not many pictures were taken during the pour. I was pretty busy :). I used a Quikrete countertop mix along with liquid colour. Charcoal / Black was the colour of the tint. I used a large electric mixer from a neighbour, and we mixed 3 bags at a time. It was quite a process but it went very well. After allowing for a 7-day cure, the side forms were removed and the counter was flipped to begin grinding.
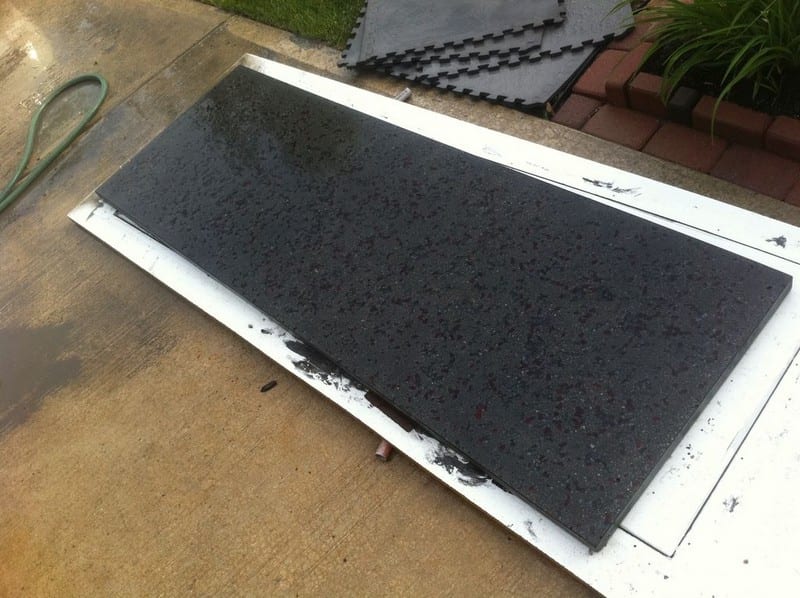
I used an angle grinder that has a water port that shoots water into the centre of the grinding pad. This keeps the area of the outdoor kitchen flushed. I started with a rough grinding wheel for rapid material removal to expose the aggregate and progressed up to 3000 grit with diamond pads.

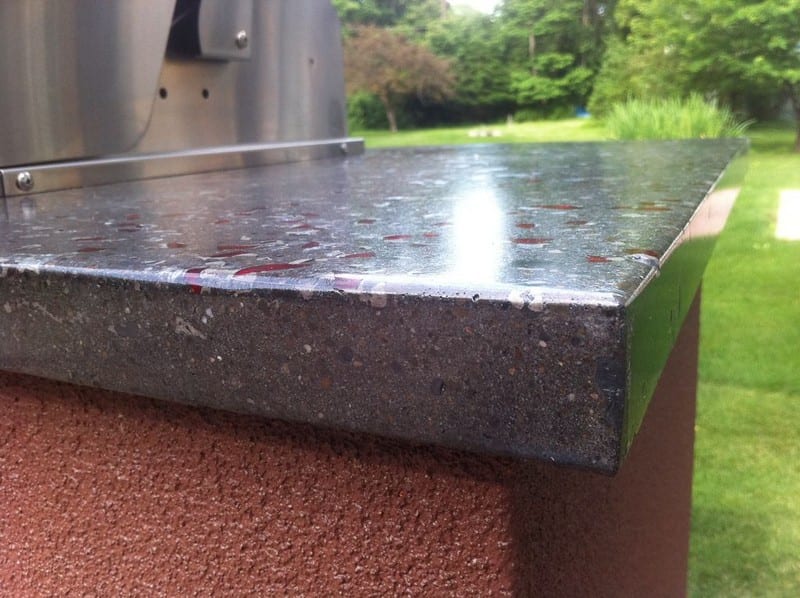
The finished product looks like glass. I found Cheng products late in this outdoor kitchen project and used Cheng spot filler, sealer, and concrete wax. Their stuff is top-notch, and I will be using their products in my next home adventure.

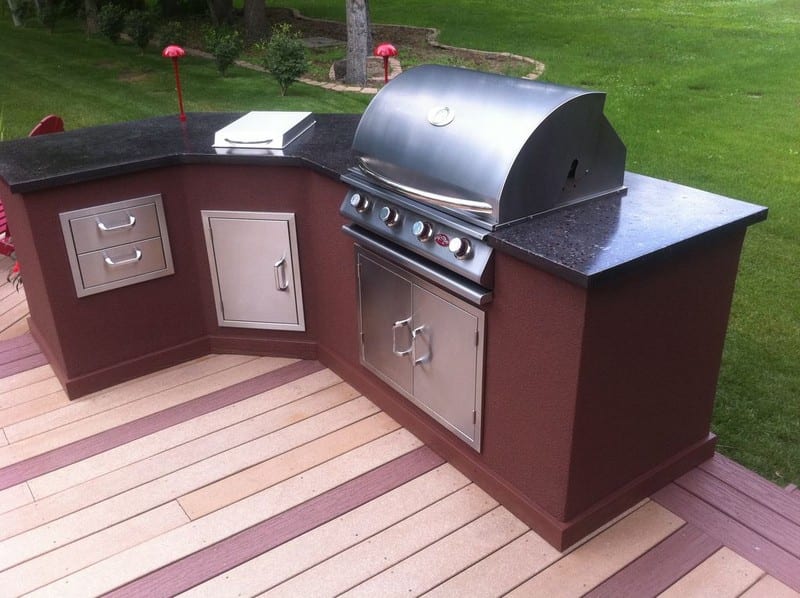
This stuff is heavy, make no mistake about that. And of course, I had to do the largest piece in one pour. I gathered up about 6 of the strongest guys in my neighbourhood, and we carried the counters out to the bases, which I had previously moved onto the deck. The doors were purchased online, these are pretty easy to find.
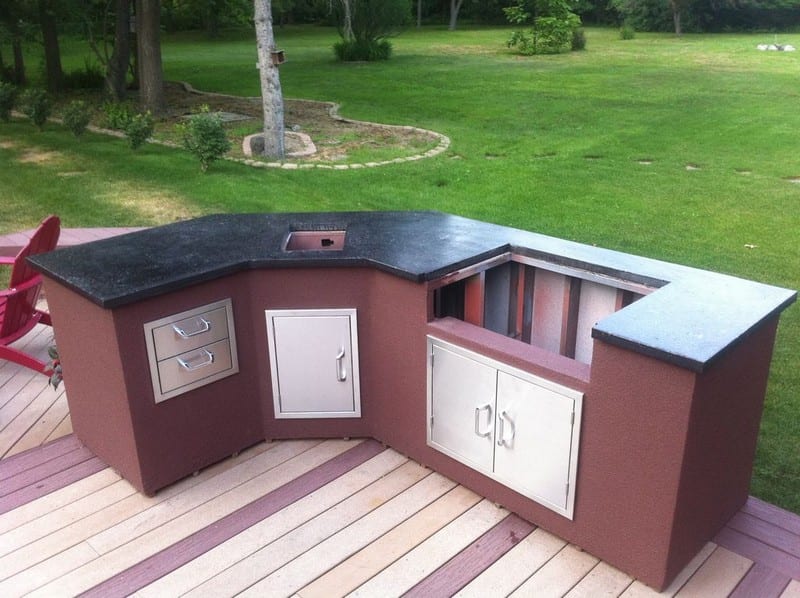
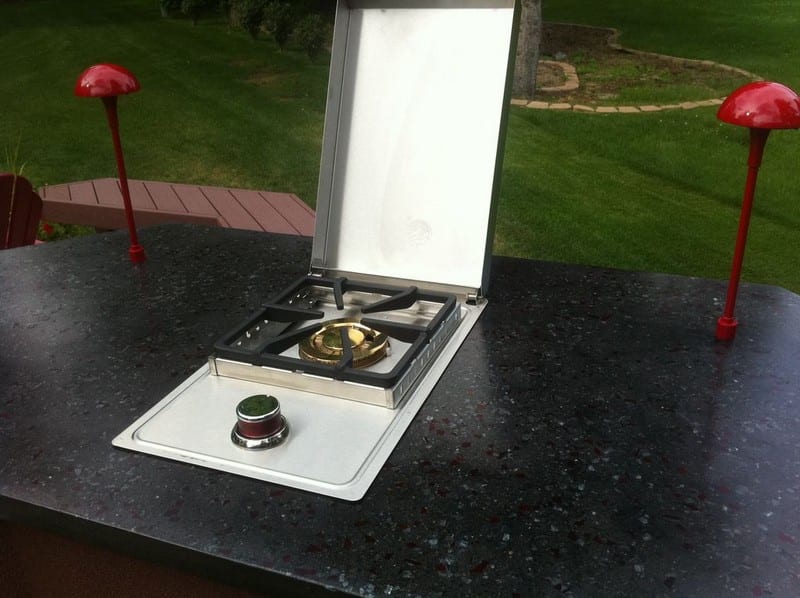
Silicone was used as the adhesive, and after the counters were put in place, I installed the remaining components. The grill and side burner are Calflame units.

The mushroom lights are low voltage, and we wanted red so I had to disassemble them and paint them. Rustoleum is great outdoor paint.
We have enjoyed this very much, and use it almost daily – even in the winter as we are in Michigan. Concrete was pretty much our only option for survival in our climate, with the freeze that cycles. With proper care, these will last for many years.
Of course, you can always choose the finish that would fit your taste and your home. You can rearrange the countertop layout that would work best for you as you do your cooking. So how would you design your own outdoor kitchen?
Thanks to glennmaggard for this great project.