Levelling and trueing the fire pit swing set will take a little time and patience. There will probably also be head scratching.
Again, there are several ways to do this. My technique might not be the absolute easiest, but it turned out pretty well.
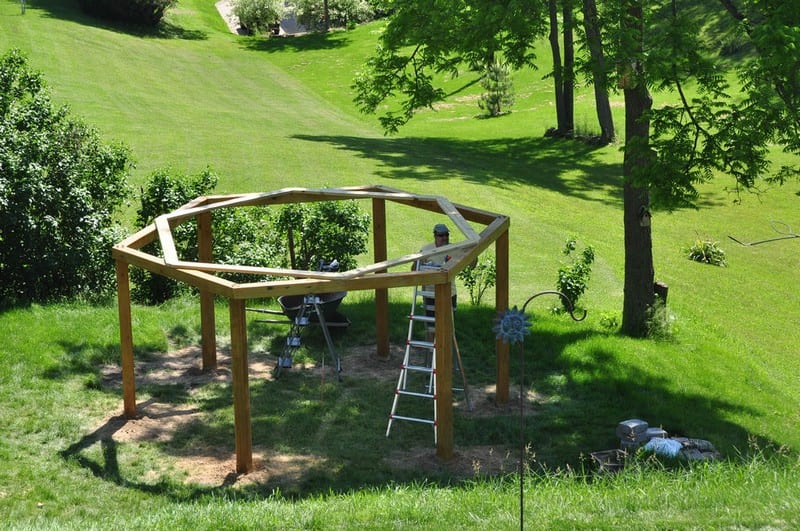
Remember those “cheater” beams we made out of the 2×6 boards? Get those out and set them on top of each fire pit swing set post. Screw each side into the top of the posts with two deck screws. The position of the cheater beams should be consistent across the centre on all posts. In my case, the ends of the cheater beams (points) just stuck over the outside of the posts by about 1/2 inch.
Now take the 2×2 braces and screw one to the top of each swing set post. Hammer in the anchors next to where the brace touches the ground but do not attach them yet. You have some extra braces to use if you need to anchor a couple of swing set posts from two directions.
Time to measure everything again for your fire pit swing set. Make sure that the cheater beams have exactly the same dimensions that you recorded for the beams you cut and laid out on the ground. They should be completely true but do not yet need to be perfectly level.
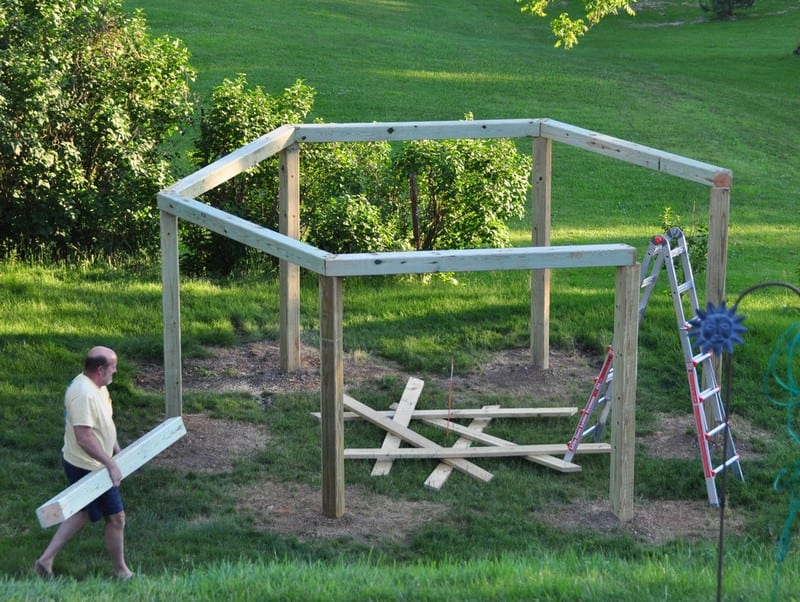
Once the hexagon is true, screw the bases of the braces into the anchors of your fire pit swing set. You might need to anchor one brace, check dimensions, and then anchor the next. The goal here is to make the hexagon perfectly symmetrical at the top. The poles to your fire pit swing set can be a little crooked.
Ok, now that the top of your structure is symmetrical, you can use the fire pit swing set post level or box beam level to ensure that each post is perfectly straight. You may need a little leverage to move the bottom of a post an inch or two. Use a shovel or a rock-breaking rod. Do not forget to check the beam measurements each time you move a post to make sure it is all still true.
Once the fire pit swing set posts are straight, you can level. I did this by setting my 8-foot box-beam level on top of each of the cheater beams. For low posts, pour in a little paver base and lift up the swing set post to allow the paver base to flow under it. You may need to disconnect the brace so you can lift the fire pit swing set post.
Keep levelling all the way around the fire pit swing set structure until all of the cheater beams are level. I ended up with one that was about an inch high and decided not to pull the beam out to dig more. Only I notice.
Once you have the fire pit swing set post-tops level, measure all of the beam dimensions again. Chance is good that something moved slightly. Adjust and reattach the braces as needed.
Once everything is true and level, pour a little gravel or paver base into each hole to ensure that there is drainage at the bottom of each post and that the post isn’t going to move as you pour concrete. This step will keep your fire pit swing set secure.
Moving on to the next step of your fire pit swing set. Mix and pour the concrete one bag at a time. Pour it in evenly, then jam the concrete in around the post with the iron re-bar you used as the centre marker. The concrete should stop at or just a little below grade. Angle the top edge of the concrete so it will channel water away from the post. Let it dry overnight.

Once the concrete is dry, you can take down the braces and the cheater beams. If you are going to stain the wood of your fire pit swing set, you might want to hold off on grading until after you’ve stained it.
OK, now is the time to look at your fire pit swing set posts and clean them up a little if you want. Sand down any pencil lines, splinters or rough areas. I decided to use a router and a round-over bit to radius all of the edges of the posts and the beams before they were installed.
The cheater beams of the fire pit swing set you used before are perfect templates for the real beams in terms of where the lag bolts are going to go. Use the screw holes on the cheater beams as a template for the countersunk lag bolt holes on the actual beams. I countersank my lag bolts about 1/2 inch. Drill holes in the beams that are the same diameter as the lag bolts but just drill a pilot hole down into the posts or use the hole made by the screws holding the cheater beams.
Set the beams on the fire pit swing set posts in the order we numbered them before and place the lag bolts with washers into each of your drilled holes. Using the socket set, start cranking one side of the first beam into the post. Once it is in there a bit but before it is tight.
Drill pilot holes for the 4″ deck screws that will hold the beams of your fire pit swing set together tight. Then screw in the deck screws. If your angles and posts are true, there will be no gaps between beams. Now finish ratcheting down the lag bolts, repeat this for each beam.
Remember when I said to mark the centre line of the beams when you first cut them? Here is where that comes in handy. Set each 2×6 board so that it lays over the centre line on two beams for your fire pit swing set. Use a speed square or straight edge to mark the cut on each end of the board. The cut on the board should match the centerline on the beam.
Number these boards on top so you can keep them in order. I suggest you cut each board one at a time and then place them on the structure to make sure they fit properly. That way, if you cut one board too short, you can cheat a little by cutting the next a little longer. You will also want to trim the outside edge of each board so it does not poke over the beam. That gives a much cleaner look.
Oh, and these boards have the same cut angle as the beams. 30 degrees.
For my fire pit swing set structure, once all of the boards were cut and set on the structure for fit, I rounded over the ends with a router so there were no points or places to splinter.
When you are happy with the way these boards look, screw them in with 2 4-inch deck screws on each board end. The fire pit swing set structure should now be rock solid and should not move at all.
Now that the fire pit swing set structure is all assembled, it is time to stain and level if your yard is sloped at all. Give every board another look to make sure there are no pencil marks left. Once stained, a pencil mark will never go away. To stain the structure, I used a quality deck stain and gave it two coats.
Once the stain is dry, grade around the base of each post and level the area as needed. (See the sidebar in step 4) I was on a gentle slope and needed to bring about 5 yards of dirt in to level.
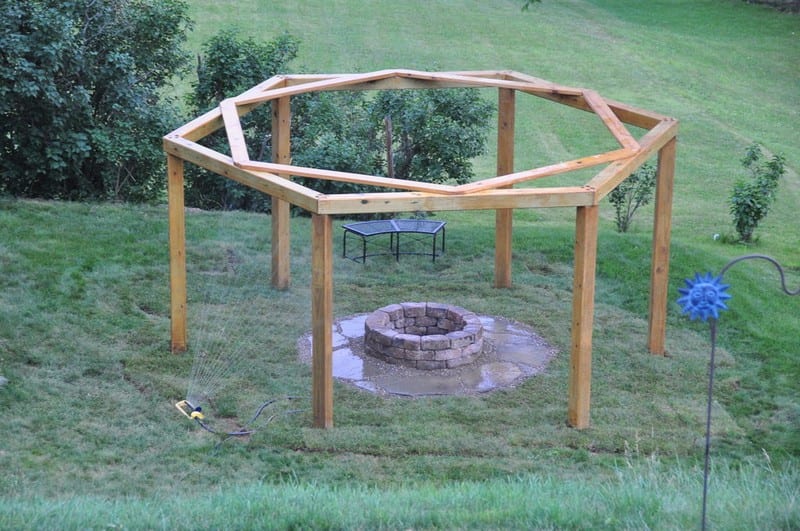
I suggest that you place your fire pit as you level the area. This way you can level the fire pit first and ensure that the foundation for the pit is exactly at or a little below grade. If it is below grade, the foundation blocks will be completely hidden, giving the pit a nice clean look. Once you are happy with the layout of the fire pit, use landscape block adhesive to secure at least the top two rows of blocks to the rows underneath them.
I used large concrete pavers for the foundation and concrete landscape blocks from Lowe’s for the fire pit. I wanted grass under the benches and a small gravel area around the pit. I also ended up using a slate that I shaped to fit. To finish it off, I purchased sod rather than having to wait for weeks for the grass to grow from seed.
If you ordered the benches from Louisiana Cypress Swings and Things, they will come in flat boxes and some assembly will be required. They are easy to assemble, though. Just follow the instructions and let them know immediately if anything is broken or missing.
To hang the swings, measure the distance between the chains on an assembled swing. Now go down to the structure and measure out from the centre of each beam (where the cross brace sits) one-half of the distance between chains. Mark those spots. Assuming you purchased through-bolts with lock nuts, you will want to drill through the beam in these locations with a bit equal to the diameter of the bolts.
Insert the hanger bolts from the bottom, drop a galvanized washer on top and tighten down the lock nut. (If you choose to use the lag eye bolts provided with the swings, just drill pilot holes into the bottom of the beams at the correct locations and twist the bolts into place with a large screwdriver or other tools that will give you some leverage. Repeat for all 5 beams where you want to hang benches.
To hang the swings, I used screw-down snap hooks and eventually added swing springs. Once you are sure the height is correct, cut off the excess chain so it does not rattle.
The cypress swings can be sealed but will weather to a soft grey if you don’t finish them. I’ve had no problem with splinters.
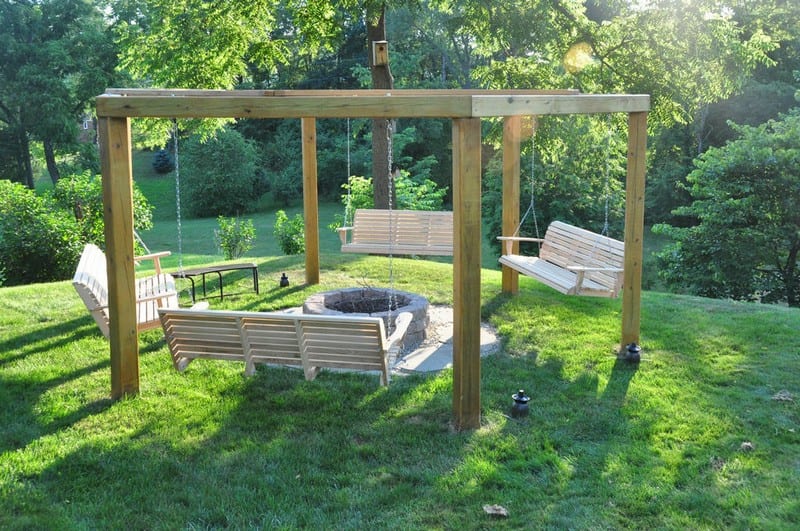
Once everything is complete and cleaned up, find some dry firewood and light it up! We placed Tiki torches just outside 4 of the posts to provide light. It is almost too much light. Grab a beer or glass of wine, light a fire and congratulate yourself on a job well done!
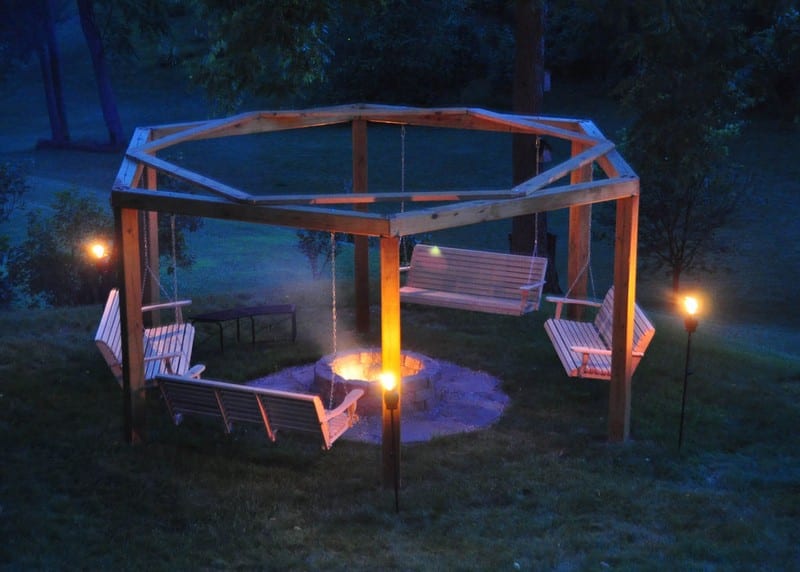
Your outdoor area doesn’t have to be dull. Add features that are both functional and beautiful just like this fire pit swing set, and you’ll be able to improve not only its look but also the quality of time you spend in your outdoor living space.
Thank you hodgepodgerama for this great tutorial!