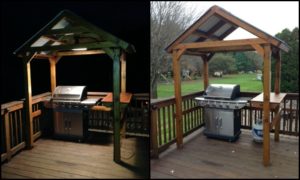
Many of us have a fascination with Mongolian yurts. Maybe because Mongolian yurts come from all those tales of Genghis Khan we’ve read!
Modern yurts are of course based on the traditional nomadic living space of Central Asia. Mongolian Yurt homes have been in use for well over three thousand years, in extreme conditions. Their basic design is ancient but enduring.
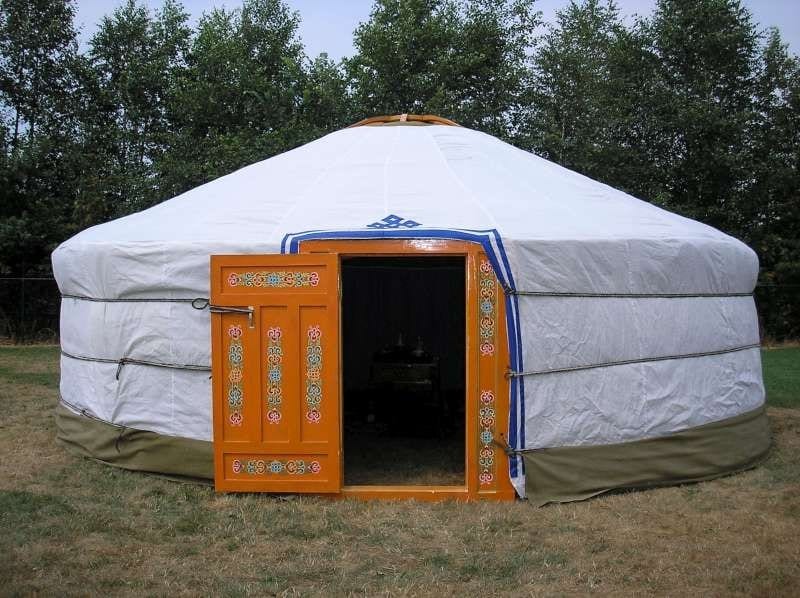
Genghis Khan and his direct descendants created one of history’s greatest empires. They did it by travelling at extraordinary speed, even by today’s standards. They took their homes and families with them, too. Their homes were the more traditional ger which has a flatter roof than the yurt shown here. They could be dismantled and re-erected in an hour!
If you’re as interested in the opportunities that Mongolian yurts can provide, from a home office to a totally unique guest room, then this could be the project for you.
Yurts or Gers?
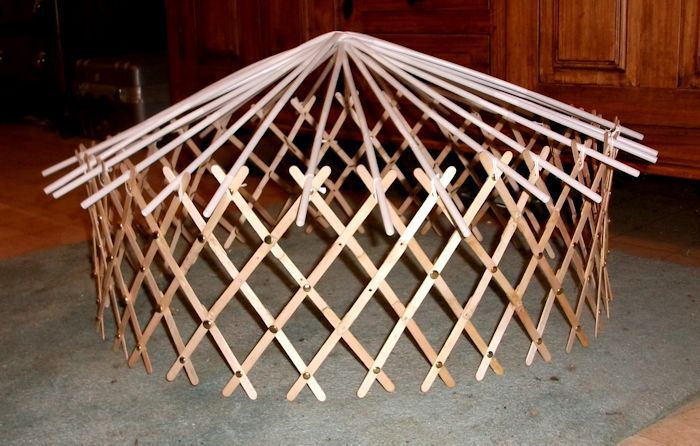
There are two main types of yurts – gers and bentwood yurts. The only difference is their roof. A ger is the older, traditional style of a yurt. In fact, “yurt” is a Russian word for what the Mongolian people call ger. The roof of a ger is made of straight poles attached to the circular crown. Gers have a very gently sloping roof.
Bentwood yurts are a later development. Makers of bentwood yurts use steam to bend the roof poles before attaching them to the crown. Bentwood yurts have a steeper roofline and a taller, domed shape.
Click on any image to start the lightbox display. Use your Esc key to close the lightbox.


Materials:
- 70 pieces 2400mm x 6mm x 35mm Pine Timber – for walls
- 8 pieces 2400mm x 45mm x 35mm Pine Timber – for main roof support
- 8 pieces 2400mm x 45mm x 16mm Pine Timber – for secondary roof support
- Timber – for door frame
- Metal
- 16 meters Proofed Roof Canvas
- 8 oz Wall Canvas
- 300 pieces of 1-1/2-inch Wall Bolts
- Nylon Nuts
- Rope
- Paint – for marking
- Metal Pins – bent 6mm Mild Steel Rod (150mm long with 50mm handle/bend)
- Roof Eyelets
- Large Galvanised Nails – bent to serve as hooks for tying rope
- 15mm Rod – for roof hub
- 3mm Woven Venetian Blind Cord
Tools:
- Table Saw
- Drill Press
- Welder
- Electric Drill (with Spade Bits)
- Hammer
- Sewing Machine
- Scissors
Steps:
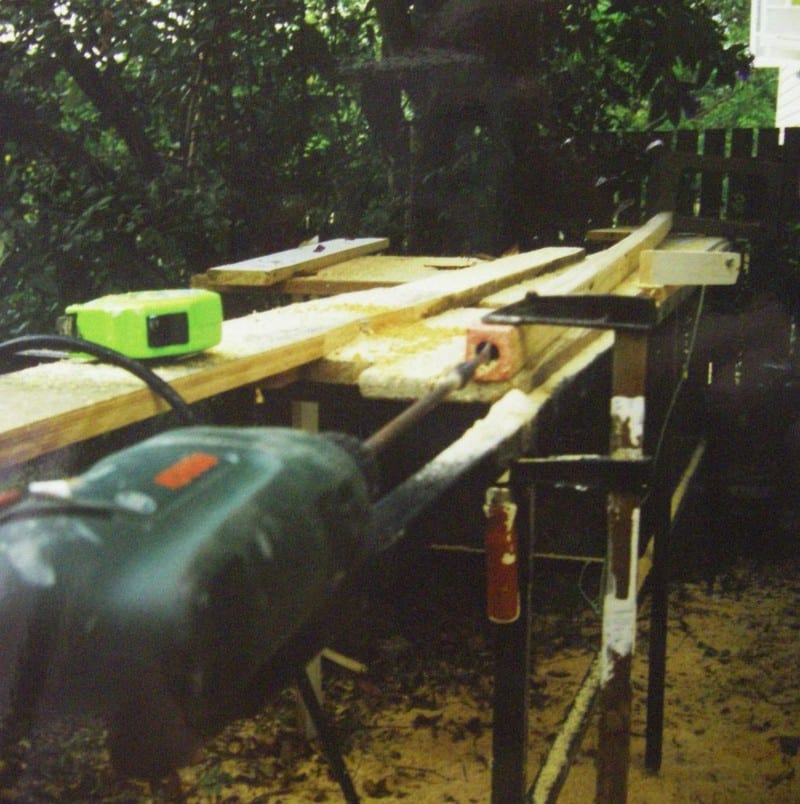
I used approx 6mmx35mm (1/4″x1&1/2″) cut from 90x35mm pine construction timber for the DIY Mongolian yurt. Using a “thin kerf” saw blade in a standard circular power saw I was able to cut 9 or 10 slats from each 90×35 length, so I cut up 8 lengths into about 80 slats, and this gave me some spares to allow for the more than an occasional knot in the timber which weakened the slat and/or caused it to snap.

The yurt is quite flexible with such thin slats. It’s quite strong enough though, so if you are after a LIGHT and easy-to-carry wall structure then go for 6mm, a reasonably sized guy (me!) can easily carry my entire wall structure when it’s rolled up into one 8′ long 300mm across the cylinder.
The length of timber was 8′ because the slats are angled at 45 degrees when set up, giving a wall height of approx 5’6″, which is adequate for anyone ‘normal’ (if you are 6’6″ tall u might like slightly taller walls).

CALCULATING THE NUMBER OF SLATS REQUIRED
A number of factors are involved:
1) How many bolt holes (i.e. overlapping slats) do you have in each slat?
2) How big do you want your yurt to be, and
3) How many roof supports do you want to have.
The number of bolt holes can be between 5 and 10 per slat. I have seen examples of 5, 7, 8 and 10. I used 8 holes, laid out thus:
first hole : 3″(75mm) from one end (the top)
next 7 holes: 1′(300mm) in from the last
leaving: 9″(225mm) between the last hole and the other end (the bottom)
This gives a “grid” when assembled whose sides are 1′ (300mm) in length.

Some maths: Let’s assume we want a yurt of around 15′(4.5m) diameter, and we are using 8 bolt holes separated by one foot into an 8′ slat as described above. When the slats are assembled we will also assume that they are angled at 45 degrees. This results in a wall height of around 5’6″ with the slats at 45 degrees.
The angle of the roof will mean that the centre of the yurt is over 7′ tall (more on that later), so if you are more than 5’6″ tall, don’t worry; you’ll only have to duck when going thru the door.
If the slats are at 45deg. then they will form diamond shapes in the wall grid that are actually completely square. The width of these “squares” across the diagonal (i.e. horizontal to the ground) is (using Pythagoras) square-root of 2, or 1.41′ (424mm).
In order to get a tent that is 15′(4.5m) round you need a circumference of 3.14×15′ (3.14x4500mm) ie: and 47.1′ (14.13m). with each ‘square’ being 1.41′(424mm), which means we need 33.65 of them to go the entire way round the circumference.
Each square takes two slats, so we need 67.3 (must be multiples of 2) rounded to 68 slats for the entire tent. That said, we haven’t allowed for the door yet or taken into consideration how the roof sits on top of the walls, but you get the idea.
If we make the door 2×1.41′ or 2.82′ (846mm) wide, then it’s a nice even figure, and we can simply reduce the number of required slats by 4 to 64. (the door taking up the space that those slats would have taken up).
Since the roof supports have to have their lower end supported onto a point where the slats intersect, then we must be able to divide the number of ‘squares’ around the tent evenly by the number of roof supports we decide to use (or suffer un-evenly spaced roof supports – eek!).
Let’s say we decide the roof is to have 8 primary supports that hold up the centre ring, and 8 secondary (smaller cross-section) supports that are for stopping the canvas from sagging, so we end up with 16 supports.
In order to divide the number of roof slats up evenly into the number of walls ‘intersections’, we must have either 16,32,48,64 or 80 ‘squares’ around the yurt (counting the door as two for the sake of the math).
Since we figured that we are going to have ‘33.65’ (rounded to 34) squares, then we were pretty close to the required 32 that we have just said we must use. Of course, you could also change the number of roofs supports to match the walls, rather than change the number of wall slats to match the roof supports.
So, the decision I made was to have 16 roof supports, meaning 32 ‘squares’ (two of them are the door), so with 30 actual squares (32 minus two for the door), we should need 60 slats (plus or minus a few to be cut up either side of the door), and have a resulting tent size of just a smidgen smaller than we originally said.
The final size is 32×1.41′ or 45.12′(13536mm) in circumference, and 14.37′(4310mm) in diameter if you keep the “diamonds” perfectly square. Just push the walls out a little more, and make them a couple of inches shorter, and you still have the 15′-16′ tent you started with.
Use a drill press, or be VERY careful to make sure you drill straight thru. Every plan I read said that a drill press was a good idea. I didn’t use one, I was just really careful and mine worked.

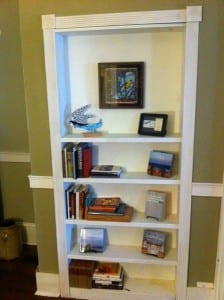
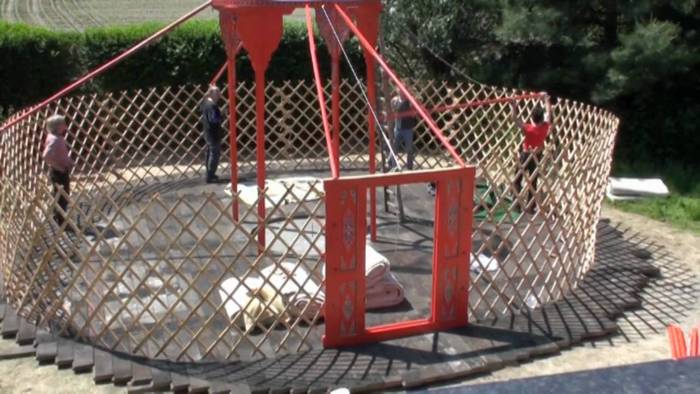
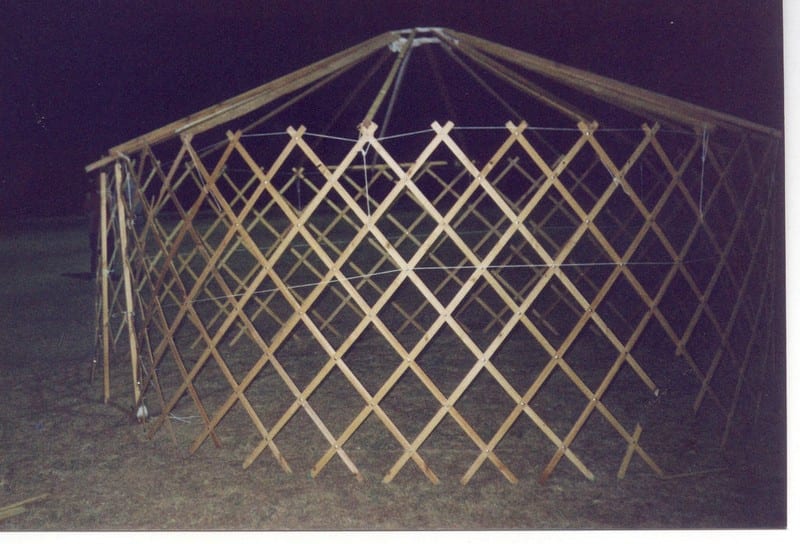
ASSEMBLING THE WALLS:
Bolts are so much easier than rivets and so much stronger than cord or cotter pins. Just make sure that you either use self-locking nylon nuts or deliberately damage the end of the bolt thread after putting the nut on (this stops the nuts from coming off in transit and getting lost).
I just hit the thread end of the bolt with a hammer a bit as it’s cheaper than nylon nuts (go to the hardware store and check the price difference for yourself – if you are on a tight budget you’ll do what I did).
If you are building a yurt then you’ve obviously seen how the walls are put together so I won’t bore you anymore. It’s just a case of inserting 300 odd bolts thru the right holes, putting all the nuts on (no need to tighten them – actually tightening them is very bad!), and then making sure the nuts won’t come off easily after you damage the thread a bit.

The only assembly point that is ESSENTIAL is that all the slats angled one way are *inside* the circle, and all the slats angled the other way are outside the circle, otherwise, the frame won’t fold together in a scissor-like fashion.
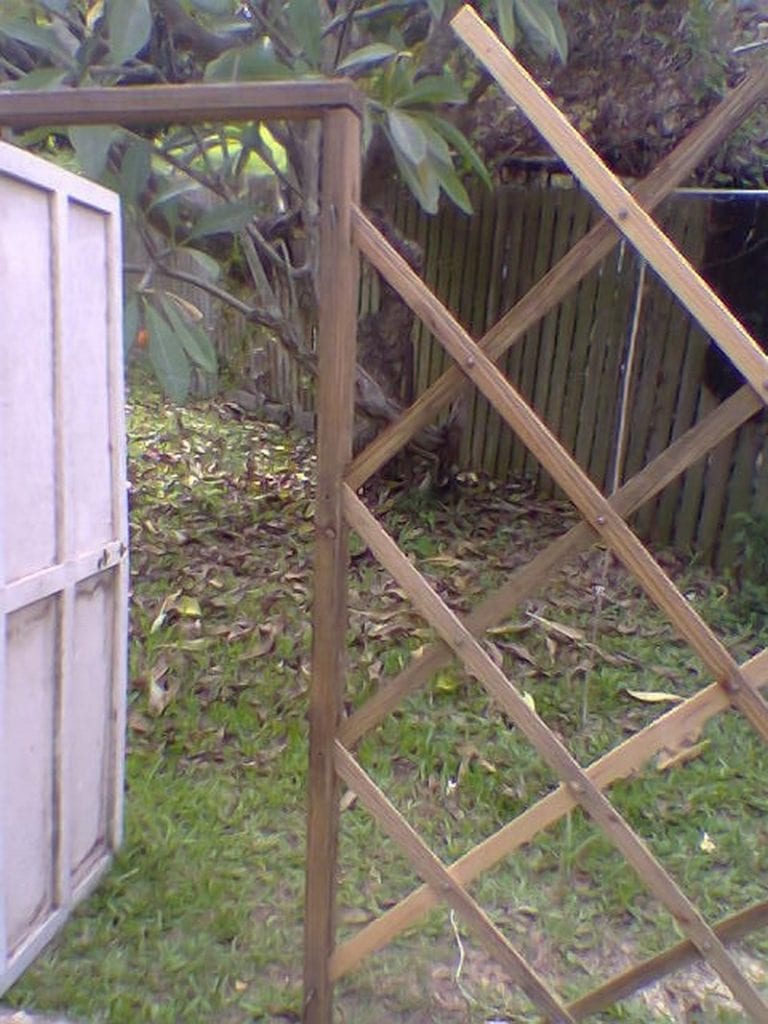
Near the doors, the slats must get shorter by one hole at a time, I fiddled with the shape of the timbers where they joined onto the door frame, just because I wanted a neat finish. Everyone does their doors differently as it depends on what you want.
Mine is an extremely simple frame made from (suprise suprise) 90x35mm pine framing timber. Two lengths of the height of the finished wall (5’6″), and two of the desired door width (2.82′ or 846mm). I made the simplest possible door frame, and the door is a canvas drapery that I hang over the space.
I did that because I wanted portability, and a big solid door seemed like a real pain to carry around. To do similar, I suggest using a large timber screw called a coach screw, two in each corner of the door, drilling a hole through them and screwing them together.
MAIN ROOF SUPPORTS:
- Cut up the roof supports from 90mmx35mm (just like everything else).
- 4x2400mm lengths, each cut down the middle makes the 8 primary supports.
- 2x2400mm lengths, each cut into 4 makes the 8 secondary supports.
I live in a snow-free zone. If you are going to be snowed on you’ll probably want a greater roof pitch (e.g. make them 9′ or 10′ long instead of 8′ long) AND stronger beams.

I could say I figured out the exact roof pitch I wanted, used some more math to get the required length of the supports, and then used that to figure the size of the ring I needed if the supports were 8′(2400mm) long, but I didn’t. I decided I wanted a 1&1/2′ (450mm) ring, and that I didn’t care what pitch the roof ended up at, so long as it wasn’t flat.
I stood in the backyard with a half-assembled yurt and no centre ring, put a ladder in the middle, propped the top ends of the roof supports on the top of the ladder (a 10′ ladder I think) and guestimated that it would be fine. I built the ring and I put it together, and it’s close enough. I could increase the pitch a little, but heck it works the way it is, so why change it?

ROOF SUPPORT CONNECTIONS:
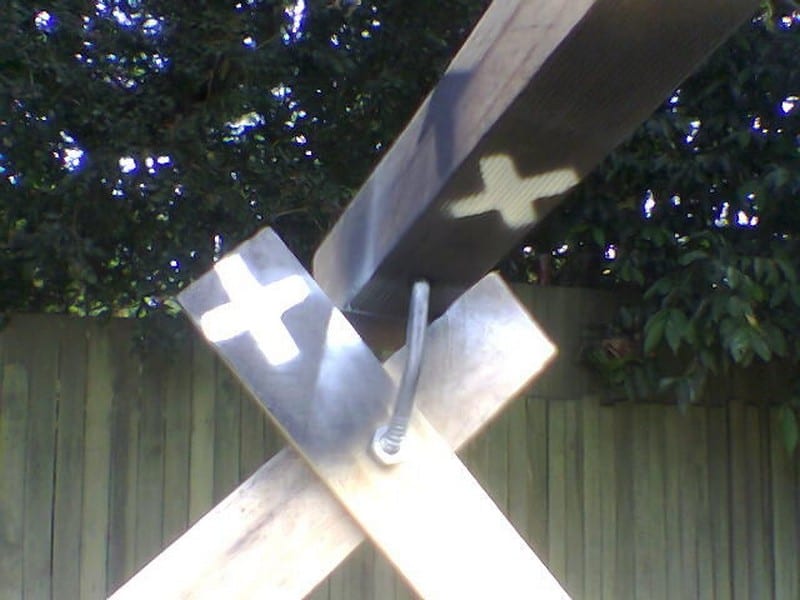
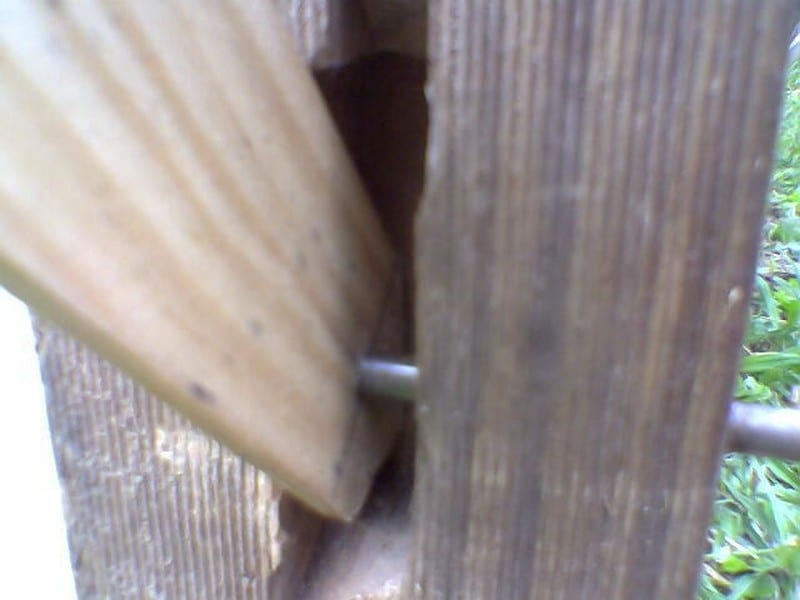
Use a steel “pin” on the top of the wall, and have a hole drilled into the roof timbers at an angle matching the pitch of the roof. The steel pin on the frame goes into the hole on the roof timber and creates a joint. Have a look at the pictures, and you’ll see what I mean.
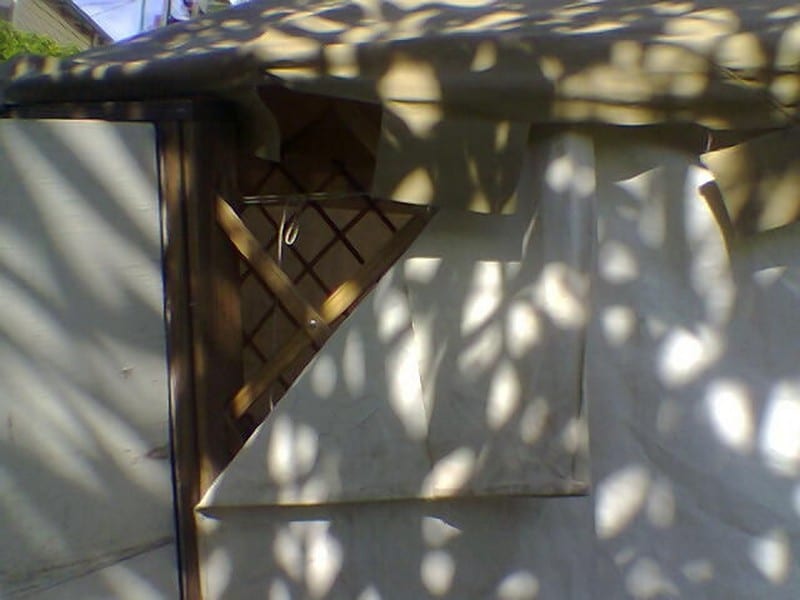
The whole purpose of the ‘hub’ is simply a way of connecting the centre of the roof together while also giving a centre ‘vent’ or ‘port’ for circulation/ventilation/smoke/watching the stars.

I own a welder and have reasonable metal working skills, so I made a 450mm (1&1/2′) ring from solid metal 15mm rod (actually an octagon, but it looks like a circle if you don’t look too closely!), and off of that I welded 8 large (15mm round) ‘prongs’, and 8 smaller 8mm round ‘prongs’ (one for each of the 16 roof supports), I arranged these so that they were angled down at the same pitch as the roof is supposed to be (whatever you worked it out to be for your tent, I just guessed).
To join the roof timbers to this steel “star”, I then VERY CAREFULLY drilled a very deep 16mm or a 9mm hole longways straight into the end of the roof supports/timbers. (I bought 2 spade bits (16&9mm) and a “spade bit extender” in order to drill a really deep hole.
I drilled about 200mm into the timber end for the large supports, and made the large ‘prongs’ 220mm long, and 100/120mm for the smaller ‘prongs’).
The remaining metal components that need to be manufactured in some way or another are:
Metal Pins – for pinning the doorframe to the wall lattice. These are just bent steel 6mm (1/4″) rods. They need to be removable so that the yurt can be disassembled and reassembled easily. I made the ones in the picture from a piece of mild steel 150mm long, with a 50mm (2″) handle/bend at one end.
Newer ones I actually make by purchasing galvanised tent pegs (just like the one shown) and cutting them in half. It’s easier, and they don’t rust so much.
Bending them is actually really easy with one end in a bench vice and hitting the other end with a hammer (start lightly, don’t rush it, or you’ll create cracks).
Roof Eyelets and Hooks of your yurt:
The hooks are actually an option, but something I find makes it easier to assemble the finished roof.
At each of the 16 points around the roof edge where the timber/s point to (ie equidistant), you should put a brass “push-through” eyelet that is large enough to lace your cord through.
Every second of these should have an “S-hook” fitted so that you can easily hook tie-down rope through it when you are assembling the yurt. I custom-made mine out of large galvanized nails, bent into a funny U shape, such that the head of the nail will not fit through the brass eyelet in the tent, but the shank will.
Bending them like this, I can permanently fit them to the roof, and not lose them, but can still lace the rope around the open end easily.

Pins for connecting walls to roof of the yurt:
Look closely at the last picture in this set, and you’ll see that the vertical part of the “pin” appears to join onto the nut/bolt that goes through the wall lattice X. It’s actually all the same bolt, just a long one, with the head cut off. The bolt is a 1/4″(6mm) diameter, 120mm long bolt with thread on about 1inch of the shank.

CANVAS COMPONENTS
Wall:
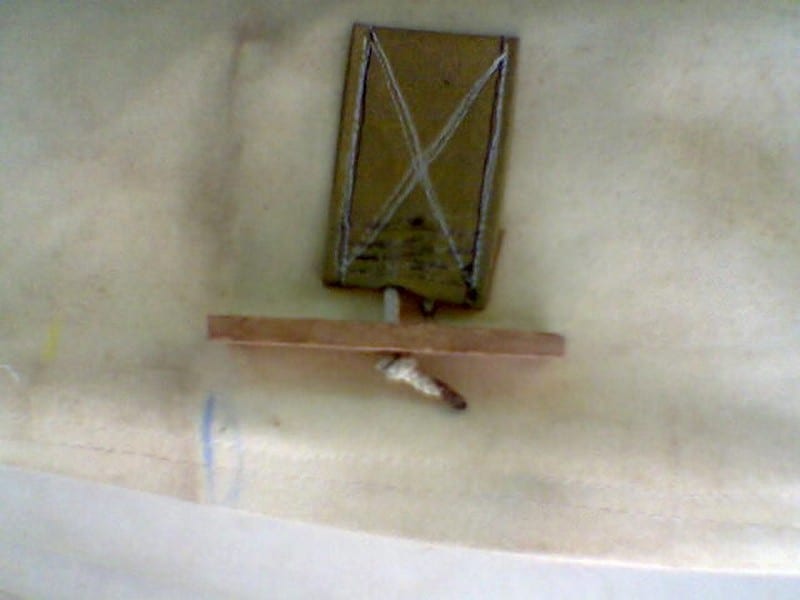
My yurts are constructed such that when all the timber frames are together, and the roof timbers are fitted, the top edge of the wall/lattice has a roof timber fitted on every second X joint. This leaves every second bolted joint free, and accessible for hanging the wall from.
To do this, I sew a reinforcing to the canvas just below the point that would be matched onto the joint in the wall, and sew a wooden “toggle”, via a strong nylon cord into the reinforcing. The wall canvas of the yurt can then just be hitched-up onto the wall timbers and hung there from the wooden toggles.
This gives a result that is invisible from the outside of the tent, easy to erect in a repeatable way, and still within the spirit of the construction.


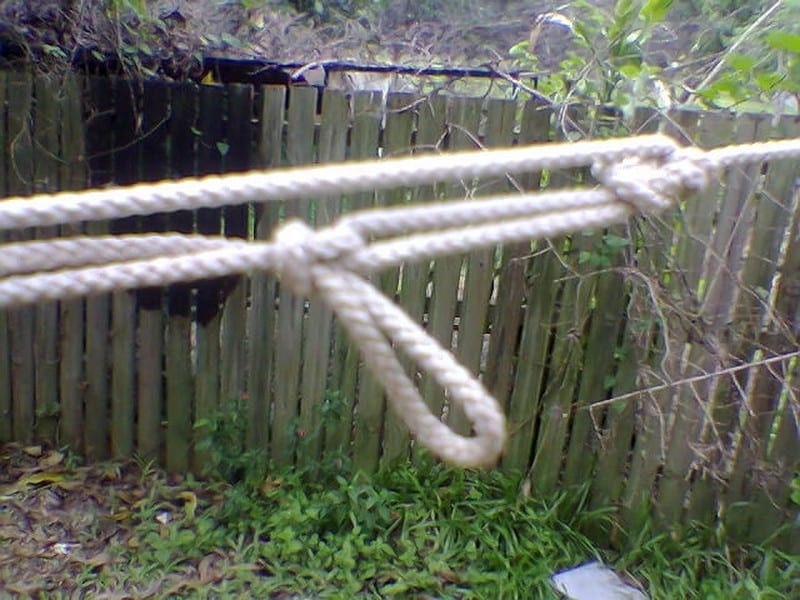
These tension ropes/cords that you can (barely) see going around the wall (I use two bands, each of 3mm woven Venetian blind cord) must be permanently fitted to the timber walls before the canvas walls and roof are put on. I will go into how these cords are tied to the wall of the yurt at the end.
During test assembly though, you can just wrap them round the whole yurt, and at least the top one must be partially tightened, or the timber lattice walls will fall down. This must be done before any weight is put on them like when you put the roof timbers us, or the wall canvas is put on.

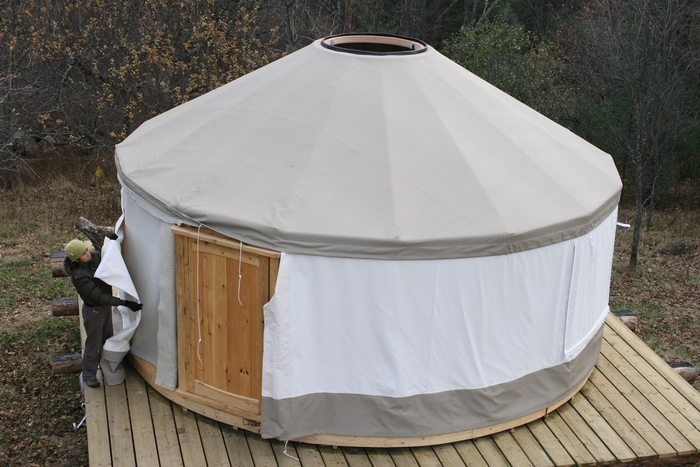
Roof:
Buy 16 metres of roof canvas at approx 6′ wide, and cut/sew it as per the picture below.
Notice how there are two sections 1800 (6′) wide, these are the full width of the canvas. The two smaller rectangles (top and bottom) are from the same length of the canvas, just split down the middle to half their width.
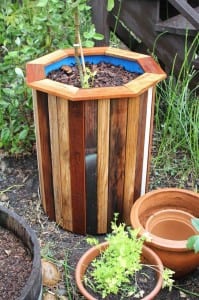
The “wedge” that is shown missing needs to be cut out and sewn up so that the roof canvas becomes “cone” shaped. to match your roof pitch.

I sew a flat and straight “band” of the canvas, about 20cm (6″) wide, all the way around the roof edge. This fabric is deliberately NOT curved to match the roof, it is instead straight to match the walls, and it hangs from the bottom of the roof, down the walls, and fully covers over the wall of the yurt ->roof joint making is really wind/rain/sleet/bug/insect proof.
Don’t throw out that “wedge” that you cut out from the yurt… Cut the biggest equilateral triangle or circle that you can from it, and use that as the “cap” to go over your vent hole. You’ll need at least 24′ (8m) of cord/rope to hold that ‘cap’ in place (three ropes that go from the tips of the triangle or edge of the circle out to the walls to be tied off.)

ASSEMBLY
The best way is to just give your yurt a go and try putting it up. Expect the first few times you do it to take quite a while. You’ll need two or 3 people, but no more. I can do it on my own now, but it’s still easier with two.
You’ll need a “tension” cord/band (or two) to go right round the top, and optionally the middle, of the wall.
It’s important that you put this in place before you put the roof supports on. Some people use a band of canvas that is a few inches wide, I use a 3mm Venetian blind cord around the top and middle of the wall (a thicker slat might not need two tensioners).

You can fit the tensioner cord permanently to the timber walls, by tying it onto each bolt-head all the way around the wall, which is a great idea, and makes putting it up so much easier too! Put the tensioning cords/ropes in place before even getting the canvas out of the car.


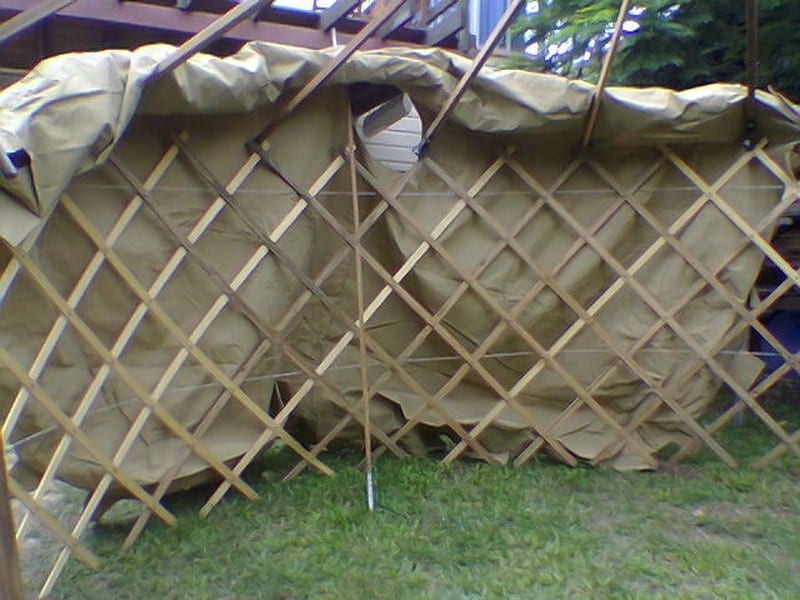
If the wind is strong, the wall canvas can act like a sail, and blow your tent away, so leave the canvas until you have the weight of the roof timber/s to hold it down.
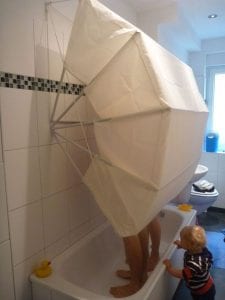
Put the centre ring up by putting in 3 opposing main supports first, the ring will then hold itself up. Try not to stand under the centre ring very much while assembling it, because getting hit in the head with a large heavy object (if it falls down unexpectedly) is unpleasant and dangerous.


Start to pull the roof canvas over the roof, and at the same time have one or two people inside the tent with long poles (borrow a couple of minor roofs supports for this if necessary), and get them to use the poles to push the canvas up and over the roof. It’s easier than trying to just drag it over with ropes.


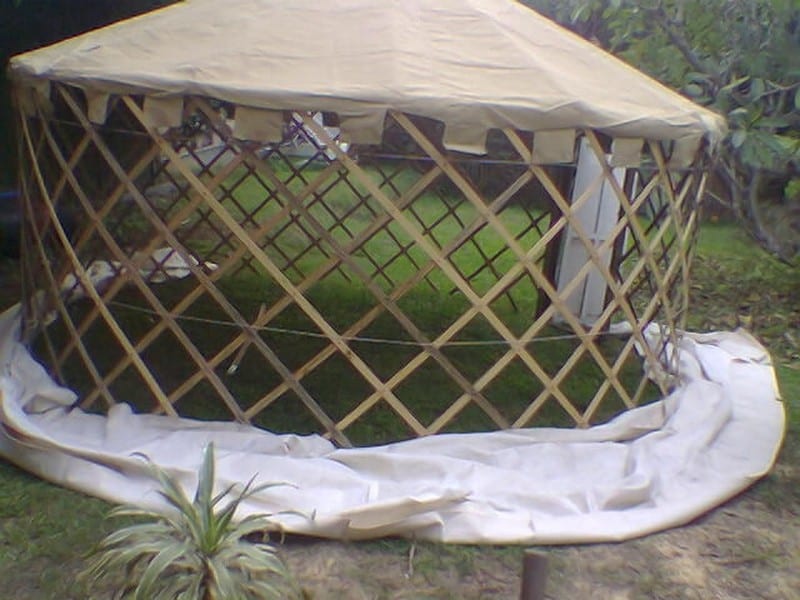
Get a tarp or large black-plastic drop sheet for your floor, you won’t regret it. Cut a circle about 3/4-1′ (~200-300mm) larger all around than your yurt, and fold the sides up inside your tent to prevent water from getting into the tent.
As a final note, yurts are generally not classified as a ‘habitable room’ nor as a permanent structure. Check first, but that most likely means that you will not need any planning or building approvals if you want to erect one as a studio, office or totally unique guest room! A quick search will find some amazing kits complete with hung windows and even French doors 🙂
Thanks to davidbuzz for allowing us to share this great project.