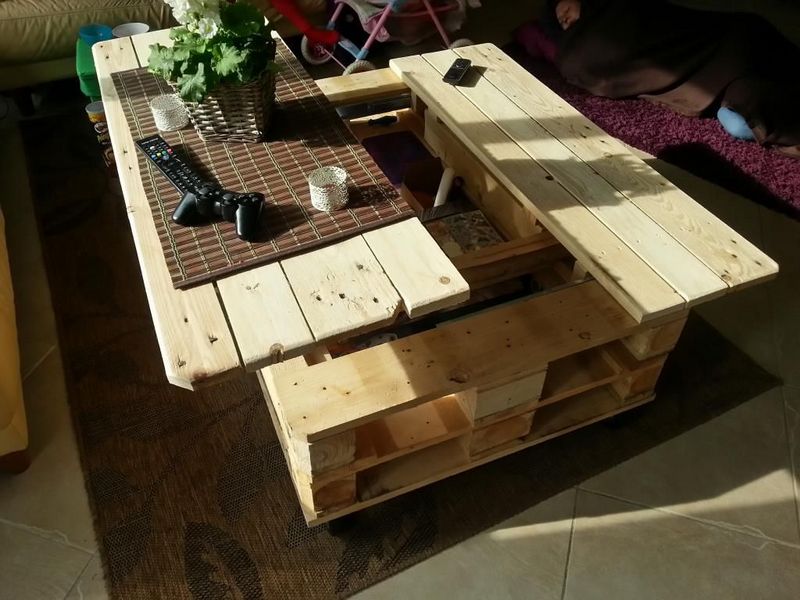
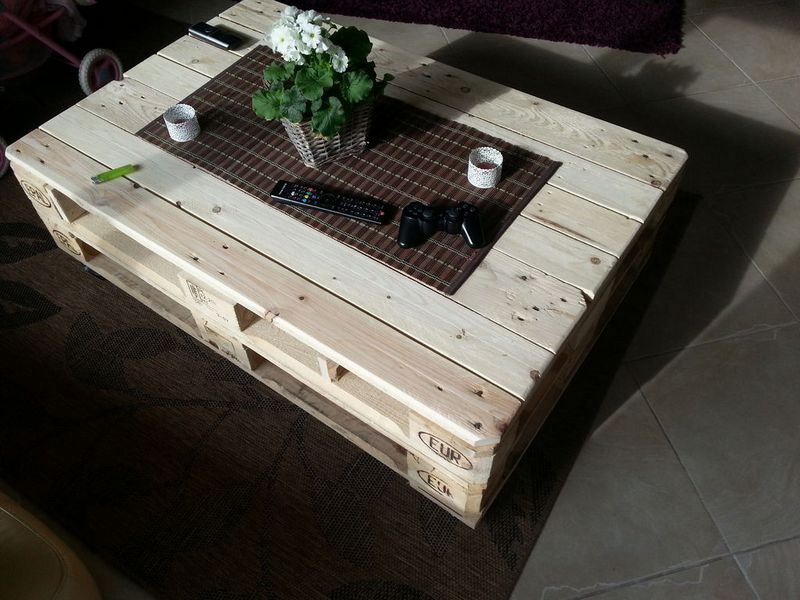
This isn’t the first lift-top coffee table we’ve shown you and it probably won’t be the last. But this coffee table may well be the least expensive! Several distinctive aspects set this coffee table apart, one of which is its construction from repurposed shipping pallets, rescuing them from a fate in a landfill.
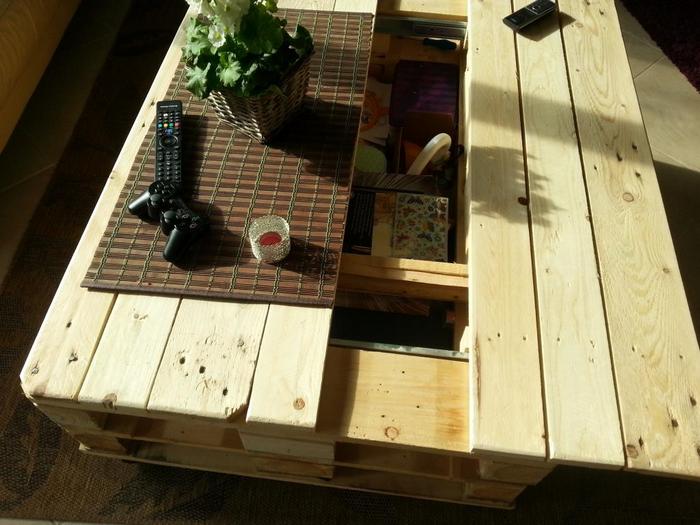
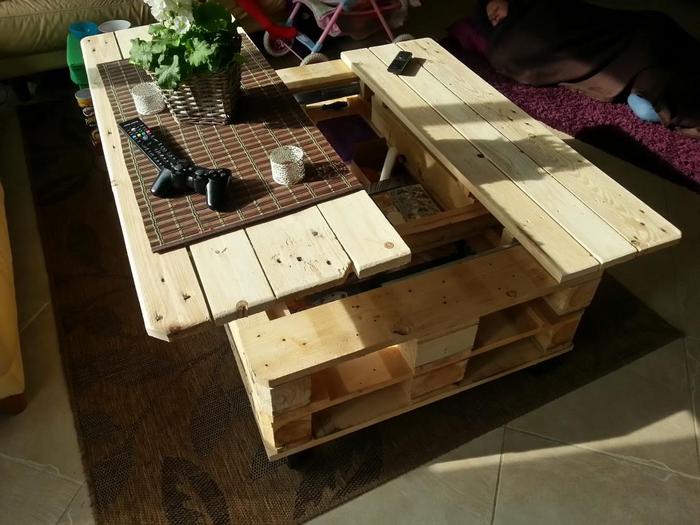
The great benefit of these lift-top coffee tables is the mechanism that keeps you from hunching over your laptop, or your food when eating off the coffee table. Another highlight of this coffee table design is the huge central storage space and the side storage compartments.

If you had to build one, what changes would you make to make it more personalized?
BTW, if you want to know which pallets are safe to use, you can get all the facts – and instructions on how to dismantle a pallet, in this post: Pallets – fact and fiction (or how to tell a safe pallet from a toxic one)…
Click on any image to start the lightbox display. Use your Esc key to close the lightbox. ?

How to Make Your Own Pallet Coffee Table
Are you ready to embark on a creative journey that combines the charm of rustic aesthetics with a touch of your personal flair? In this part, you’ll unveil the secrets to crafting your very own pallet coffee table, a DIY project that not only adds character to your living space but also redefines the concept of upcycling.
Pallets, often overlooked and discarded, will be transformed into a stunning centrepiece that reflects your unique style and ingenuity. This transformation isn’t merely about function; it’s about the infusion of your personal style and creative flair into every grain of wood.
In this project, the conventional boundaries between utility and creativity become delightfully blurred, giving rise to a beautifully handcrafted masterpiece. Get ready to discover how to make your own pallet coffee table.
Materials
- 2 Pallets
- Wood slats (that match the pallets, or you can buy a third pallet and disassemble them to use the pieces)
- Heavy duty Casters
- Heavy duty Cantilever Hinge
- 2 Heavy duty Slides
- Screws
- Thick Steel Straps (for holding tabletop pieces together)
- Wood Glue
Tools
- Cordless Screwdriver
- Saw
- Belt sander
- Crowbar
- Drill with a 3-4 mm drill bit for pre-drilling (optional)
Steps
1. Start with the first (bottom) pallet. The steps needed to be taken here would depend on the kind of pallet that you have. Ultimately, the goal is to have a box-like result where space is available for storage inside and the bottom is closed.
2. You want to start by cleaning it up by sanding it or removing unnecessary things found on it. Cut some wood slats, if necessary, to provide the space that you are aiming for.
3. Now pallets have holes on all four sides. Close these with the smaller wood slats or boards.
4. Then turn it upside down to work on the bottom. You need to close it as well by hammering or screwing wood slats. Then, attach the casters to the corners.

5. Disassemble the second pallet, removing the top part of it. Do the same “cleaning” with it. Attach the second pallet to the first one, and now you have the “body.”
6. For the tabletop, join wood slats together with the thick perforated steel straps (you can also use ¾ thick pieces of wood) as shown in the picture. Ensure the strategic placement of these fasteners, positioning them in a manner that firmly secures the wood planks together without any risk of contact or interference with other components of the table’s structure. If you desire added structural integrity, consider applying wood glue along the sides of the wood planks. This adhesive reinforcement will not only strengthen the bond between the planks but also contribute to the overall stability of the table
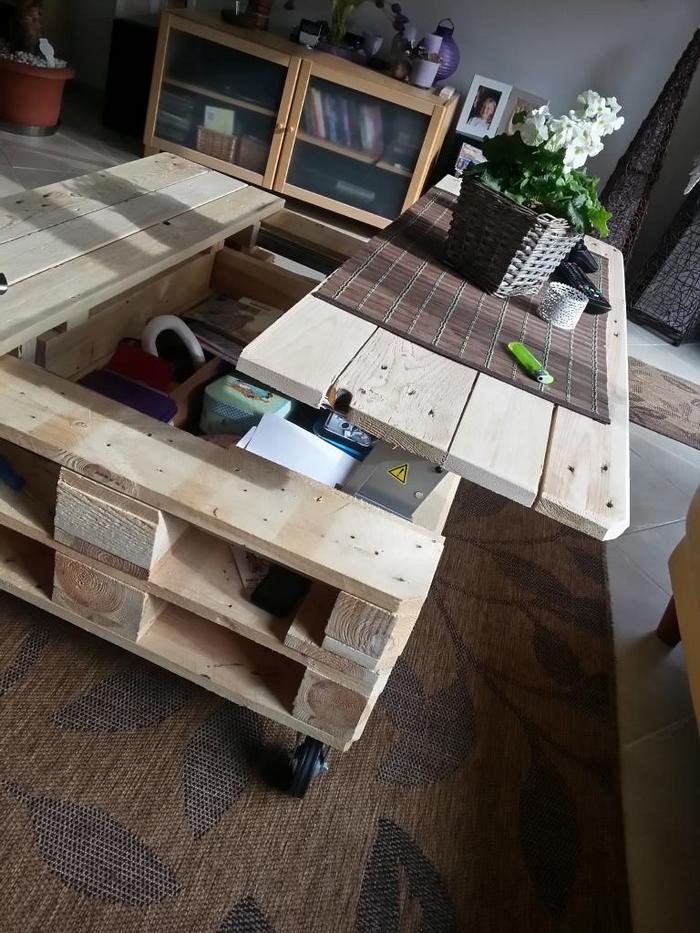
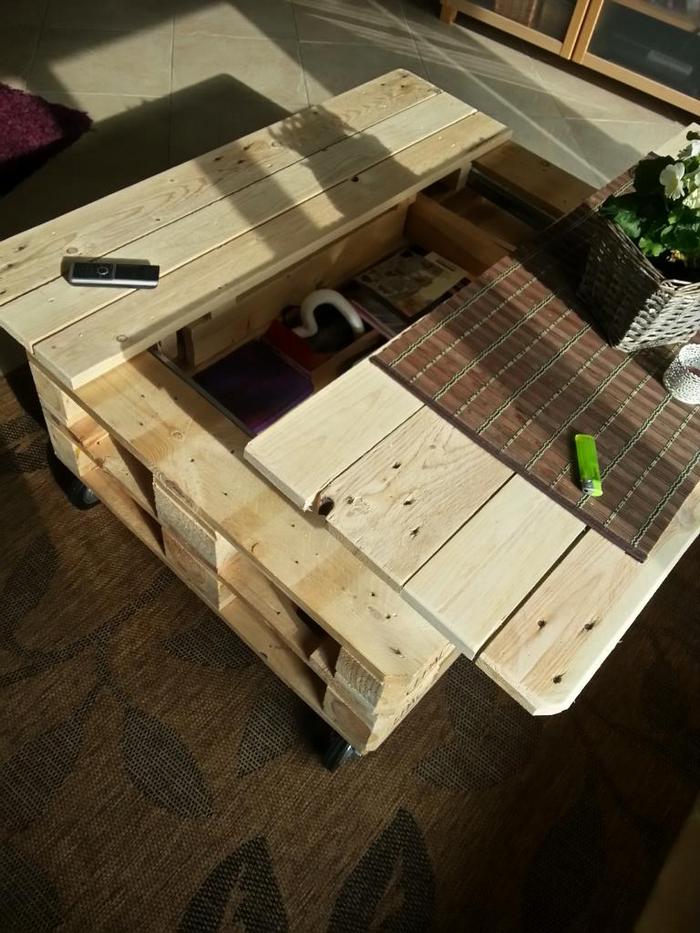
Naturally, the tabletop’s dimensions should match those of the body. However, as illustrated in the image above, a vital step involves dividing the tabletop into two distinct sections. One would have a sliding mechanism only, while the other can be lifted. As an example in the picture, this will serve as easier access to the things you will be storing inside.

7. Next, install the sliders and the hinge. You have to do a trial and error to determine the accurate positions of the mechanism before screwing them into place.
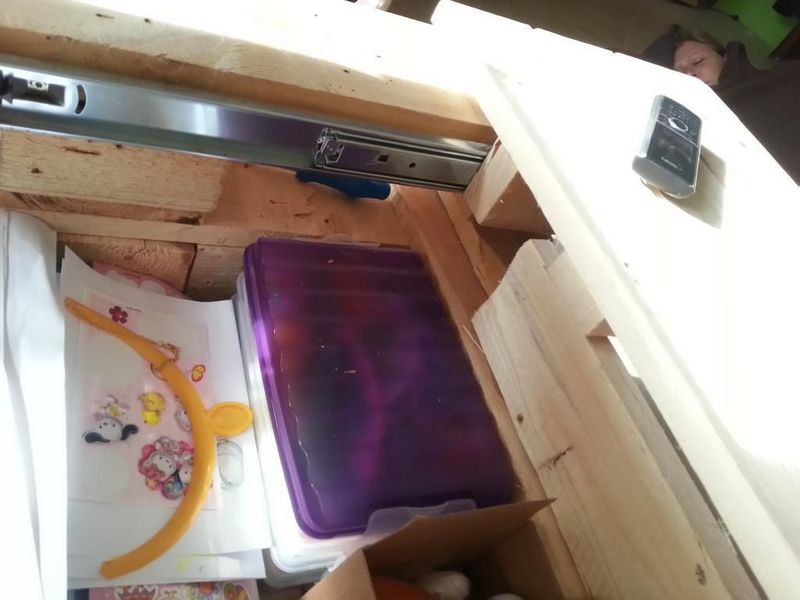
8. If possible you can install the slider on the pallet itself. But for some, you might need to add wood pieces on the inside of the body where you can attach the sliders and the hinge (lift mechanism). As you can see in this picture, the two mechanisms are installed on different wood surfaces.

Thanks to dirkdeus for sharing insights into this lift-top coffee table from pallets.
If you’ve taken a liking to the idea of crafting functional and aesthetically pleasing furniture from reclaimed materials, then the DIY pallet swing bed could very well pique your interest. This particular project seamlessly marries the rustic charm of repurposed pallets with the inviting allure of a swinging bed, resulting in a piece that not only serves a practical purpose but also becomes a captivating focal point in any space it graces.
DIY Pallet Magic
In this guide, you’ve walked through crafting a cute and functional coffee table from pallets in just eight easy steps. You’ve discovered how a touch of creativity and some straightforward woodworking can turn humble pallets into a charming centrepiece that adds a dash of rustic charm to your living space.
With simple tools, you can take unassuming pallets and, like a magician weaving a spell, metamorphose them into a captivating centrepiece. This piece of functional art will serve as a coffee table and will let you create an atmosphere that feels both warm and welcoming.
Are you prepared to embark on an exciting craftsperson’s voyage, where you’ll acquire the skills to repurpose materials and give life to your individual style? Craft your very own coffee table today, one that stands out for its exceptional, functional, and exquisite qualities.