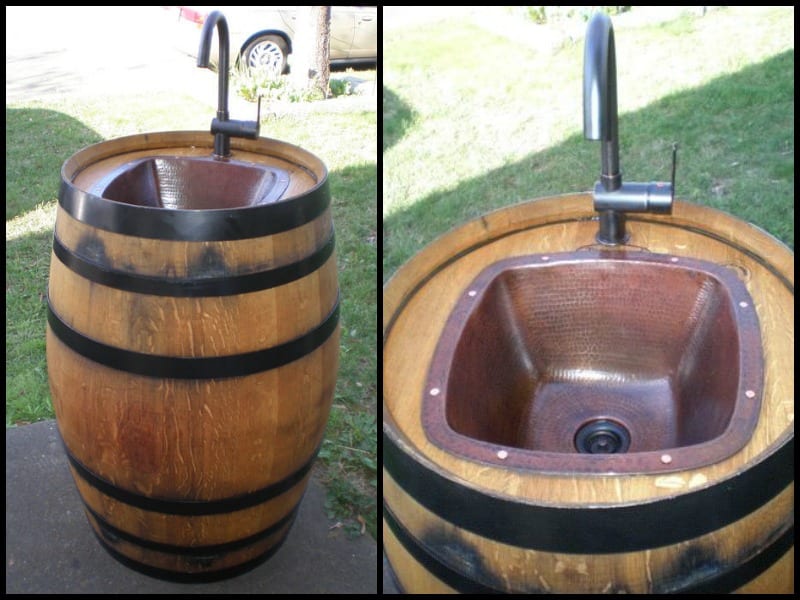
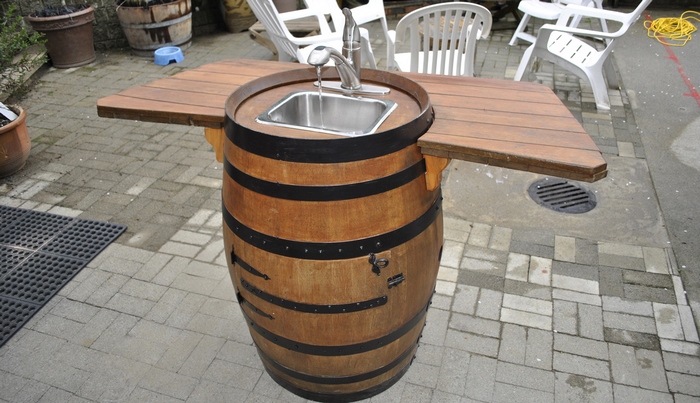
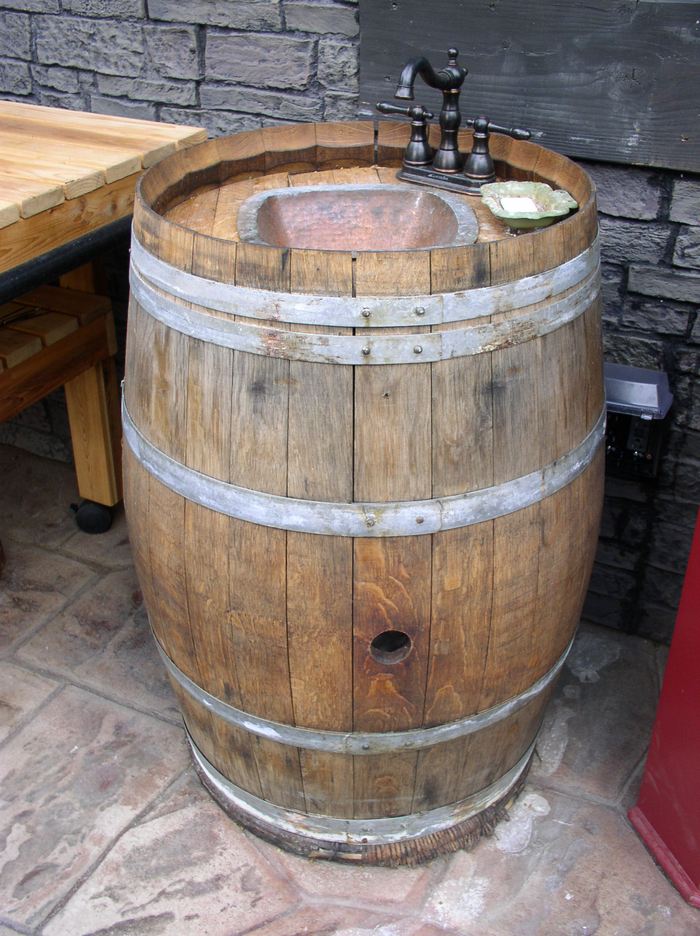
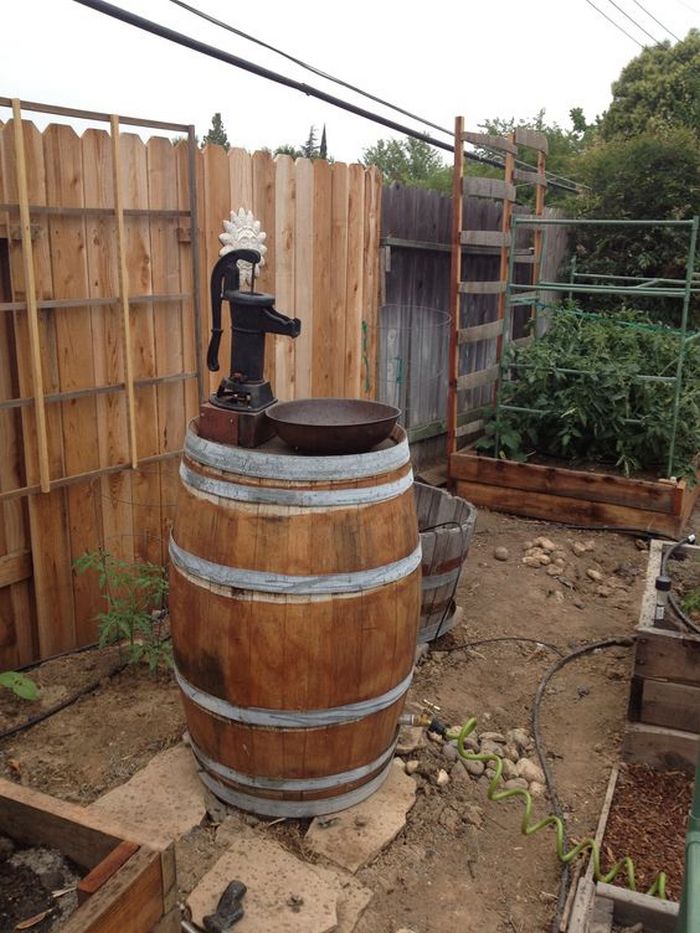
Here’s a great addition to your outdoor space. Why not turn an ordinary wine barrel into both a functional and decorative outdoor sink?
Wine, whiskey and brandy are stored in oak barrels to both ages the contents and add flavours that are absorbed from the oak staves. After a period of use, the surface has given all the tannins and flavinoids it can, and the staves need shaving back to fresh wood.
But stave shaving can only be done a couple of times before the barrels have given all there is to give. That’s the time you see them offered for sale. Amazon is a good place to find used wine barrels.
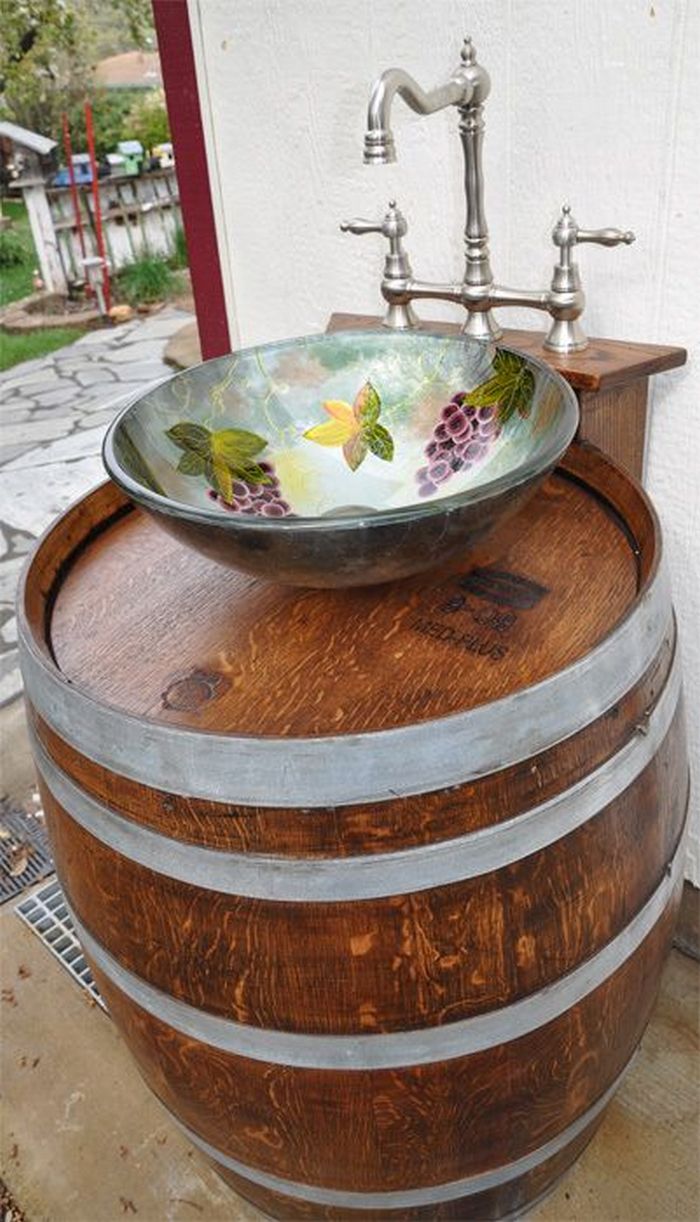
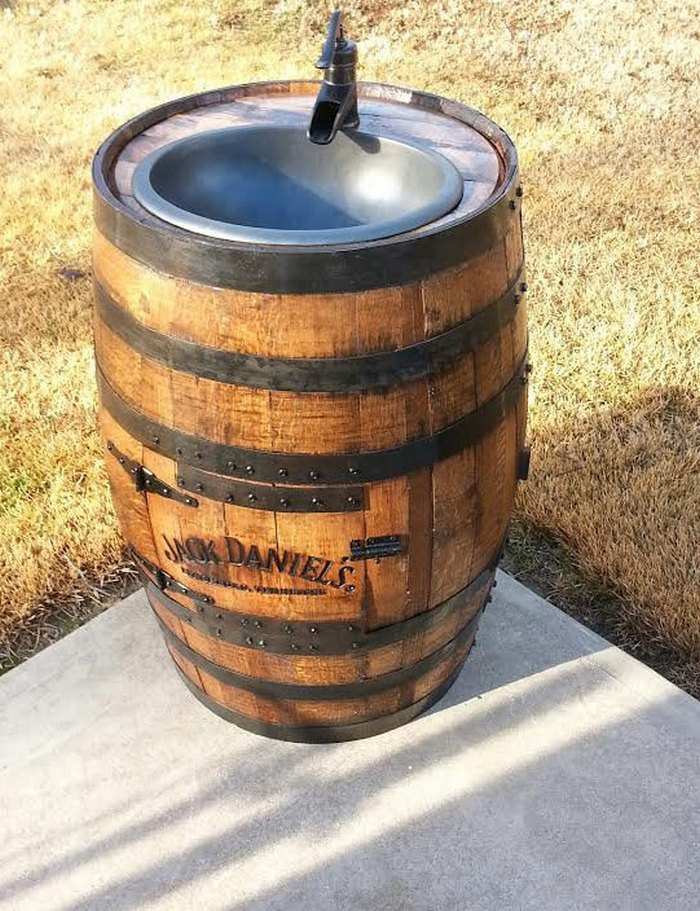
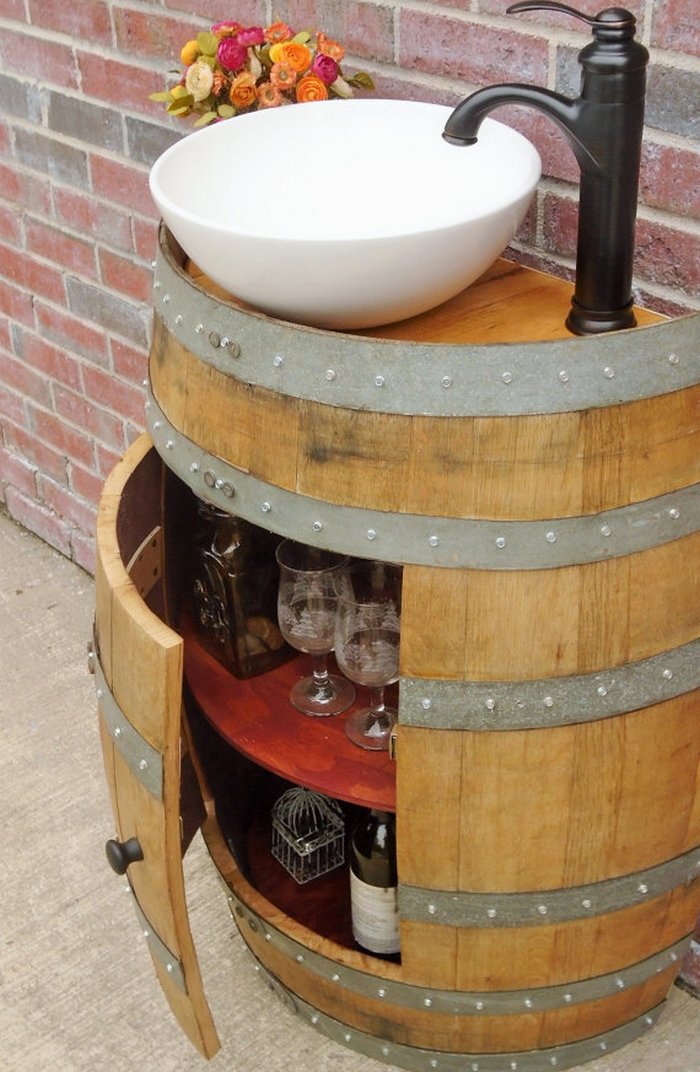
Granted that you already have used wine barrels, you can now start the conversion. You can use a variety of sinks and fittings that suit your budget and the look you desire for your wine barrel outdoor sink.
Click on any image to start the lightbox display. Use your Esc key to close the lightbox. ?

You’ll need these materials:
- One 55-gallon oak barrel
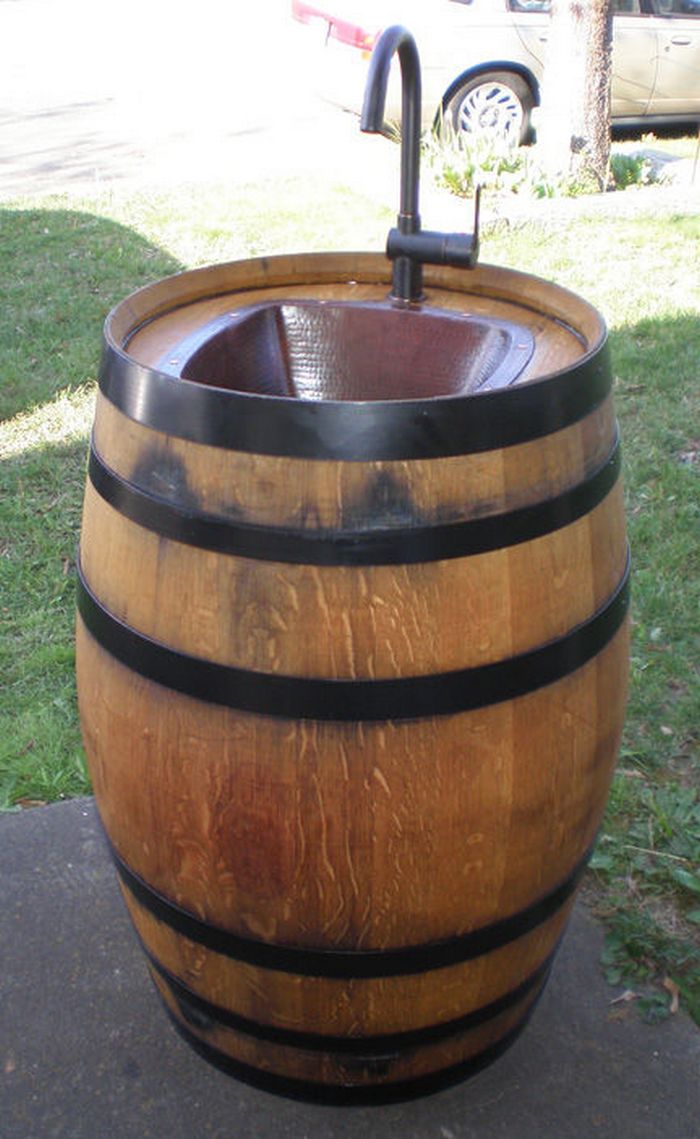
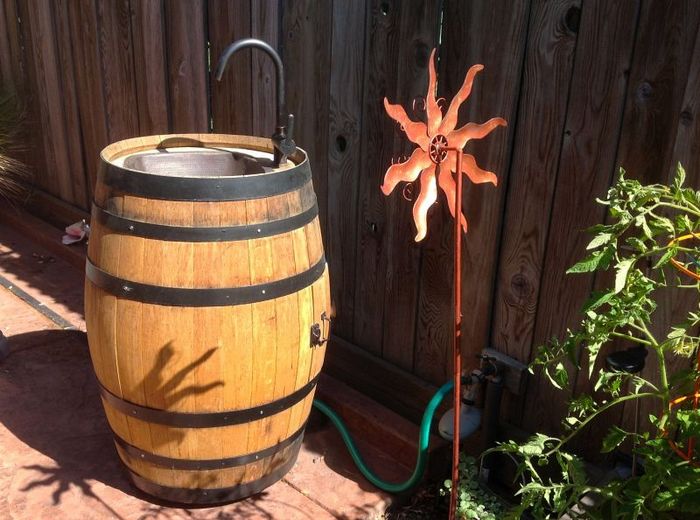
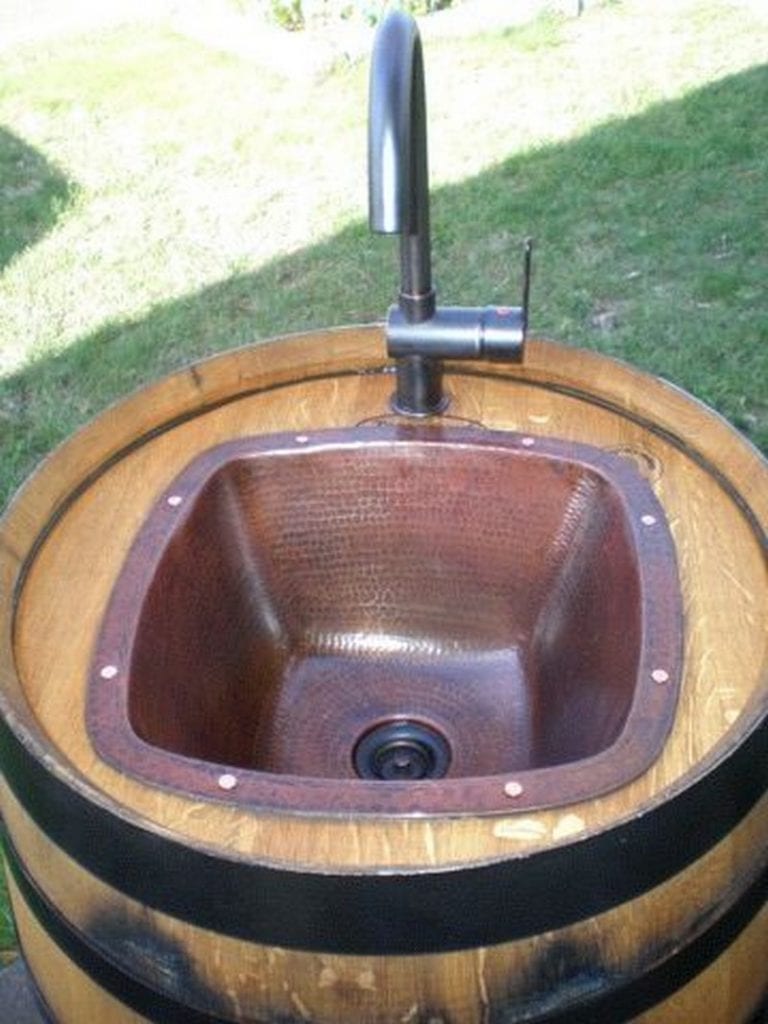
- Bar sink (mine is a 15″ hand-pounded copper sink)
- Faucet (I used an oil-rubbed brass single-lever faucet)
- Copper roofing nails (If using a copper sink)
- Silicon sealer (my sink came with a bronze-colored silicon)
- Sink drain (my sink came with a drain)
- Metal support straps to hold the door wood together
- Door hardware (hinges, handle and latch)
- Water in connectors (this will vary on your water source)
- Plastic drain extender
- Connectors to go from drain extender to sump pump connector
- Hose drain (I used a sump pump tubing)
- ABS glue if using the plastic drain to sump pump hose as in Instructable
- #8 3/4″ stainless screws to secure the wood staves to the metal rings
- 000 steel wool to sand the metal rings for painting
- Metal paint primer (for barrel rings)
- Metal paint (for barrel rings)
- Painters masking tape
- Deck stain/water repellent (for oak staves)
- Paint/stain brushes
And these tools:
- Electric Drill with titanium drill bits for drilling metal rings and sink if necessary
- Jigsaw with a fine-toothed blade to cut oak
- Mitre or other hand saw with a fine-tooth blade
- Screwdriver or screw bit for drill
- Pliers for shaping the metal rings and hinges to fit wood curvature
- Crescent wrench(s) for attaching hose connectors to faucet
- Clamps for securing wood while assembling the door
Steps to make an outdoor sink out of a wine barrel:
Locate a wine barrel:
If you are lucky enough to live in a region with lots of wineries, you should have no problem locating a barrel, sometimes for FREE. Often, around the time of harvest, wineries will have barrels to unload just call a few wineries to see what their policy is for used barrels.
I bought mine for around $40 from a place that makes all kinds of products from barrels but they also sell them whole.
Choose sink and faucet:
This part is really up to you and what you want to use it for and how much you want to spend. You could go the route of using a stainless steel bar sink and just some galvanized pipe and spigot for your faucet or dress it up a bit like I chose to. I actually picked up both the sink and faucet on eBay. The sink was $160 and the faucet ran about $80.
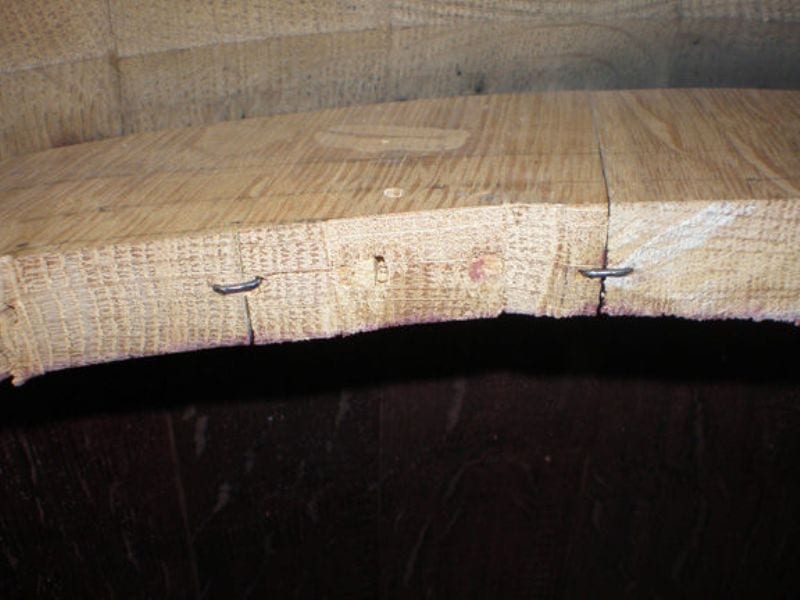
Before you can cut any of the wood staves, you need to secure them to the metal rings. The way that the barrel is constructed, if you remove a portion of the vertical boards (staves) the pieces above and below the opening will fall out.
I secured this wood by drilling two different holes through the metal ring and underlying wood. I used #8 3/4″ stainless screws. The hole through the metal was just large enough to allow the screw through but I drilled the wood with a smaller bit to just create a pilot hole to prevent the wood from splitting.
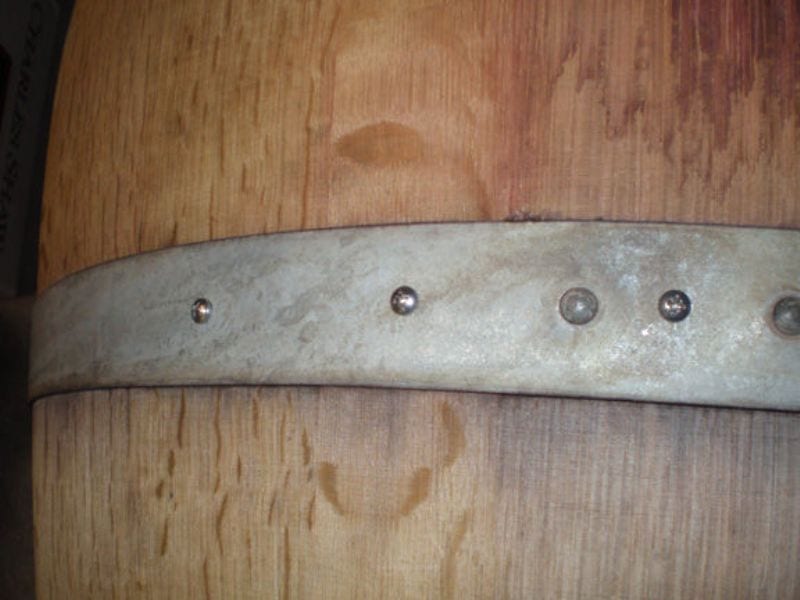
I placed a screw above and below each wood stave that was being removed. I did this process for both the door access and the opening to bring in and remove water at the bottom.
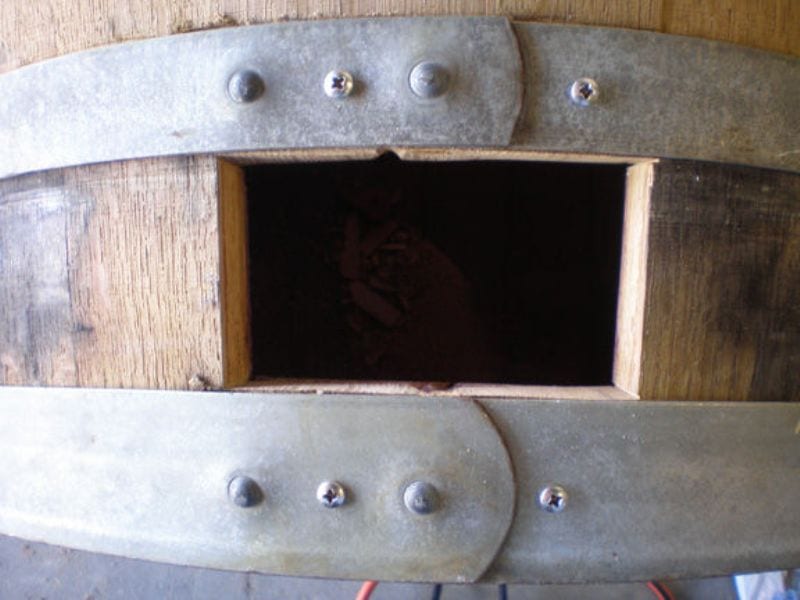
For the door portion, I used a mitre saw to start cutting the wood and finished the cuts with a jigsaw. I used the hand saw to just cut through to allow the jigsaw in and complete the cut. I started at about the middle of my total length because I had to cut into about three staves before I cut through one completely.

For the opening for the water access and drain of the outdoor sink, I didn’t care about the wood that would be removed, so I just used a drill to make a pilot hole for the jigsaw to make the cuts. I did however want to save the door pieces, so the hand saw gave me a clean finish.
I used the top and bottom of two of the metal rings to create a clean straight line. Determine the size of your door. Remember that the barrel consists of vertical strips of wood that can vary slightly in width. Before you cut, locate the ends of the staves at the beginning and end of your opening.
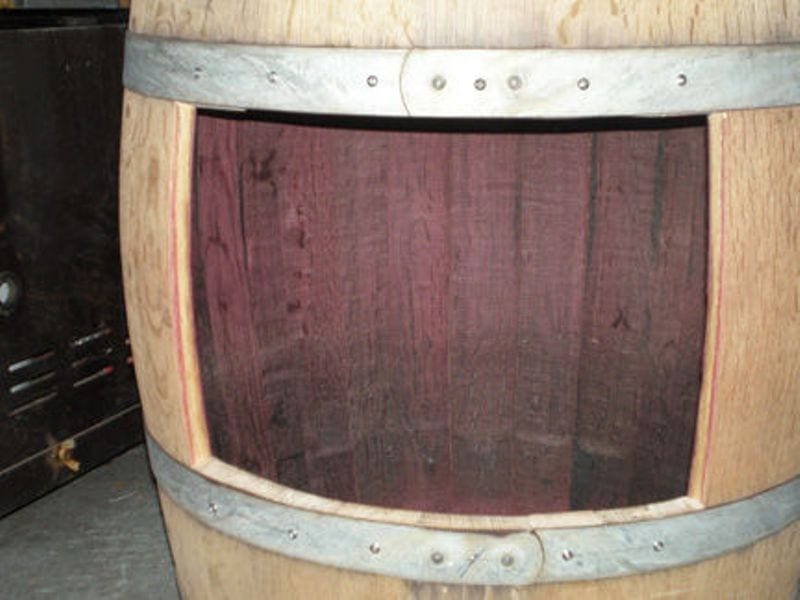
The nice thing with these boards is you only have to make horizontal cuts and your vertical lines are formed by the staves for a nice clean look.
If you want to have an outdoor sink door versus just an opening, save the wood staves.

Once the two cuts for the door opening are made, be sure to mark the boards so you know the order that they should be reassembled.
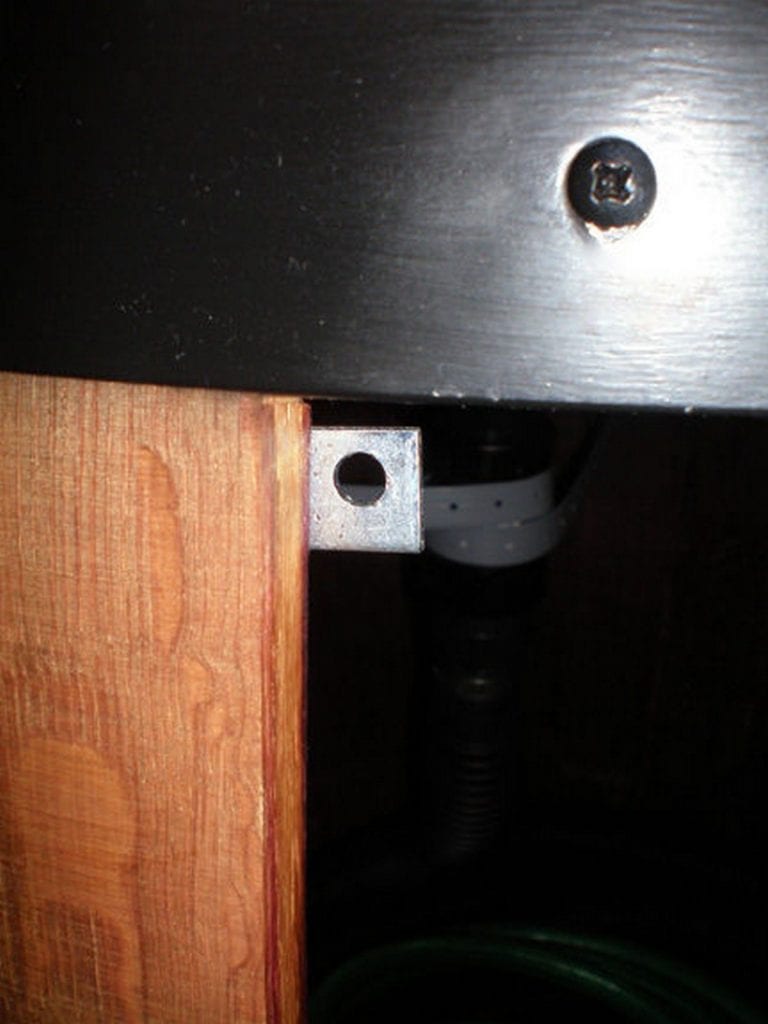
While making this one I discovered that these wood staves don’t necessarily want to go back to the same shape that they were when connected to the barrel. I used metal strips found in the hardware/roofing section at the hardware store. There are a variety of sizes available. For me, I had to trim off a couple of inches with a hack saw to fit this door.

The wood will want to curve so slightly bend the metal strips and connect them together, checking the opening as you go to get the correct curvature of the door to the barrel. As you can see by mine, it took some shims to get a closer match.
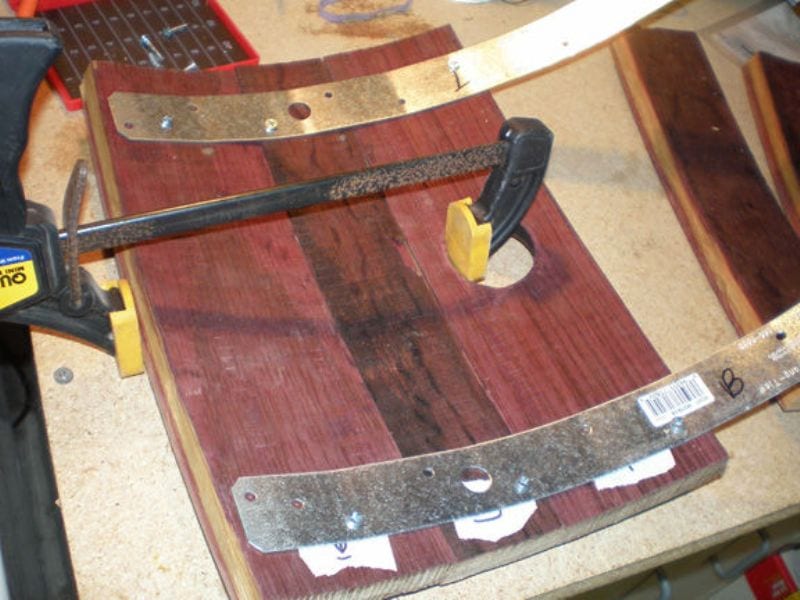
An alternate method would be to connect the metal strips through the top once you cut the opening for the sink and connect the metal strips while the barrel is still intact. (A method I would do if I make another one.)

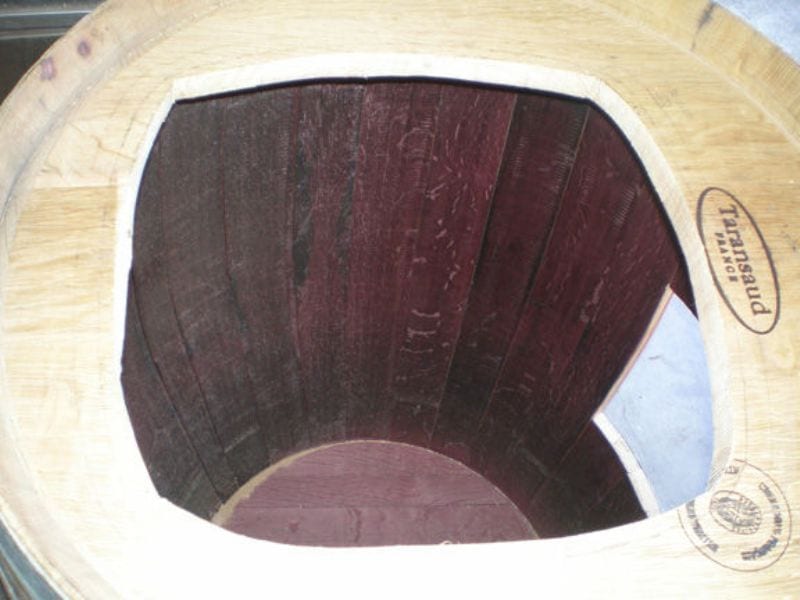
After finding the centre of the barrel, I placed the copper sink upside down on the top of the barrel and traced the outer flange. I then measured in 7/8″ to allow a lip to secure the sink.
I made a pilot hole on the inside portion of the outdoor sink to get the jigsaw blade into it to cut out the sink. You may have to make a few pilot holes if you are not able to turn the jigsaw at the corners of the outdoor sink opening.
I used a hole saw to make the opening for the faucet. With the single-lever style, I cut a 1 1/4″ hole for the faucet.
A few boards towards the front of the outdoor sink were not glued well, so I secured them together with a couple of nails/staples as shown.
The barrel tops are usually glued well but this barrel was not as secure as I would have liked.
This portion is up to you on how you want the outside finished. You could go au natural and let it weather over time or treat it to protect the oak and metal, I chose to protect it so my outdoor sink will last for years.
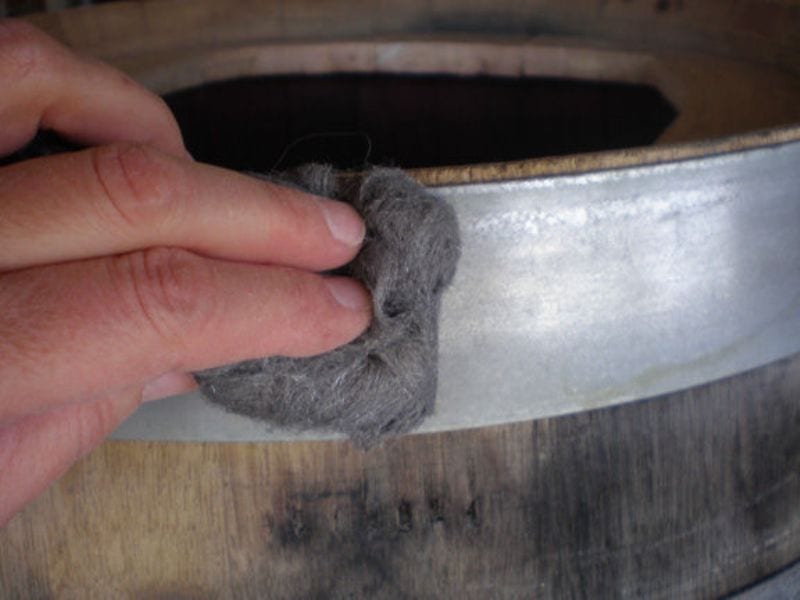
I first sanded the metal rings with a #000 steel wool to remove any rust or film. I taped above and below each metal ring with the painter’s blue masking tape and applied a metal primer and four coats of black satin paint to the rings. I used metal primer and a latex-based Rust-o-leum satin black paint for the rings.
Make sure that you choose a paint that does not react with galvanized metal as some oil-based paints can.
I used a deck stain/water repellent on the outside of the barrel with no pre-sanding to allow better absorption of the stain.
Allow drying overnight before attaching the sink and faucet.
For the sink, I drilled in eight locations to help secure the sink to the wood with the copper roofing nails. I then drilled a pilot hole slightly smaller than the copper nail into the oak through the newly created hole in the sink to prevent the oak from splitting but having some bite into the wood.

I then applied a bead of the bronze silicone along the edge of the sink opening on the barrel and faucet opening and placed the sink and faucet into the openings.
Nail the copper roofing nails into place and then place additional silicon along the outer flange of the sink, faucet and the top of the barrel for better waterproofing.

The copper nails will weather and get a nice brown patina colour once out in the elements.
Allow the silicon to completely dry before connecting the water source.

You can use whatever you like to attach the door to the barrel. Make sure that you choose something that will allow you to follow the slight curve of the door or are short enough to allow them to be straight.
First, attach the hinges to the door. Align the hinge to the outside of the barrel to allow the door to open freely. (You may need to sand or slight trim the door or opening to allow the door to close/open easily.)

I chose to place a latch on the door (which is actually a window sash latch) but again, the type of hardware you use is totally up to you and the look you want.

I placed a couple of door stops for the outdoor sink to help keep the door flush with the barrel when closed.
The faucet I used came with two braided water hoses that needed a few parts to allow connection to a hose bib. The plumbing department can assist you in getting the right connectors based on the type of faucet you go with on your outdoor sink.

I will only have cold water coming in, so I capped off the hot water side.
Use an extension to the outdoor sink drain. Add pipe adapters to connect the flexible hose and then the flexible hose (sump pump hose) for drainage. I used a plastic strap to prevent the hose adapter from coming off the pipe extension.

Connect your water source, (in this example, a hose bib) to check for any leaks and proper drainage.
If all goes well, you’re done and can enjoy the look and use of your new wine barrel outdoor sink!
Could this outdoor sink be your next project?
Thanks to xraywinedrinker for this great tutorial!