The word “gazebo” often brings to mind an octagonal white garden building at the end of a long sweep of green grass. While many do fit this traditional image, today’s gazebos are just as likely to be square, rectangular, or round. They may sit close to the house, too, to encourage outdoor dining. They can even be built right onto a porch or deck, patio, or swimming pool area.
Gazebos provide shade in the summer and protection from rain when the weather isn’t cooperating. It’s a great place for entertaining and having one in your home increases its desirability and may even increase the market value!

You can have one in your yard by buying a kit, but some of you might find this very expensive. A better and cheaper option is to build your own. This will require a lot of planning, but it allows you to lessen the cost as you have the choice of what materials to use.
You might not find the right design you desire if you choose to buy a prefabricated gazebo. By building it yourself you have control over the design and other details. And being involved in building your own gazebo ensures its quality. You’ll also have the satisfaction of being able to say, “I built that!”

Want your own backyard getaway? Why not learn how to build a gazebo?
Click on any image to start the lightbox display. Use your Esc key to close the lightbox.![]()
Contents
Building a DIY Gazebo
Materials
- Lumber – sizes will depend on the size of your space
- Thin Wood – roofing
- Metal Bars – square, T- and L-shaped
- Very Big Screws – long enough for the thickness of 2 pieces of wood
- Ladder
- Concrete
- Silicone + Tar
- Tegola Canadese – roofing tile
Tools
- Welding Machine
- Metal Cutting Tool
- Electric Drill
- Table Saw
Instructions
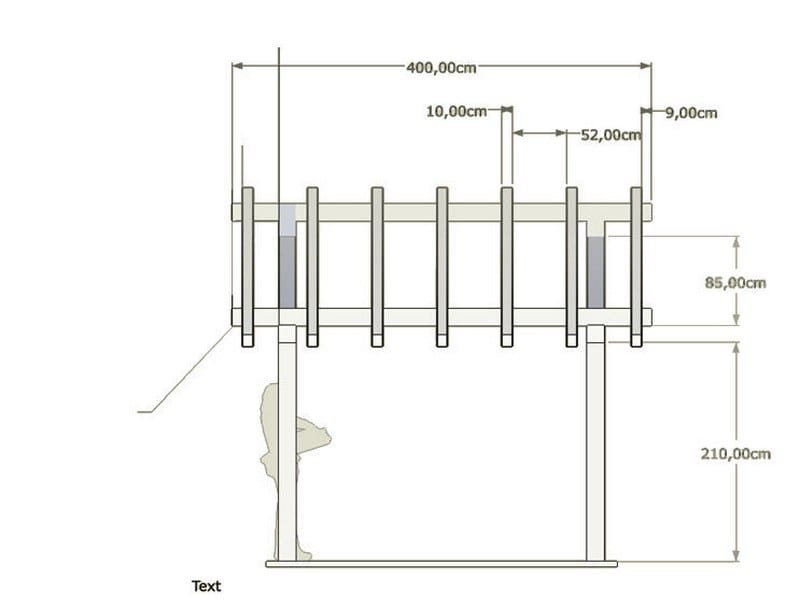
The first thing to do is to design your gazebo. You can use SketchUp which is one of the easiest 3D modelling software there is.
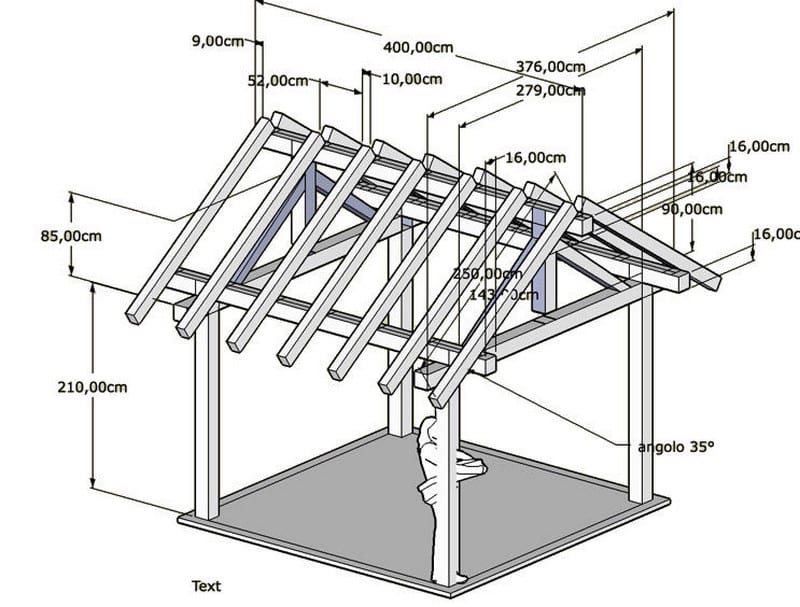

Since I don’t have the right tools, I printed some images of the gazebo design with quotes and gave them to someone that cut wood for work. It cost a little bit more than DIY but is cheaper than buying the tools and more precise than doing whit cheap tools.
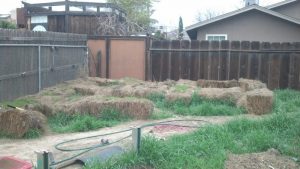
The first thing you have to do is a flat floor surface made of concrete matching the desired size. This will be the floor of the gazebo and the anchor of the entire structure. To add strength to the concrete you can add some metal bars to the concrete floor.
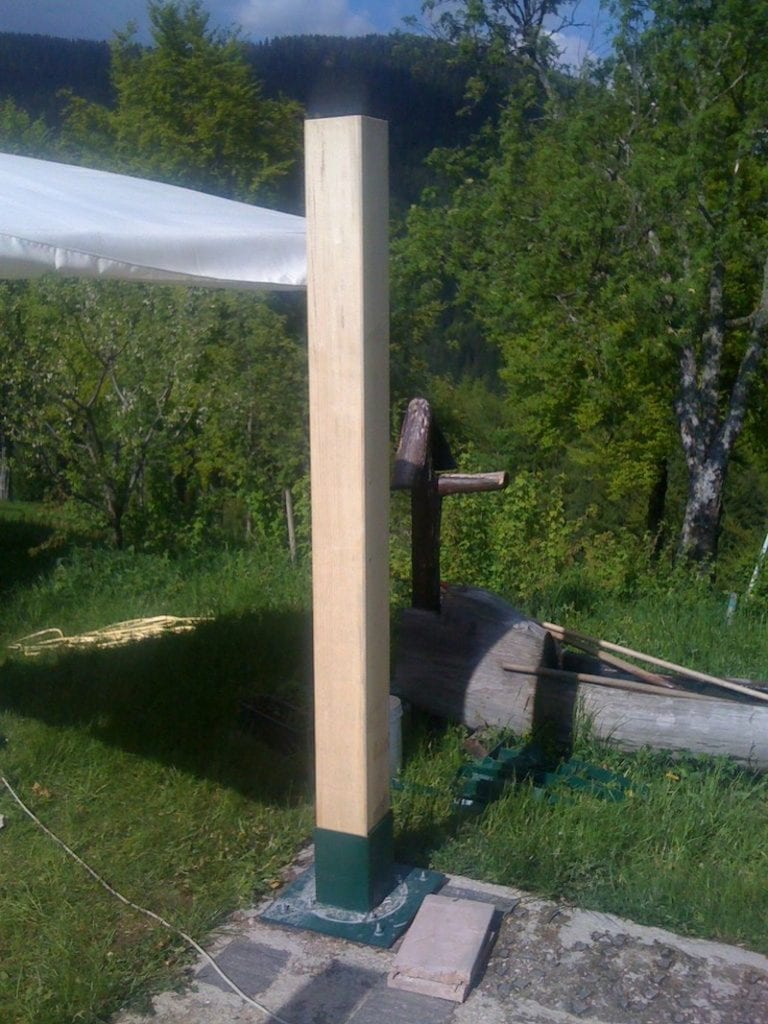
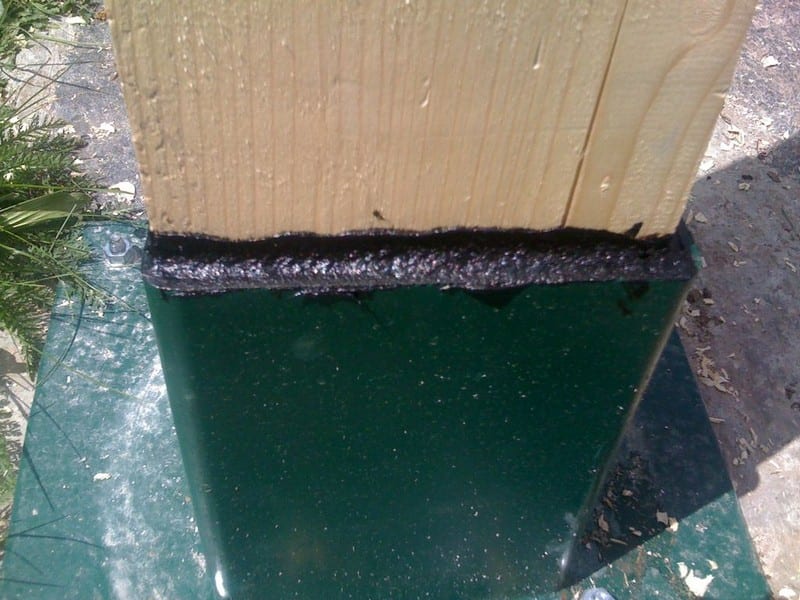
Metal pieces used for the structure were recovered from trash and adapted (welded and cut) to fit the wood structure. To avoid water dropping inside gaps between metal and wood I filled the gaps with silicone and tar (usually used to insulate RV windows). I also do a hole on the bottom of the metal supports to avoid water condensing to stay in contact with the wood for too much time. Metal supports are covered and protected from rain by the gazebo roof so the bottom holes should not be a problem.

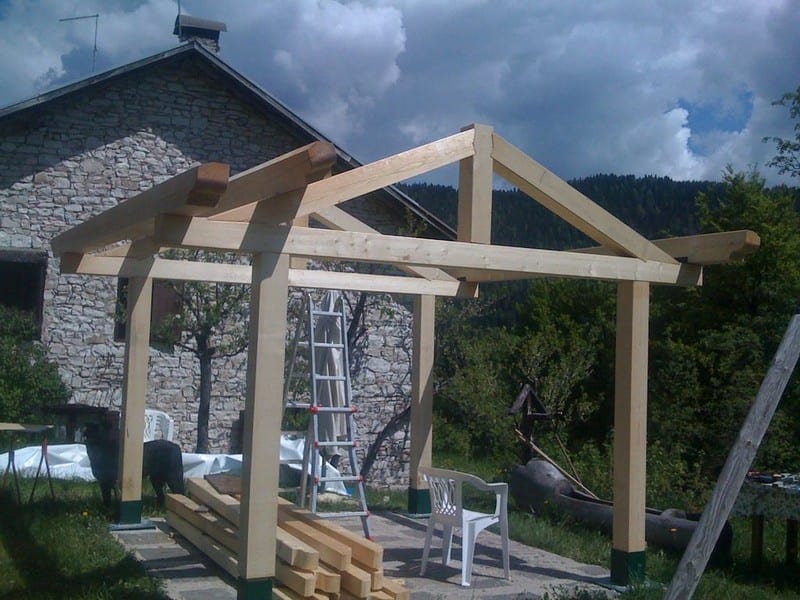
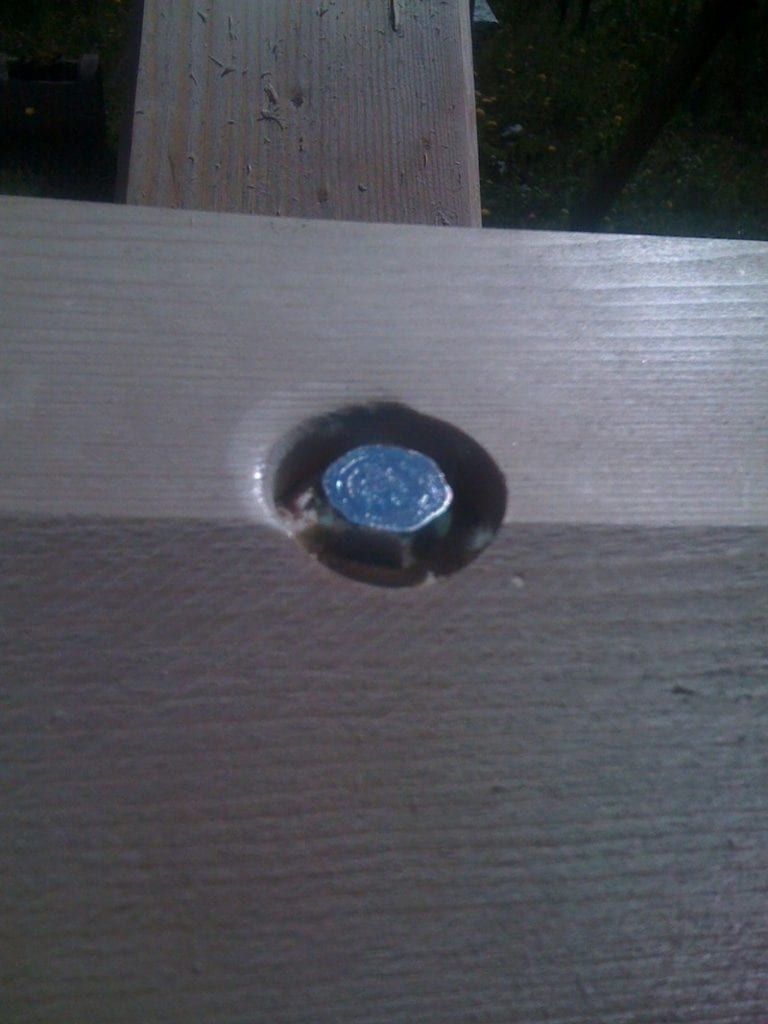
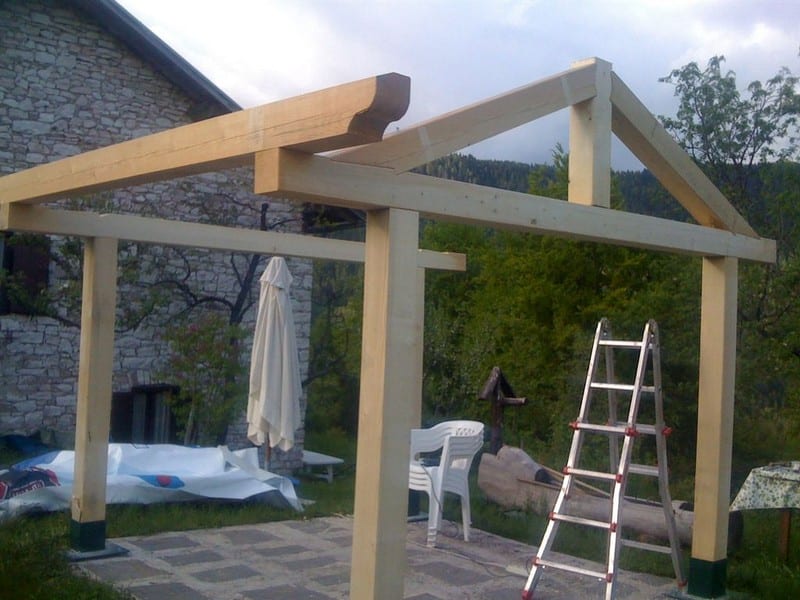
Put the wood traverse on the supports. Be sure that the traverse is centred measuring on both sides of the traverse. Once the traverse is right in place, fix it to the supports with long screws. I used a screw length twice the width of the traverse.
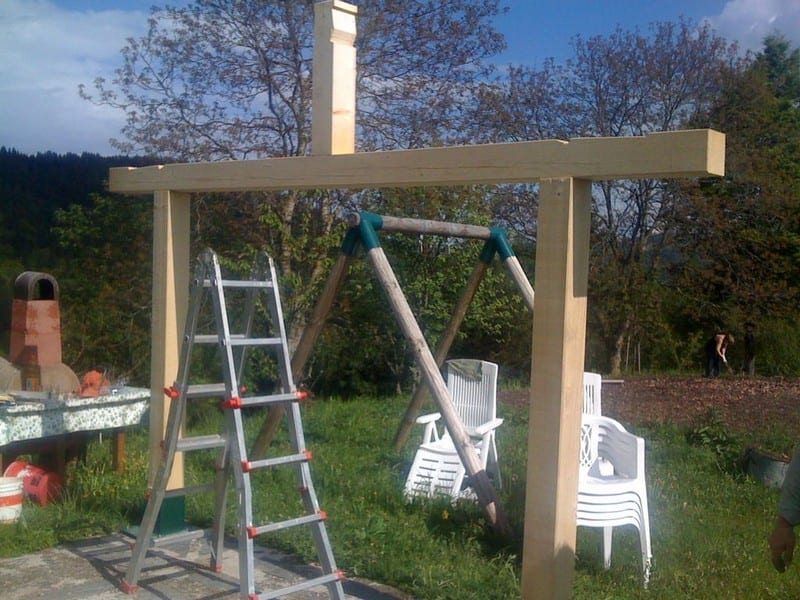
Countersink screws to avoid it from interfering with other pieces of the gazebo.

Now you have to fix the wood traverse a side traverse (tagged in the photo). As explained in the previous step, fix the wood traverse with the same big screws. Do this step on both sides.

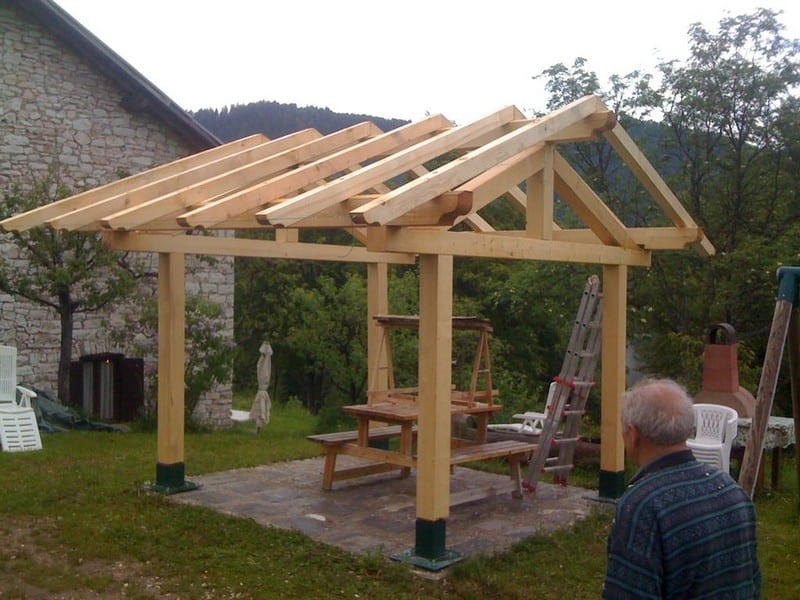
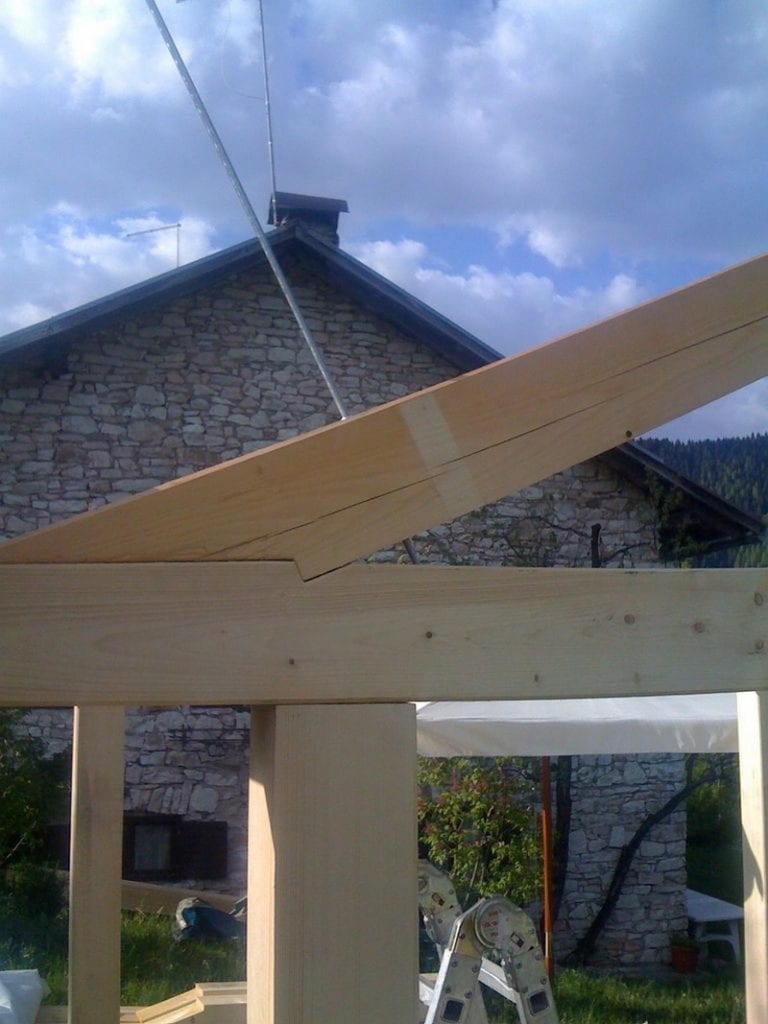
The triangular shape is a very special structure of the roof of the gazebo. It must be flexible and sustain all the weight of the roof (especially when covered with snow). The purpose of the 2 diagonal wood pieces is to distribute the weight on the sides instead of on the centre of the wood traverse (a weak structural point). Actually, the centre piece and the traverse do not touch!
To strongly fix the diagonal pieces I used a metal bar that pass through the two wood pieces. When the roof will be covered with snow, the pressure of the weight will push on the sides (so you have to strongly fix the diagonal pieces to the traverse) and on the centre (in this case the centre will get closer to the traverse without putting pressure on it).
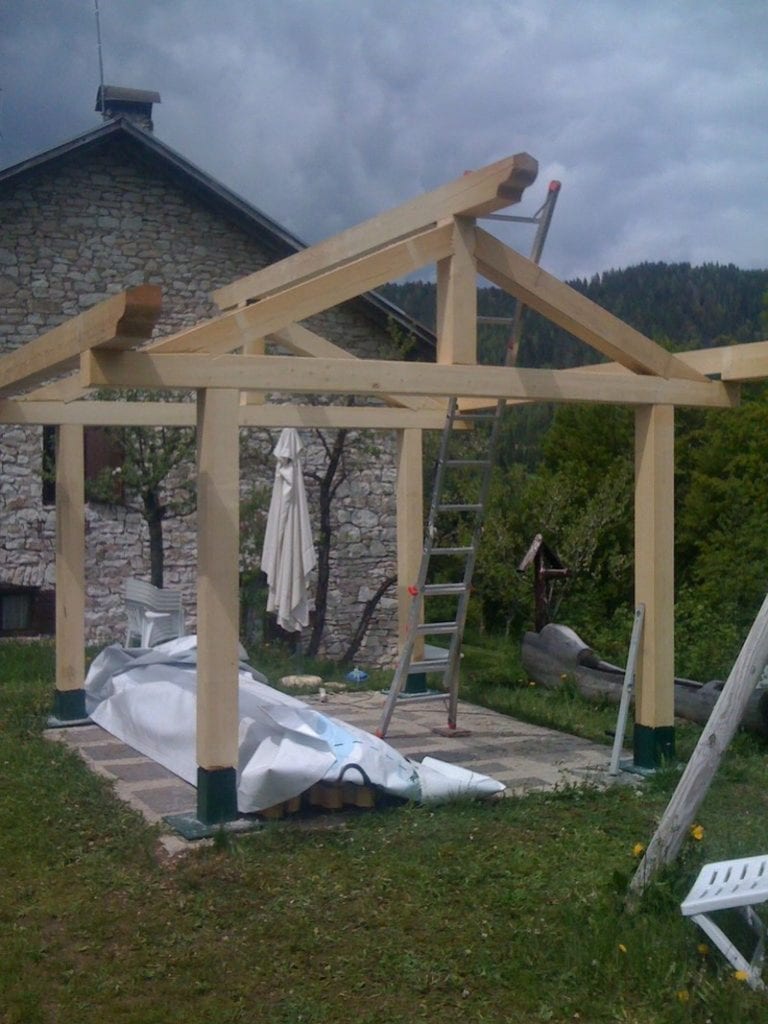
The top side traverse is where the roof will be fixed. Since it’s a very heavy piece I used some ropes to keep the piece in place while my dad was slowly pushing the piece in position.


The roof is needed to distribute the weight on the roof to the structure of the gazebo. I put a support every 55cm (21 inches). The width of the wood used is 4 inches. Every support is fixed to the structure with screws.

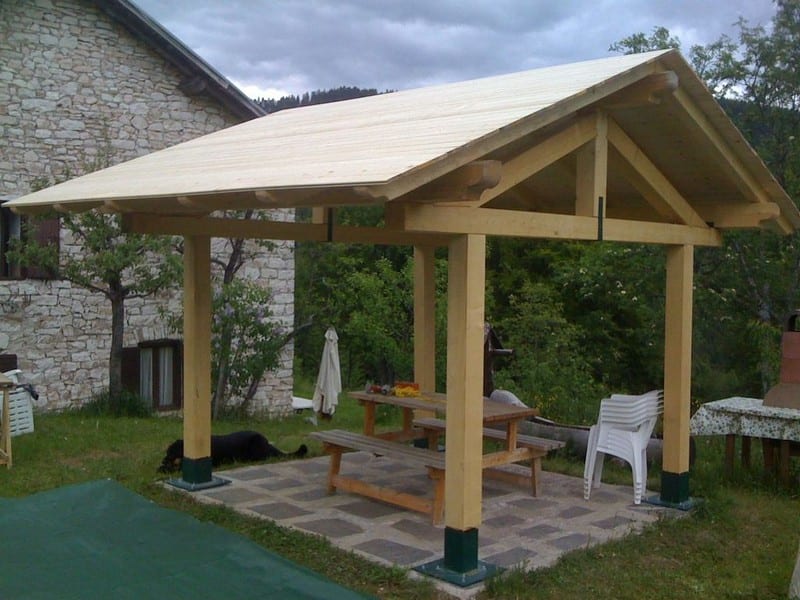
The first layer of the roof is made of thin wood. Its purpose is to support the watherproof layer. After installing it, I walked on to test its capability: if it can support my weight it ‘should’ support a lot of snow. The next layer will storm-proof the roof and will acts also as anti-slippery layer. I will use a very light roofing tile named “tegola canadese”.

Would you and the rest of the family be up to building your own gazebo? 🙂
Thank you derte84 for the great tips for building this gazebo!
Choosing the Right Location
Choosing the ideal spot for your outdoor structure is crucial for maximizing its enjoyment and functionality. Here’s how to determine the best location:
Consider Sun Exposure
Think about how much sun you want in your area. If you prefer a sunny spot for morning coffee or an evening unwind, choose a place that catches the sunrise or sunset. Conversely, if you seek shade, look for areas under trees or on the north side of your property where sunlight is less intense.
Evaluate Wind Patterns
Areas that are too windy can make the space uncomfortable and potentially damage the structure. Observe the wind patterns in your yard over several days. A sheltered location, perhaps near a fence or hedge, can reduce wind impact while still allowing for a fresh breeze.
Assess Privacy Needs
Your comfort in this space can greatly depend on its privacy. Consider the sightlines from neighboring properties or streets. Using natural elements like shrubs, or installing privacy screens, can enhance seclusion.
Proximity to Other Structures
The closeness to your house or garden can influence its use. Near the house, it might be convenient for outdoor dining; farther into the garden, it could serve as a tranquil retreat. Ensure it doesn’t interfere with underground utilities, and it complies with local zoning laws which may dictate specific distances from property lines or structures.
Ground Conditions
The foundation is key to your project’s longevity. Look for level ground with good drainage. Avoid low spots that collect water. If your chosen area has poor soil conditions, consider professional grading or adding a suitable sub-base layer for stability.
By thoughtfully assessing these aspects, you can select the perfect spot that ensures your outdoor structure is both a beautiful and functional addition to your home.
Legal Considerations and Permits
Before starting the construction of any significant outdoor structure, it’s important to understand and comply with local regulations to ensure the project proceeds smoothly and legally.
Know Your Local Zoning Laws
Zoning laws vary widely depending on where you live. They can dictate the size, location, and sometimes even the style of your structure. Check with your local planning department to get specific guidelines for your area. This step is crucial to avoid any costly mistakes or the need to modify or remove the structure after construction.
Obtain Necessary Permits
Most localities require a building permit for outdoor structures. The permit process ensures that your plans are safe and compliant with building codes. You will likely need to submit detailed plans and site diagrams with your application. Some areas might also require inspections during and after construction to ensure compliance with the plans and safety standards.
Consider Property Lines
Be aware of your property boundaries to avoid building on a neighbor’s land or violating setback requirements, which dictate how close structures can be to property lines. A survey of your property may be necessary if current property line markers are unclear or disputed.
Check for Utility Easements
Utility easements could restrict where you can build if they are present on your property. Before designing your project, obtain a utility map from your local utilities company. This map shows where underground pipes and cables are located, helping you avoid these during construction.
Review Homeowners Association Rules
If you live in a community governed by a homeowners association (HOA), additional rules may apply. HOA regulations can be even more restrictive than local laws and might require approval from the association before any work begins.
By taking these legal considerations into account and securing all necessary permits, you can ensure that your construction project is legal, safe, and set up for success.
Conclusion
Building your own gazebo can really transform your backyard into a cozy and appealing spot for relaxation or entertaining guests. Keep in mind of your gazebo’s spot at home and materials you use in building it. When done right, this project not only adds charm to your outdoor space but also boosts your home’s overall value and appeal.
We have more incredible gazebo ideas. Check out our grill gazebo project next!