Contents
- 1 Another project by Roy Shearer of Zero Waste
- 2 Step 1: Get your hardware:
- 3 Step 2: Get the bottles
- 4 Step 3: Place your first board
- 5 Step 4: Place your bottles and second board
- 6 Step 5: Fit the turn buckles and tighten
- 7 Step 6: Use 🙂
- 8 Step 7: Collaborate!
- 9 Enjoy, and comment or email me with some photos of your version! You can find the original material for this post here…
Another project by Roy Shearer of Zero Waste
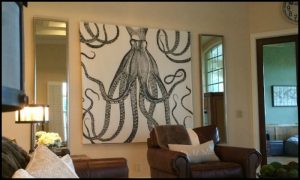
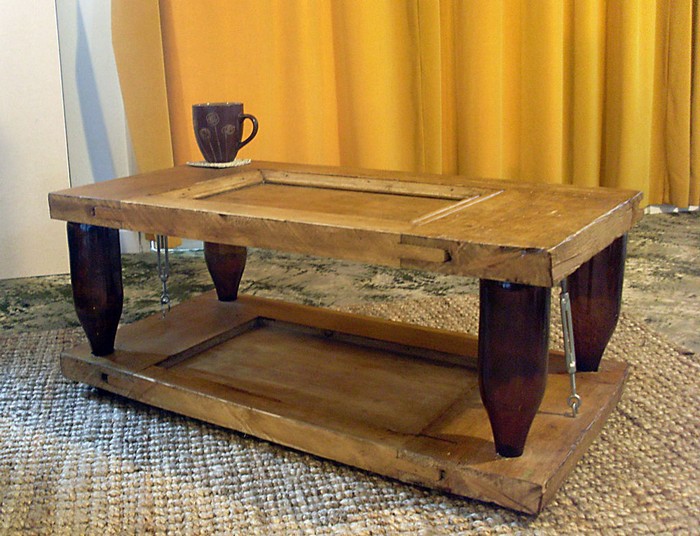
Coffee Table? Well, function before form, any interior decorator will tell you. That’s why it’s so important to establish how you’ll use a space before you start shopping. In your living room, you’ll likely be watching television, entertaining guests, and relaxing.
It’s a room meant to be comfortable. That’s where a good coffee table comes in. Because it holds drinks, your remote, and reading material, the coffee table is an indispensable part of your living room.
The base design for this table is released under a share-alike/attribution CC license by Zero-waste Design. I will happily make up kits to order for UK customers.
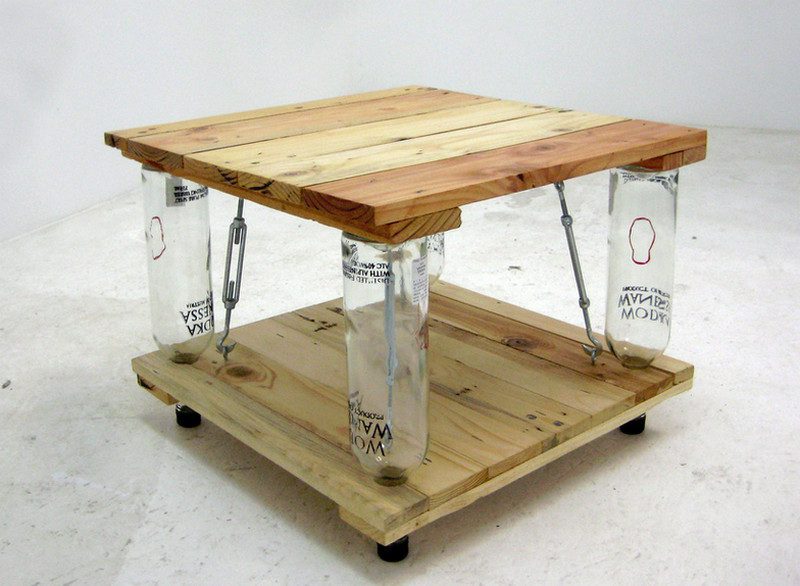
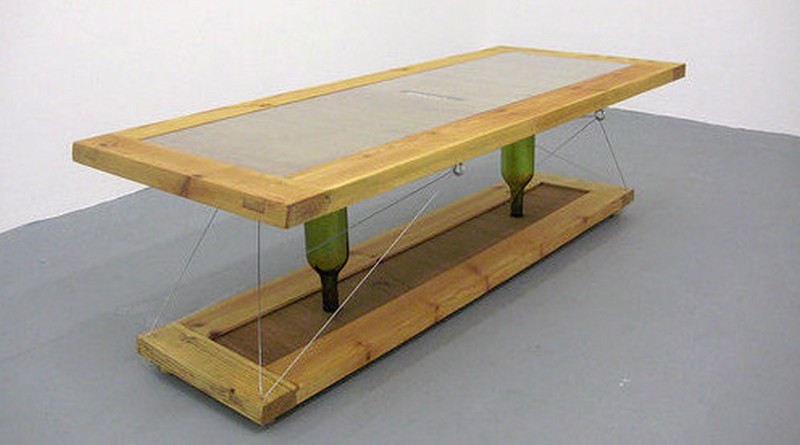
Ten Green is a shelving and table system. It uses commonly available waste materials. The range started with shelving/table modules and continued into small shelving units, then big shelving units, and now on to coffee tables.
In this post, I’ll share how to build a Ten Green coffee table. You can use any four bottles of similar height and any found timber, including pallet timber. Just adapt the table dimensions to suit the timber sizes you have available.
Click on any image to start the lightbox display. Use your Esc key to close the lightbox.![]()
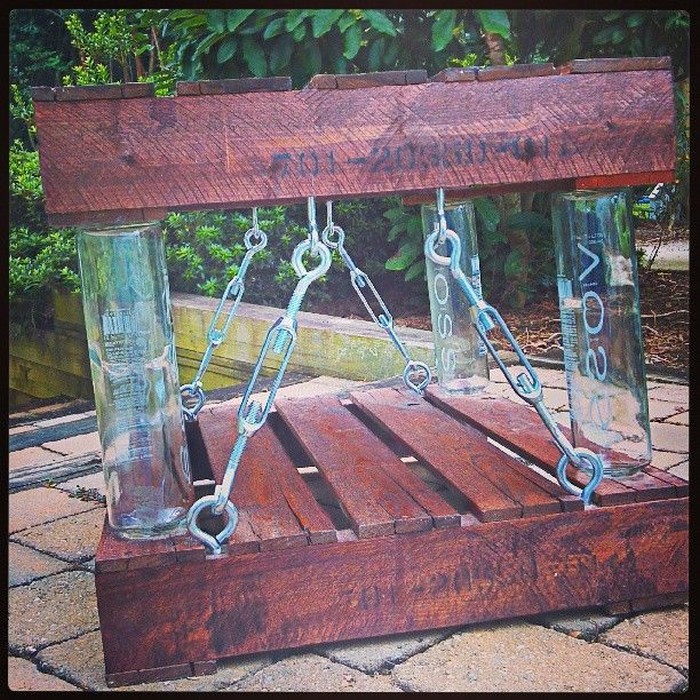

Step 1: Get your hardware:

For a single table you’ll need the following items:
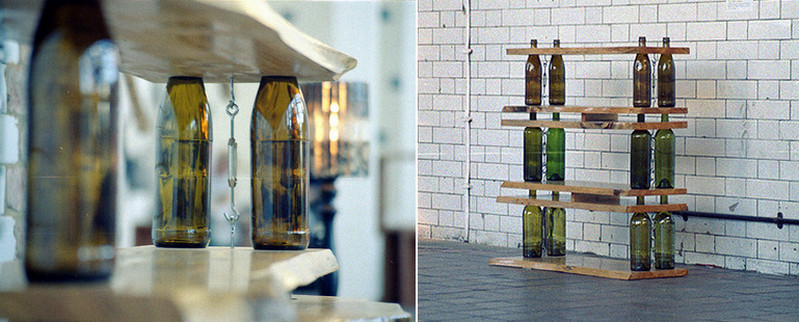
Four turn-buckles. I used the smallest I could find, which are 14mm OD at the buckle and 5mm OD at the threads. They should be available from any decent hardware store. Mine came from Screwfix.
Four screw eyes and four screw hooks. These need to match the turn-buckles.
Depending on the height of your bottles, you may need some “S” hooks to help the strainer reach between the upper and lower hooks.
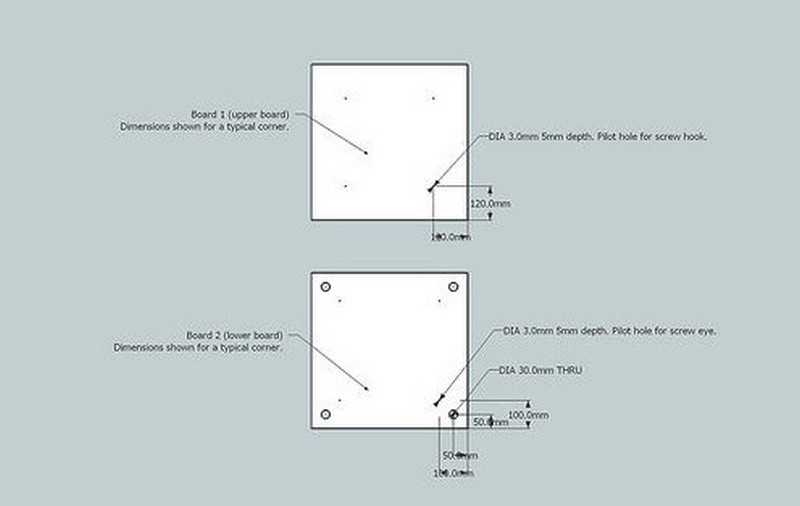
Two pieces of reclaimed wood are at least 25mm thick. Here I used some small pallets. Ensure the timber is rot free. Trim the boards square and to the dimensions required and sand them to a smooth finish. If the board is constructed out of many pieces joined together, as in the example, ensure all joints are well secured as the board will be subjected to bending and shear forces.
Drill four holes and attach the hardware as described in the layout image. I can not emphasise enough how great Forstner bits are for this job!


Ensure that the screw eyes and screw hooks are securely held into the timber as they may be subjected to anticlockwise twisting – you may require pliers or a similar tool to fully screw in the hardware. If the timber does not allow a secure fixing, consider gluing in the fixings using a two-part resin or using bolt-through fixings.
Step 2: Get the bottles
You also need four bottles. All the same brand/height/shape is preferable. Wash them thoroughly in hot soapy water. I think the clear ones look the best.
In this example, I used some rather lovely bottles by Wodka Wanessa.
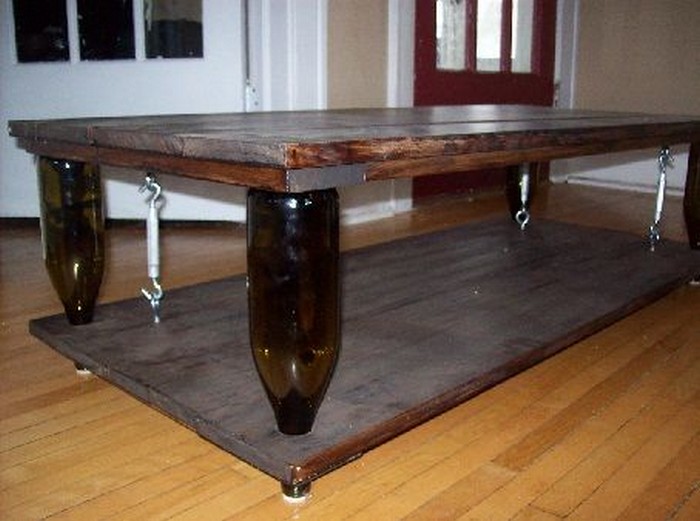
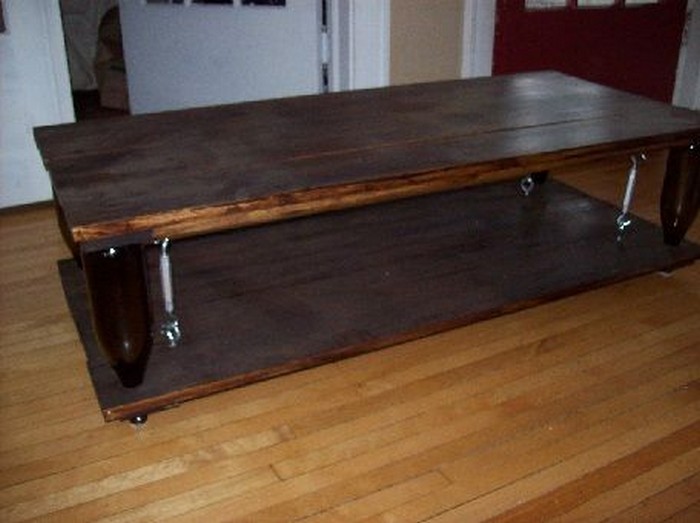
Step 3: Place your first board

Start with the top board. That’s the board without holes drilled through it. Place this upside down on a clean firm surface so that the screw eyes are facing up.
Step 4: Place your bottles and second board

Place the bottles in each corner of the board. Then carefully lower the upper shelf, so that the necks of the bottles pass through the 30mm holes in the upper board. Allow the board to rest on the necks of the bottles. Then by hand adjust the bottoms of the bottles so that they sit flush with the lower shelf.
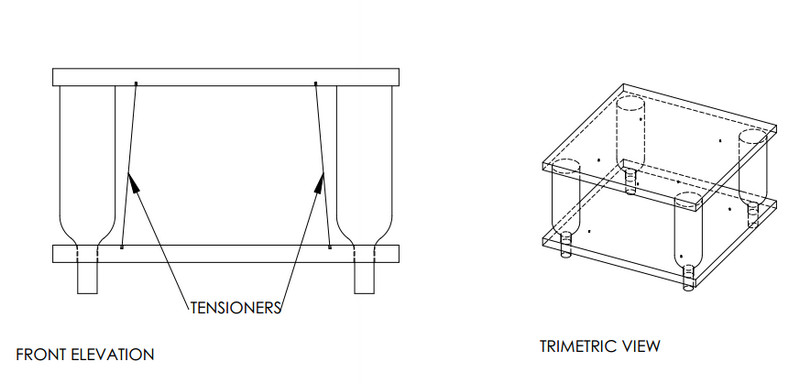
Step 5: Fit the turn buckles and tighten
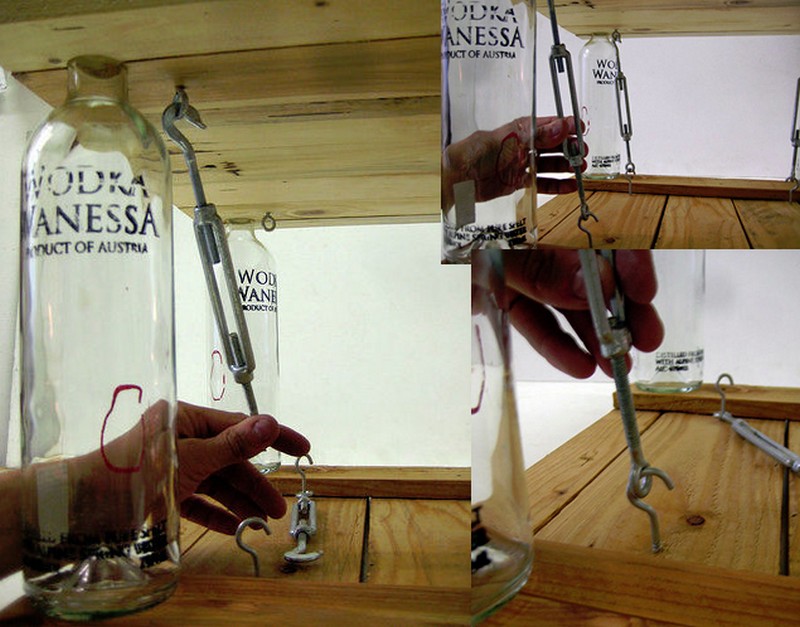
Adjust the bases of the bottles to ensure that they are flush with the first board. Attach a turn-buckle (and “S” hook on the turn-buckle eye end if necessary), between the screw eye and screw hook. The design of these turn-buckles can vary, so you will have to experiment to see which way to fit the buckle. As you turn the centre of the turn-buckle, the ends should pull together, compressing the bottles.
Repeat for each of the four bottles. Tighten the turn buckles as much as you can by hand. This should easily be sufficient for rigidity and tools should not be required.
The turn-buckles are designed to sit at an incline in order to increase the torsional strength of the table. This resulted from testing an initial prototype where the turn-buckles gradually loosened over time. The table was being used as a footrest or otherwise pushed around from the side. Hopefully, that should be fixed here. Check the turn-buckles occasionally for tightness anyway.
Step 6: Use 🙂
Your table is now assembled. If your bottles have screwtops, you may want to replace the lids for use as the feet. Turn the whole assembly over so that the tops of the bottles are resting on the floor.
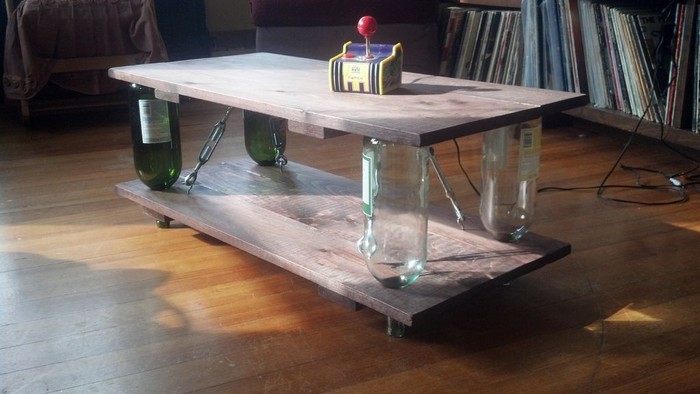
Step 7: Collaborate!
I am always up for collaborative work, hence my devotion to open sourcing in design. Here are some pictures of other tables I have made so far using this method.


And a real variation on the theme 🙂
The following examples are of tables made by others who have adapted my plans to their needs…